Móvil o sonajero de viento con conchas de mar y concha de coco 🩷🥥🐚🦪🦀🏖️ [esp/eng]
Saludos amigos de DIYHUB, feliz comienzo del mes de julio, deseándoles que tengan un mes lleno de mucha energía para que logren todos sus proyectos 😊, dándole comienzo a este creativo y maravilloso Concurso vengo a dejarles por aquí mi primera Participación
Todos los amantes de las manualidades guardamos siempre materiales que en algún momento le encontraremos una buena utilidad, en este caso tengo desde hace varios meses unas conchas de mar guardadas las cuales les he tenido muchos propósitos y hoy les ha llegado su momento, me gusta mucho el sonido de estas cuando chocan entre ellas es por esto que pensé en la idea de hacer un lindo móvil o sonajero de viento con estas conchas y colocarlo en un lugar estratégico de mi hogar donde le pegue la brisa y escuchar el agradable sonido que producen las conchas 🐚 , ven y te comparto el paso a paso :
Greetings friends of DIYHUB, happy beginning of the month of July, wishing you a month full of energy so that you can achieve all your projects 😊, starting this creative and wonderful Contest I come to leave you here my first Participation
All of us craft lovers always keep materials that at some point we will find a good use for, in this case I have had some seashells saved for several months which I have had many purposes for and today their moment has come, I really like the sound of these when they collide with each other, that is why I thought of the idea of making a nice mobile or wind rattle with these shells and place it in a strategic place in my home where the breeze hits it and hear the pleasant sound that the shells produce 🐚, come and I will share the step by step:

MATERIALES
MATERIALS
Estas conchas de mar tienen su historia y su valor sentimental, mis hijos y yo por diferentes motivos estuvimos varios años sin poder ir a la playa (las más cercanas nos queda a 4 horas de carretera), hasta que por fin nos llegó el momento y hicimos el viaje, en una de las paradas en el camino conseguimos una orilla de playa la cual era completamente llena de conchas de mar, recogimos las que más nos gustaron, las colocamos todas en un envase la metimos en el carro y continuamos nuestro paseo.
Al llegar a casa las guardé y las olvidé por un tiempo, pero de vez en cuando me llegaba el pensamiento hacer algo bonito con ellas, luego las volví a guardar, hasta que leo las pautas del Concurso y dije: les ha llegado el momento a estas hermosas conchas de mar 🐚, la idea que más me retumbó en la cabeza fue a hacer un móvil con ellas, así que manos a la obra, aquí le dejo la lista de materiales a utilizar:
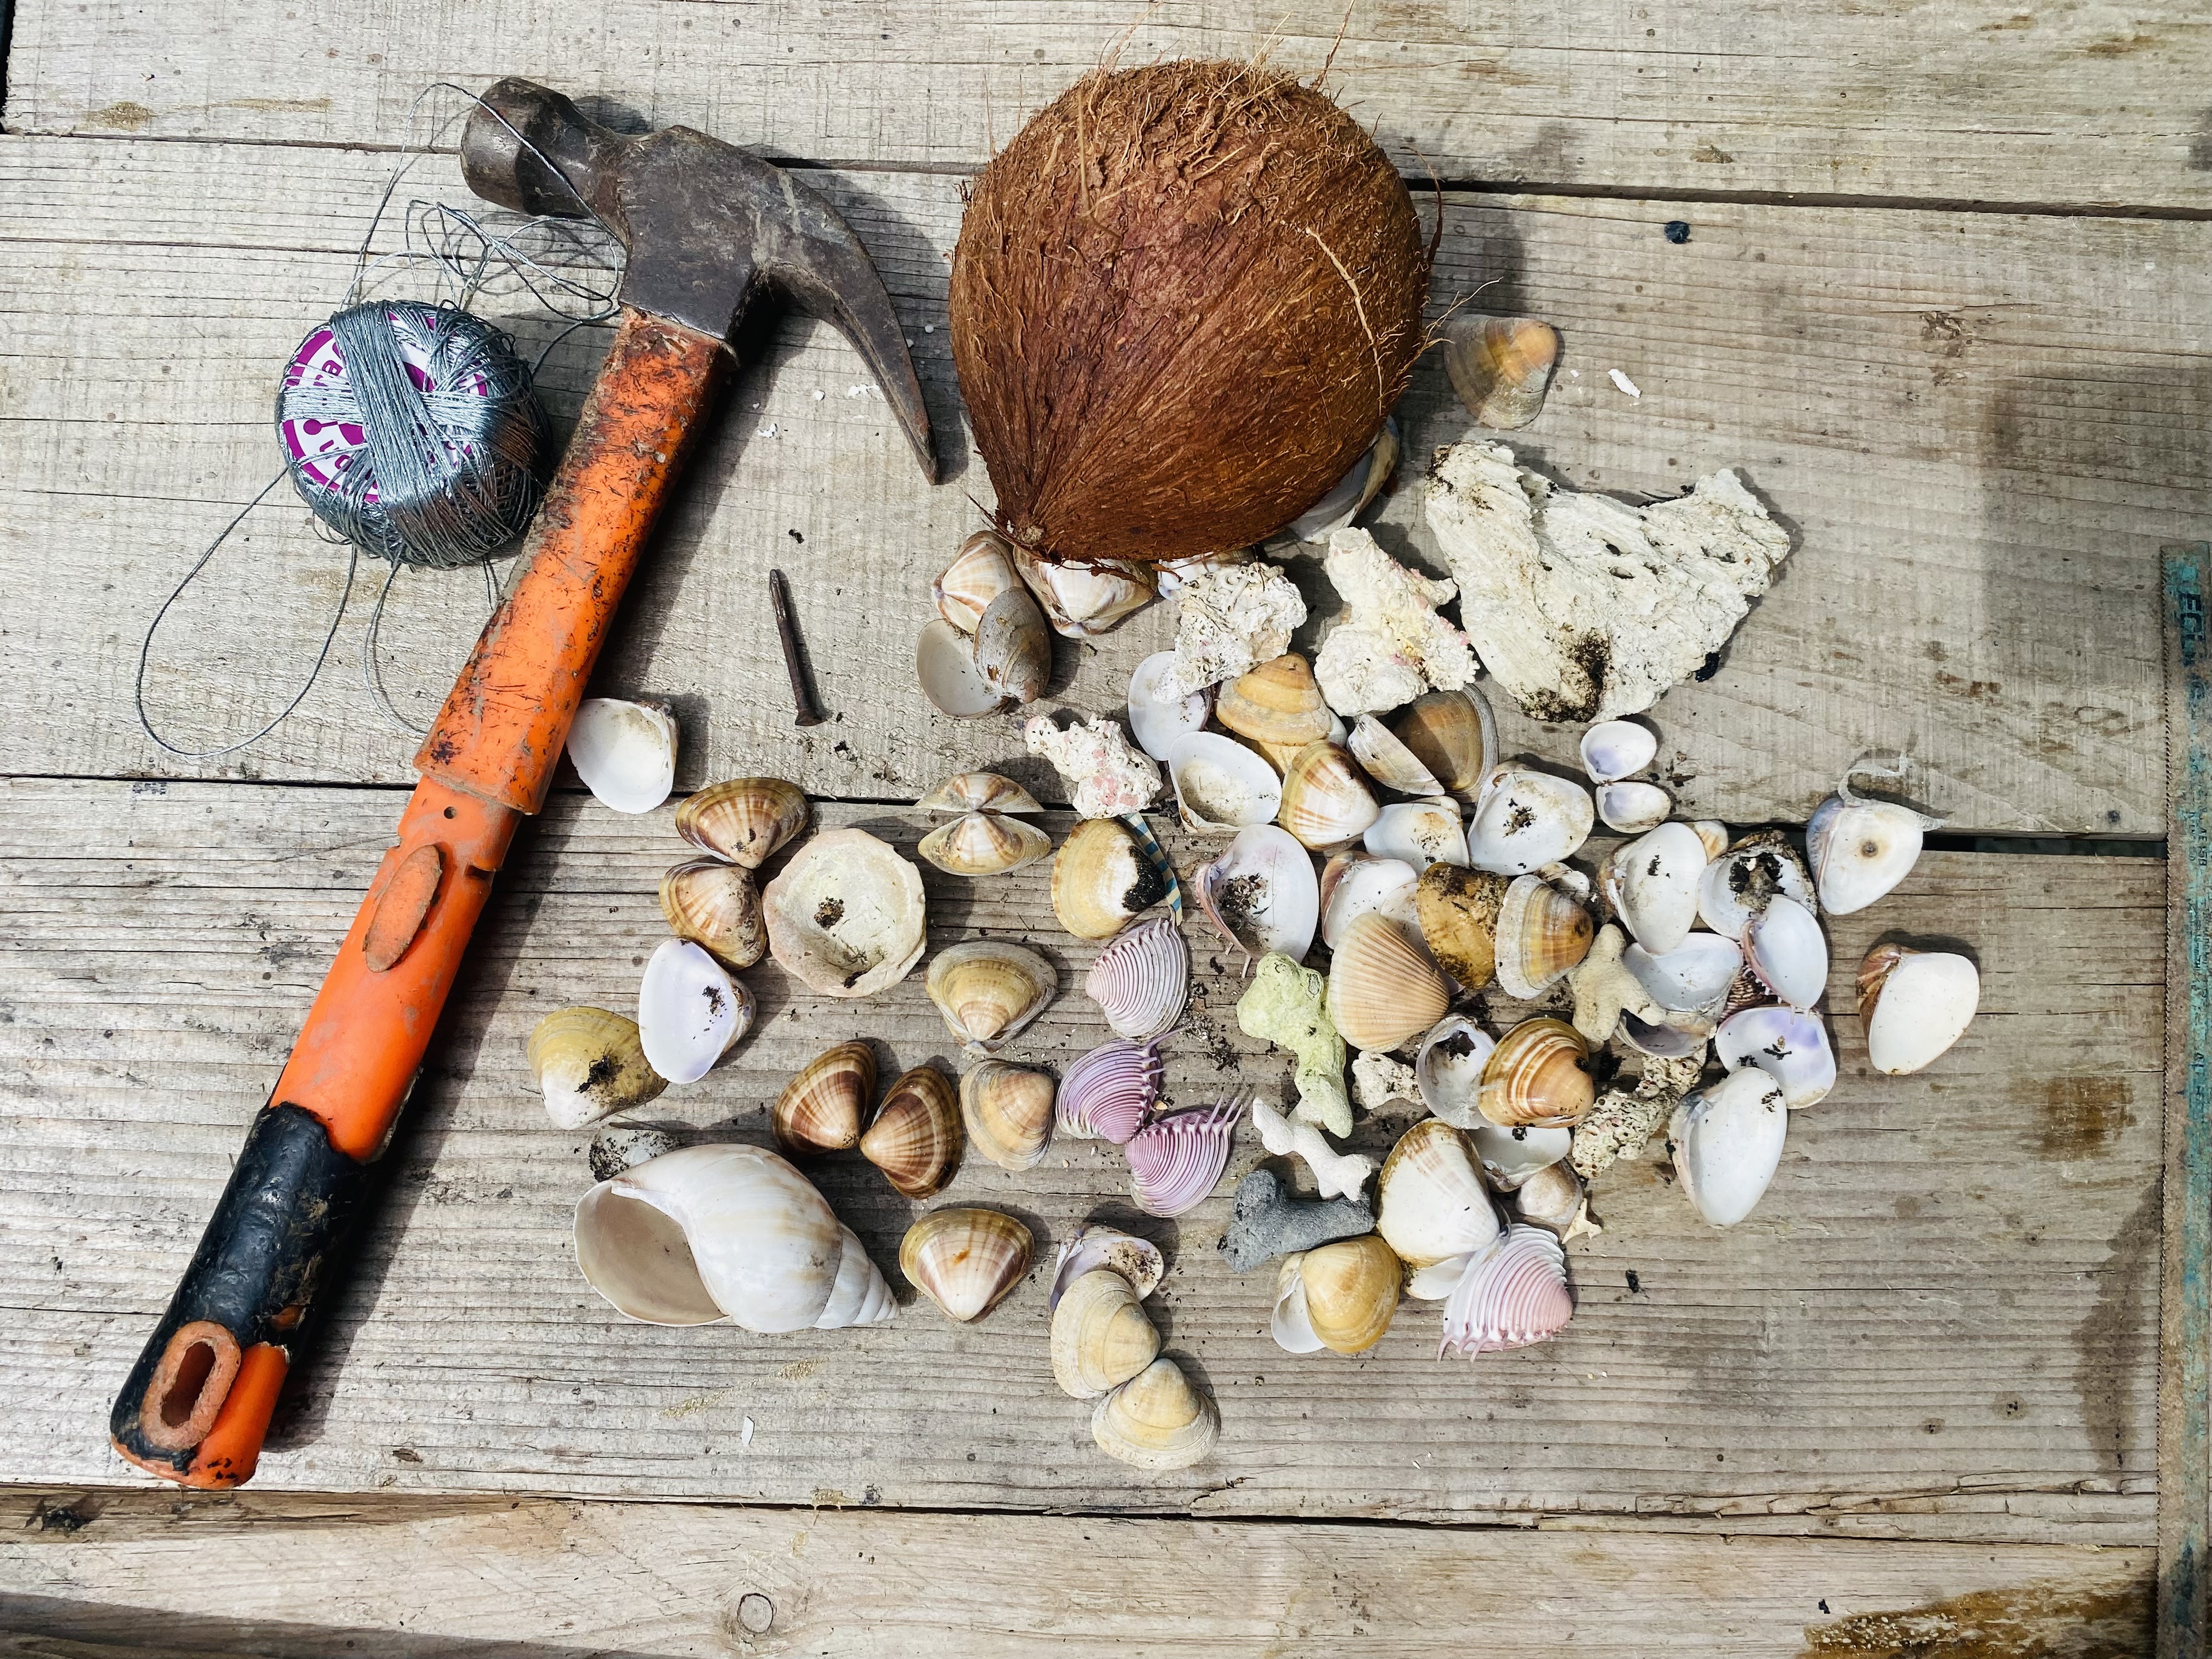
- conchas de mar 🐚
- Concha de Coco 🥥
- Un clavo pequeño
- Martillo
- Una sierra o serrucho para cortar el coco 🥥
- Hilo
- taladro o algo que sirva para perforar el coco 🥥
- diferentes perlas o pepitas de collar
These seashells have their own history and sentimental value. For various reasons, my children and I couldn't go to the beach for several years (the closest one is a four-hour drive away), until the time finally came, and we made the trip. At one of the stops along the way, we found a beachfront completely covered in seashells. We collected the ones we liked the most, placed them all in a container, put it in the car, and continued our walk.
When I got home, I put them away and forgot about them for a while, but every now and then the thought of doing something pretty with them came to me. Then I put them away again, until I read the contest guidelines and said: the time has come for these beautiful seashells 🐚. The idea that echoed in my head the most was to make a mobile with them, so let's get to work. Here's the list of materials to use:
- Seashells 🐚
- Coconut shell 🥥
- A small nail
- Hammer
- A saw or handsaw to cut the coconut 🥥
- Thread
- Drill or something useful to drill holes in the coconut 🥥
- Various pearls or seed beads for a necklace
PASO A PASO
STEP BY STEP
𝓟𝓐𝓢𝓞 1
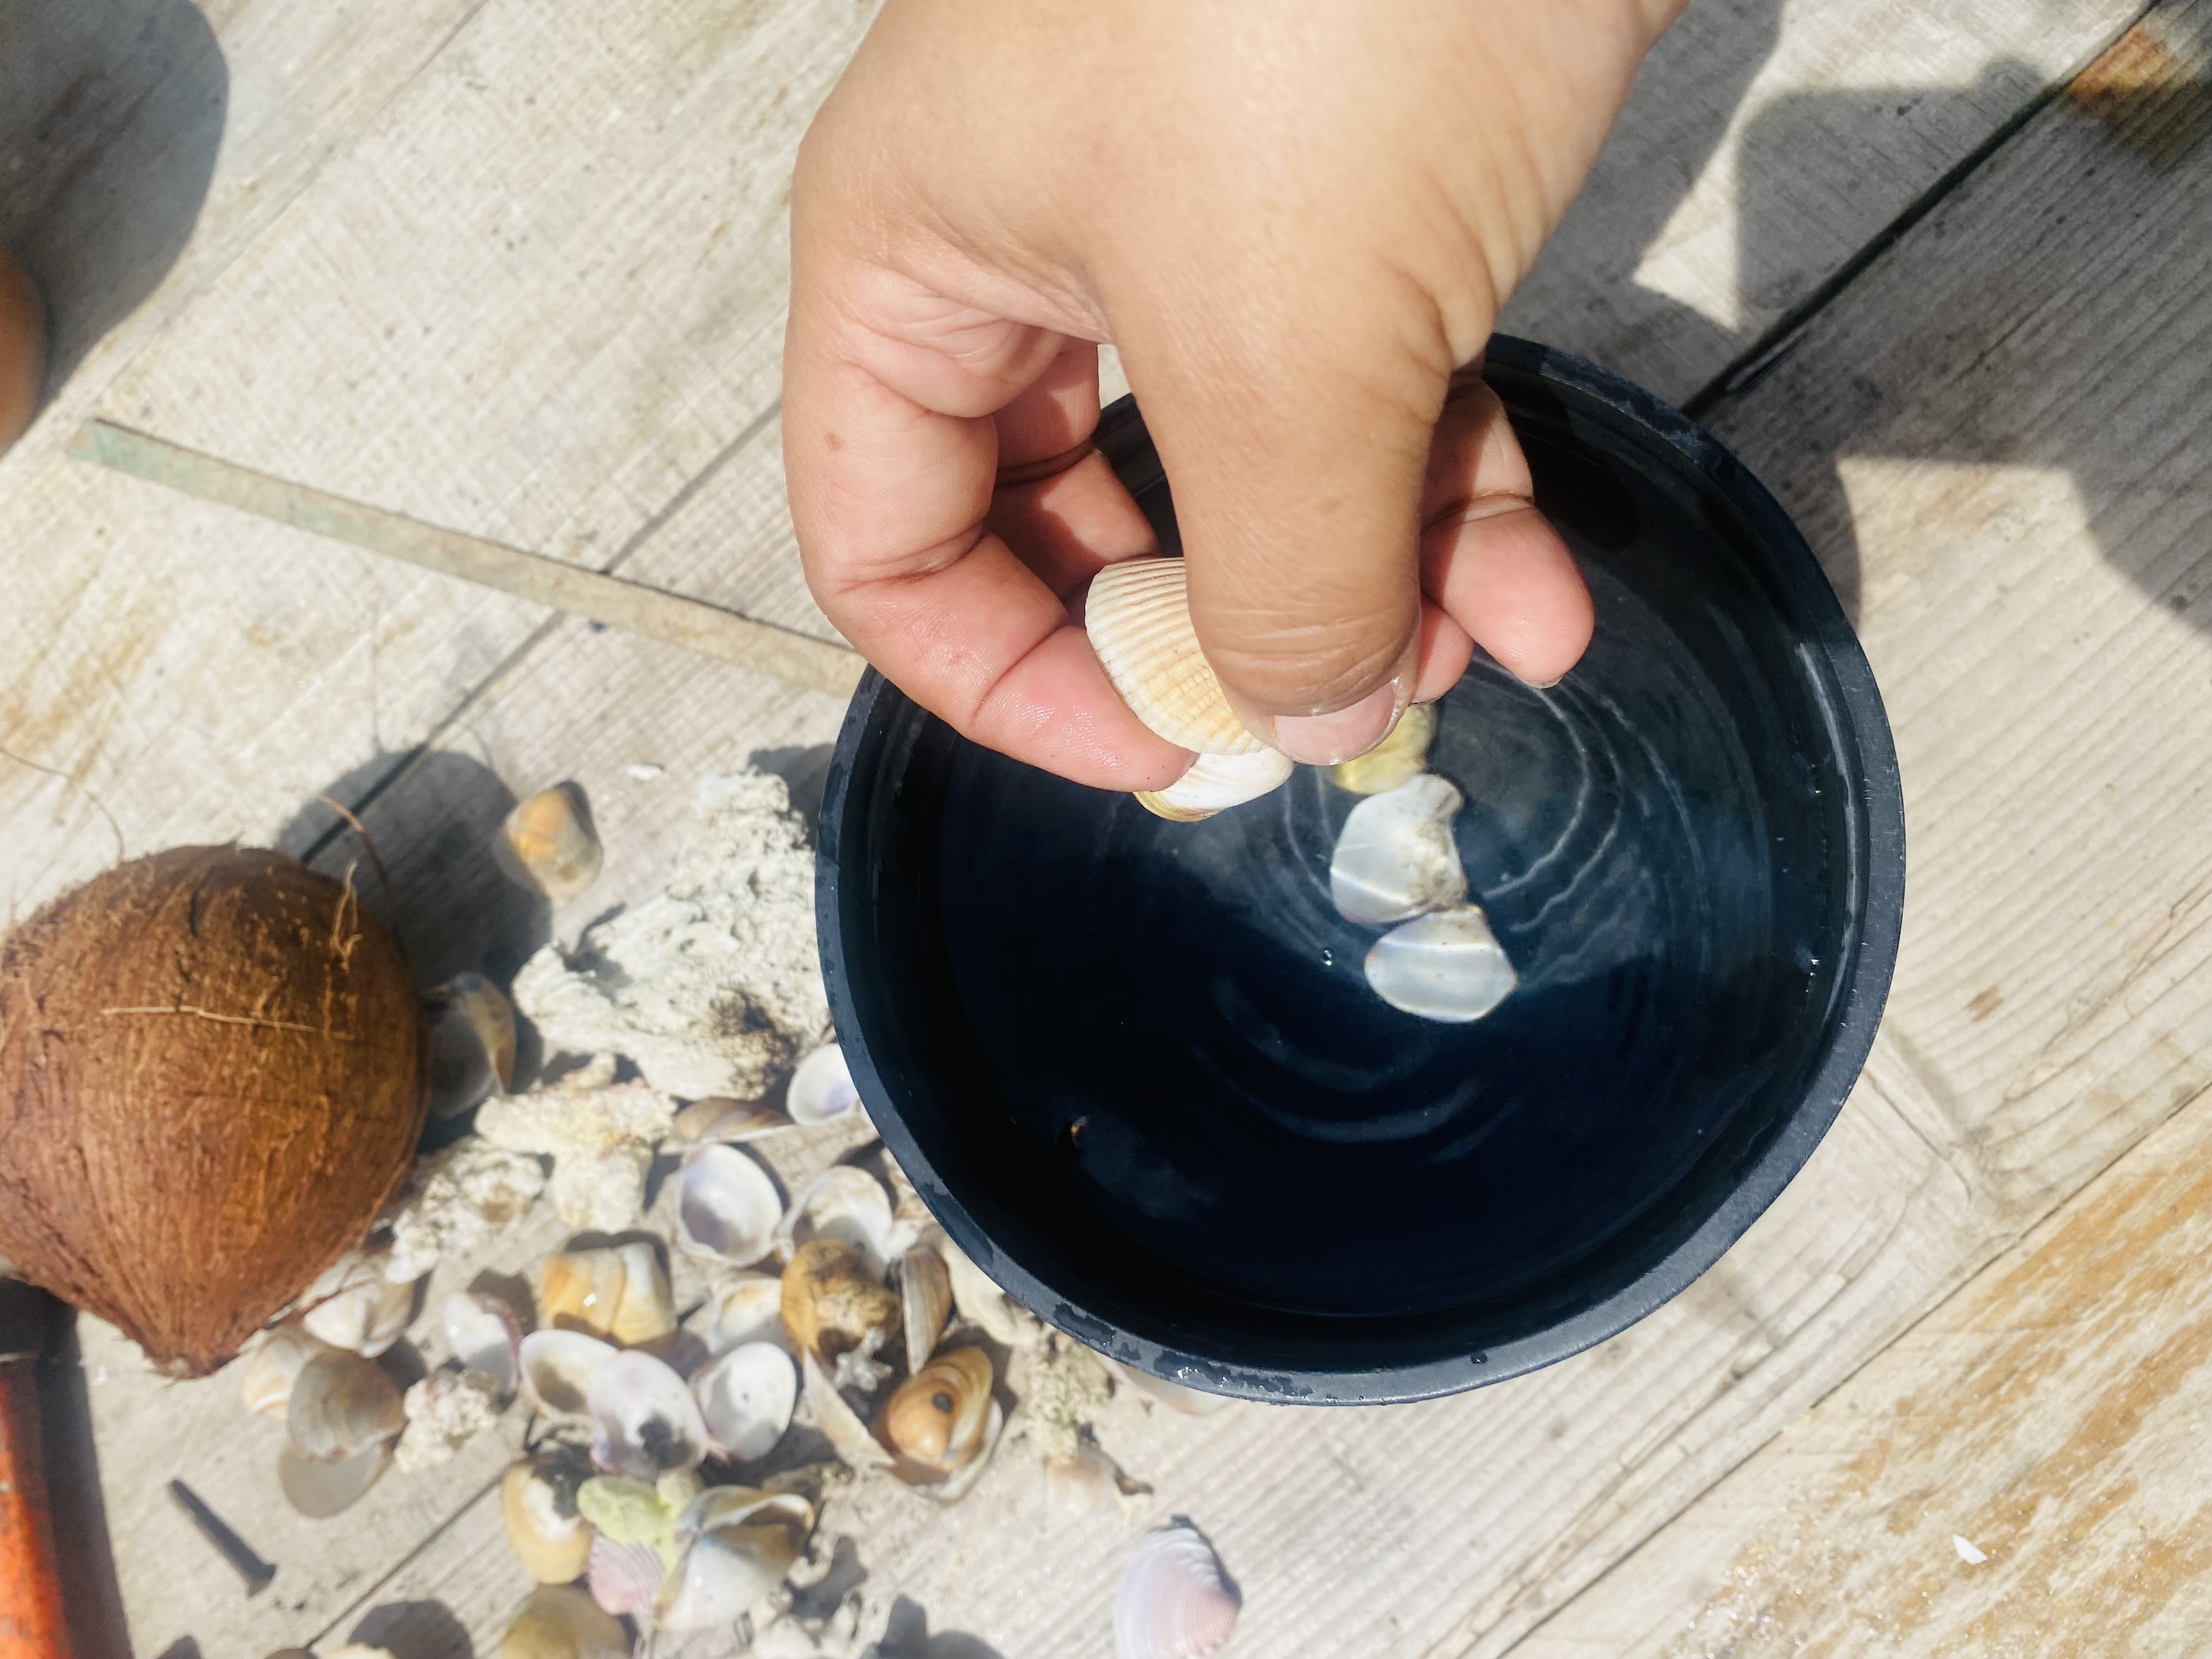
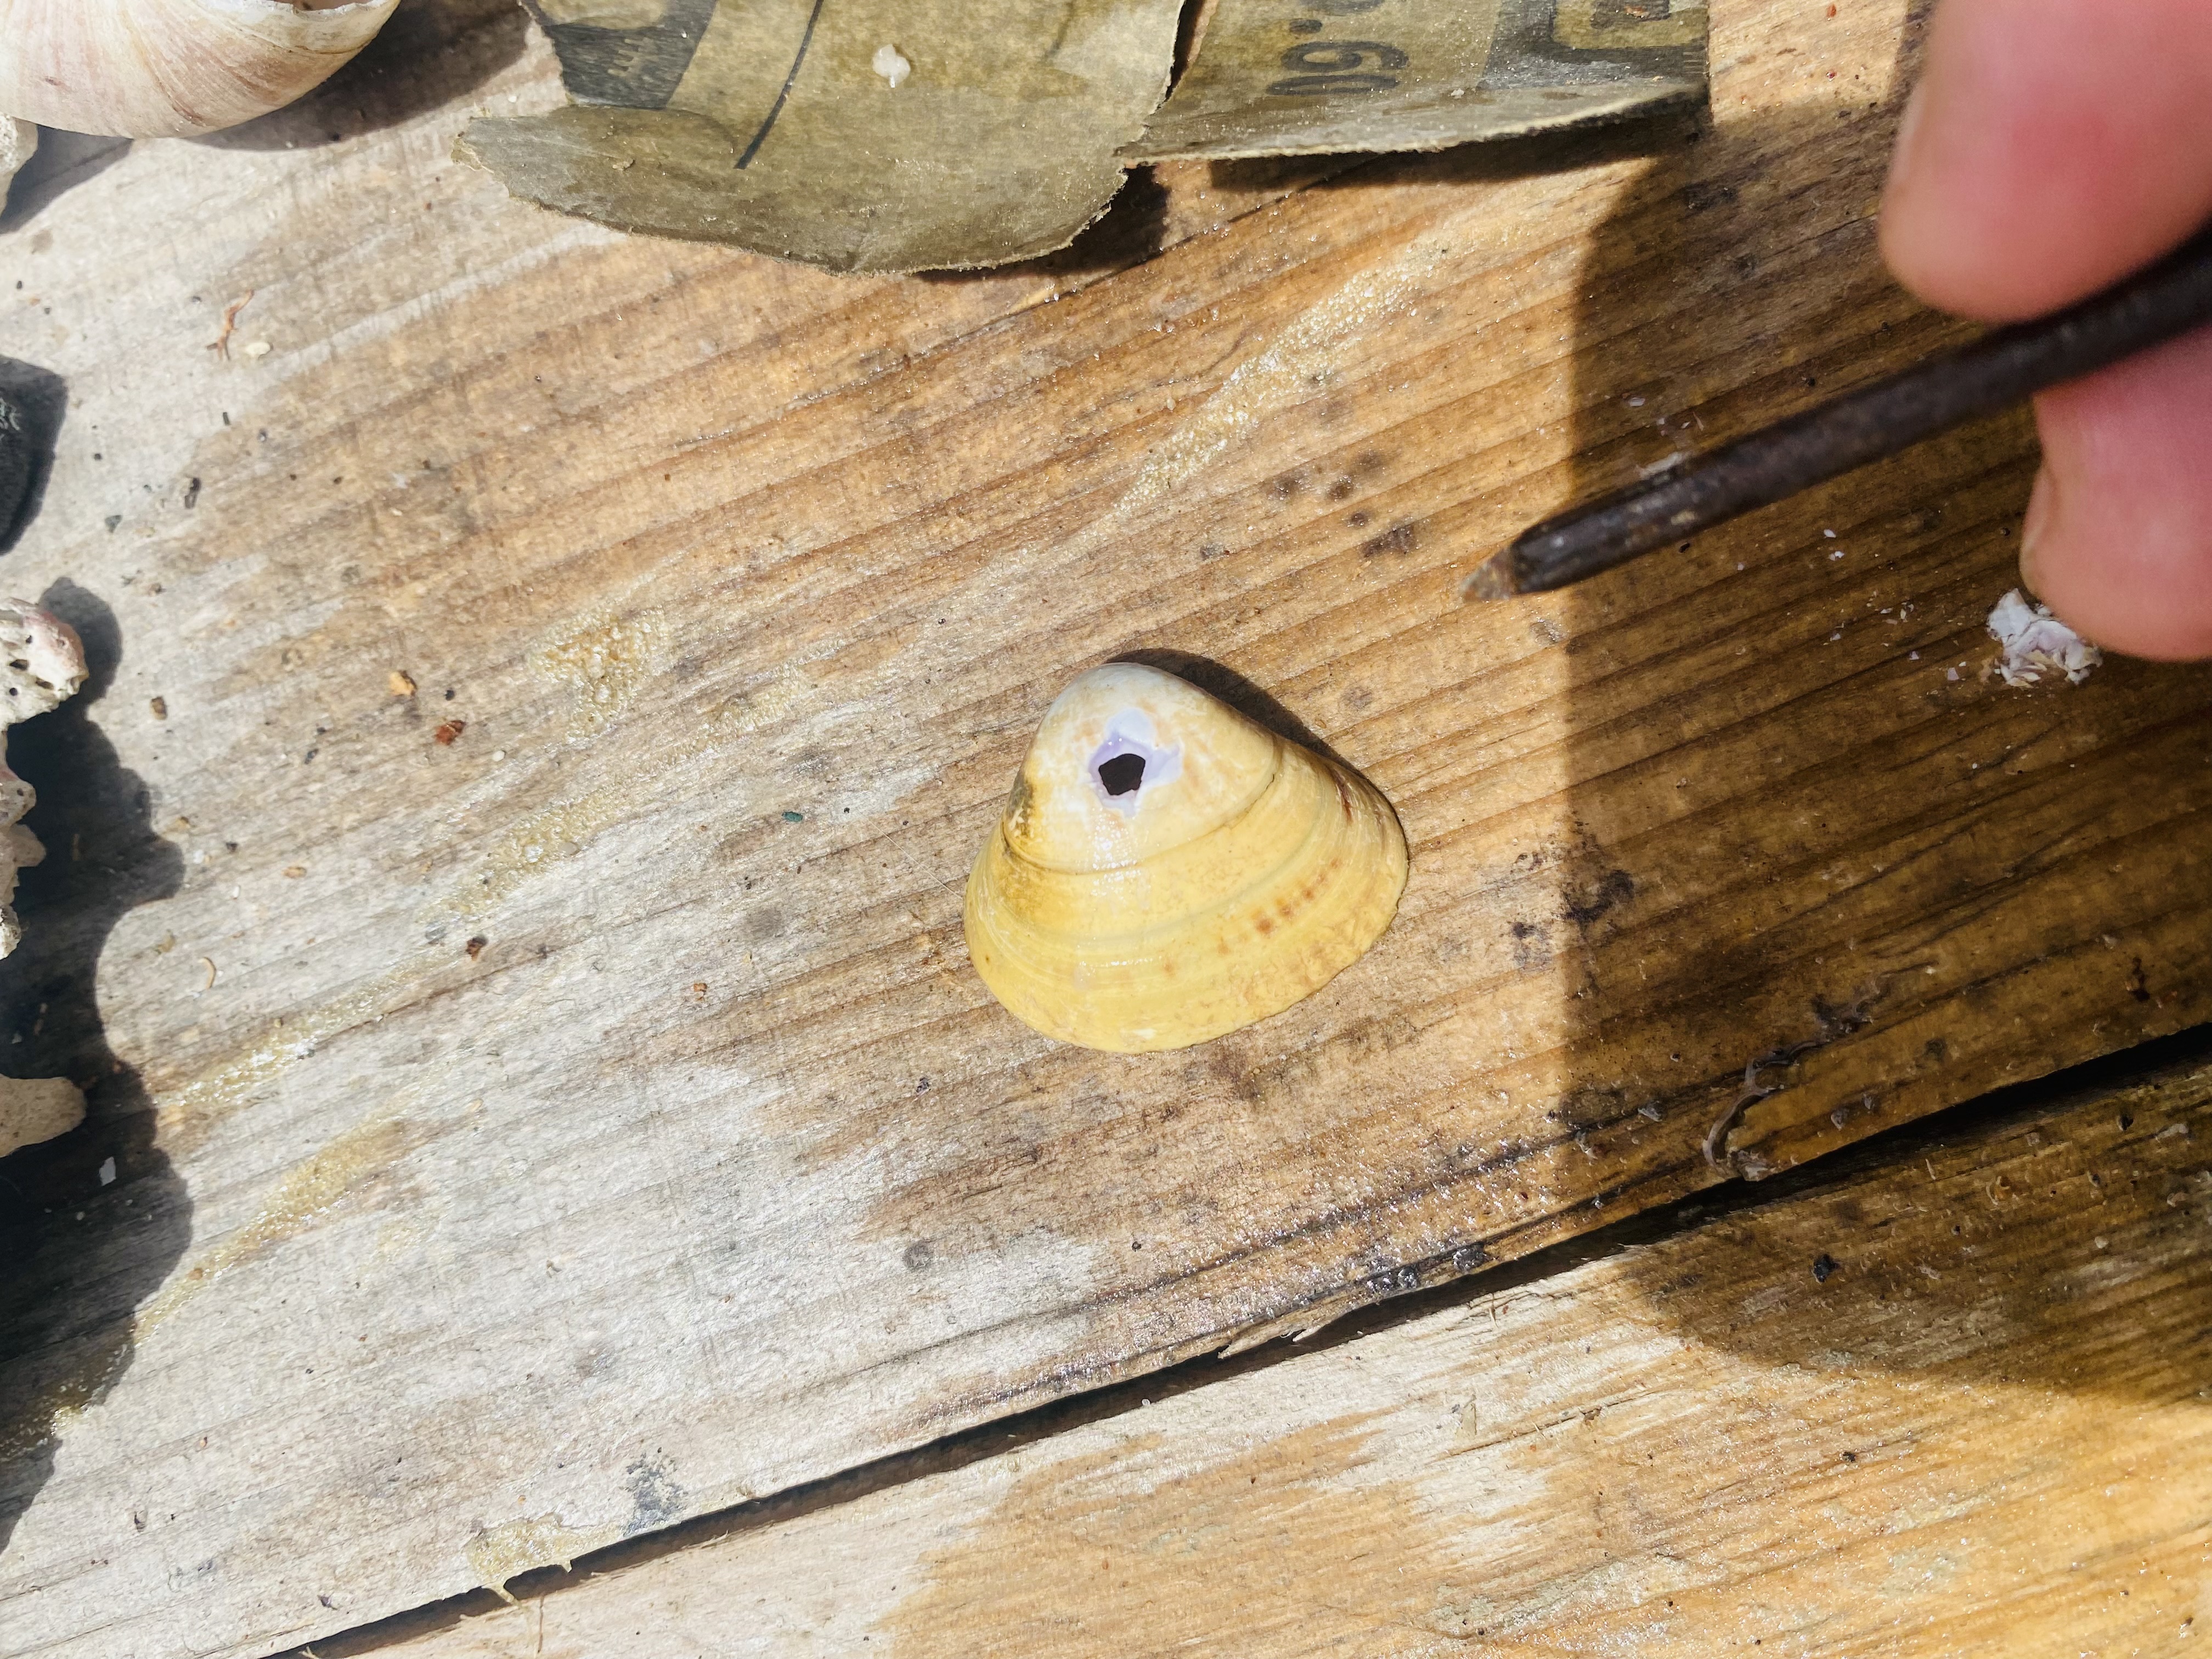
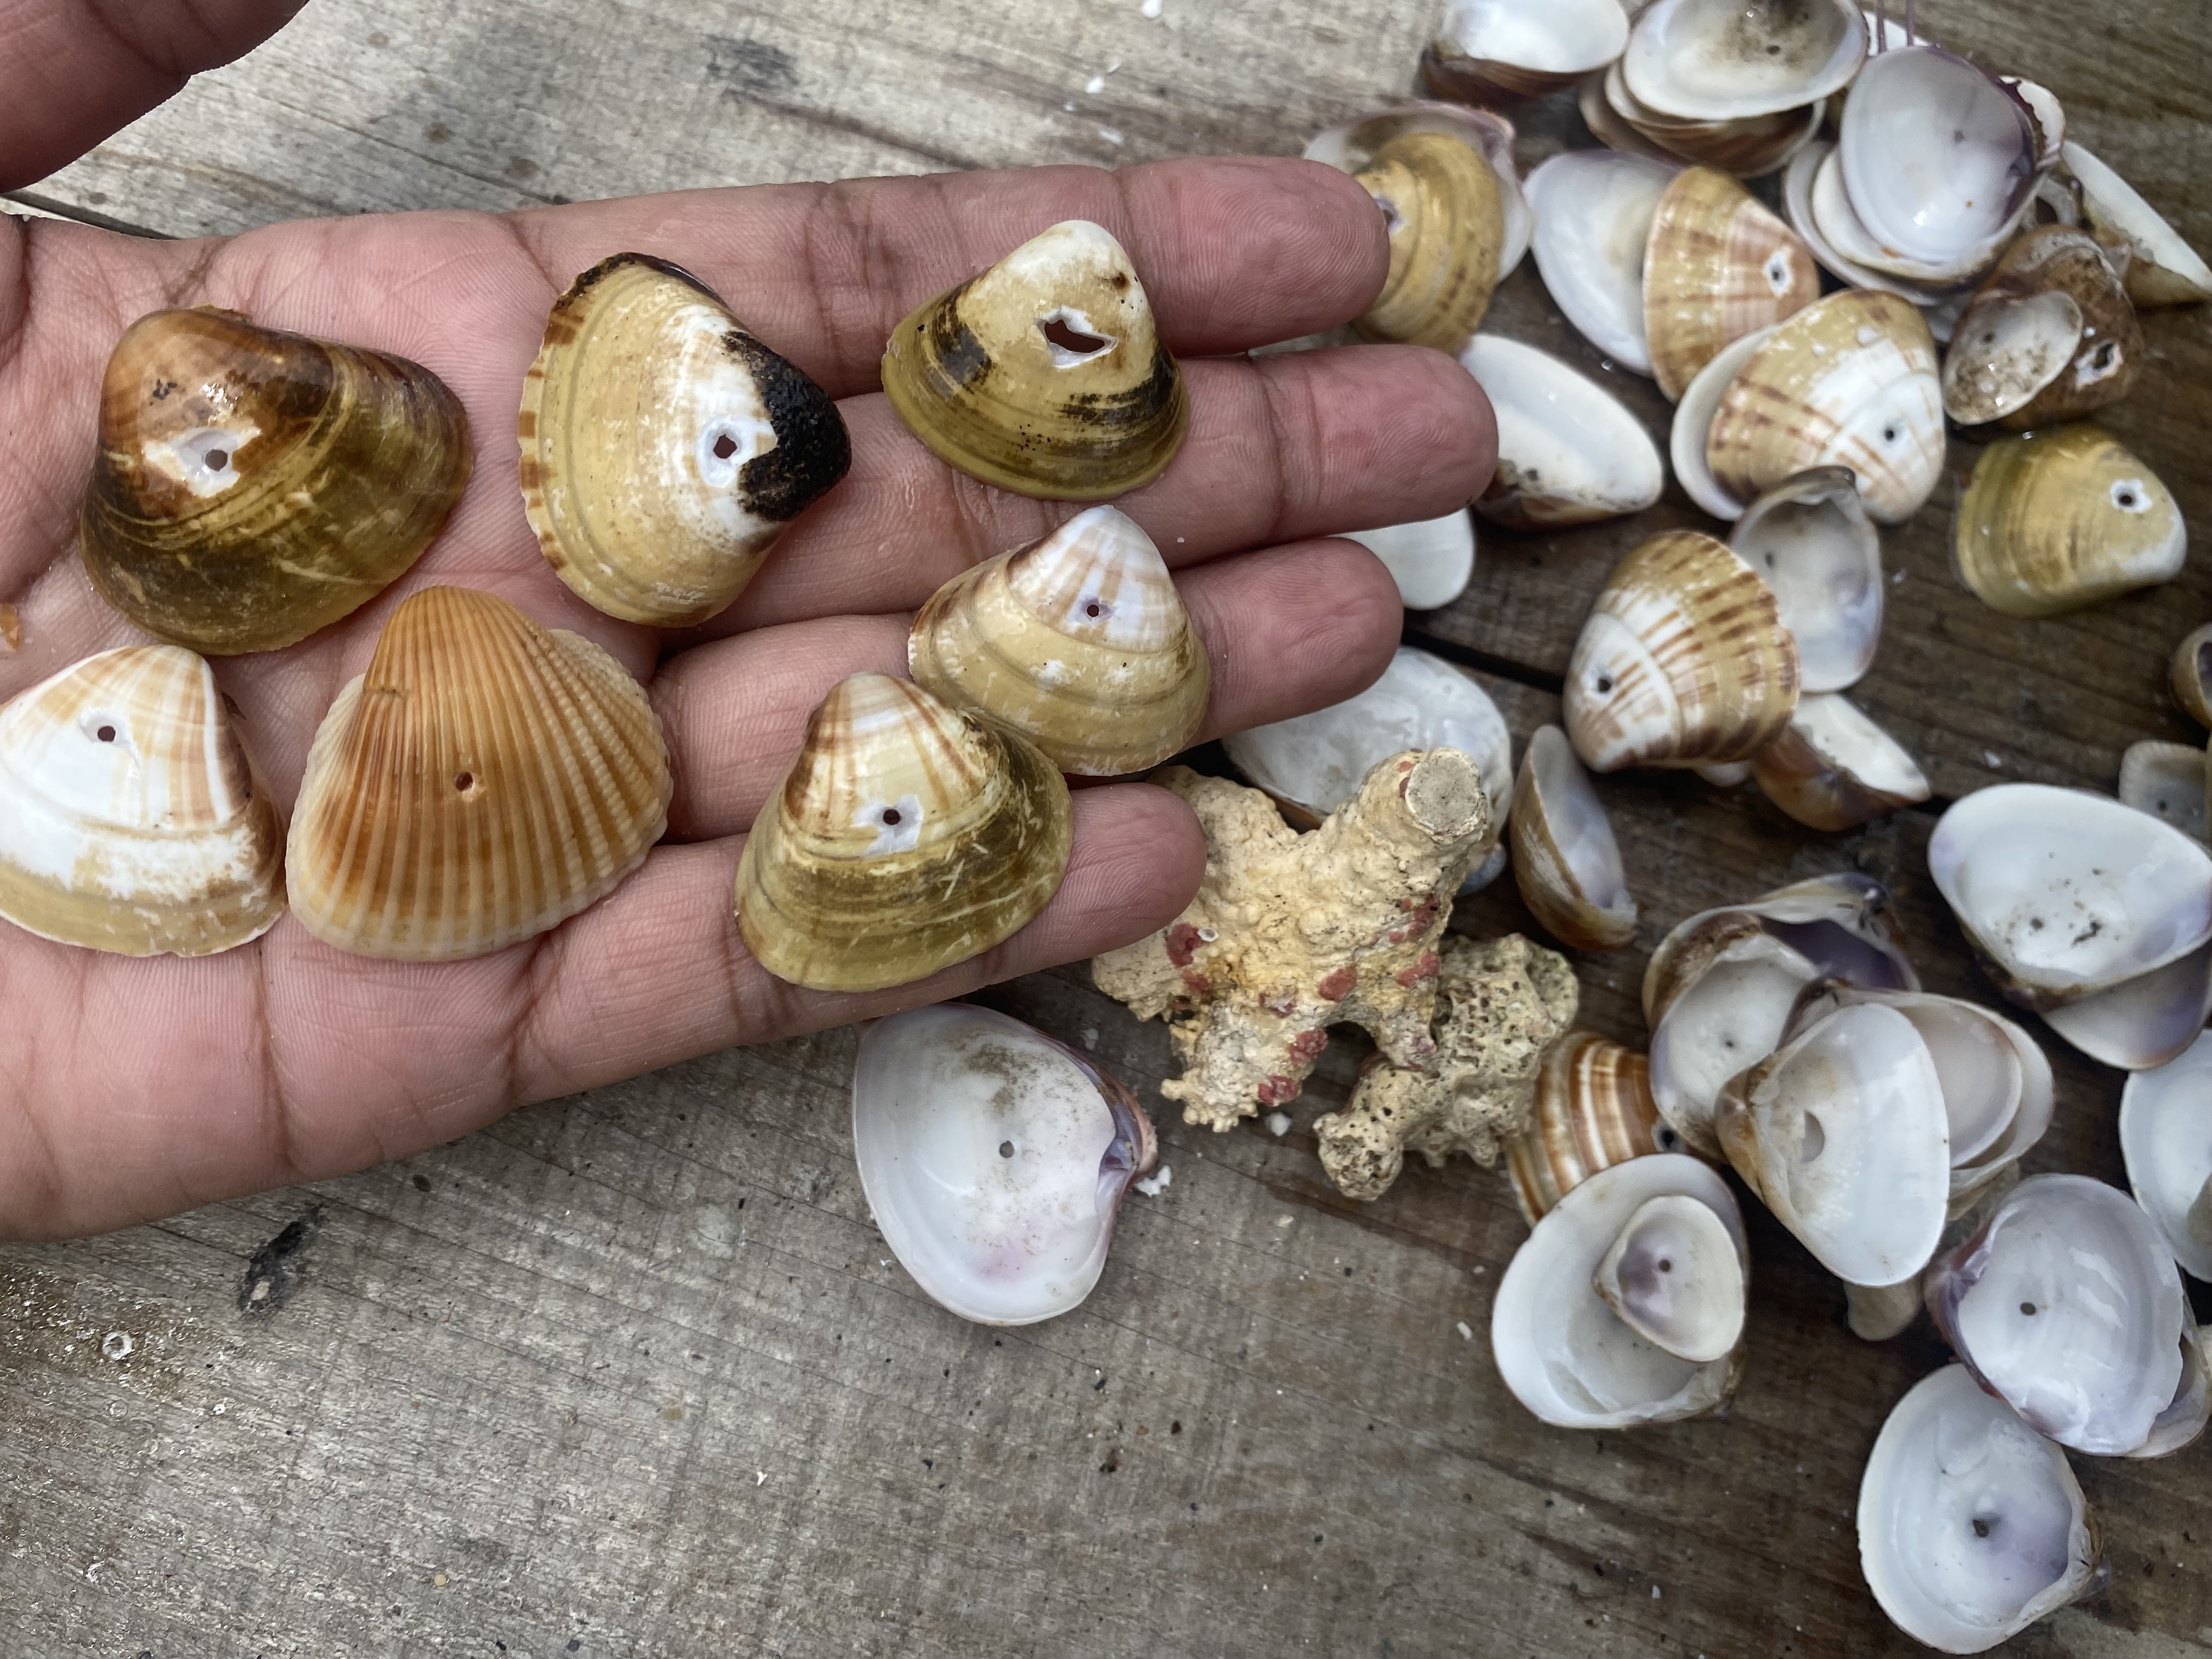
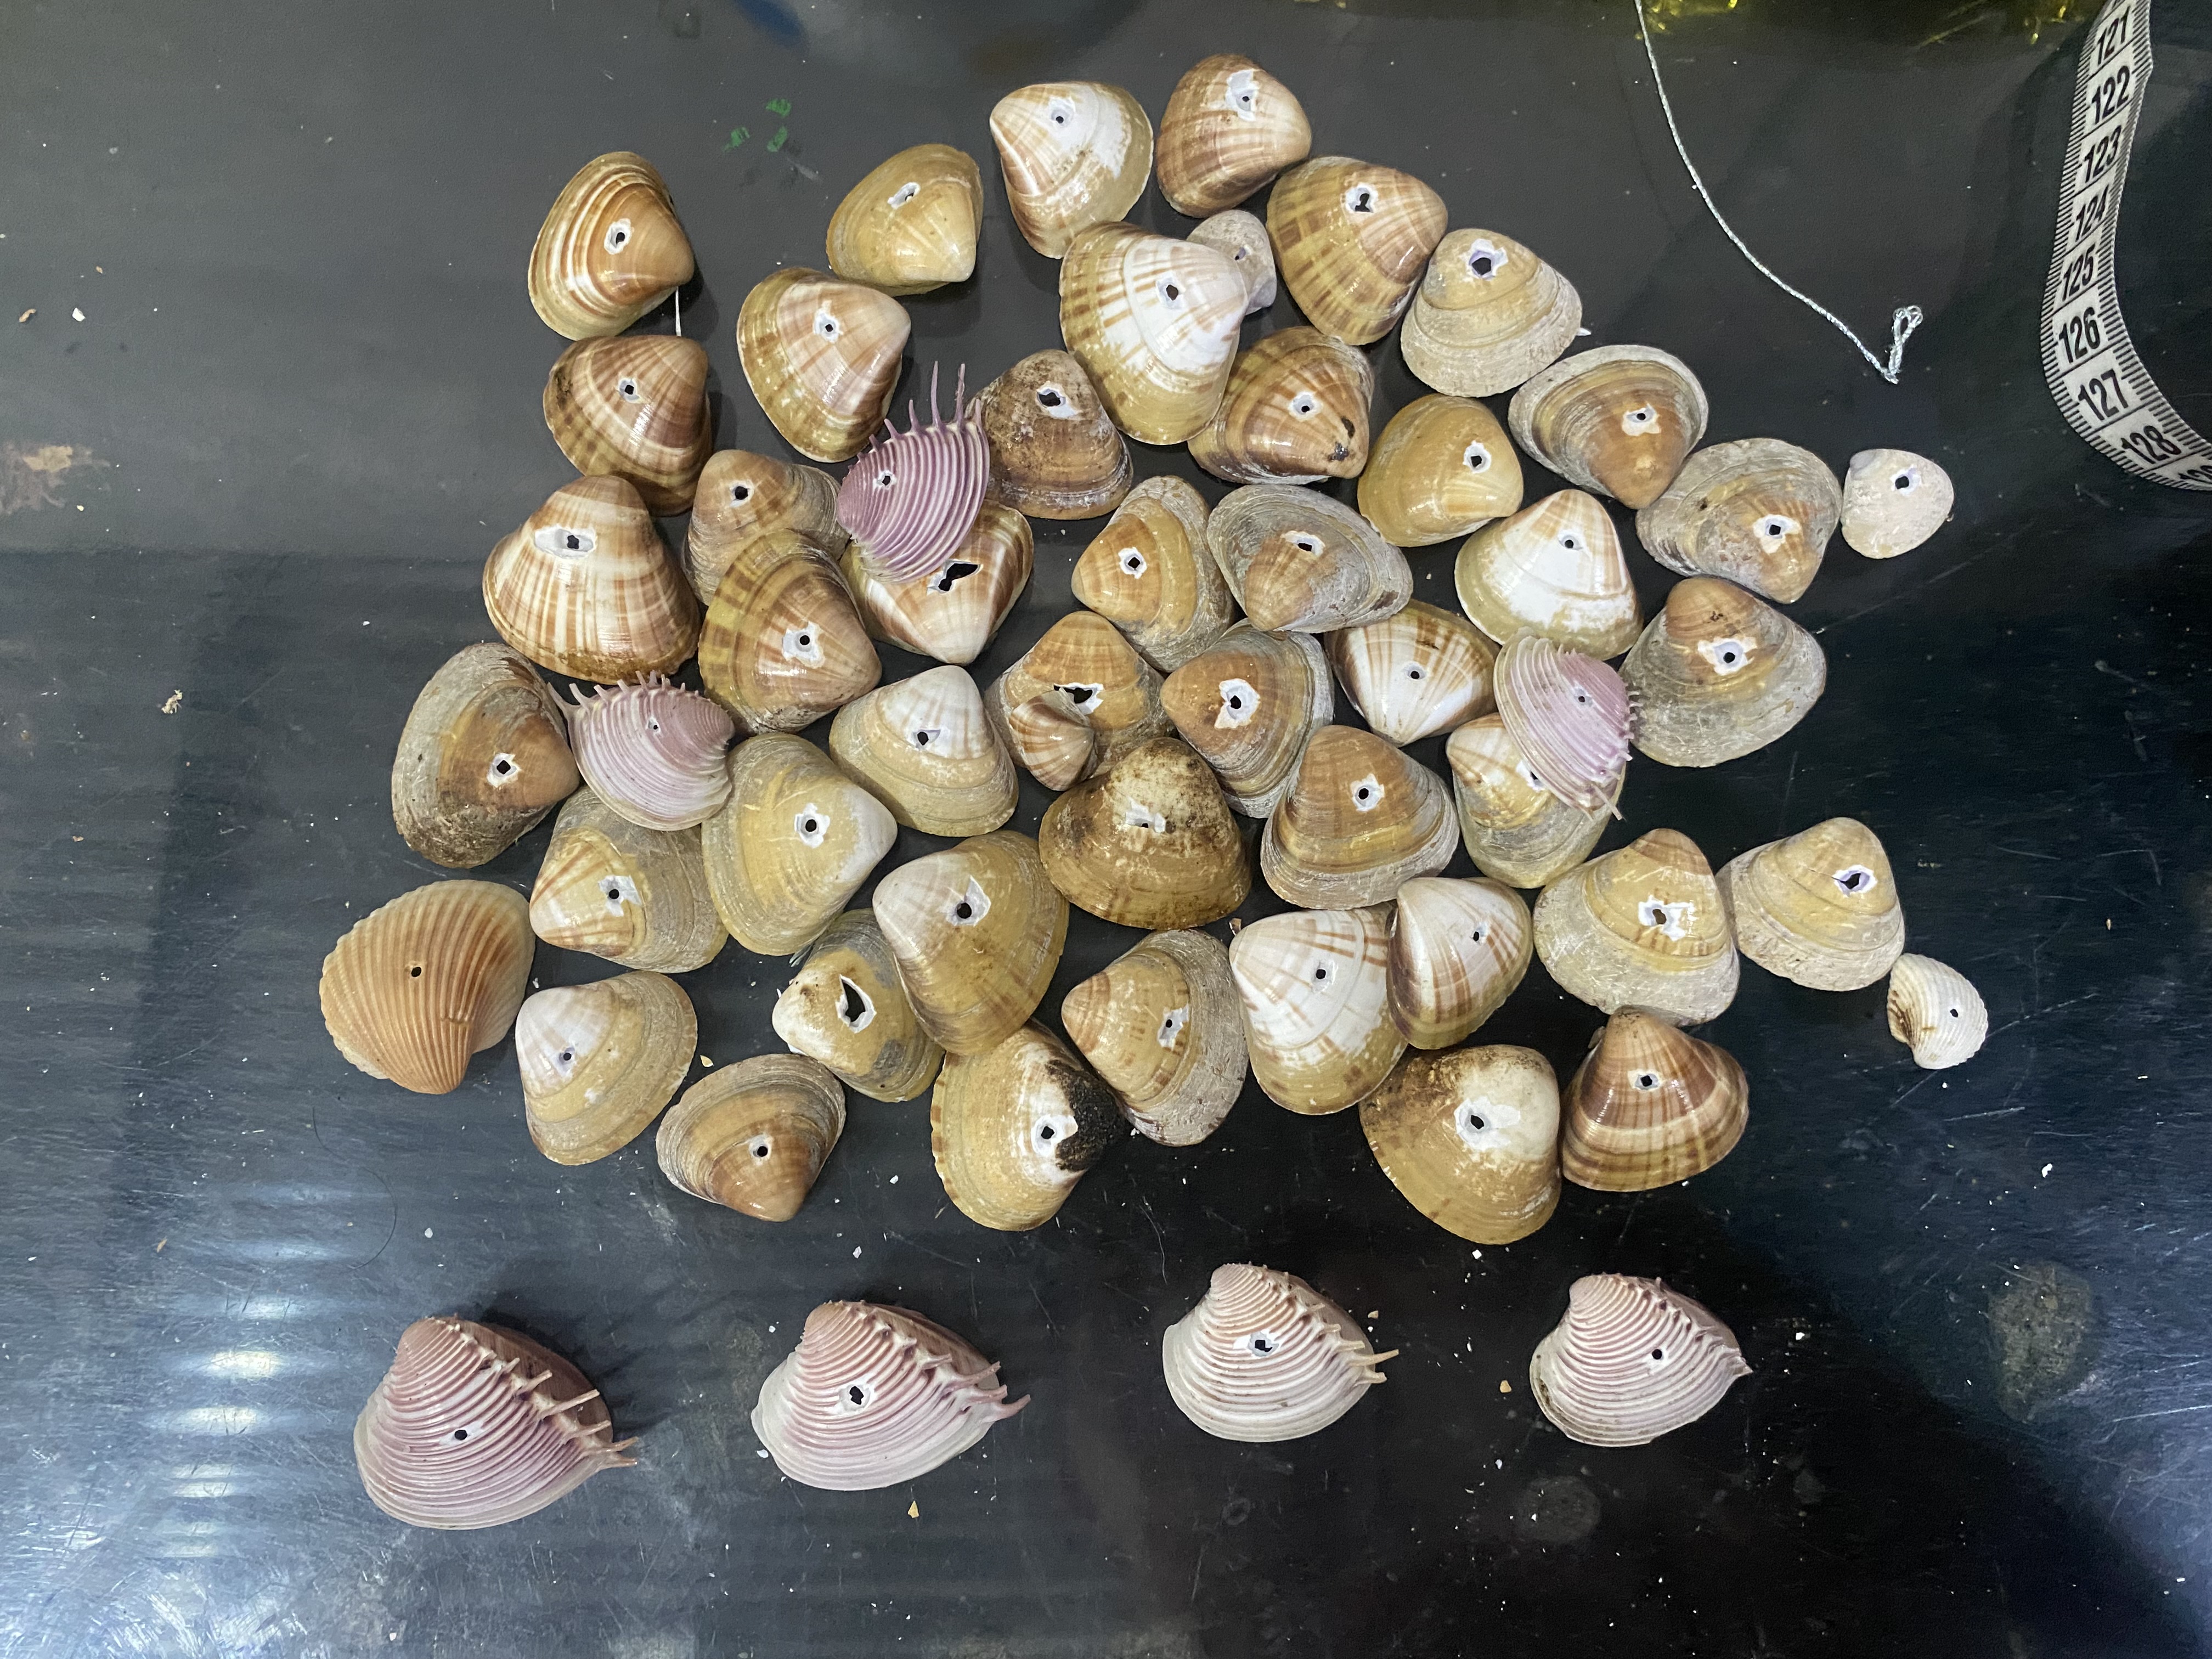
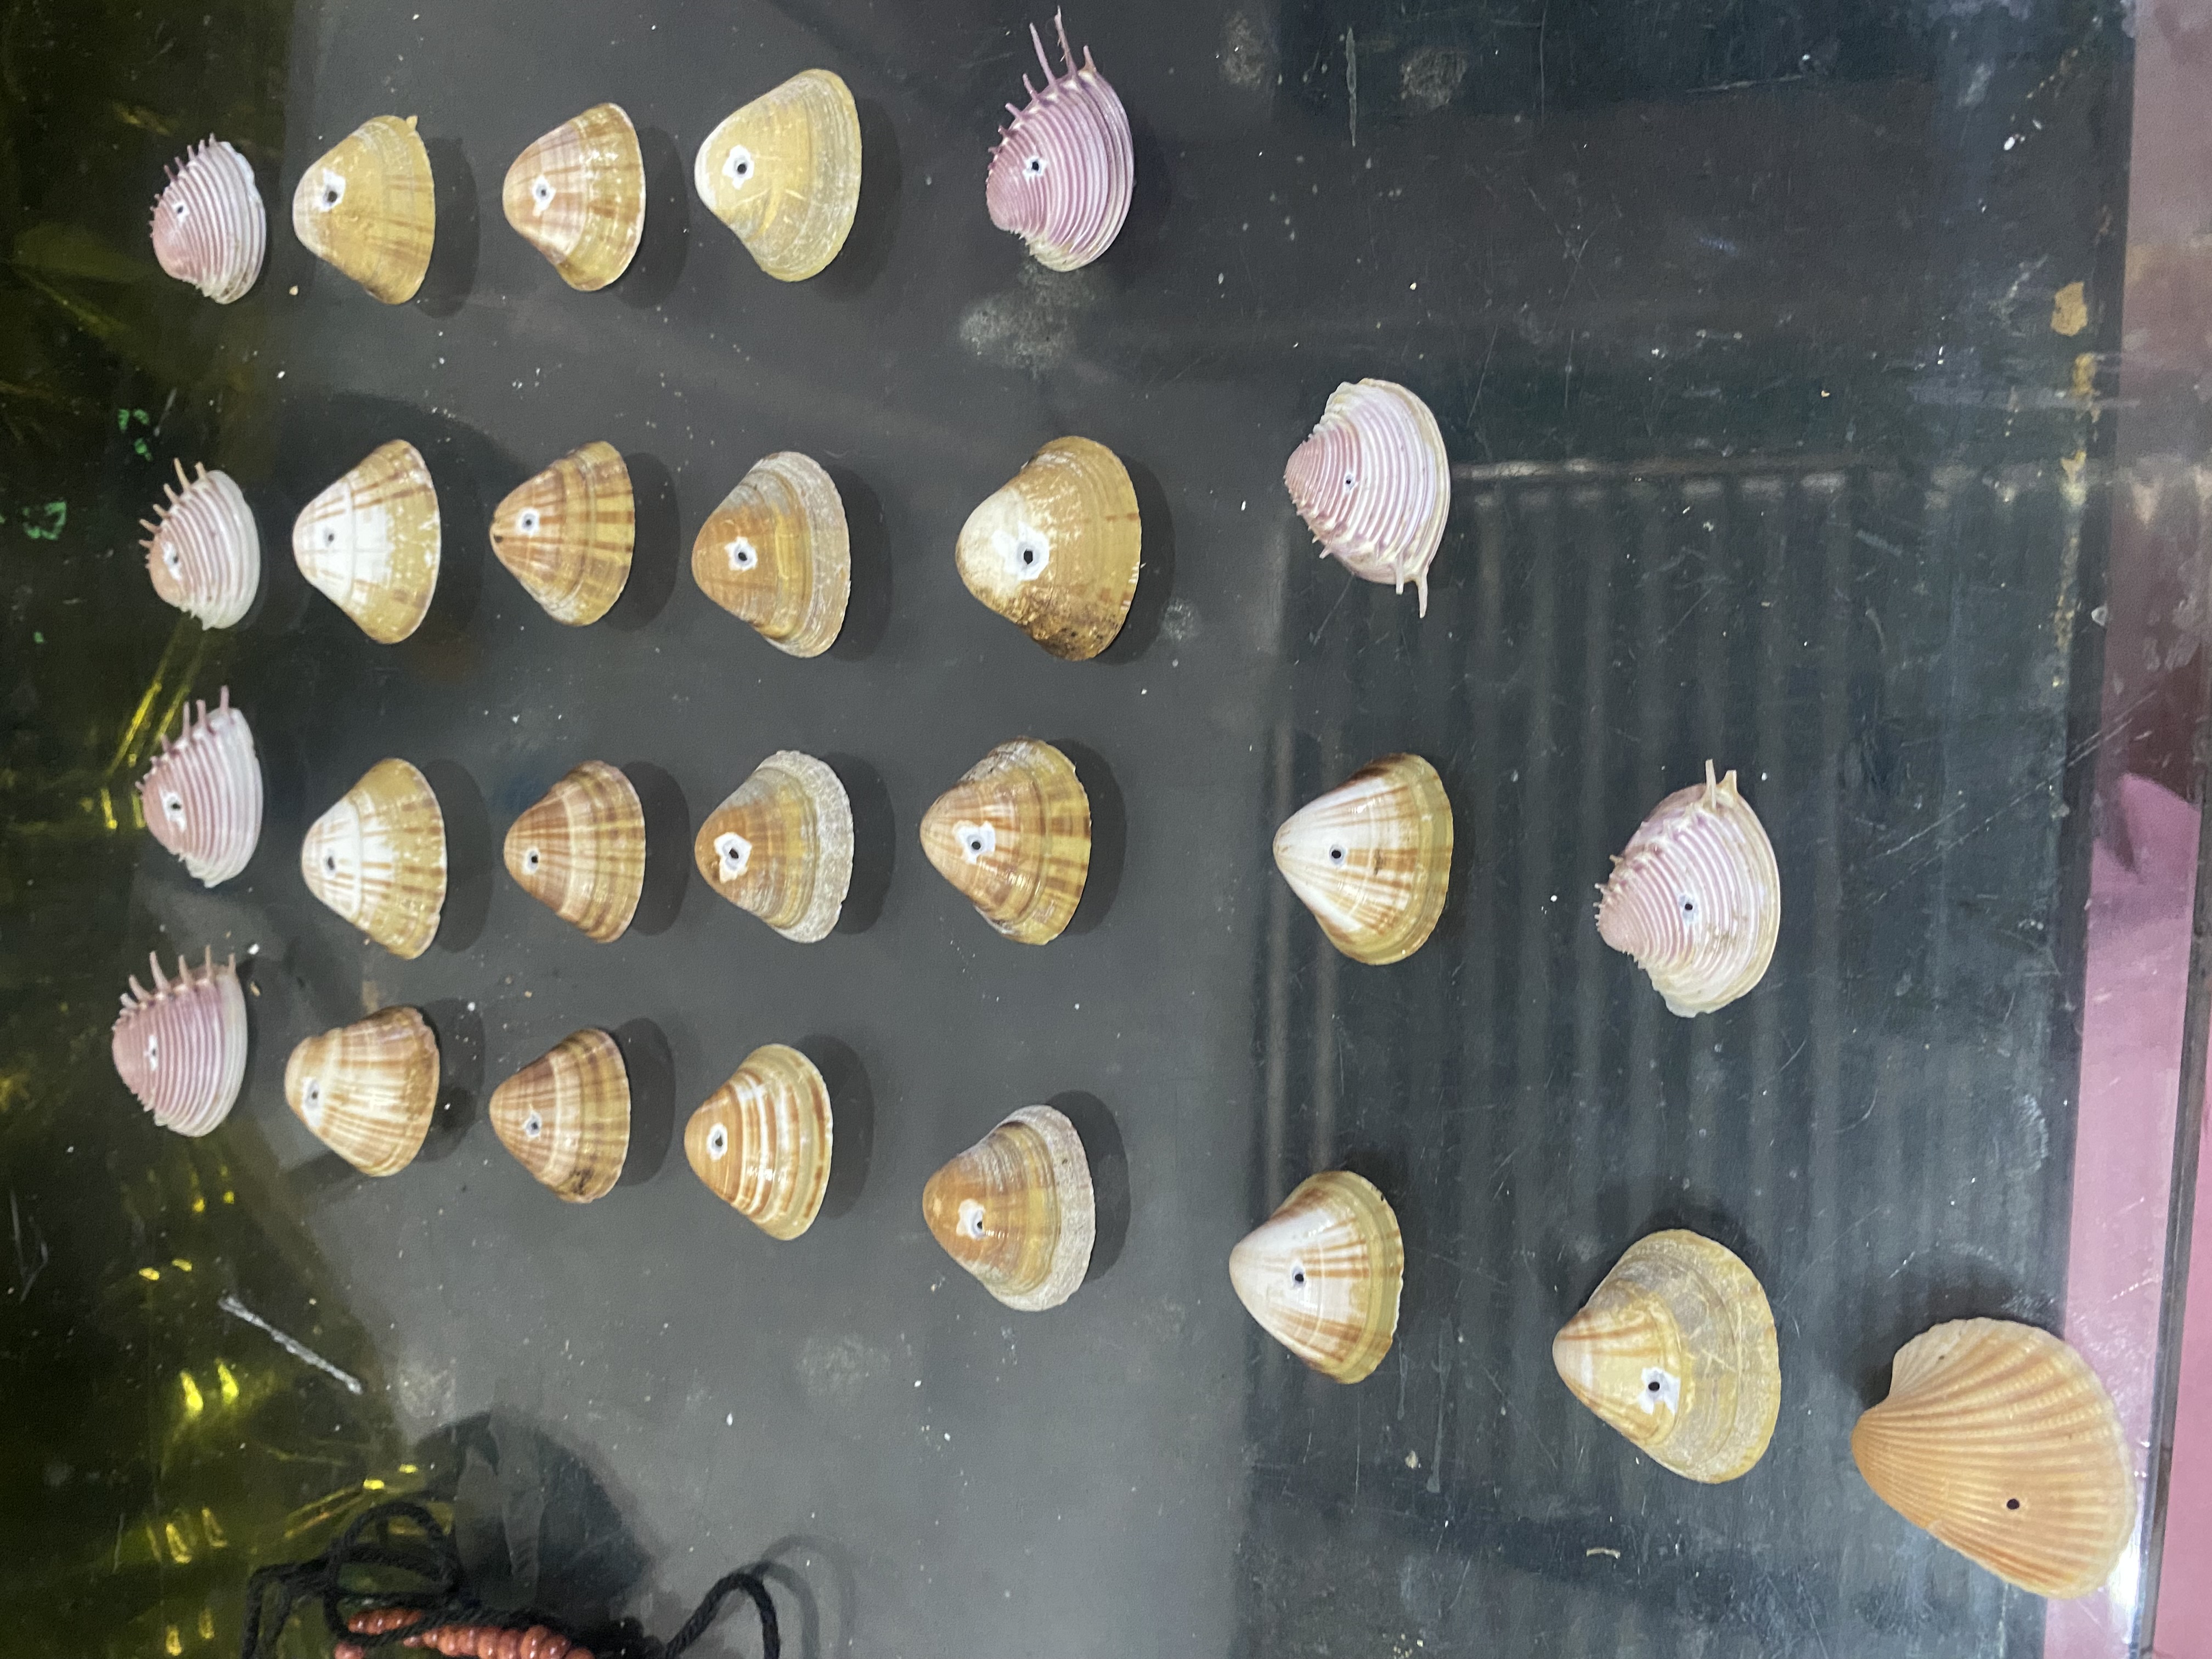
Para nuestro primer paso vamos a comenzar lavando las conchas de mar y remojándolas un poco para que vayan suavizando, luego haré la primera prueba para abrir uno de los orificios, tuve que hacer la prueba con diferentes tipos de clavos ya que al principio utilicé uno muy grueso y partí varias conchas, luego fui utilizando unos más delgados y puntiagudos y me funcionaron mejor, también hay que irle dando golpecitos muy suaves ya que parten con mucha facilidad, pero una vez que le agarras la técnica se logra abrir el orificio fácilmente.
For our first step we are going to start by washing the seashells and soaking them a little so that they soften, then I will do the first test to open one of the holes, I had to do the test with different types of nails since at first I used a very thick one and broke several shells, then I used some thinner and pointier ones and they worked better for me, you also have to tap them very gently since they break very easily, but once you get the hang of it you can easily open the hole.
 |  |
|---|---|
 |
𝓟𝓐𝓢𝓞 2
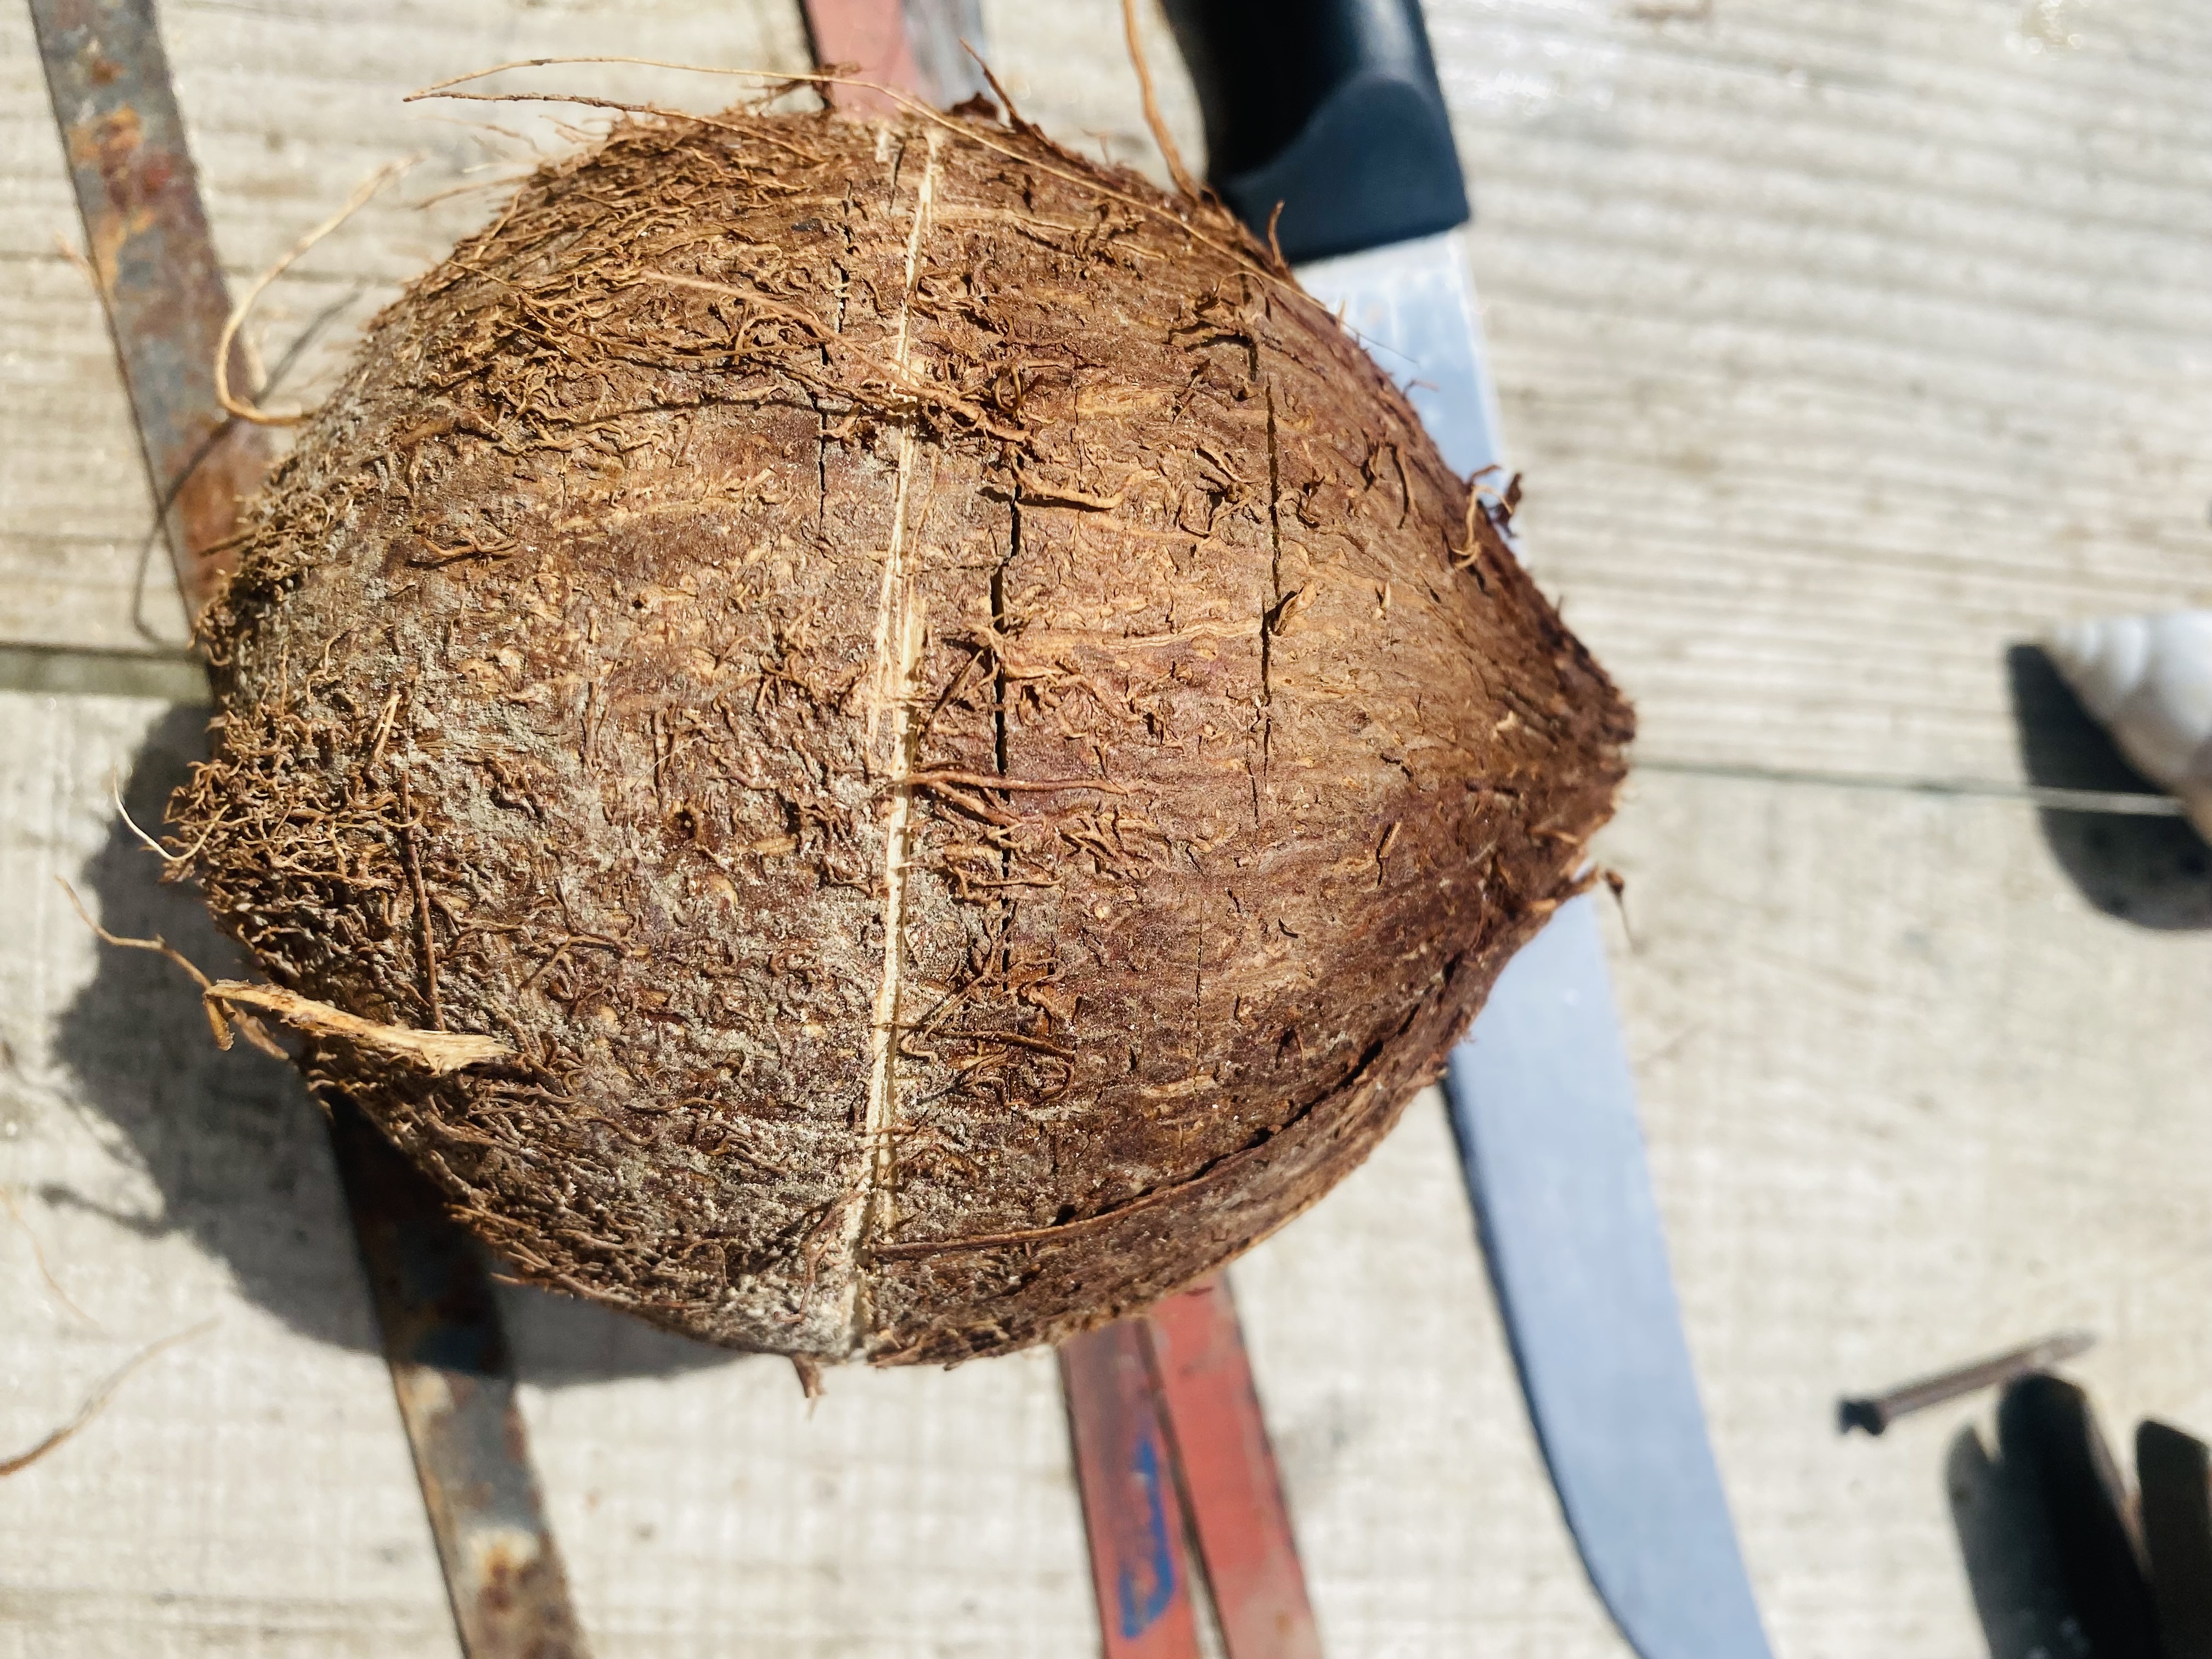
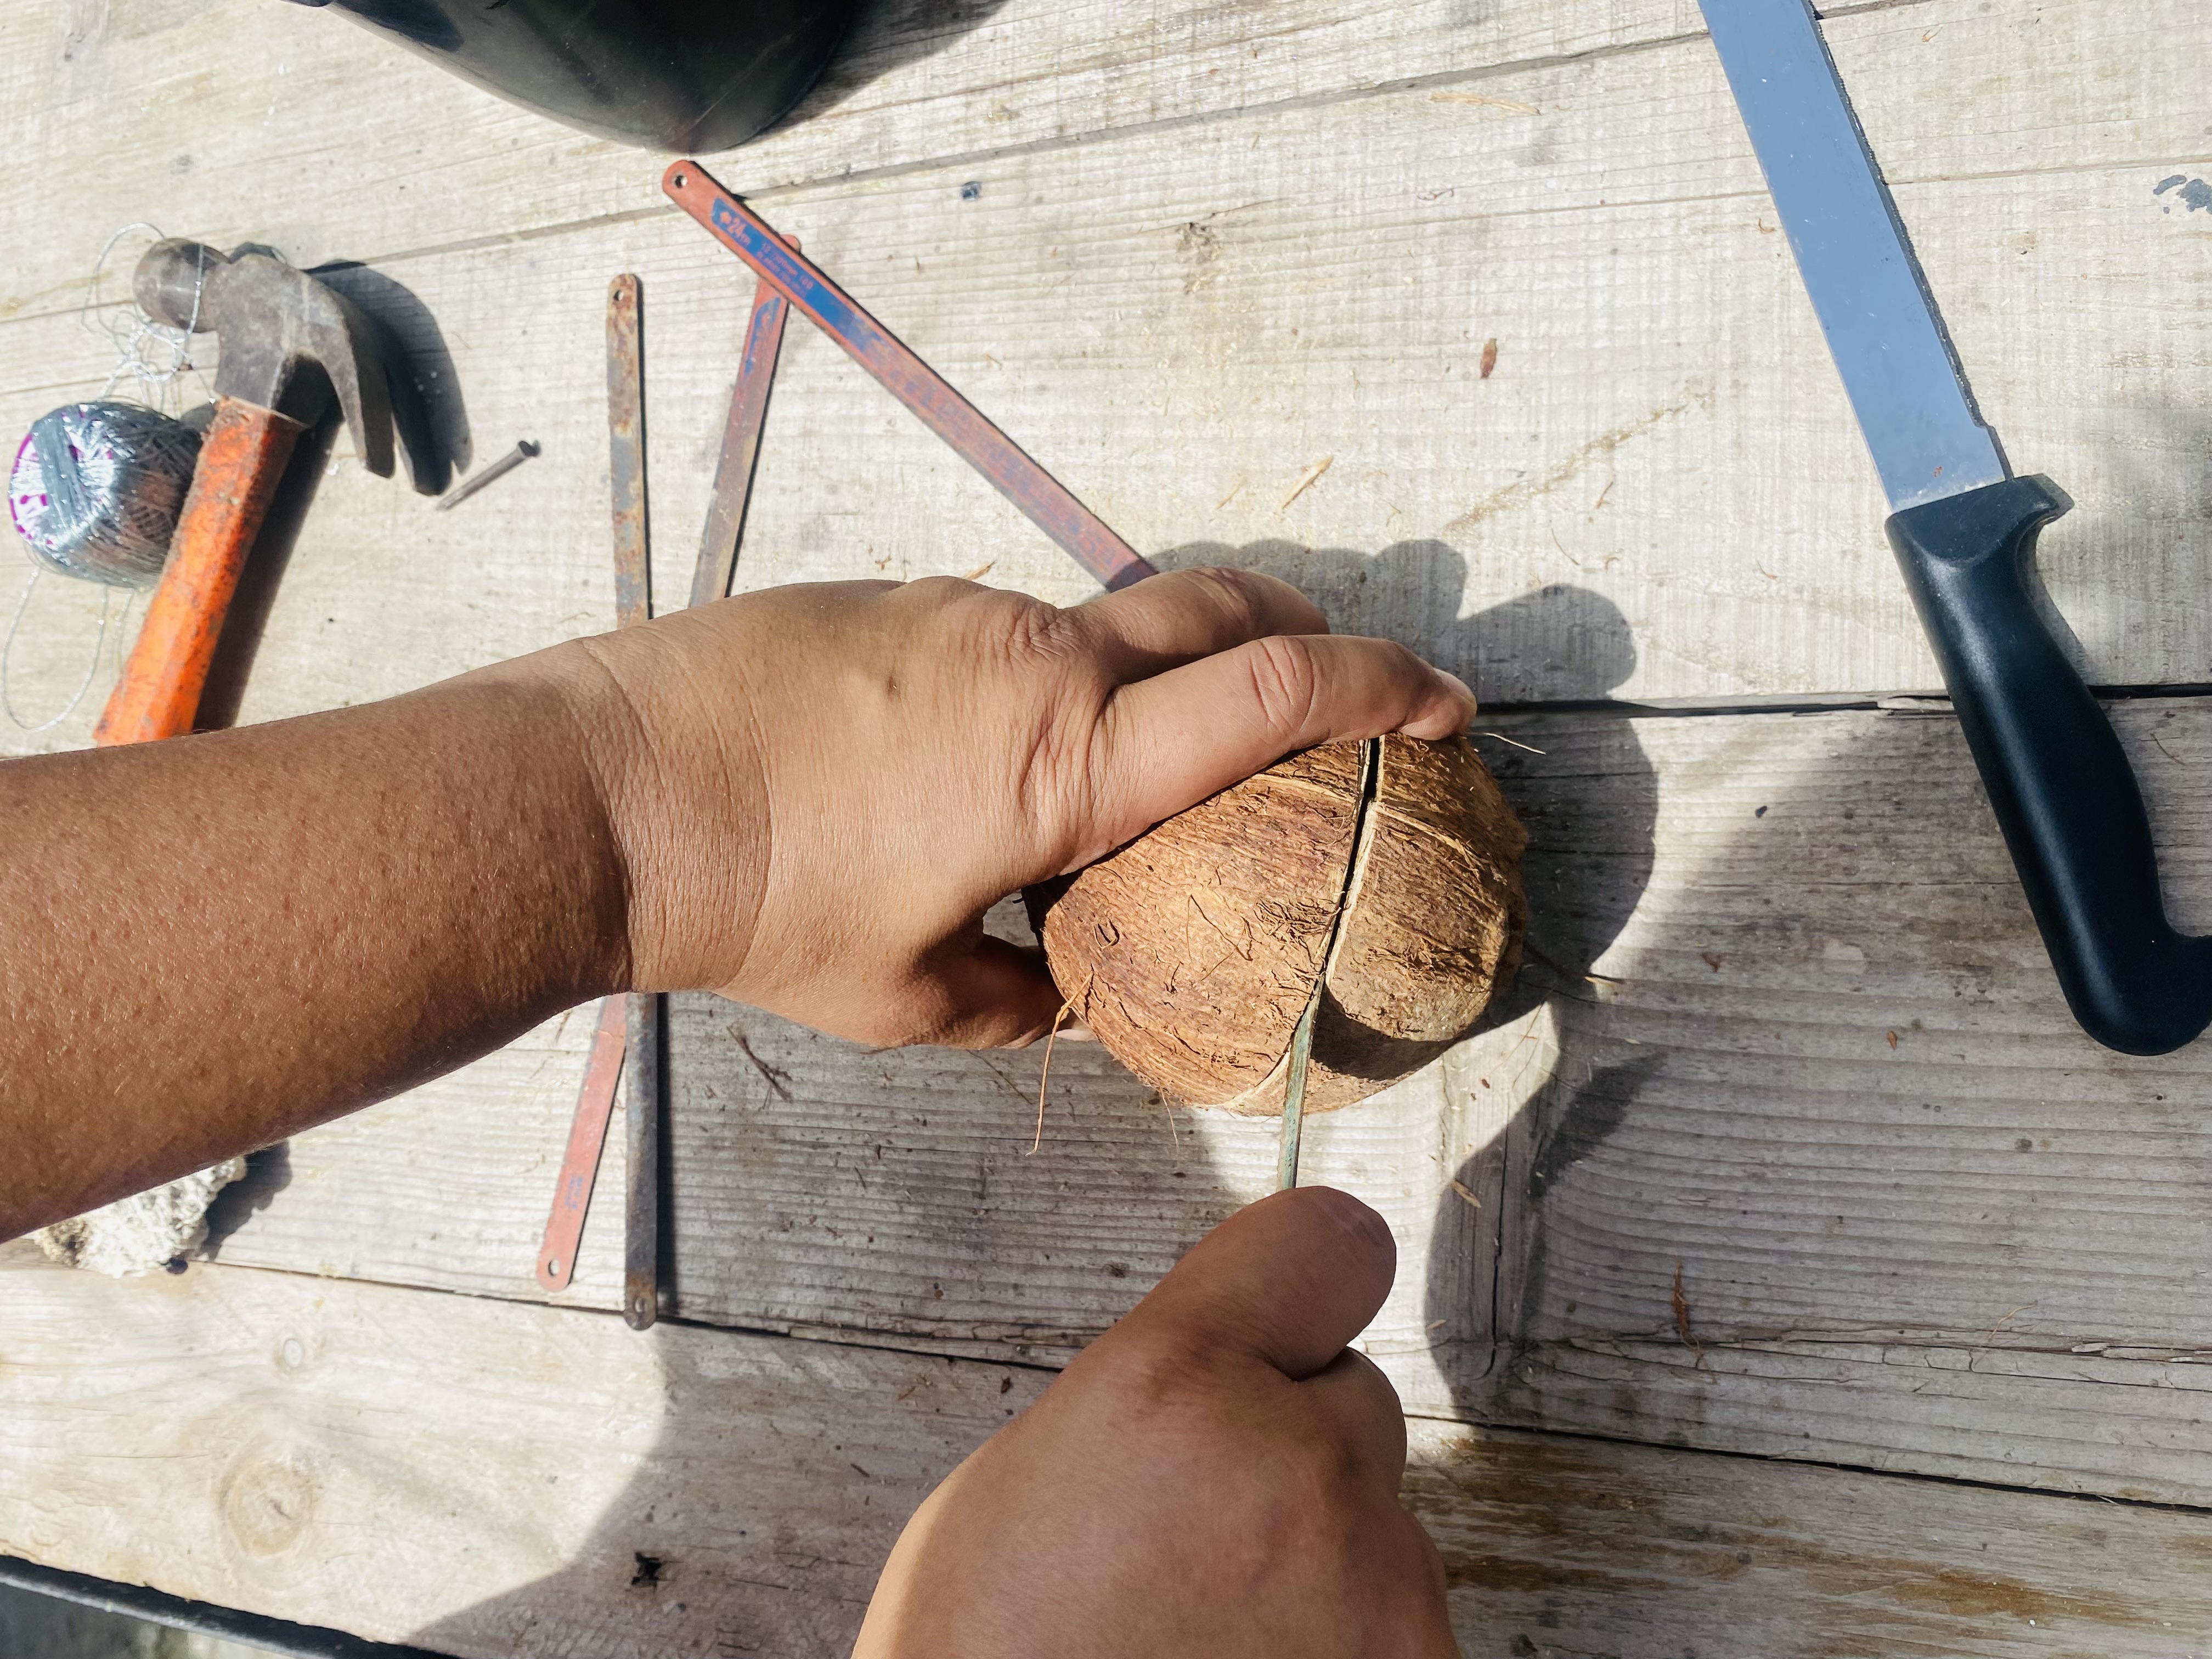
Para el segundo paso vamos a preparar el coco, éste me pareció un complemento perfecto para este móvil ya que es algo natural y que mayormente lo conseguimos en la playa, éste lo vamos a cortar aproximadamente a la mitad, para esto podemos utilizar una sierra, serrucho o algún cuchillo que sea tipo sierra.
Comencé con una sierra fina llamada segueta, fui haciéndole el canal o marca por todo el alrededor, también me ayude con un cuchillo tipo sierra y entre los dos fui dándole hasta que logré cortarlo, una de las partes se me quebró ya que era un coco que tenía guardado desde hace mucho tiempo, le quité todo lo que tenía en la parte interna ayudándome con un cuchillo pequeño, luego comencé a lijarle la orilla y por todo el alrededor para dejarlo sin pelos.
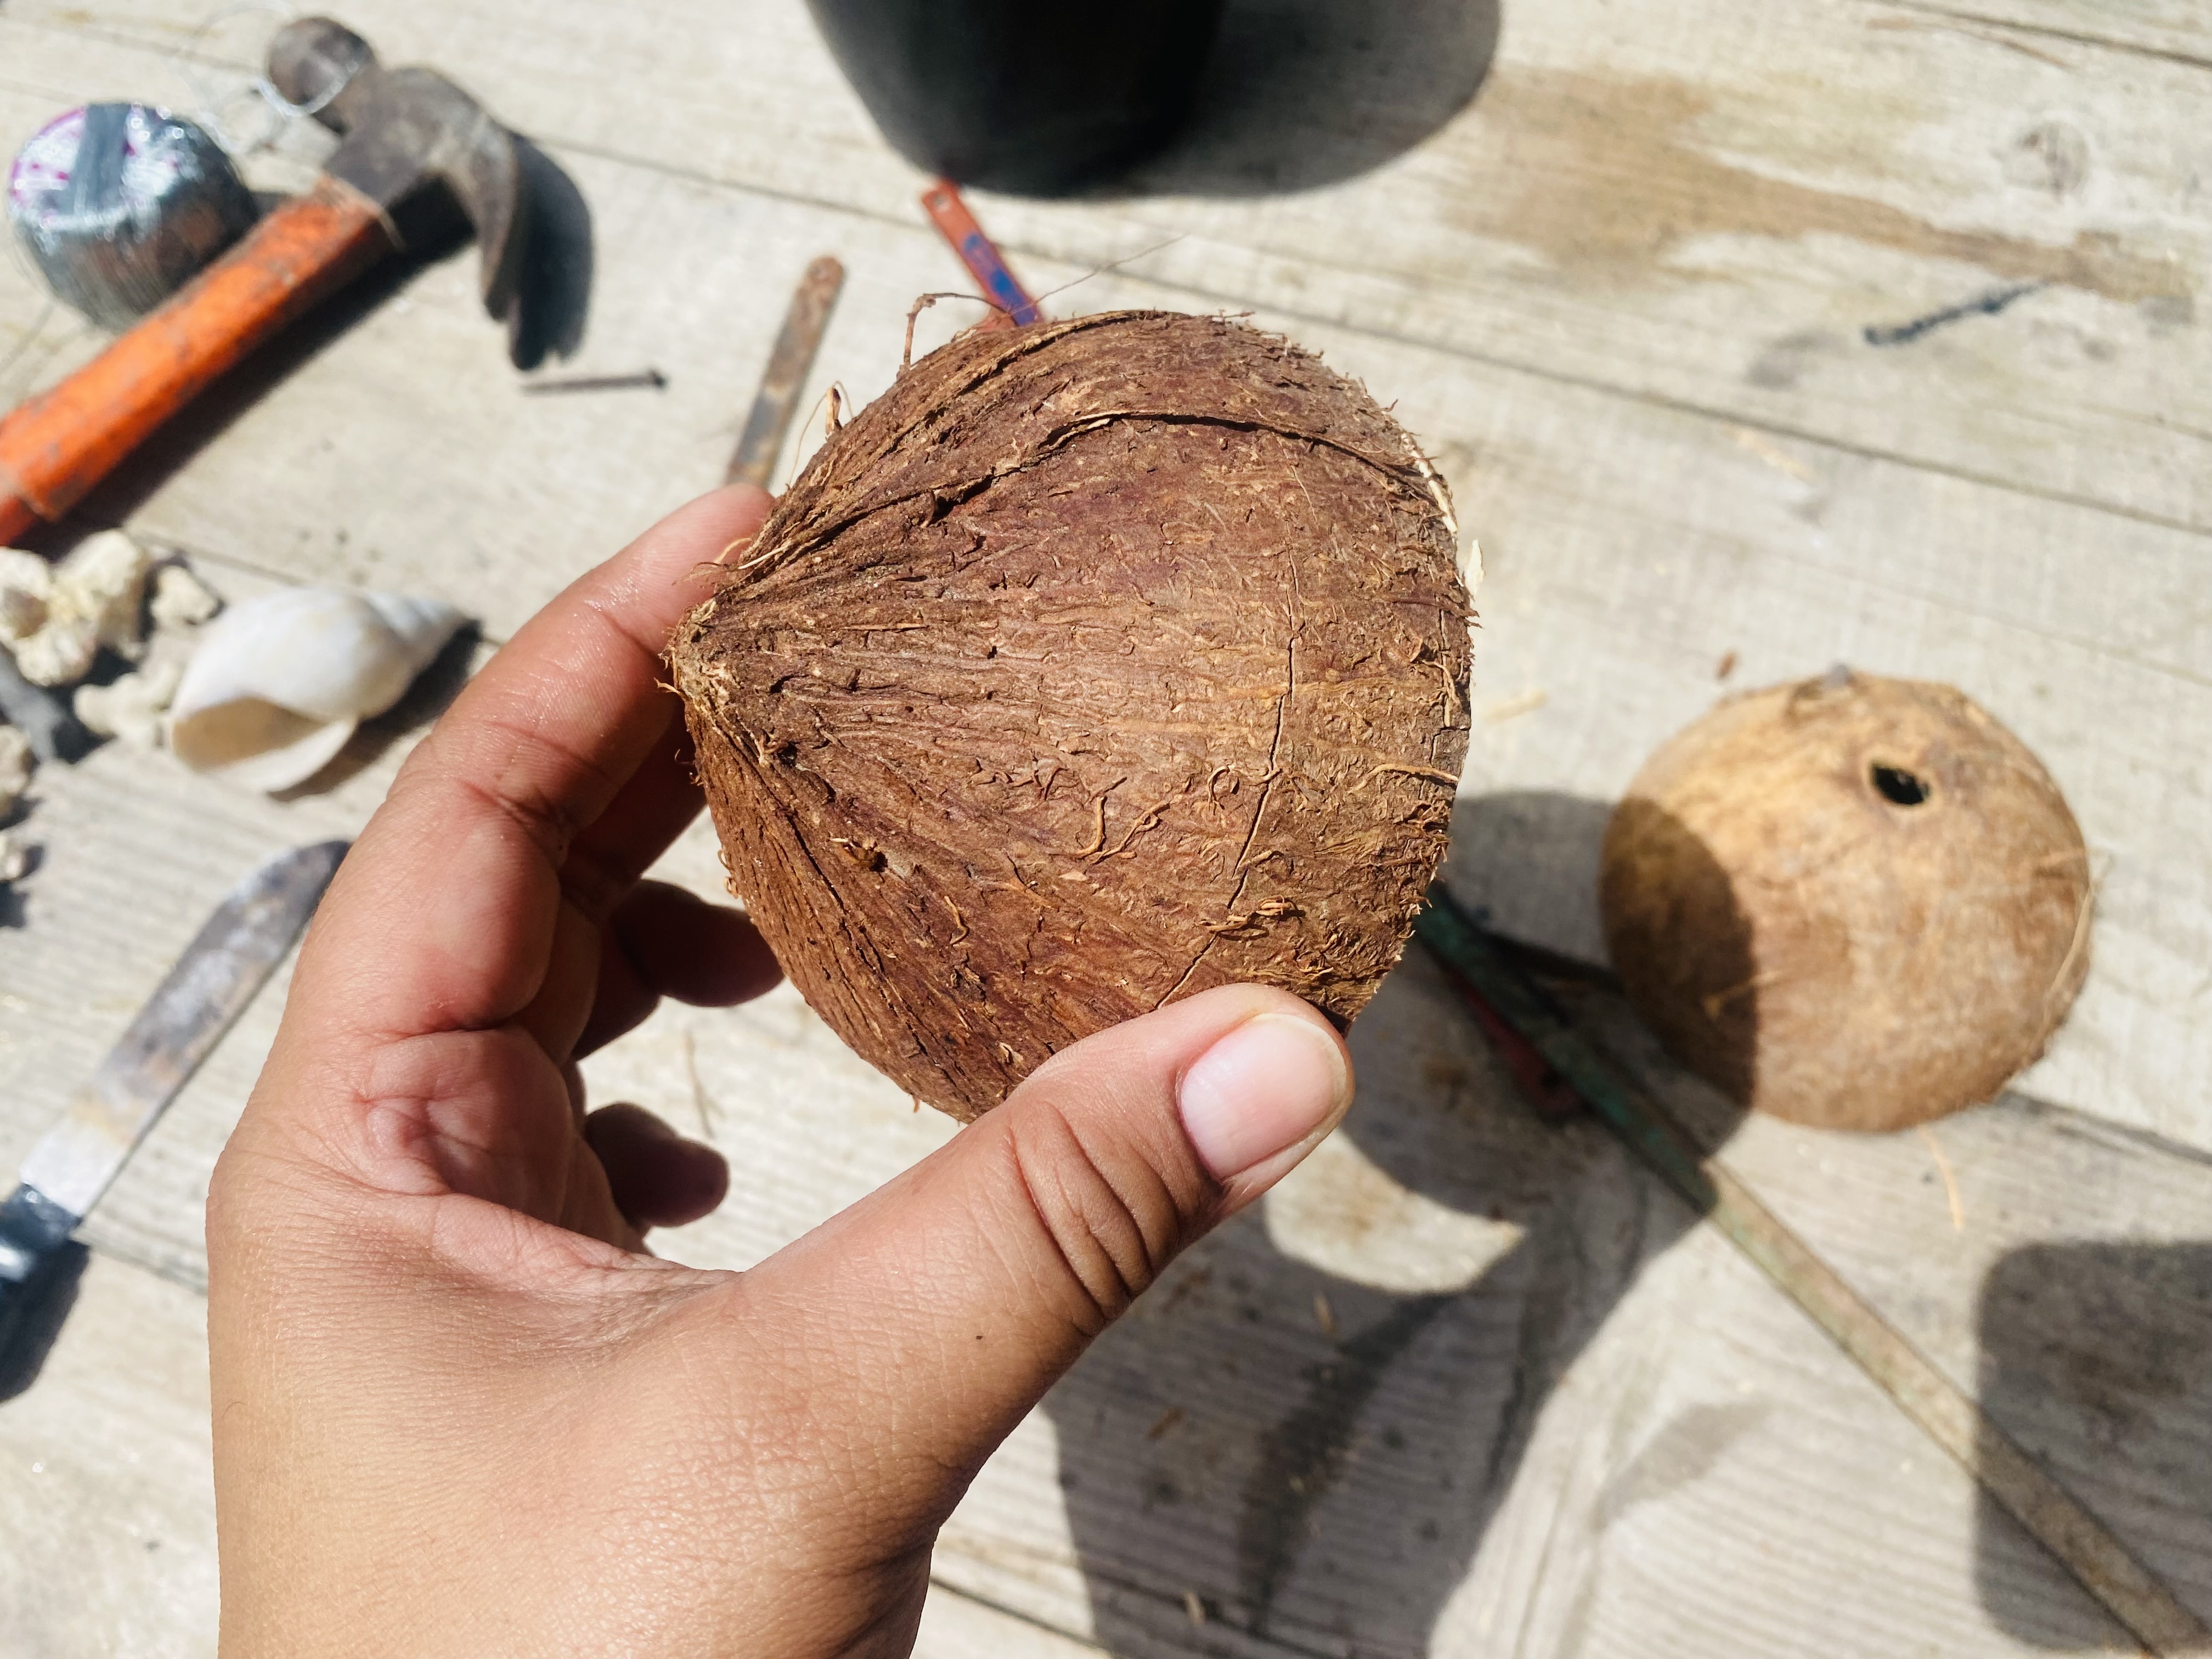
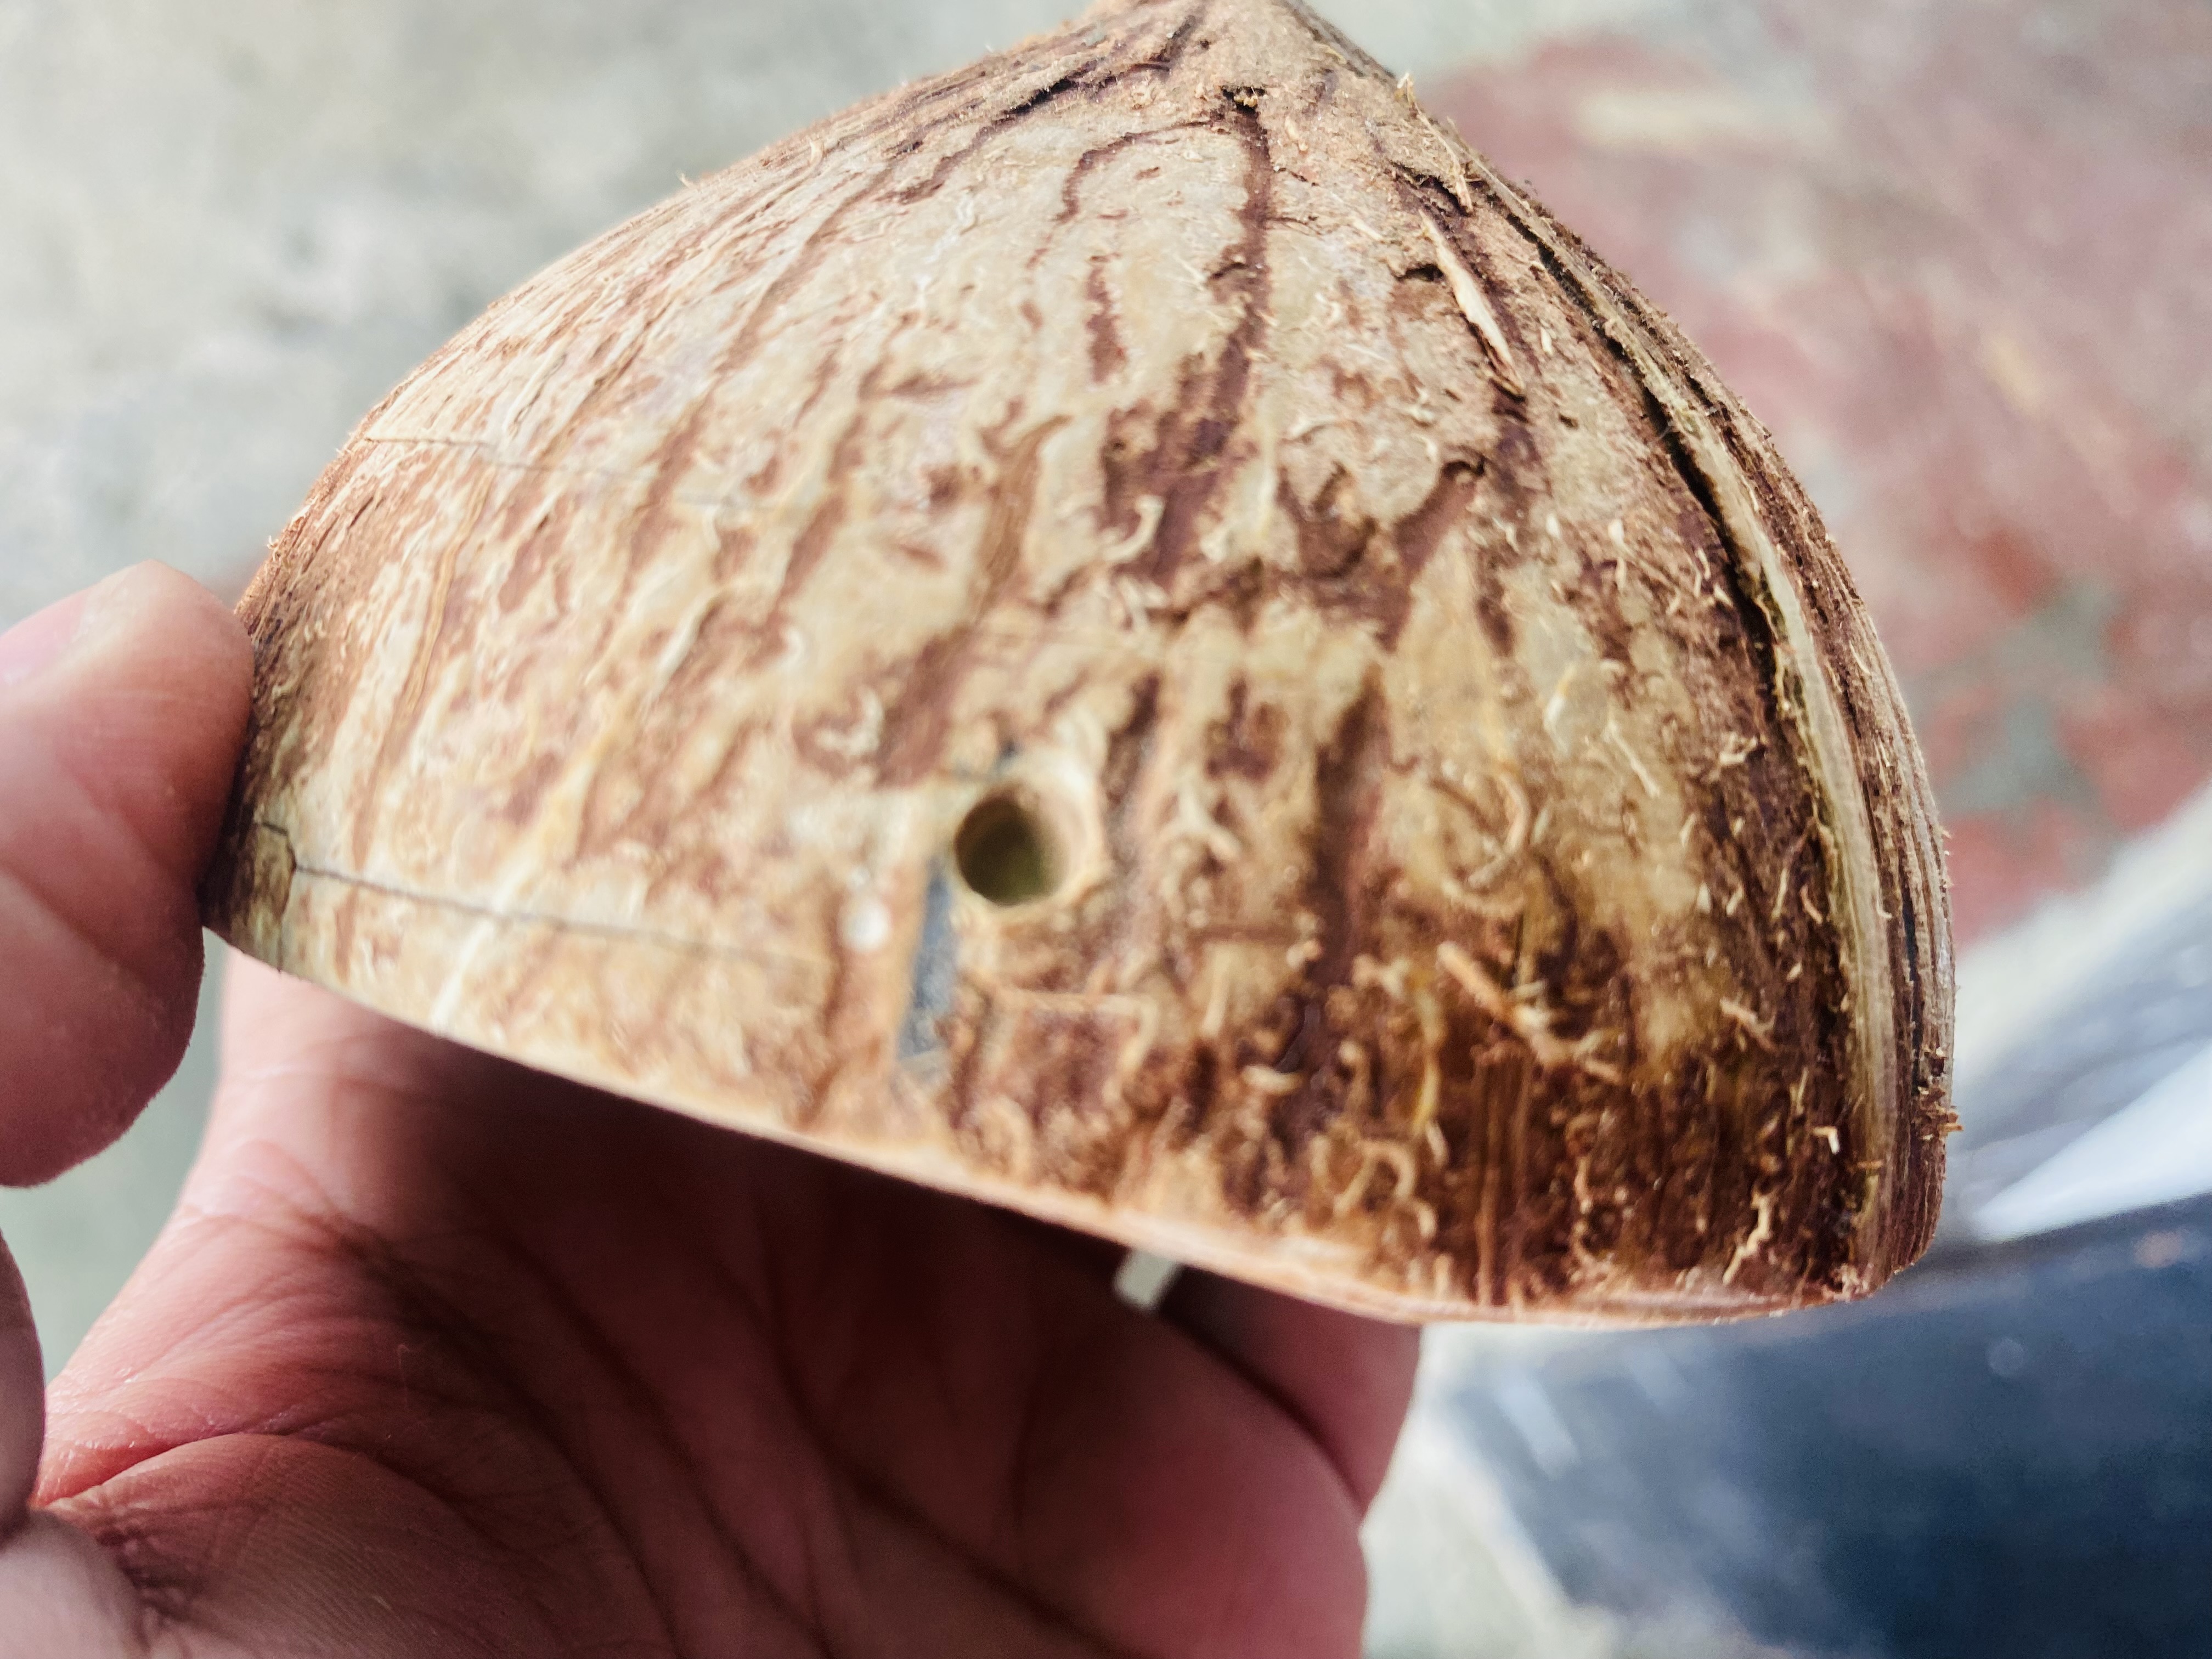
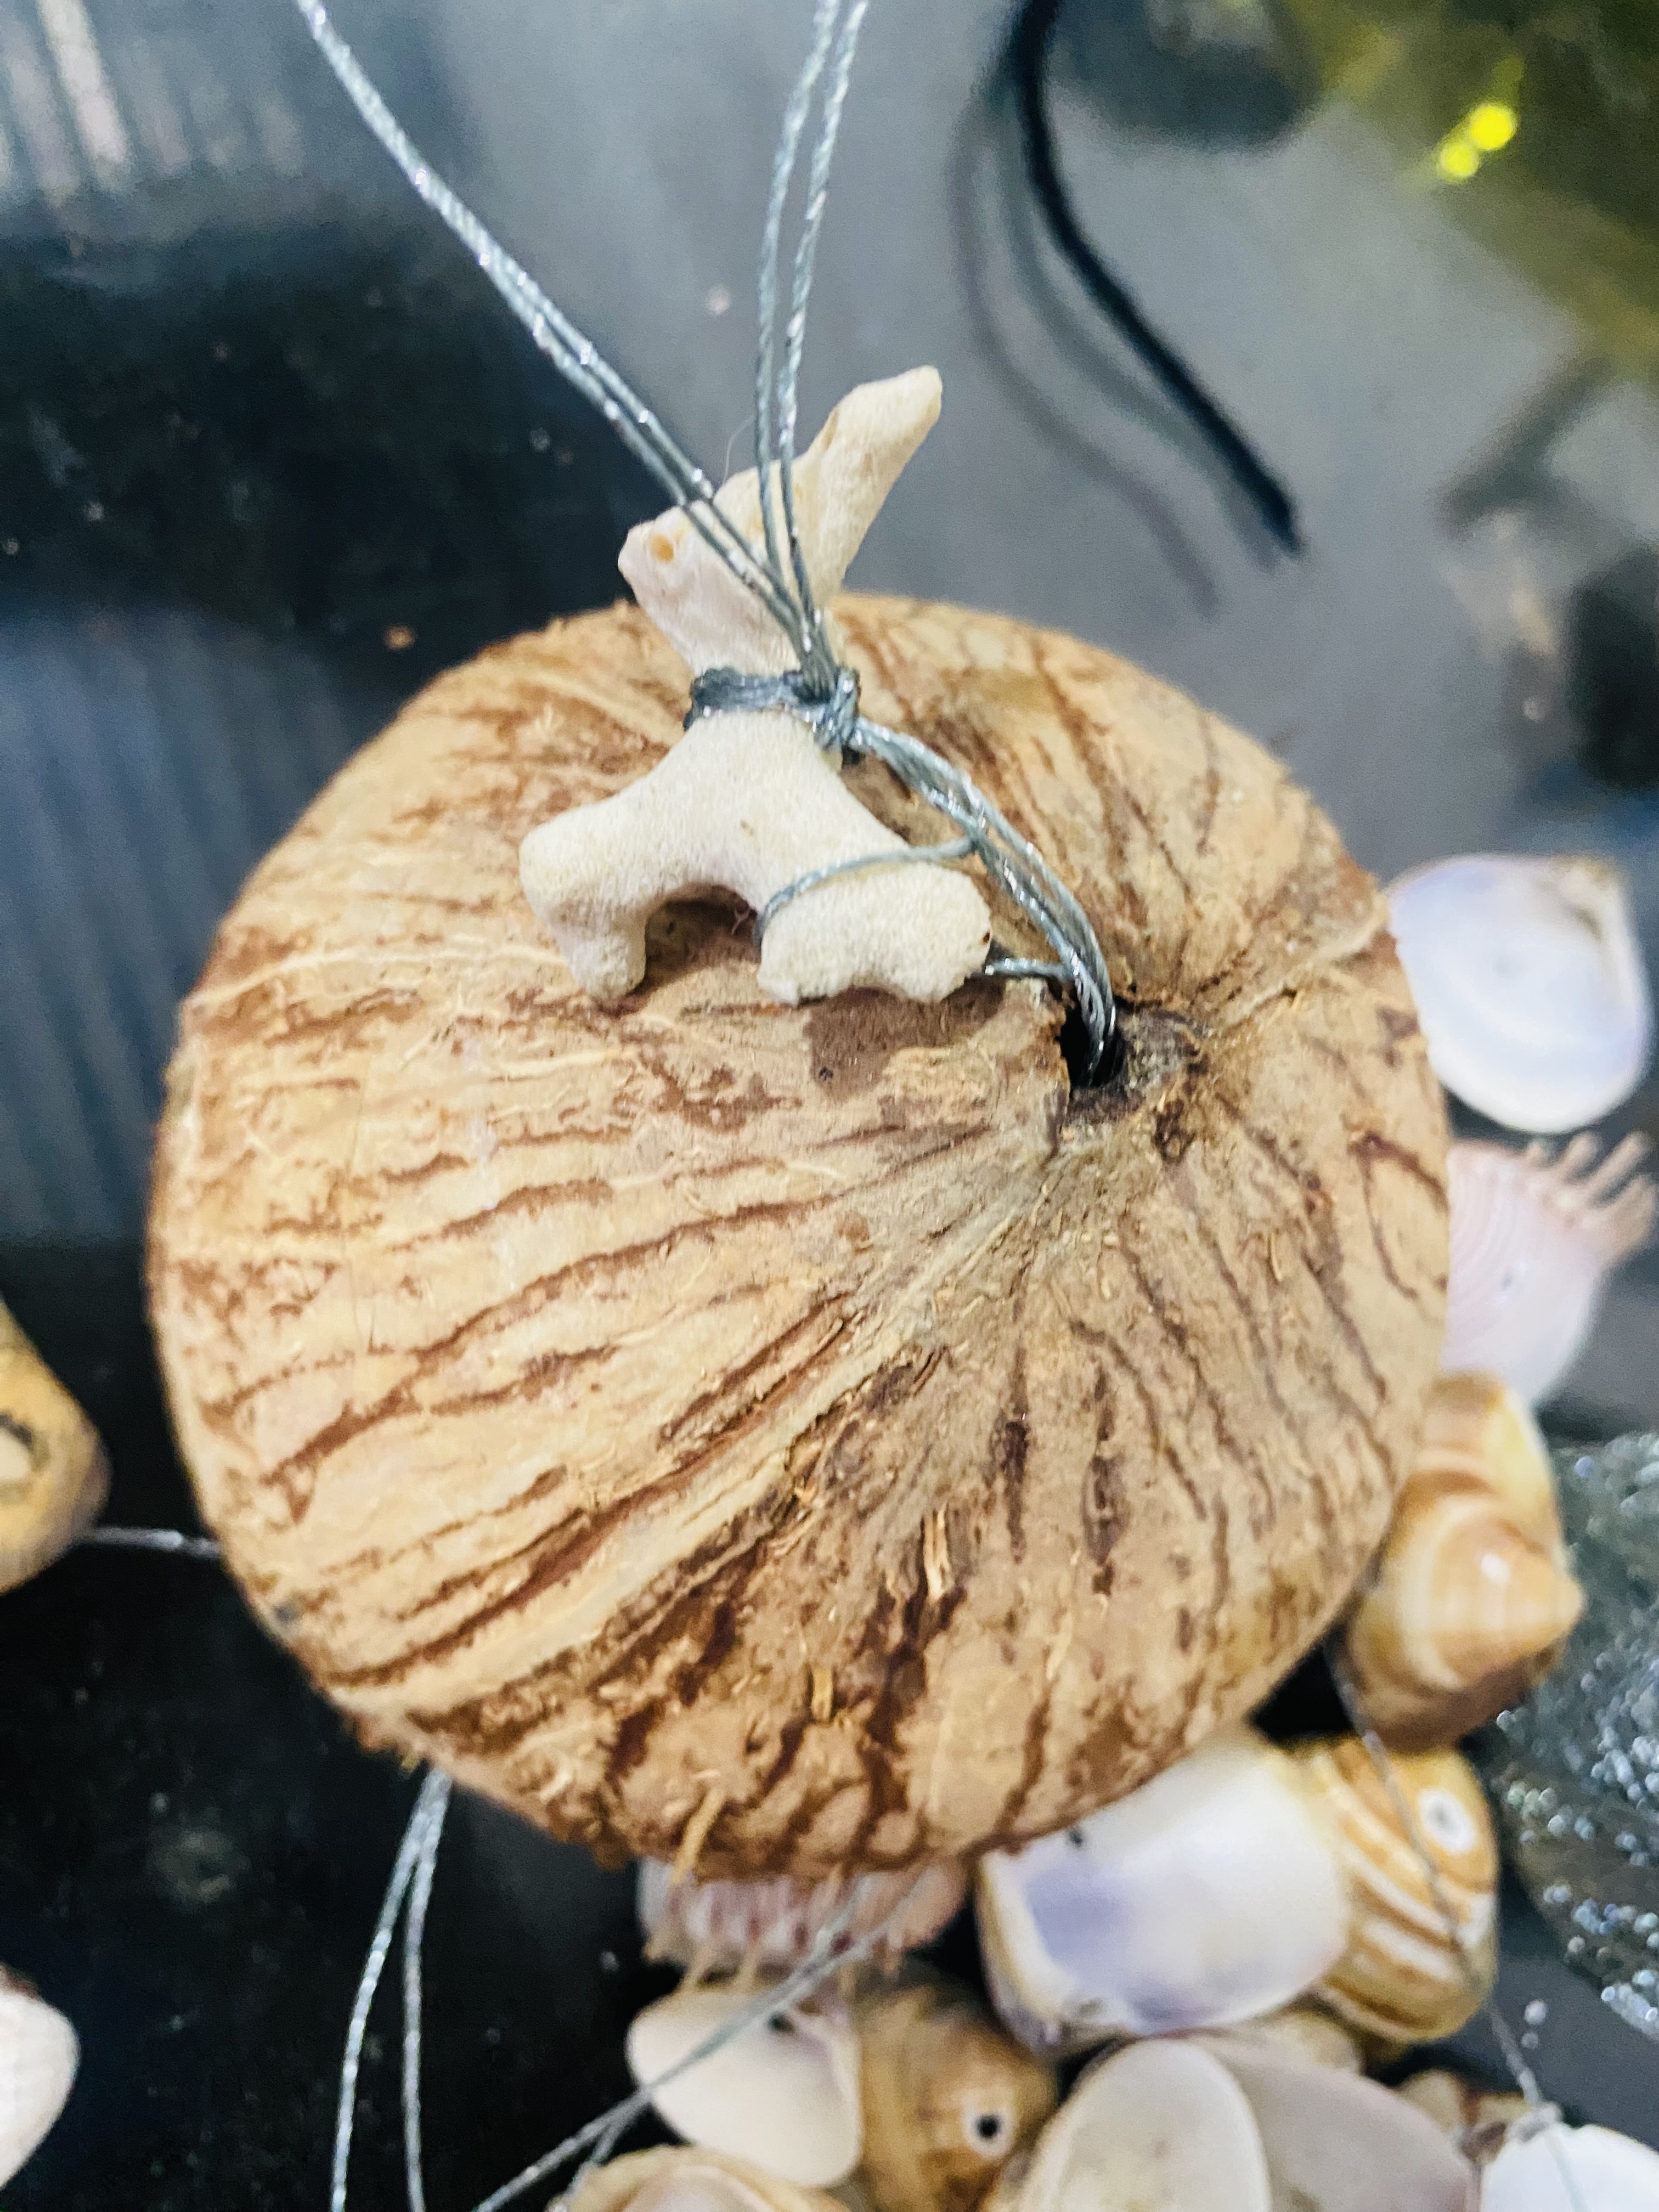
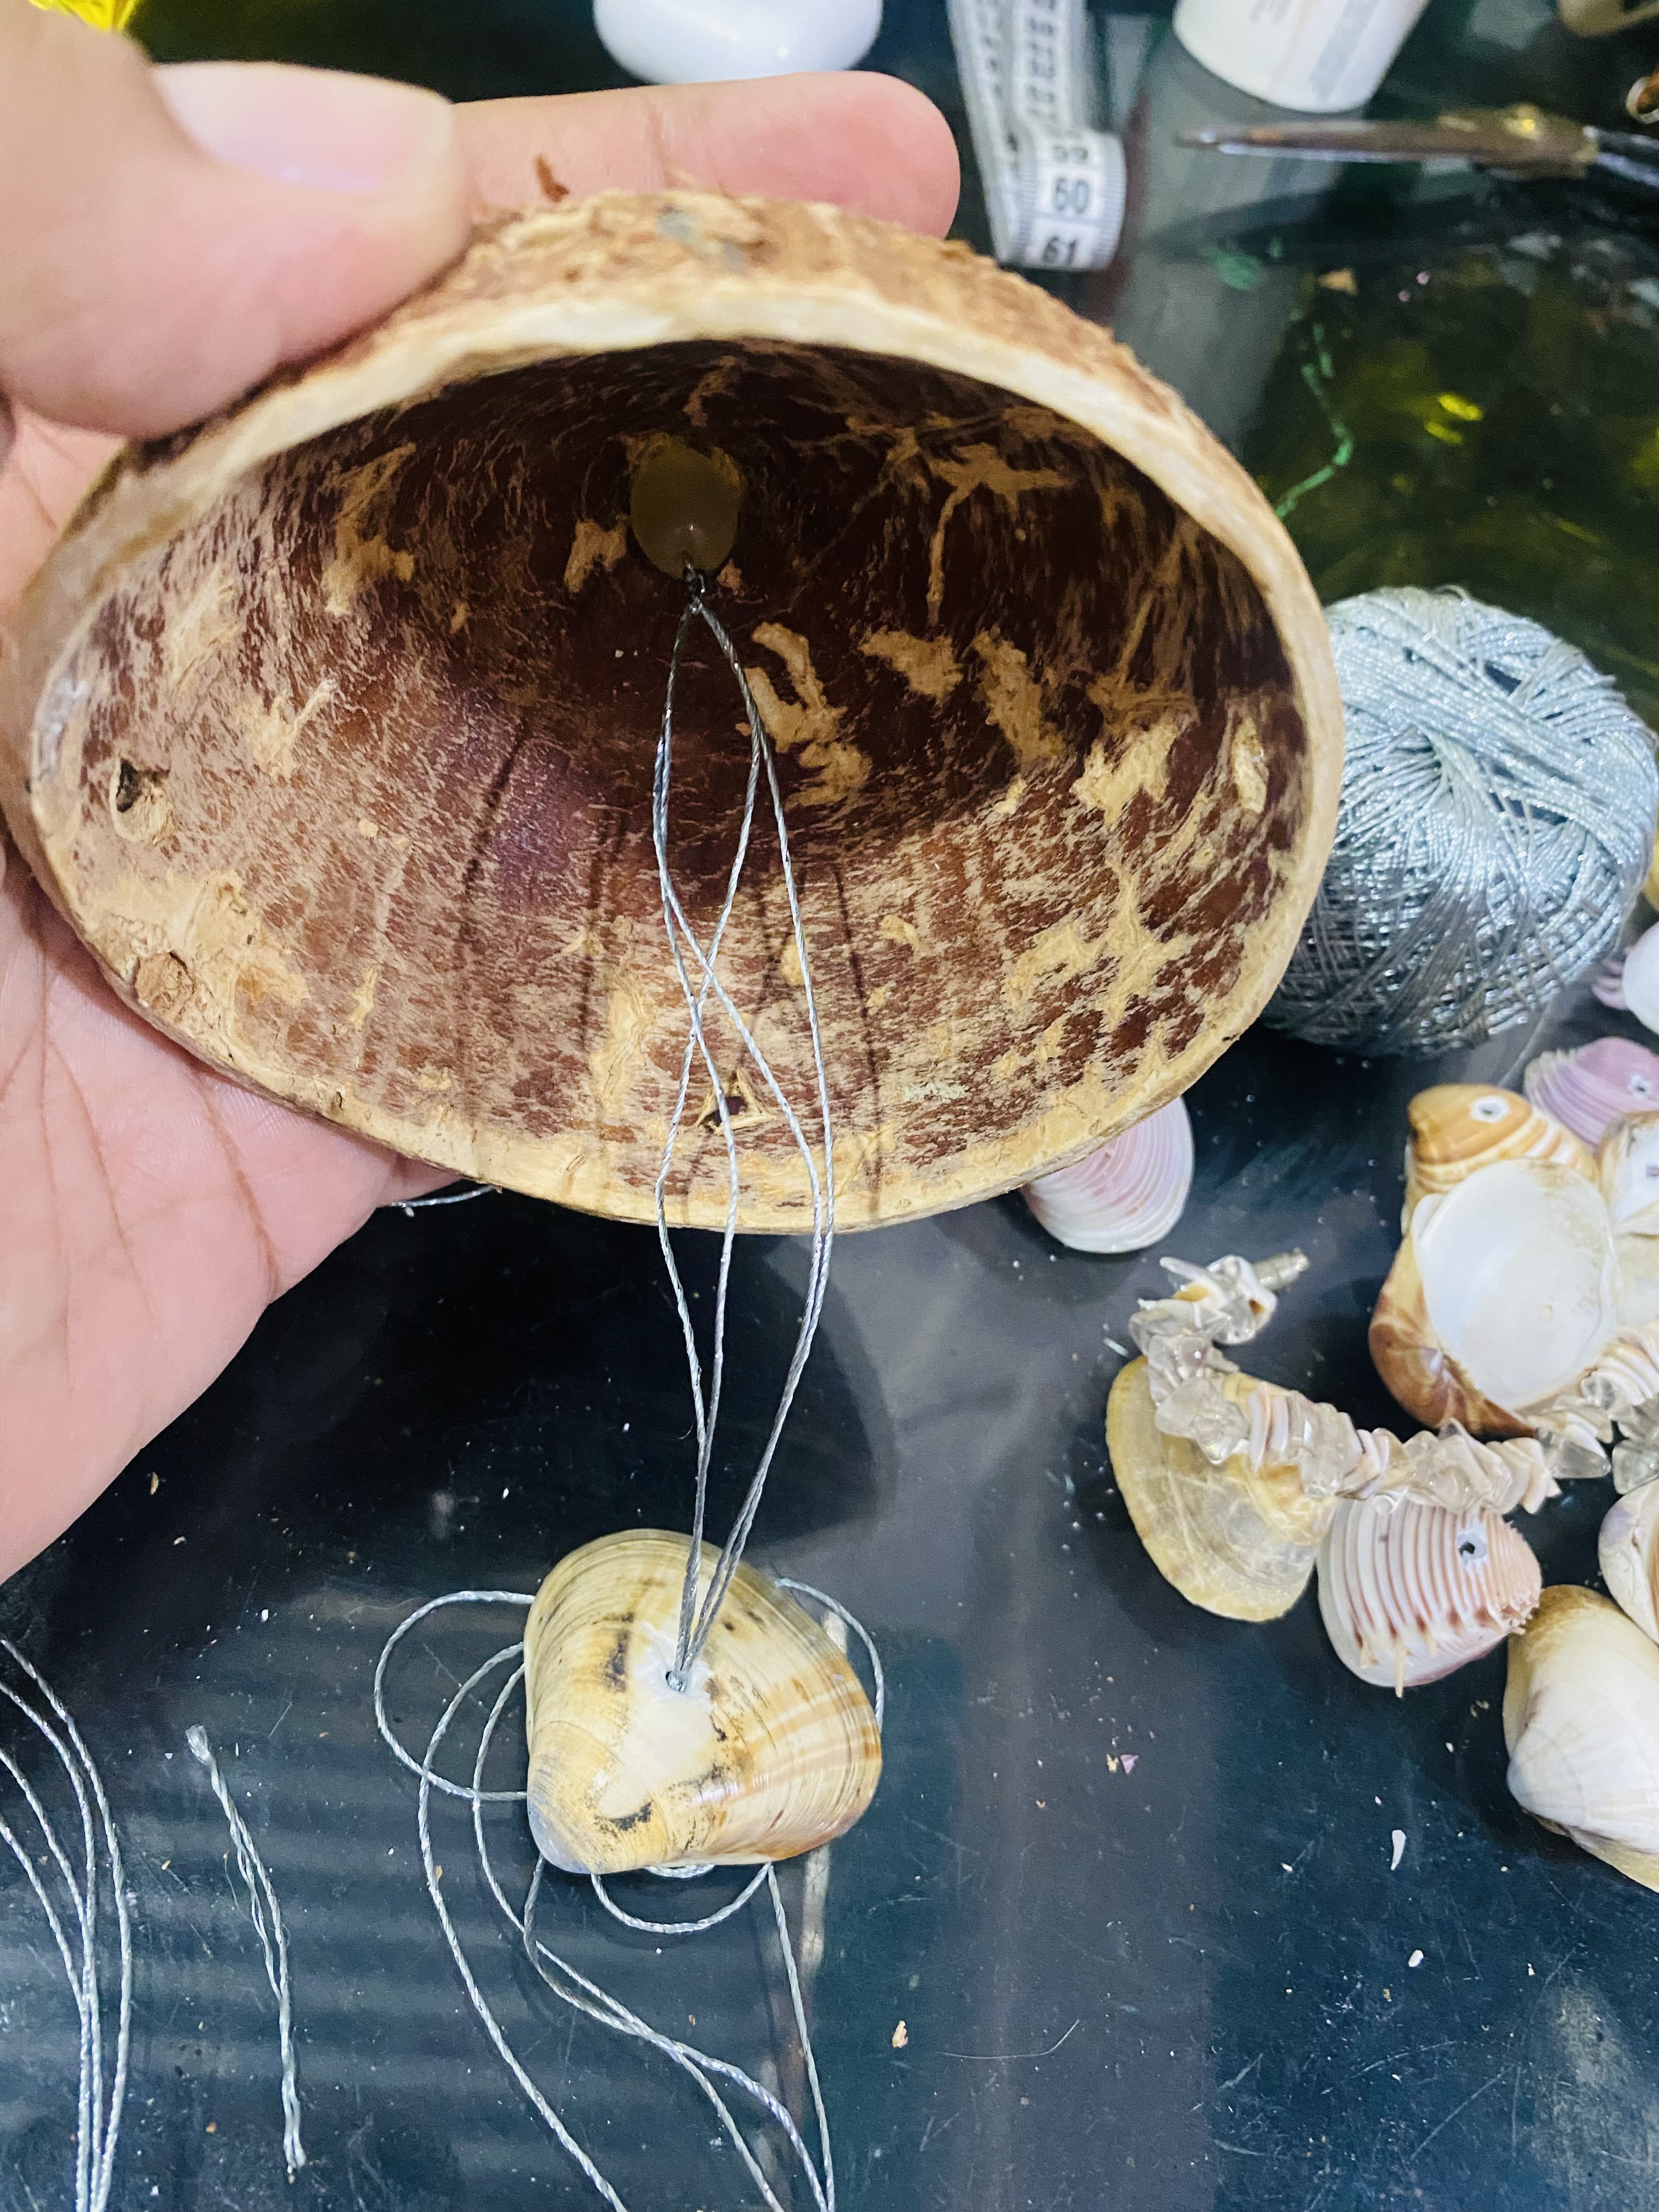
Al tenerlo ya listo vamos a marcar y a abrirle los orificios, esto lo hice con un taladro ya que este material es bastante grueso y sin embargo me costó bastante, en total le abrí 4 orificios y uno en el centro para guindarlo.
For the second step, we're going to prepare the coconut. This seemed like a perfect complement to this mobile since it's a natural product that we mostly find at the beach. We're going to cut it approximately in half. For this, we can use a saw, a hacksaw, or a saw-like knife.
I started with a fine saw, called a hacksaw, and I made the groove or mark all the way around. I also used a saw-like knife to help me, and I worked between the two of us until I managed to cut it. One of the pieces broke because it was a coconut I'd been storing for a long time. I removed everything inside with the help of a small knife. Then I began sanding the edge and all around to remove any hairs.
Once it's ready, we're going to mark and drill the holes. I did this with a drill since this material is quite thick, and it took a while. I drilled four holes in total, including one in the center to hang it.
 |  |
|---|---|
 |  |
𝓟𝓐𝓢𝓞 3
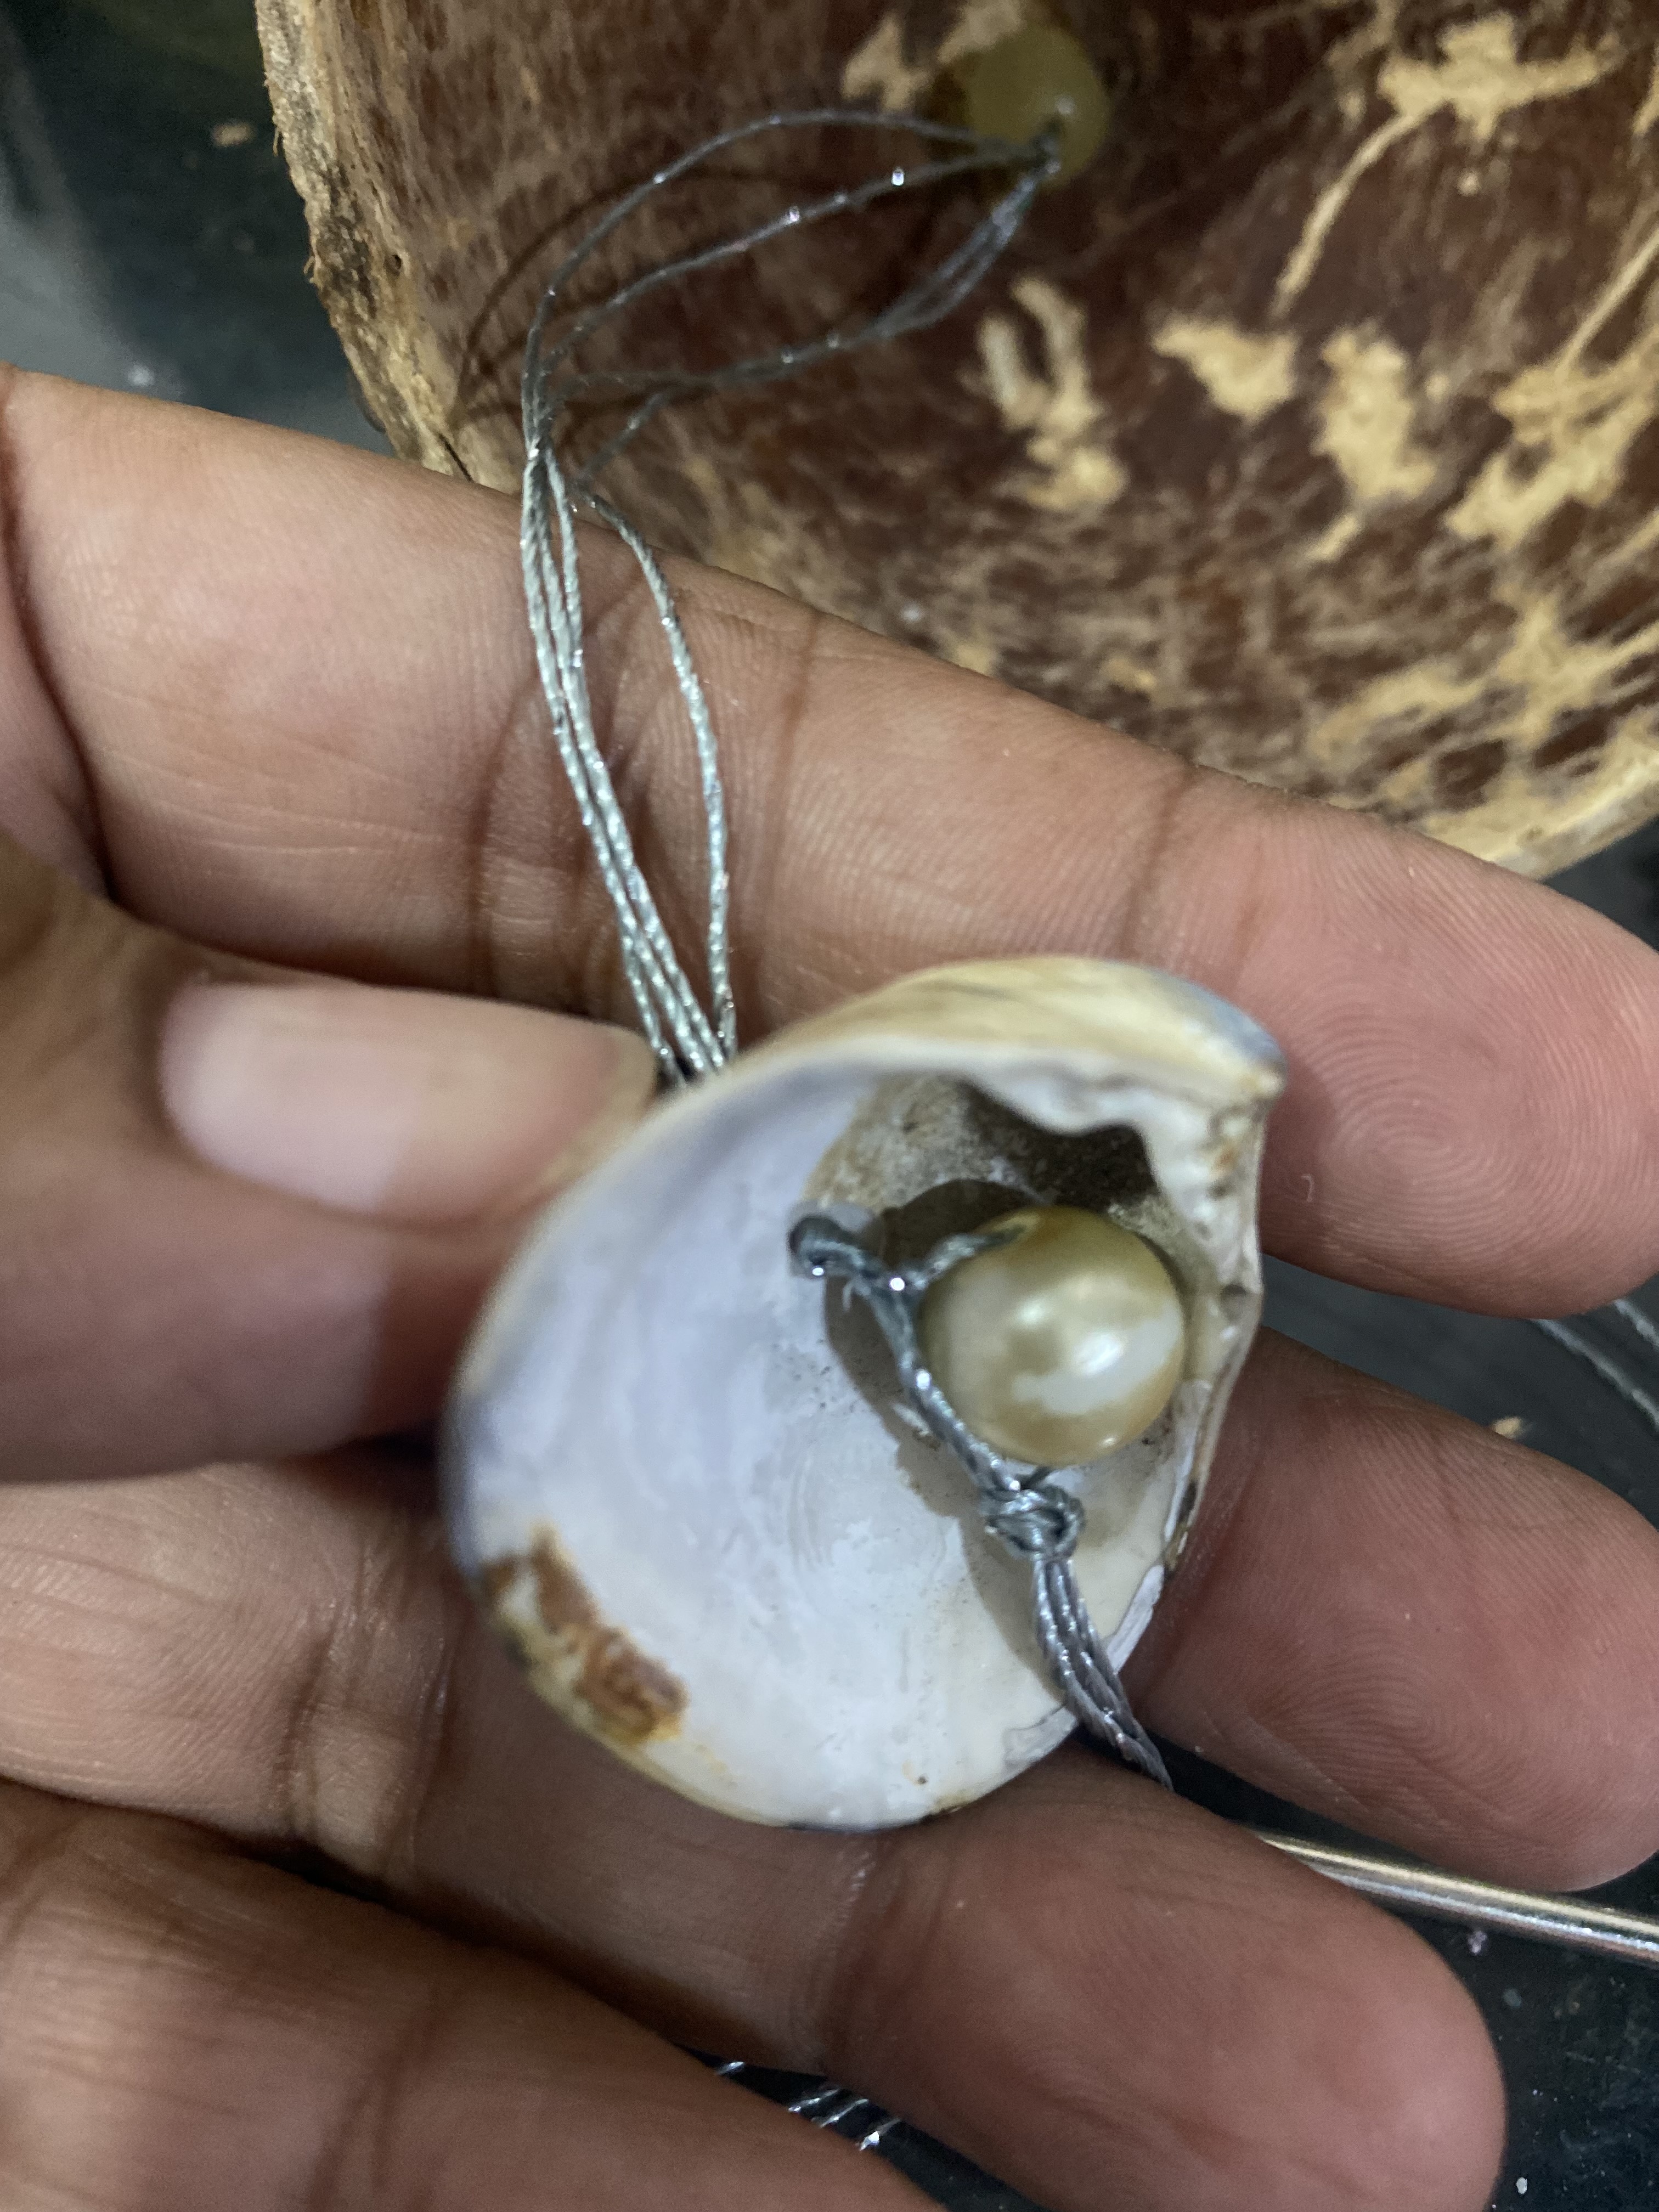
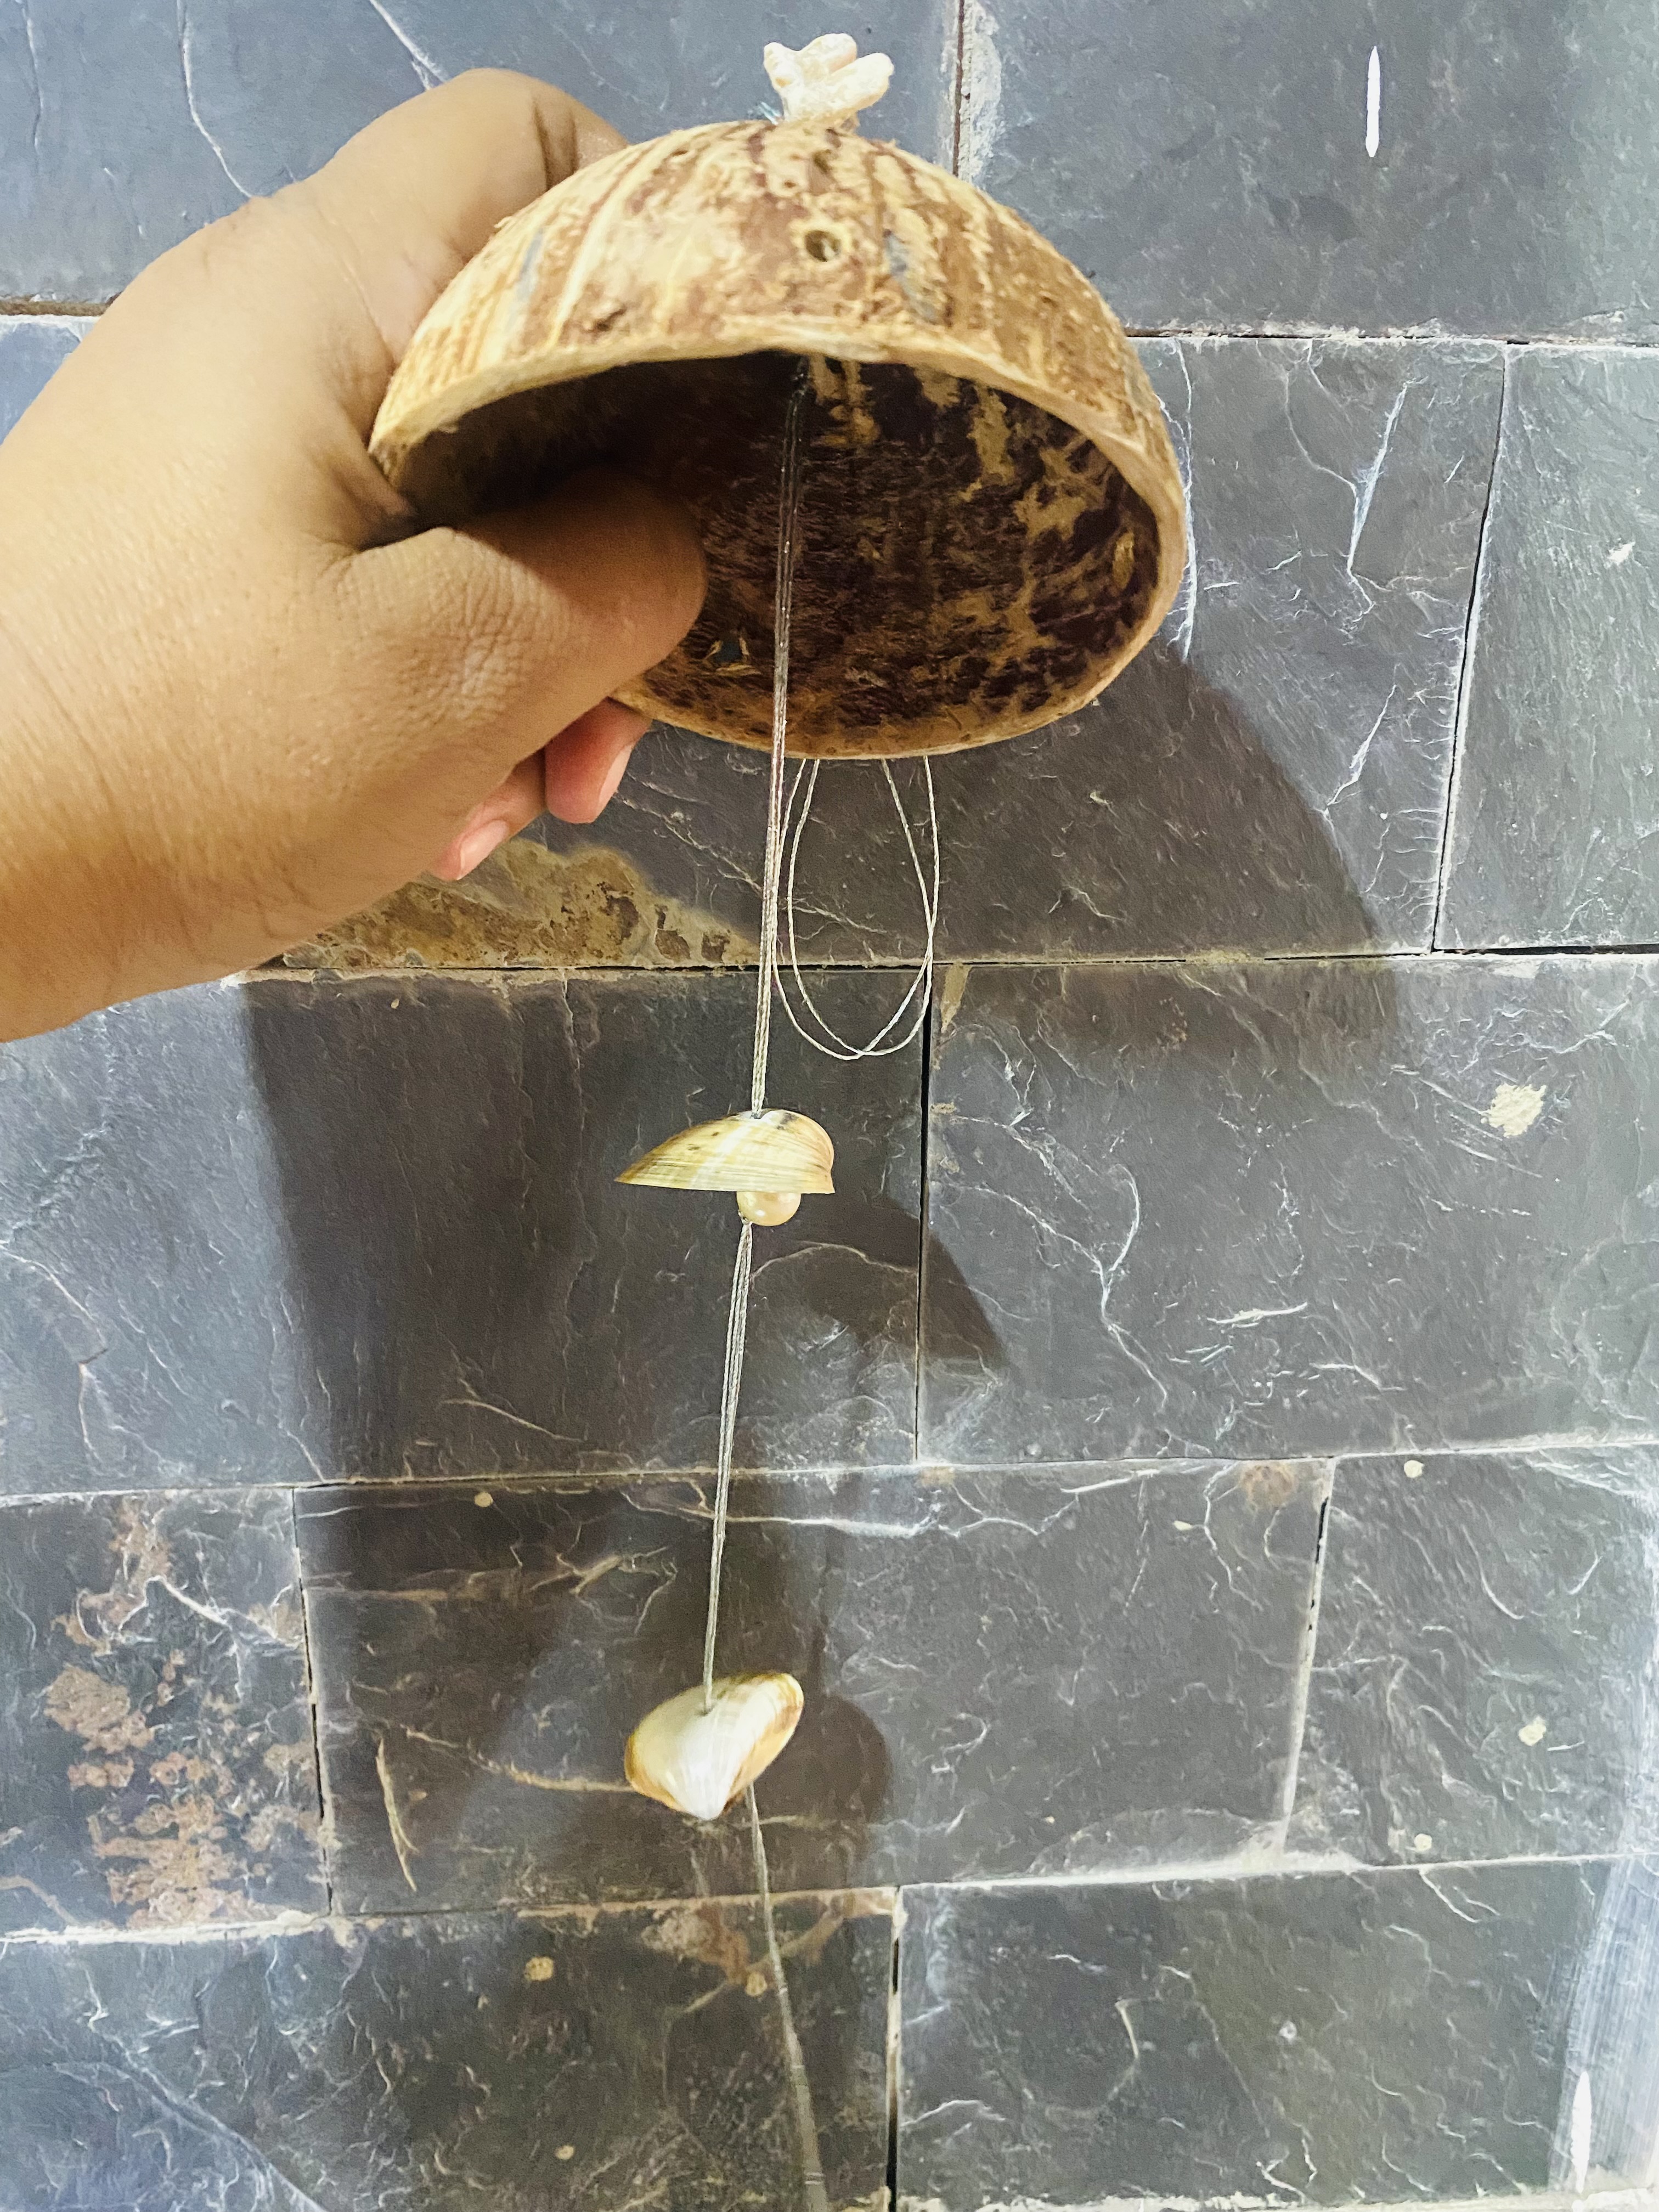
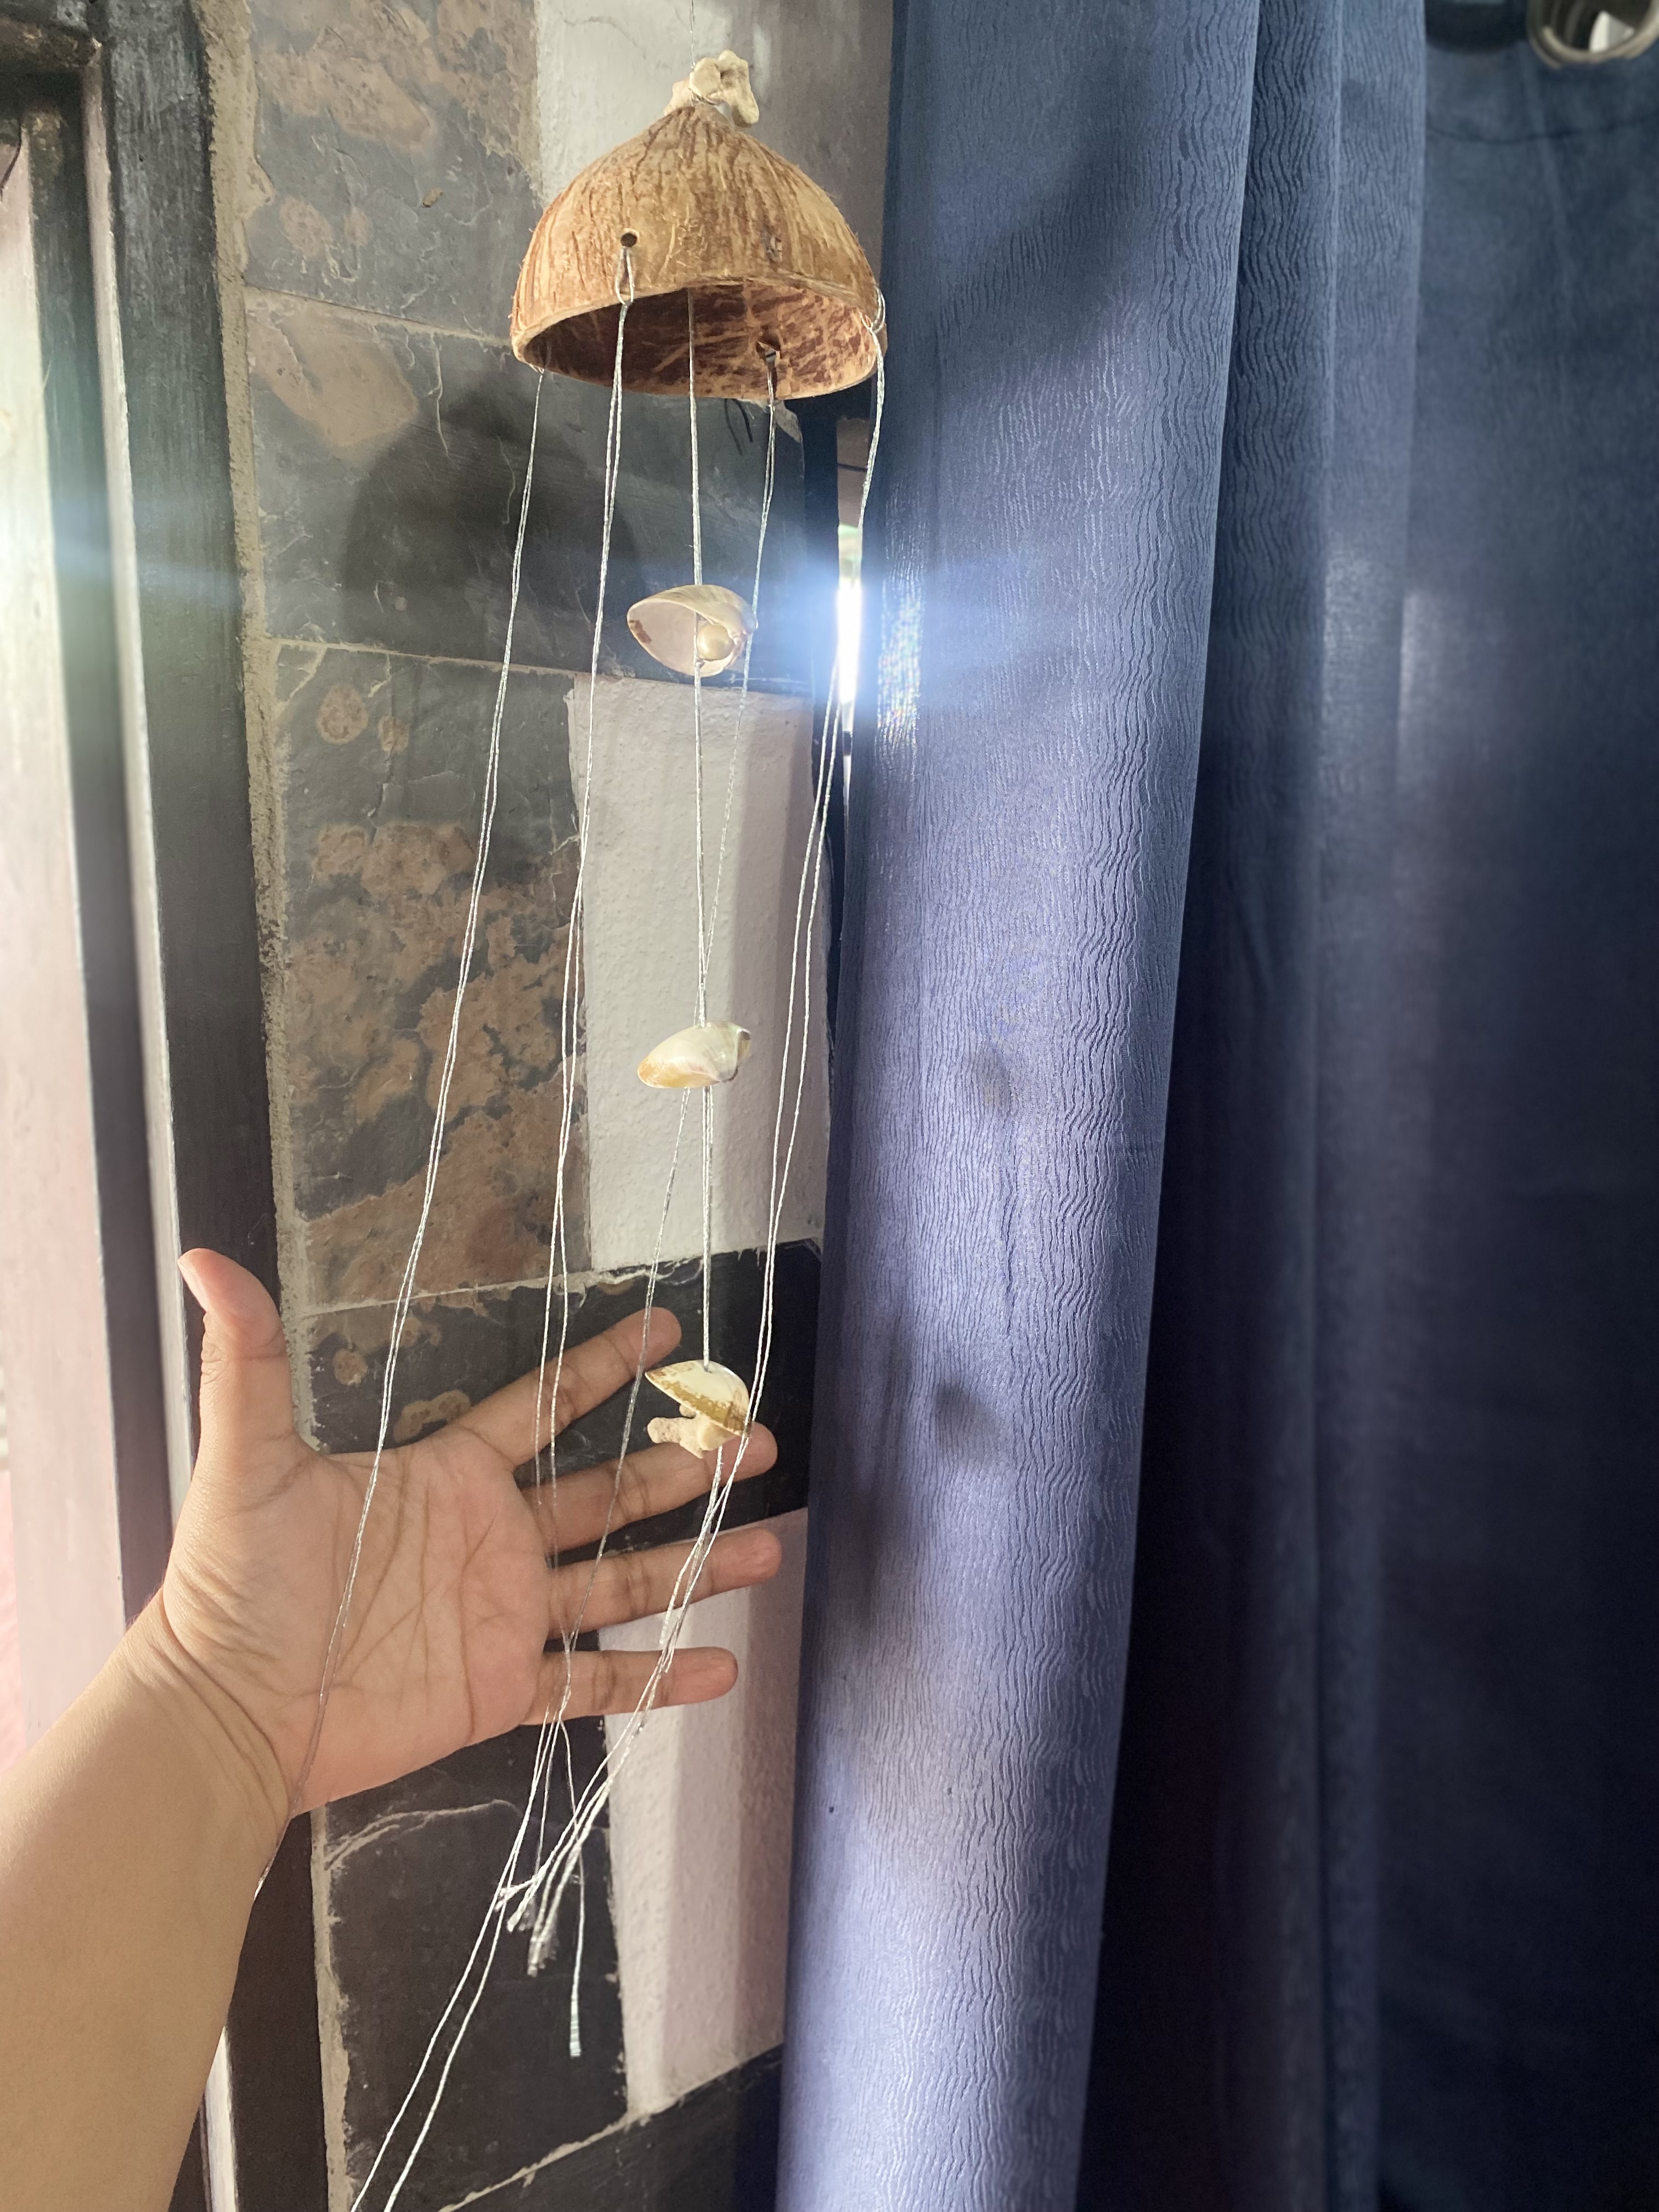
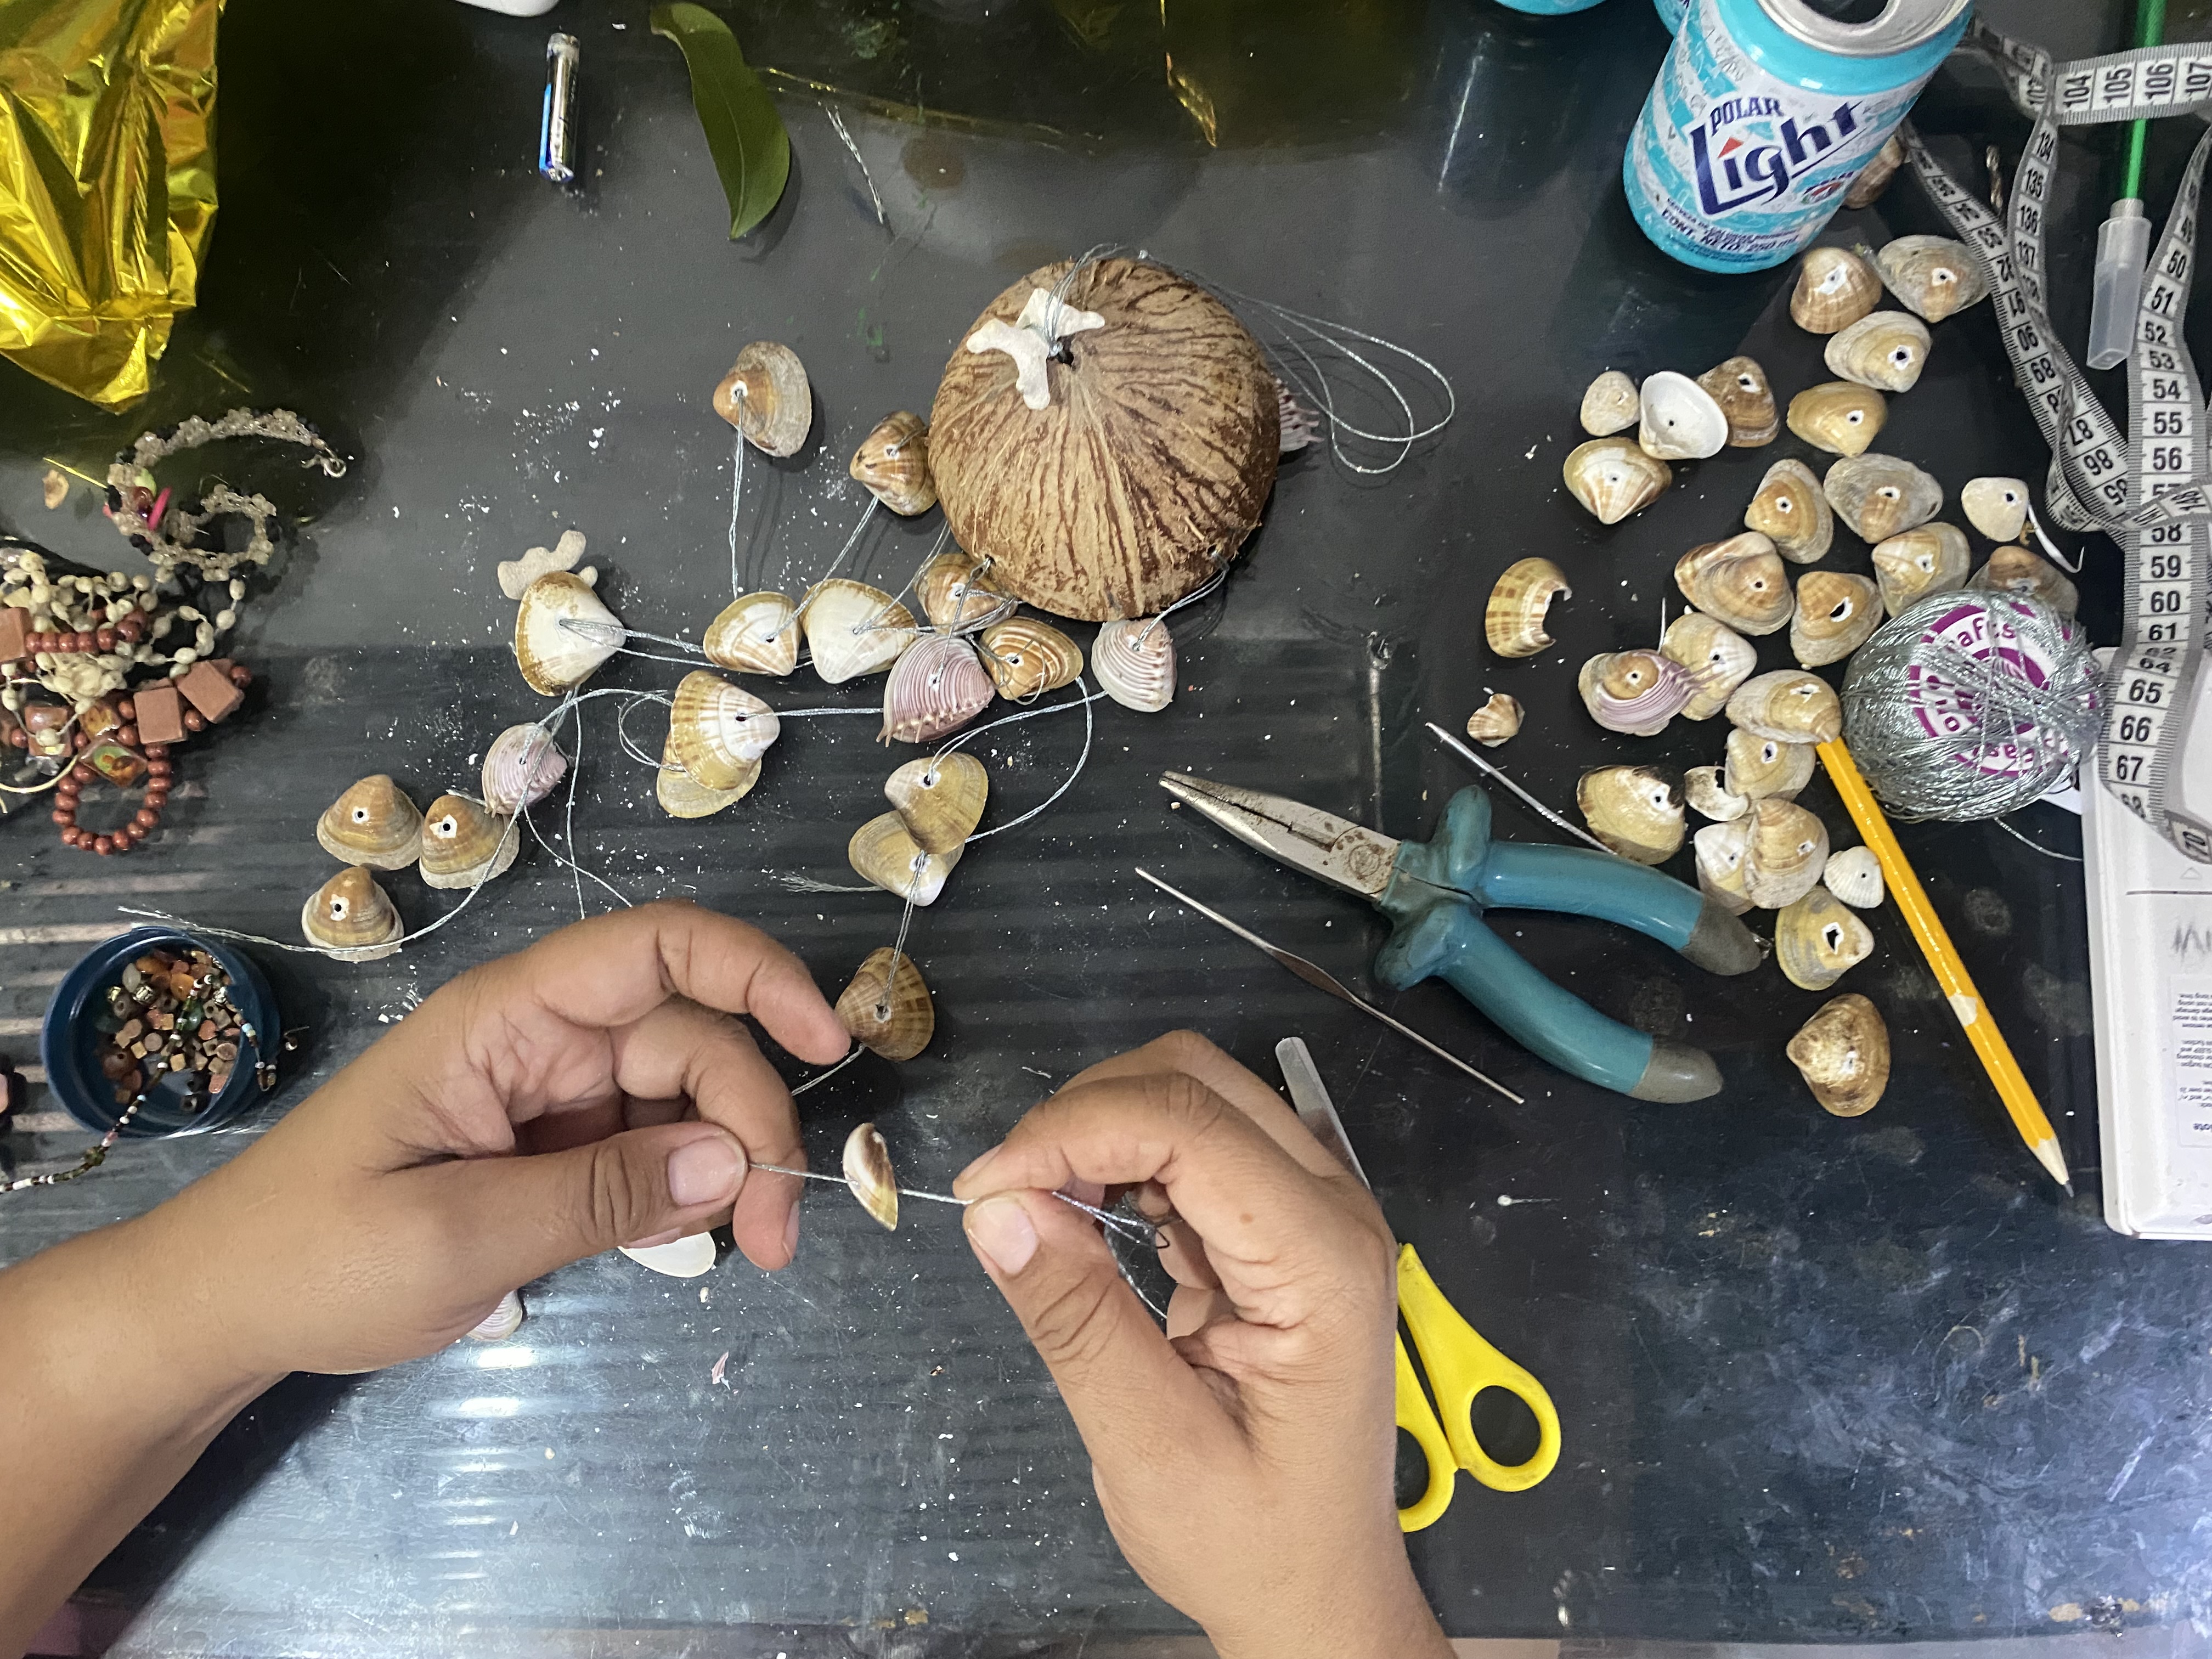
En este paso vamos a comenzar a colocarle el hilo por el orificio del centro por donde lo vamos a guindar, para este medí el hilo de aproximadamente 70 cm utilicé cuatro hebras de hilo ya que es muy fino y luego puede romperse, introduje por el centro de la concha de coco le amarré un lindo coral pequeño, por la parte interna le coloqué una pepita de un antiguo collar, le hice nudos luego amarre la primera concha de mar seguida de una perla, le vuelvo a hacer nudos y sigo nuevamente con otra concha de mar, dejando un espacio aproximado de 10 cm, en total le coloqué cuatro conchas de las más grandecita que tengo al final le amarre dos conchas juntas, anudamos y quemamos el hilo en la punta para que no se suelte
In this step we will begin to place the thread in the center hole where we are going to hang it, for this I measured the thread of approximately 70 cm I used four strands of thread since it is very thin and can then break, I introduced it through the center of the coconut shell I tied a nice small coral to it, on the inside I placed a nugget from an old necklace, I knotted it then tied the first seashell followed by a pearl, I knotted it again and continue again with another seashell, leaving a space of approximately 10 cm, in total I placed four of the largest shells I have at the end I tied two shells together, we knotted and burned the thread at the tip so it doesn't come loose
 |  |
|---|---|
 |  |
𝓟𝓐𝓢𝓞 4
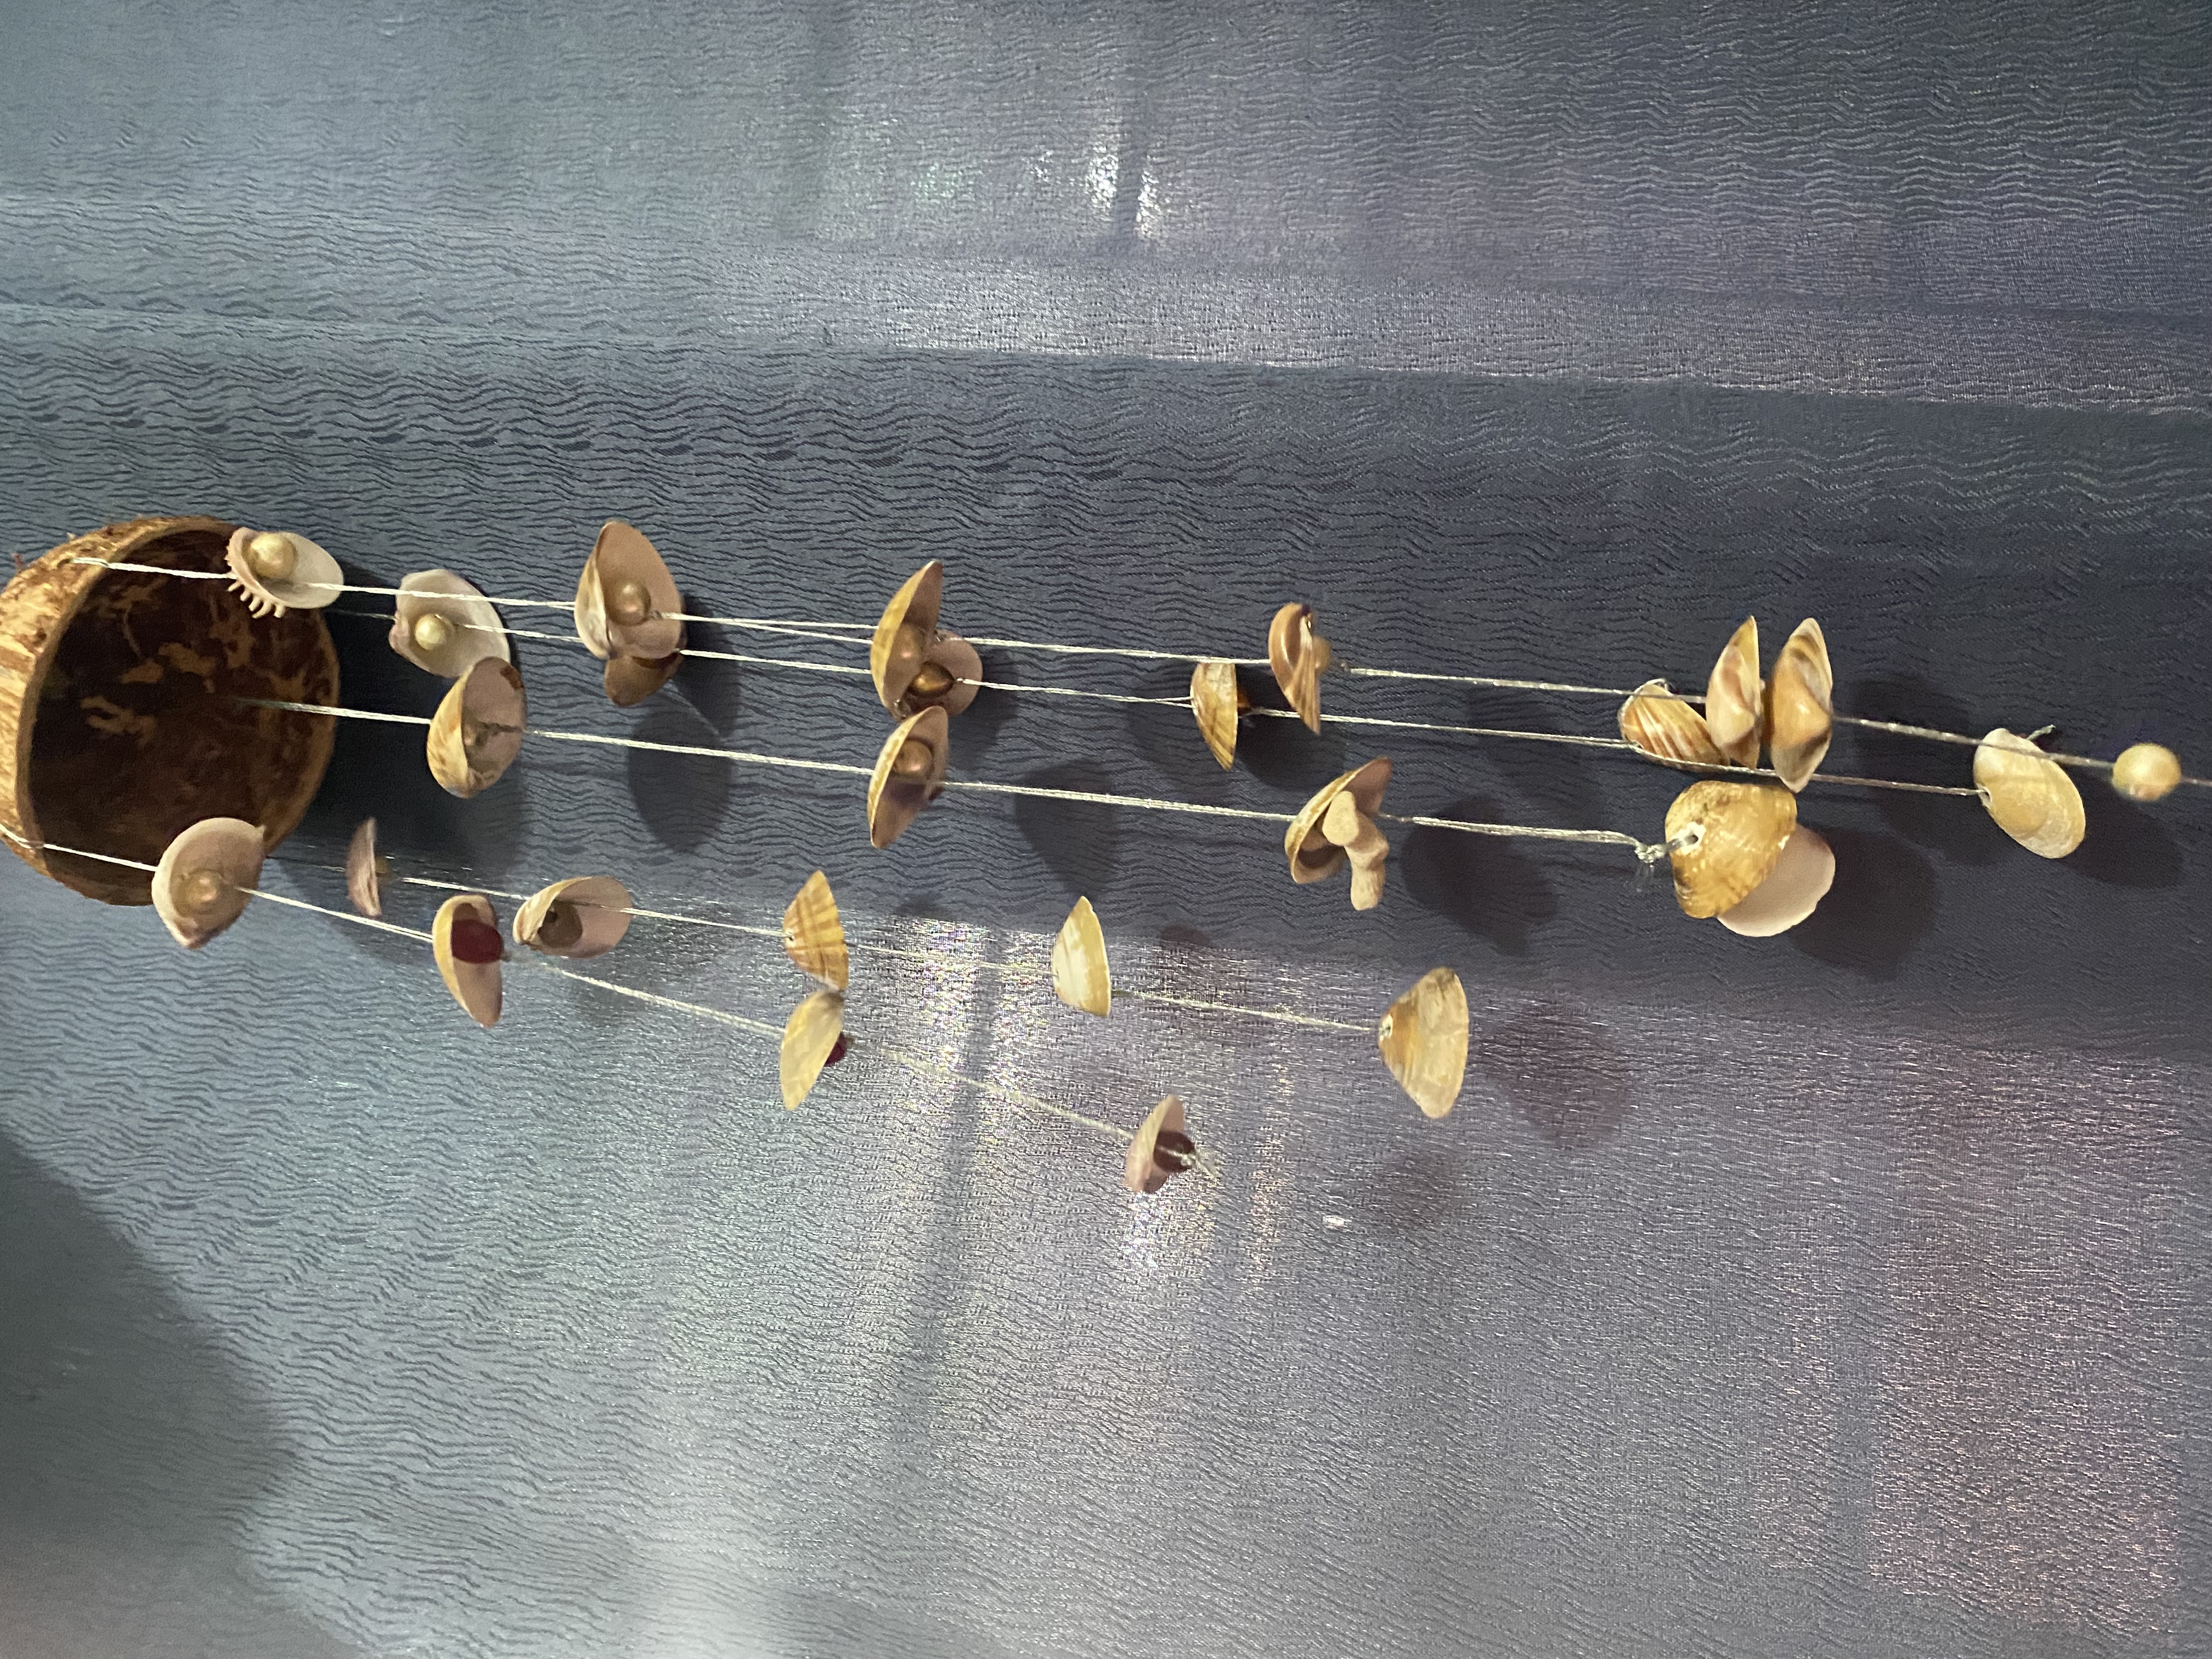
Vamos a colocar el hilo en los cuatro orificios, para esto utilizaré doble hebra de hilo, la primera de 40 cm, luego de 50 cm, otra de 60 cm y otra de 70 cm, esto para que quede como en caída vamos a colocarle las conchas de mar en secuencia una concha una bolita o perlita, Hacemos nudos para que se sostenga y de la separación y seguimos con la otra concha dejando un espacio aproximado de 6 cm.
Las conchas traté de colocarlas del mismo color en cada posición comenzando la primera hilera de cuatro conchas, la segunda hilera cinco conchas la tercera hilera seis conchas y la cuarta hilera siete conchas, entre mis cosas conseguí un collar que tenía varias pepitas grandes que me gustaron para colocarle a cada concha, también conseguí unos lindos cuadrados hechos en madera que eran de un viejo collar.
 |  |
|---|---|
 |  |
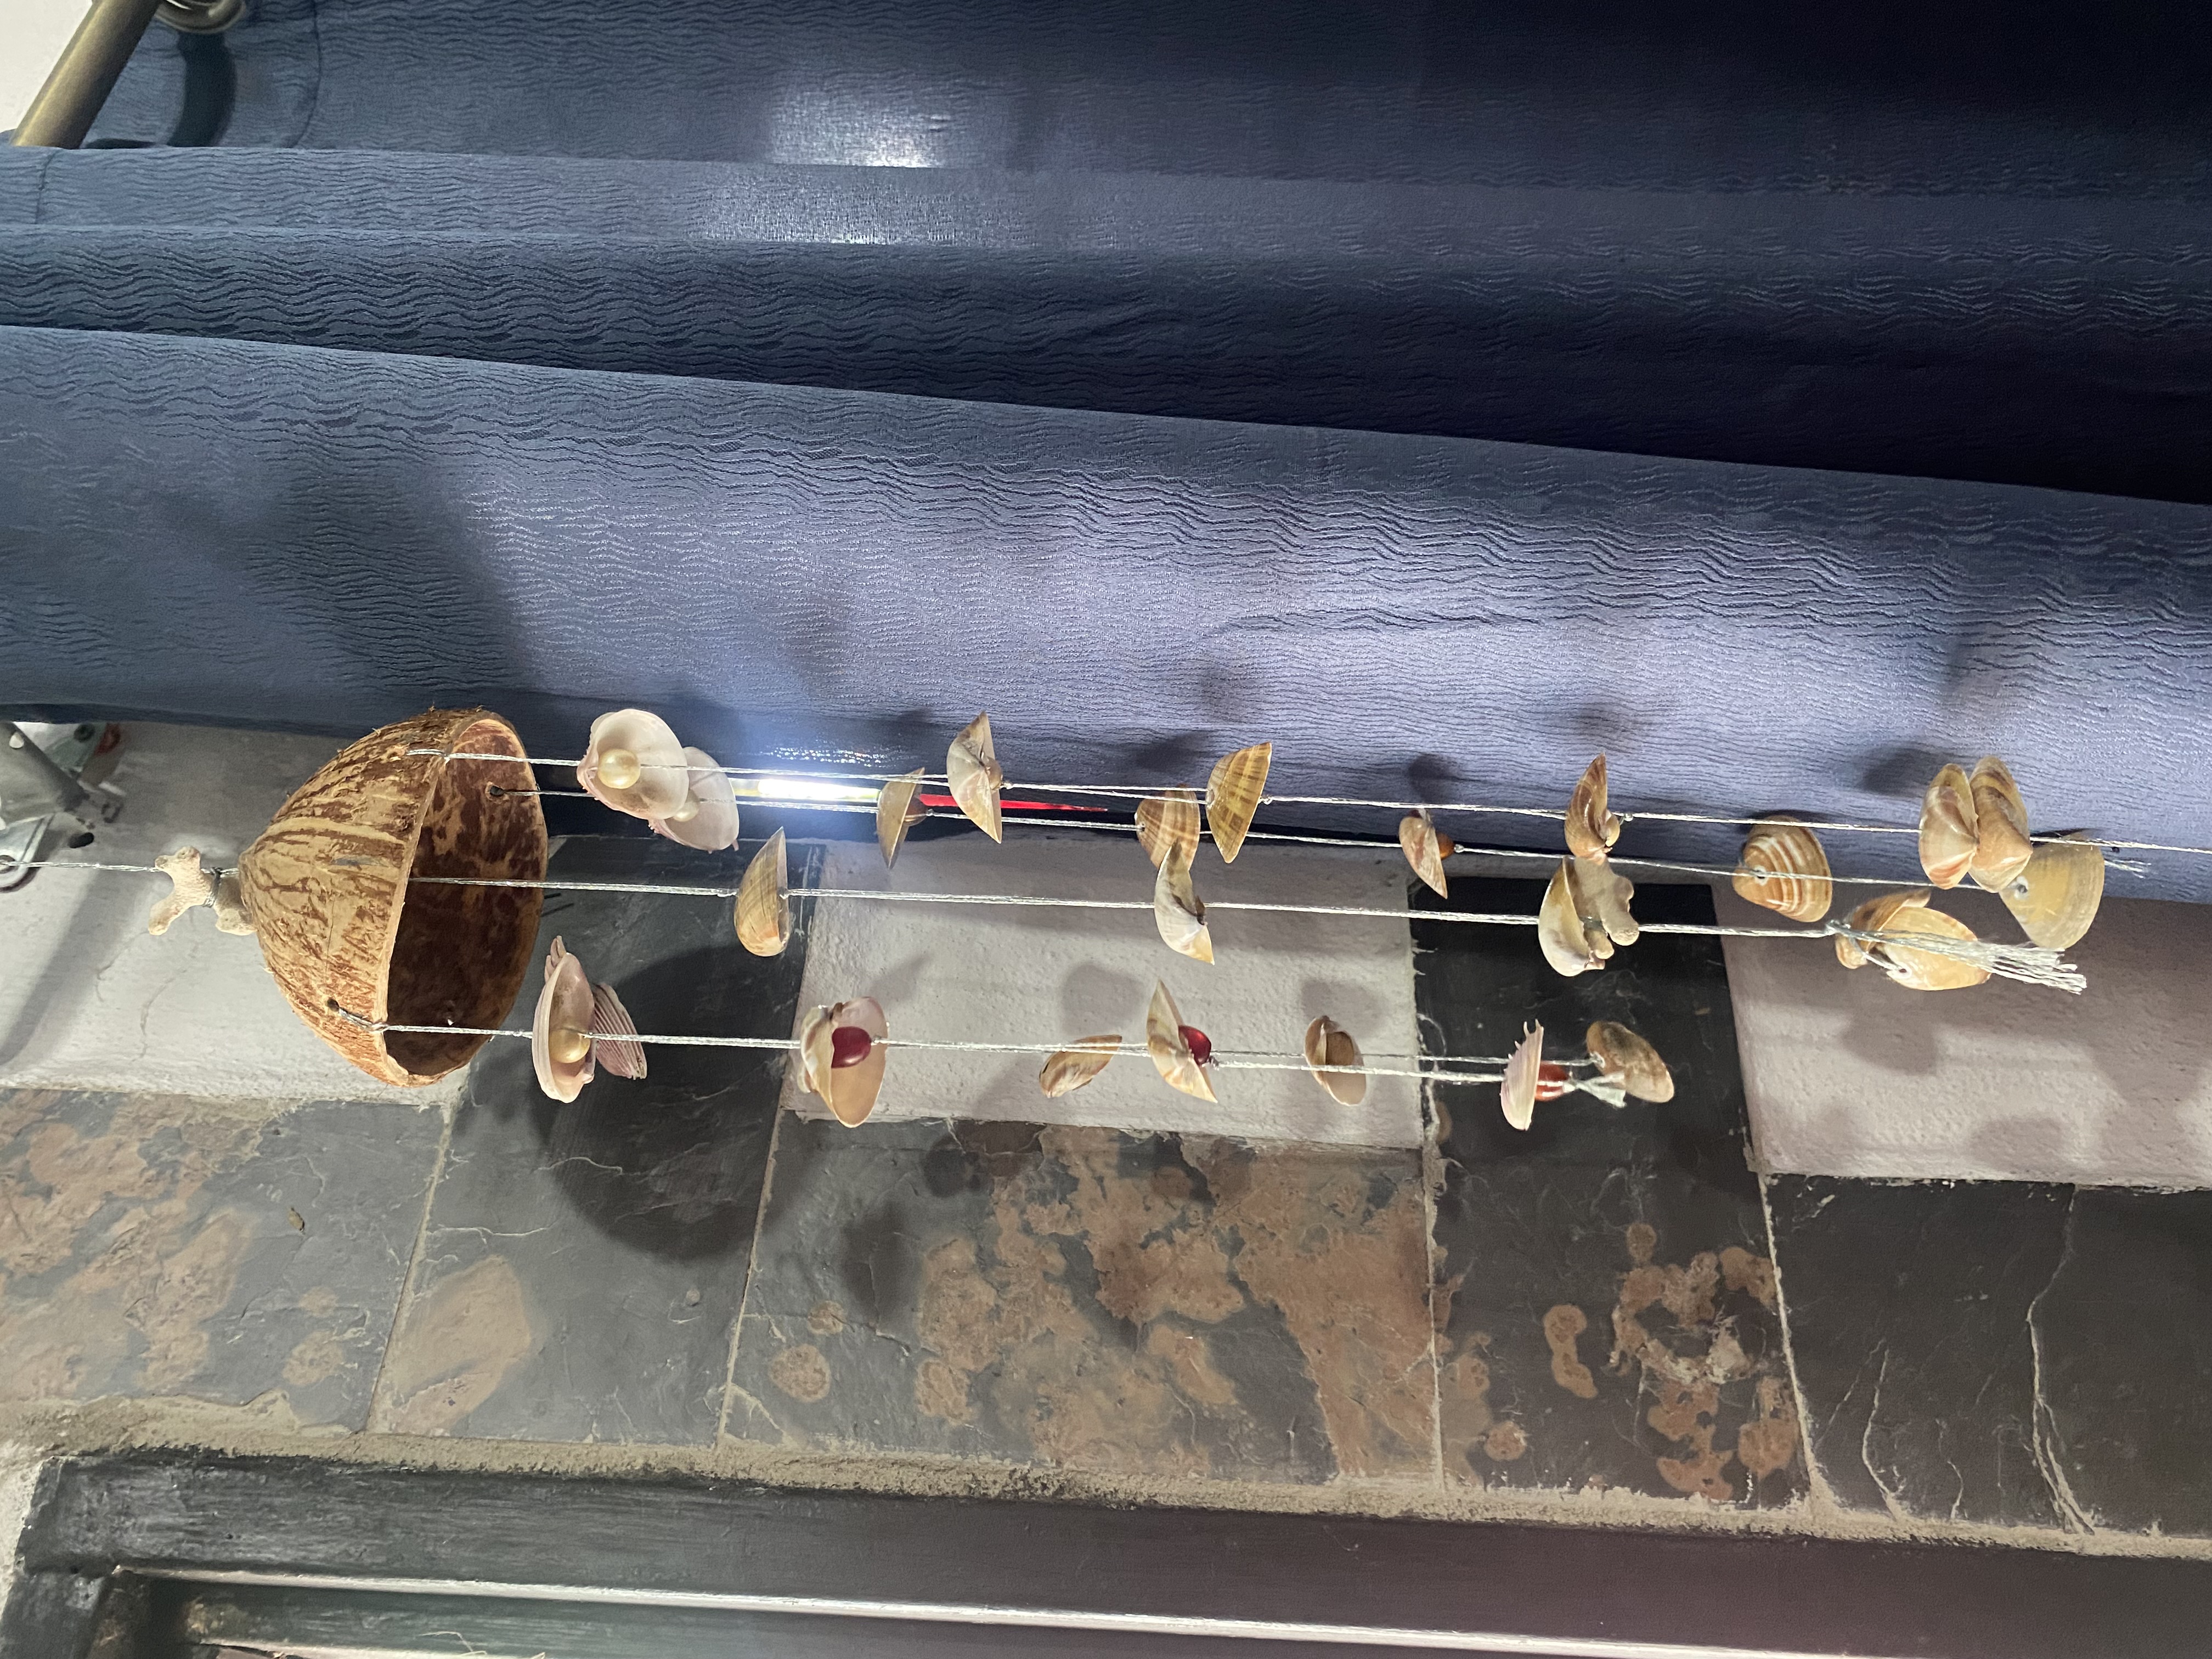
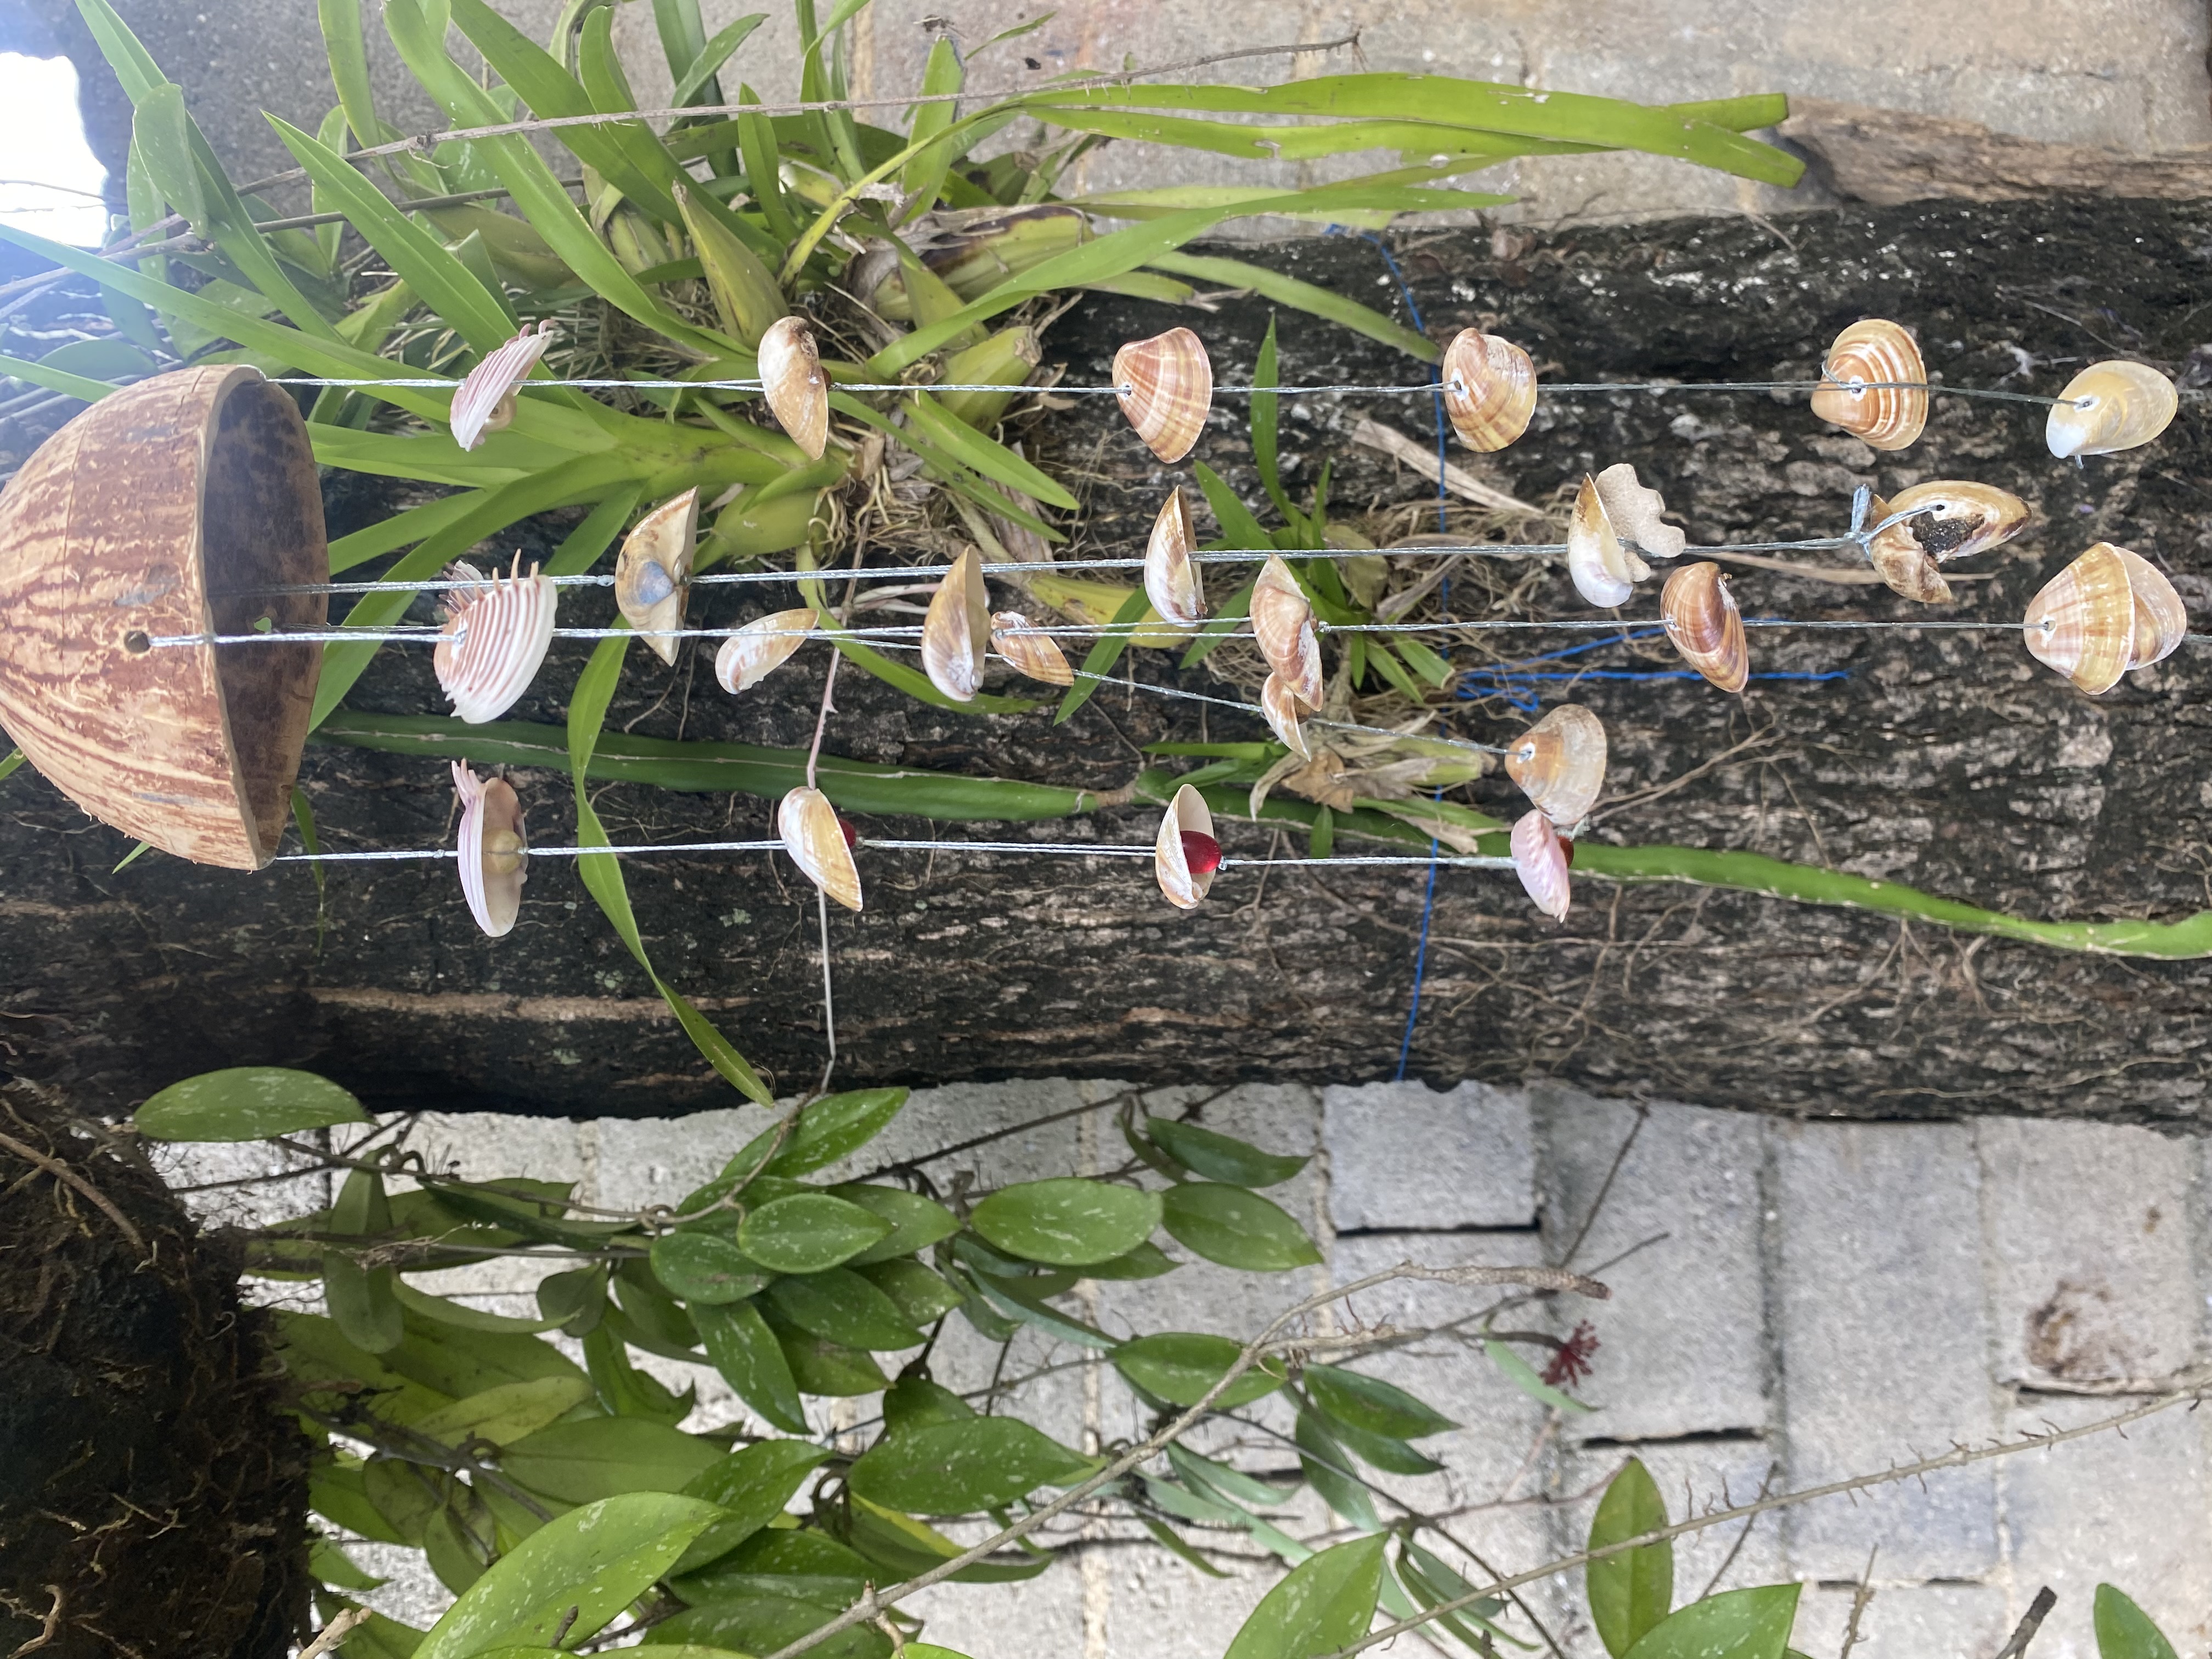
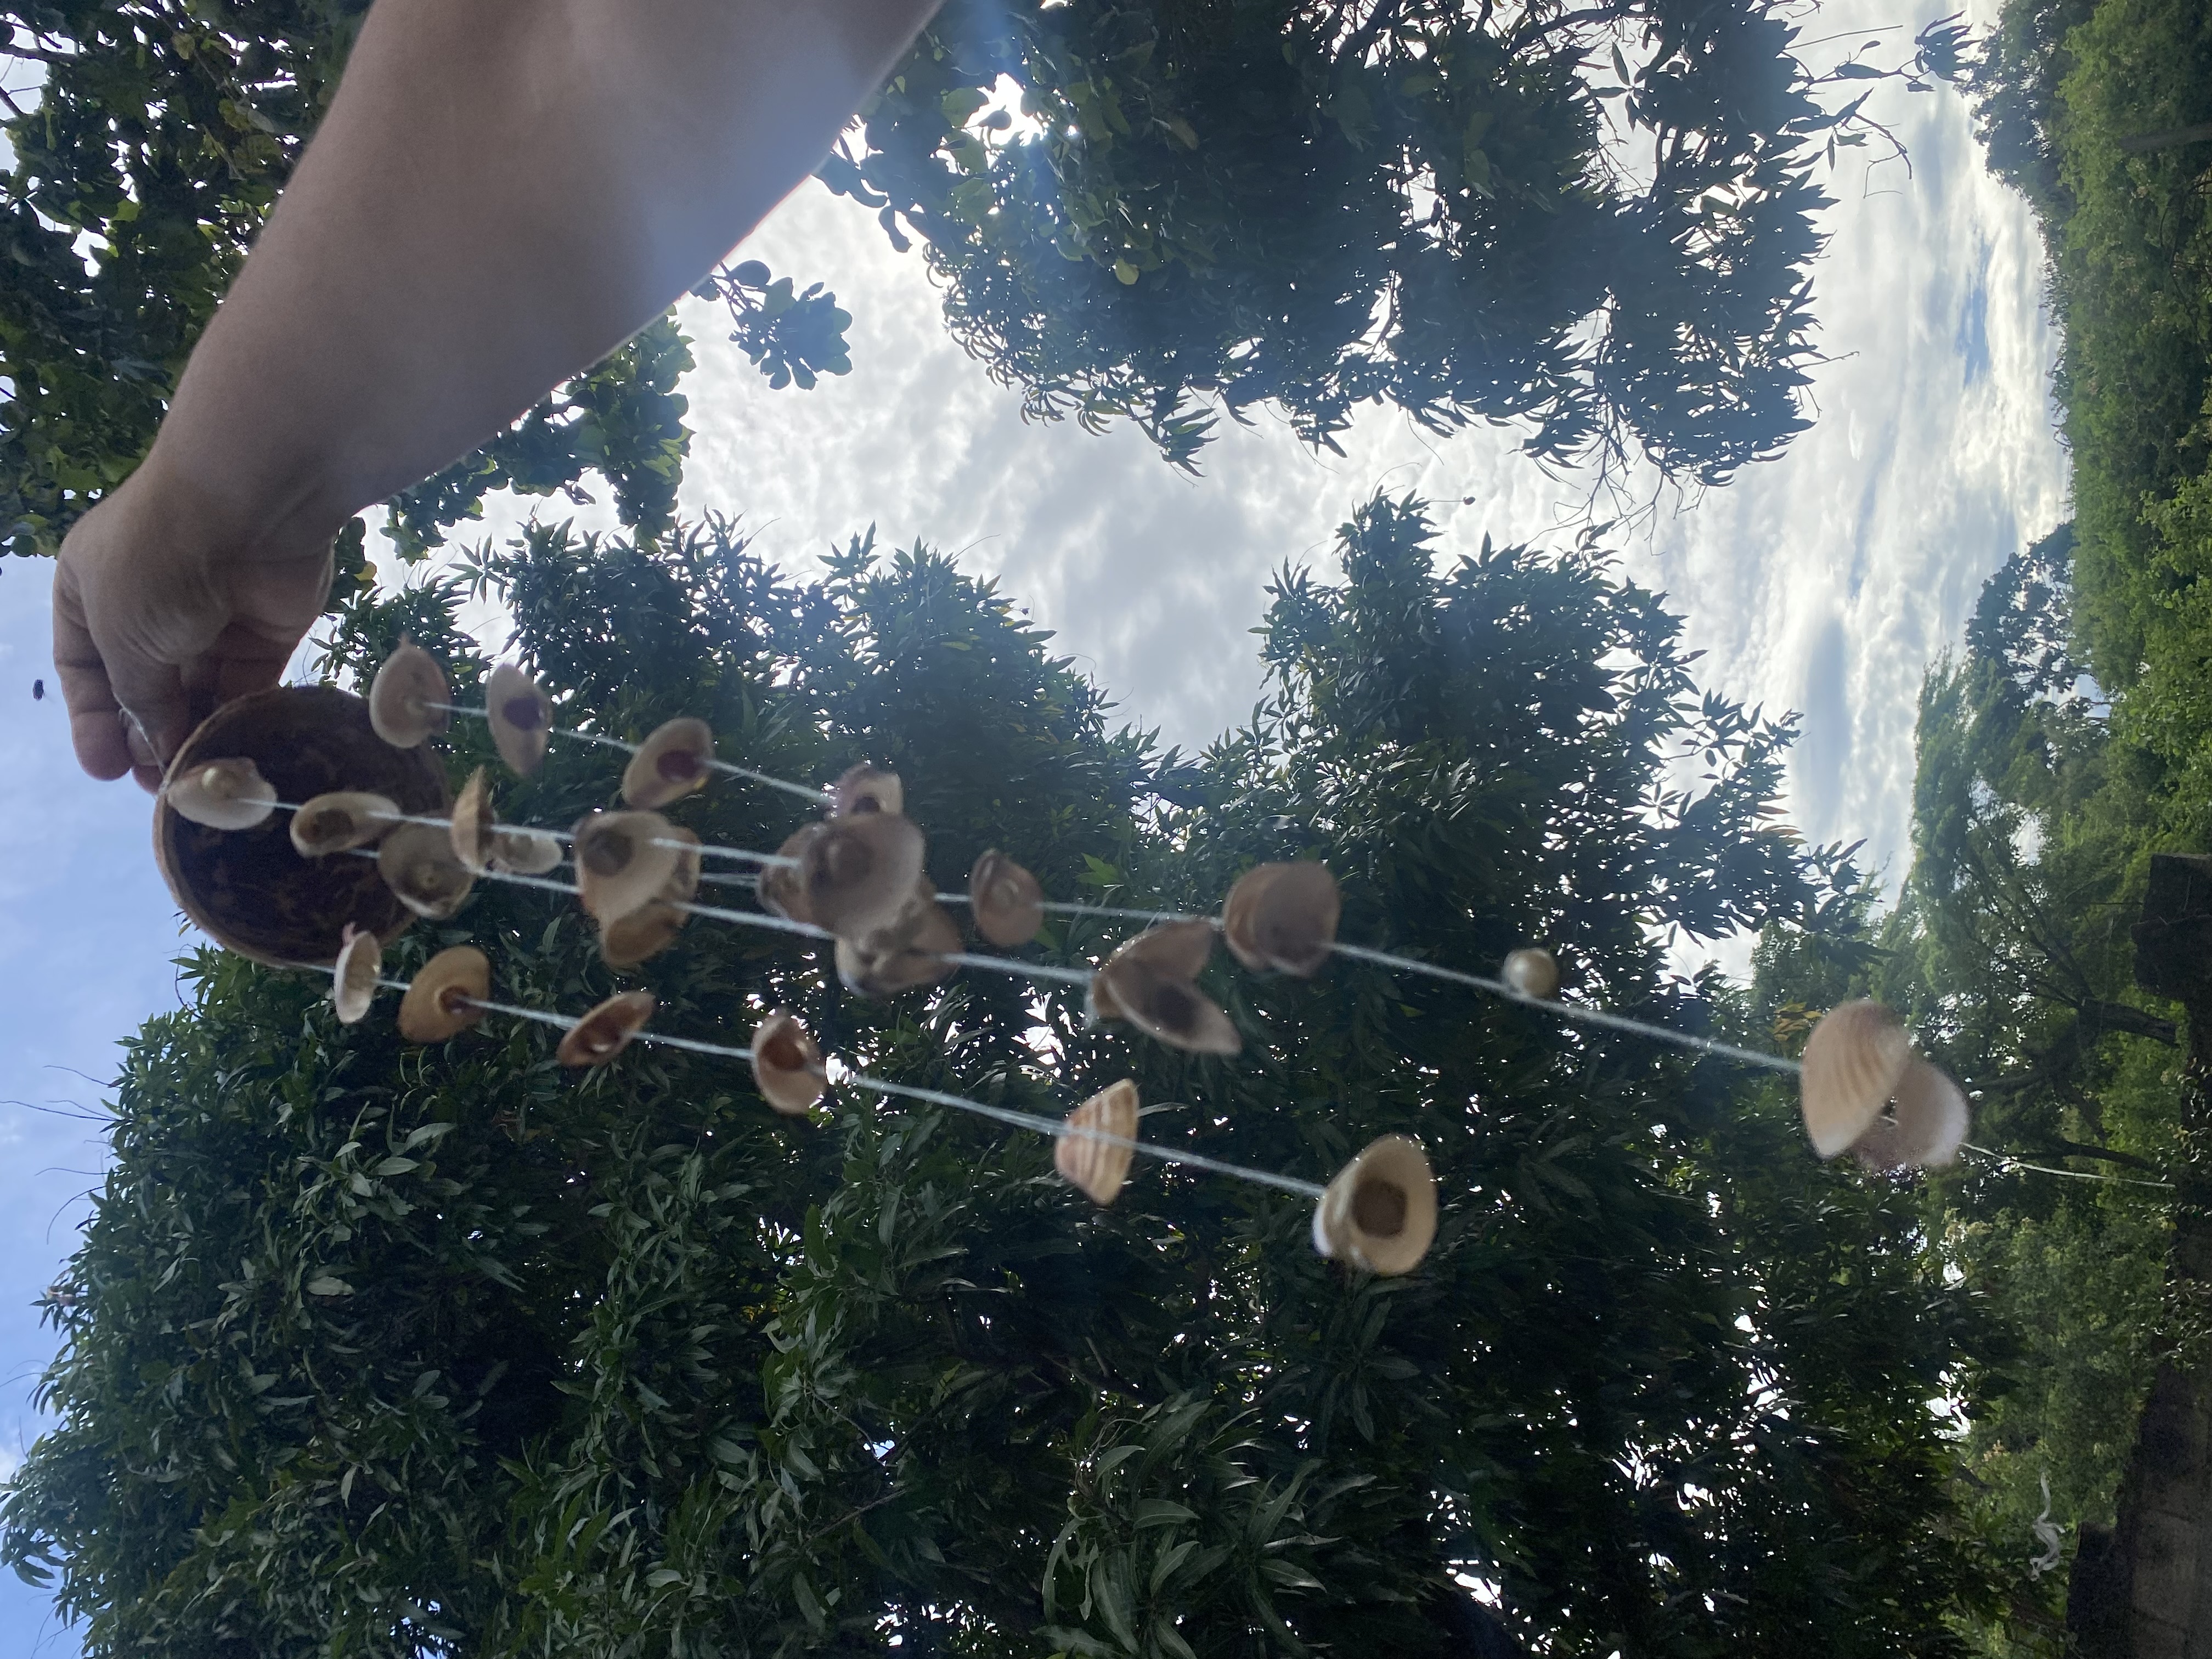
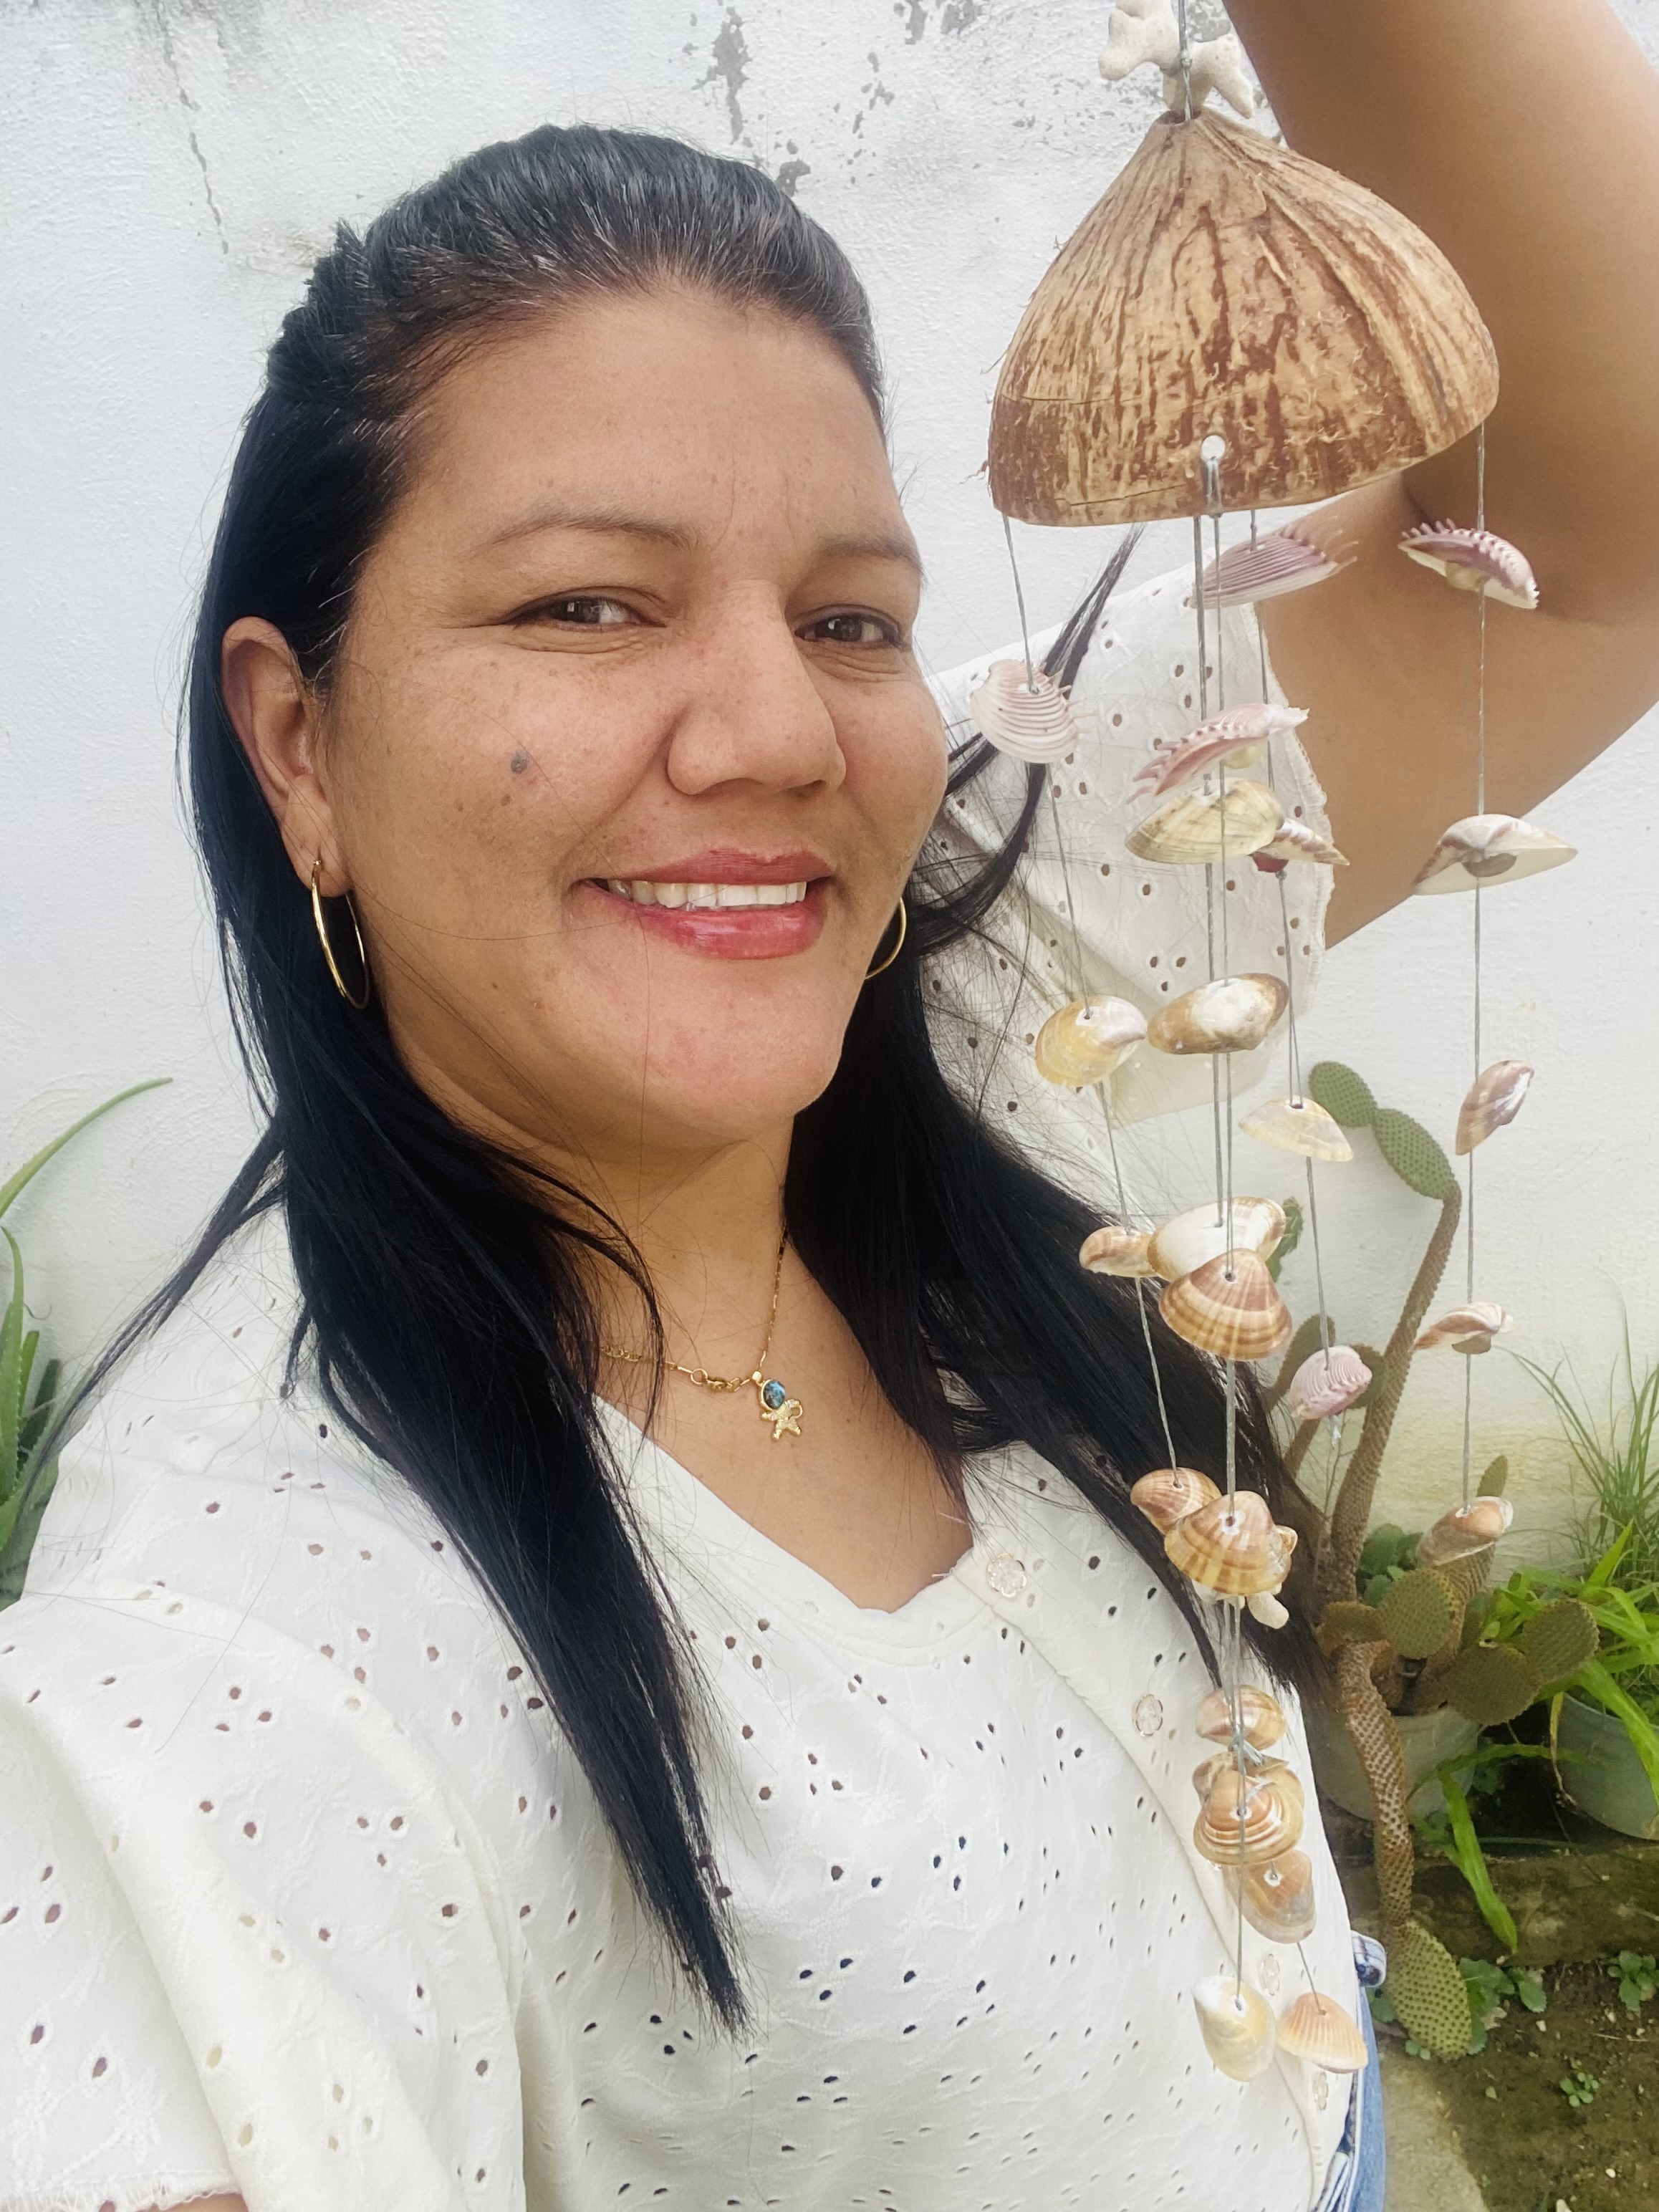
Para hacer este móvil hay que llenarse de mucha paciencia, ya que requiere dedicación, pero el resultado es algo muy bonito, aparte de ser algo hecho con nuestras propias manos es algo hecho con obsequios que nos da la naturaleza, espero les guste el resultado, acá les dejo las fotografías:
To make this mobile you have to be very patient, as it requires dedication, but the result is something very beautiful, apart from being something made with our own hands it is something made with gifts that nature gives us, I hope you like the result, here are the photographs:
 |  |
|---|---|
 |  |
Amé haciendo este lindo móvil o sonajero de viento, me gusta mucho hacer manualidades y más cuando se trata de utilizar materiales que nos da la naturaleza, eso es todo por hoy me despido deseándoles muchos éxitos y bendiciones, de antemano estoy muy agradecida de qué hayas visitado mi Publicación, hasta otra oportunidad 🩷🥥🐚🦪🦀🏖️
I loved making this cute mobile or wind rattle, I really like doing crafts and even more when it comes to using materials that nature gives us, that's all for today I say goodbye wishing you much success and blessings, in advance I am very grateful that you have visited my publication, until another opportunity 🩷🥥🐚🦪🦀🏖️

las fotos aquí compartidas son de mi propiedad tomadas con mi teléfono iPhone 11, la edición fue hecha en Canva, para la traducción del inglés utilice el traductor de Google
The final outcome is awesome. It looks pretty good. Thank you for sharing step by step about how you made it. Nice work!
selected by @rezoanulvibes
Thank you so much 😊
Hay que lindo quedo bellísimo amiga, aquí tengo algunas conchas de esas, voy a ver que se me ocurre con esta idea que nos compartes.
Yes, it's really beautiful. She has come up with a good idea. Love it. Thank you for your feedback!
selected by @rezoanulvibes
Yo estoy enamorada de este móvil, lo miró y me encanta, me alegra que le haya gustado amiga, saludos 🥰
!discovery 30
This post was shared and voted inside the discord by the curators team of discovery-it
Join our Community and follow our Curation Trail
Discovery-it is also a Witness, vote for us here
Delegate to us for passive income. Check our 80% fee-back Program
You and your idea's are very creative. It looks so beautiful 😍
Thank you 😊
que belleza! excelente trabajo!
what a beauty! excellent job!
Muchas gracias 🥰
Bravo!, I admire such genius! Thank you for sharing it with our DIYHub community. We love welcoming talented people who become role models. Have a great weekend Marlyn!...
Thank you very much, my friend, for such nice words. It is a pleasure to share in this dear community. ❤️. Greetings. 😊