DIY: colorful decorative and multifunctional fruits for the kitchen 🍓🍋🍇 (Eng - Esp)
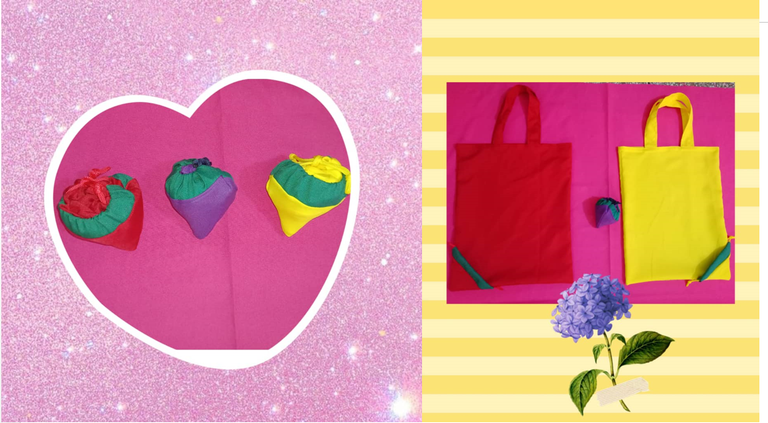
Hello creative friends and #Diyhub community, I wish you an excellent day together with your loved ones, I am happy to participate in the contest May: Kitchen Hacks and DIYs , the kitchen is the most visited place in the house because it is where food is prepared and it is also a place where the family converges for a good chat while enjoying the food, it is the most visited space in the house and it is very nice to have it beautifully decorated with accessories that in turn can be very useful for various activities, for my entry I made a set of decorative fruits that in turn can be used as shopping bags or to store groceries, it is a simple project to do, I invite you to join me in the process of elaboration.
Hola amigos creativos y comunidad #Diyhub, les deseo un excelente día en unión de sus seres queridos, me siento feliz de participar en el concurso May: Kitchen Hacks and DIYs , la cocina es el lugar de la casa más concurrido pues en ella se preparan los alimentos y también es un punto donde converge la familia para una buena plática mientras se disfruta de la comida, es elespacio más visitado de la casa y es muy agradable tenerlo hermosamente decorado con accesorios que a su vez pueden ser de gran utilidad para diversas actividades, para mi entrada elaboré un set de frutas decorativas que a su vez pueden ser usadas como bolsas para la compra o para guardar los víveres, es un proyecto sencillo de hacer, les invito me acompañen el proceso de elaboración.


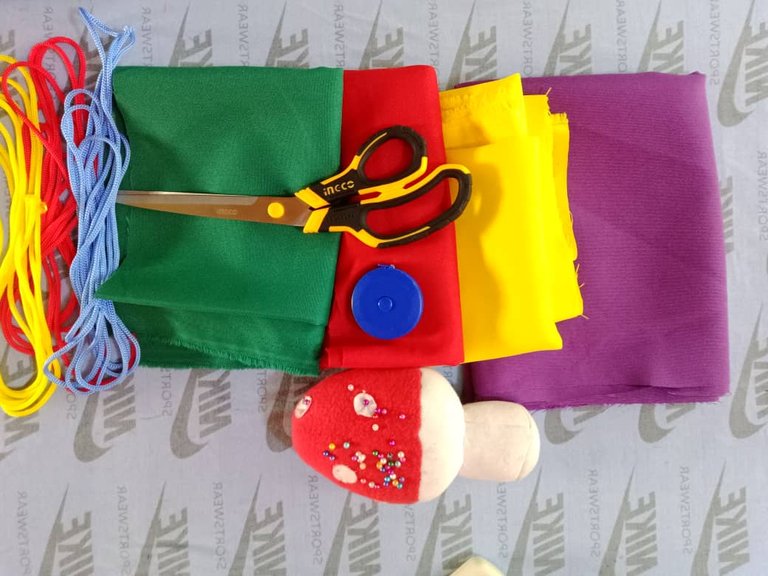
MATERIALS
Sewing machine
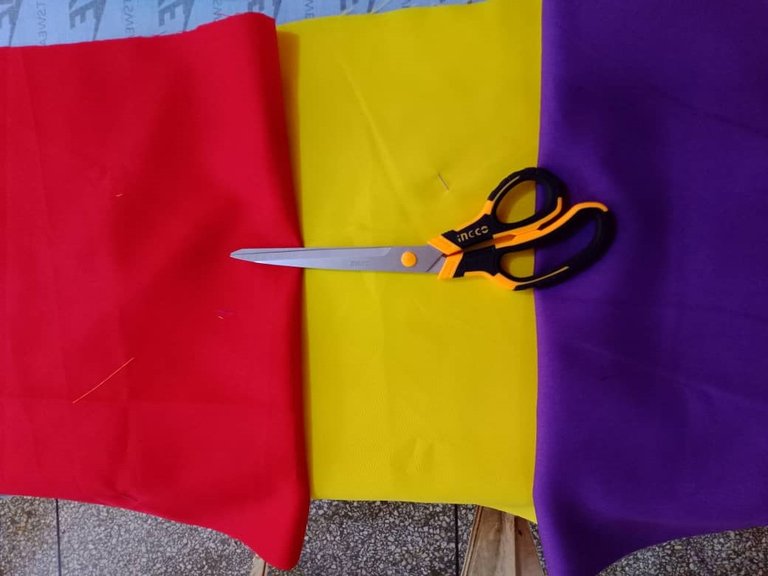
Minimatt fabric (green, red, purple, yellow)
Cord (colors to match fabrics)
Scissors
Tape measure
Pins
MATERIALES
Máquina de coser
Tela minimatt (verde, roja, morada, amarilla)
Cordón (colores a tono con las telas)
Tijeras
Cinta métrica
Alfileres

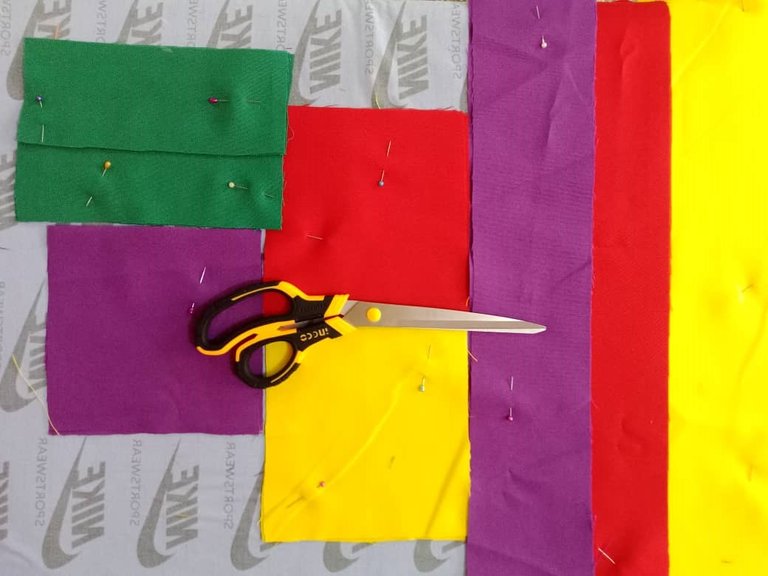
Elaboration
The first step is to cut the pieces; two rectangles of 50 x 40 centimeters, which will be the front and back, two squares of 16 x 16 centimeters, to make the fruit, two rectangles of 8 x 50 centimeters, for the handles and two rectangles of 18 x 8 centimeters, which will be the leaves and the tunnel of the cord.
Elaboración
El primer paso es cortar las piezas; dos rectángulos de 50 x 40 centímetros, que serán la parte delantera y posterior, dos cuadrados de 16 x 16 centímetros, para hacer la fruta, dos rectángulos de 8 x 50 centímetros, para las asas y dos rectángulos de 18 x 8 centímetros queseran las hojas y tunel del cordón.
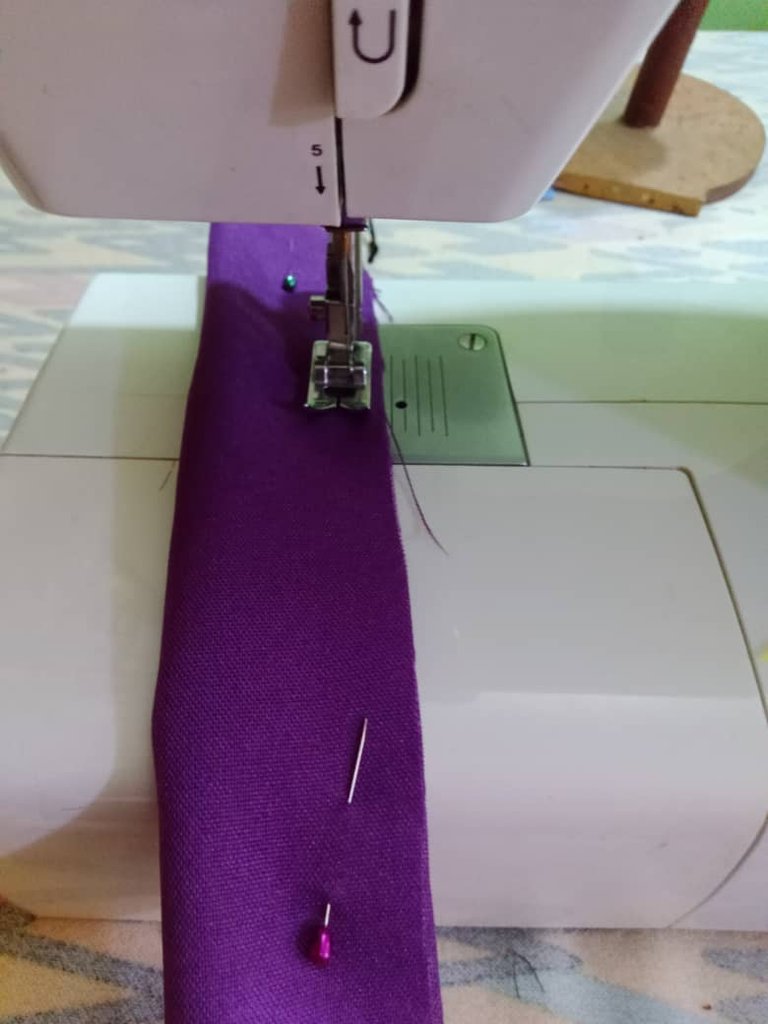
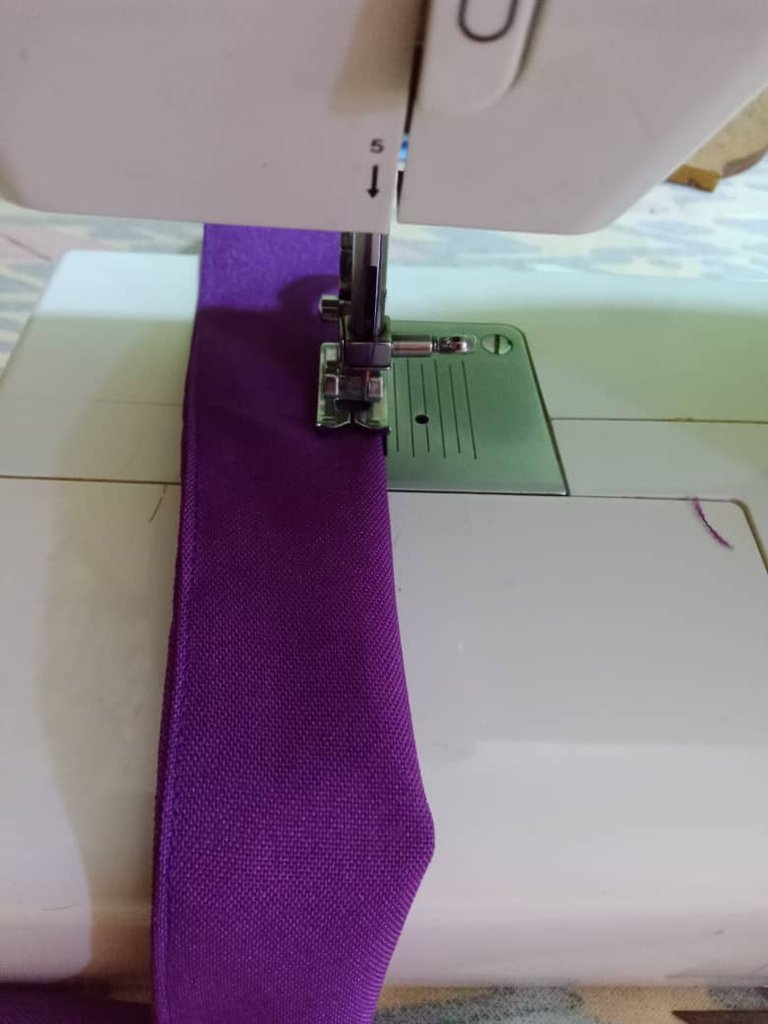
To make the handles, I sewed the 8 x 50 cm rectangles, right sides together, turned and repeated the sides to reinforce them.
Para hacer las asas, cosí los rectángulos de 8 x 50 cm, enfrentando los derechos, volteé y repísé los laterales para reforzar.
I folded the squares in half and formed a triangle, also sewed a hem on the ends of the rectangles that will simulate the leaves, folded them in half and joined them to the previous triangle using straight stitch.
Doblé los cuadrados por la mitad y formé un triángulo , también cosí un dobladillo en los extremos de los rectángulos que simularán las hojas, los doblé por la mitad y los uní al triángulo anterior usando puntada recta.

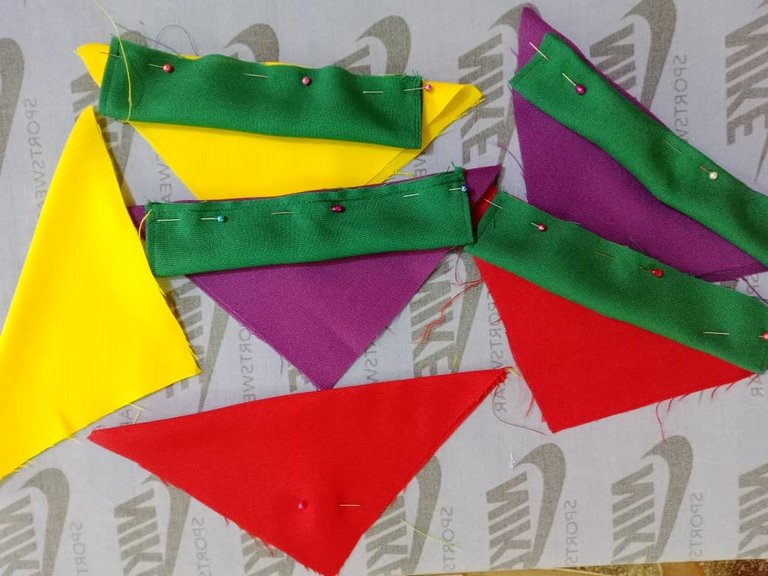

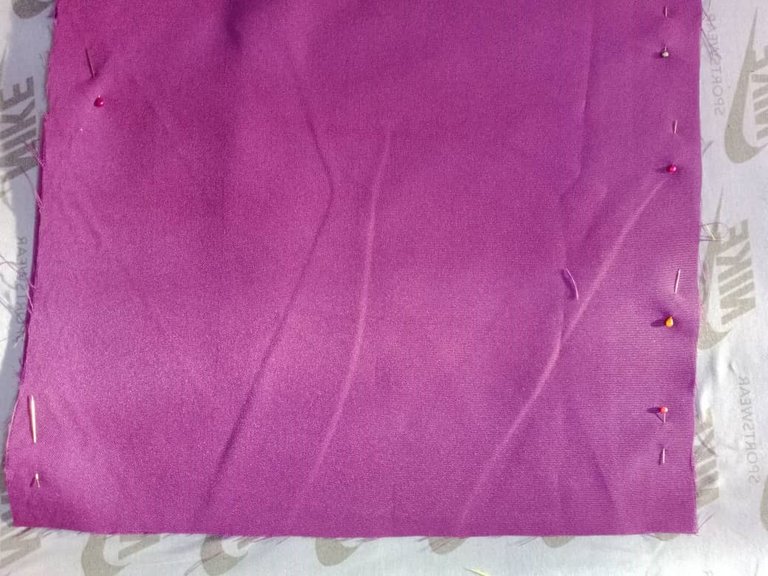
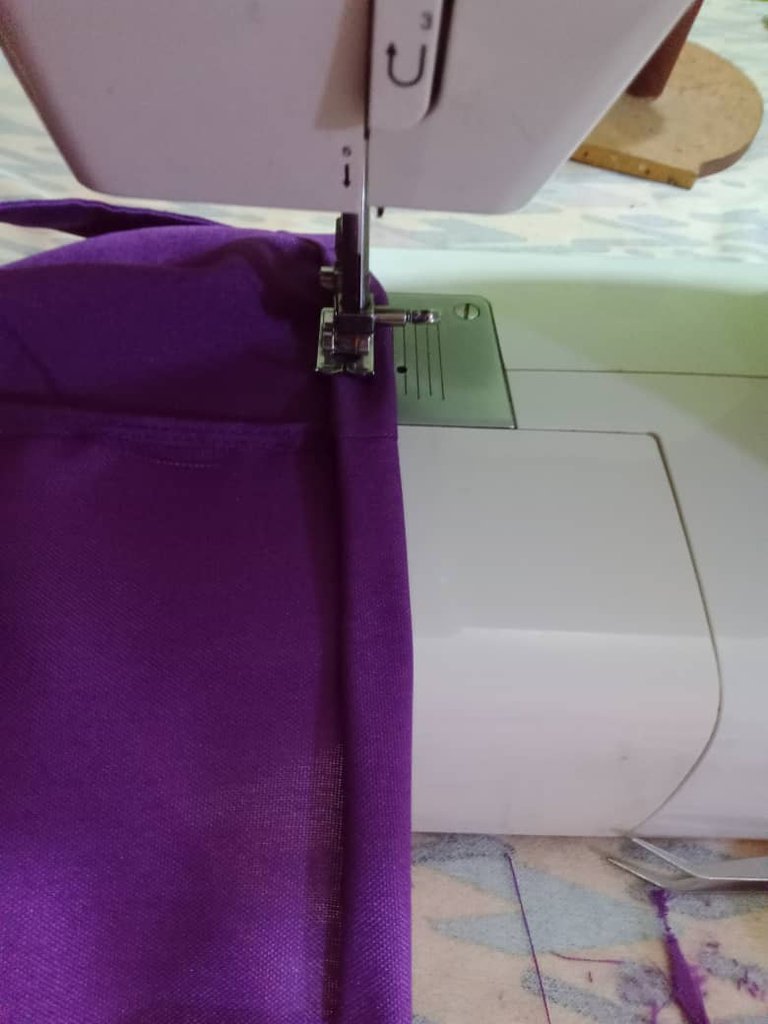
With pins I pinned and sewed the triangles to one of the corners of the 50 x 38 cm rectangles so that they match when facing each other.
Con alfileres sujeté y cosí los triángulos en una de las esquinas de los rectángulos de 50 x 38 cm de manera que coincidan al enfrentarlos.

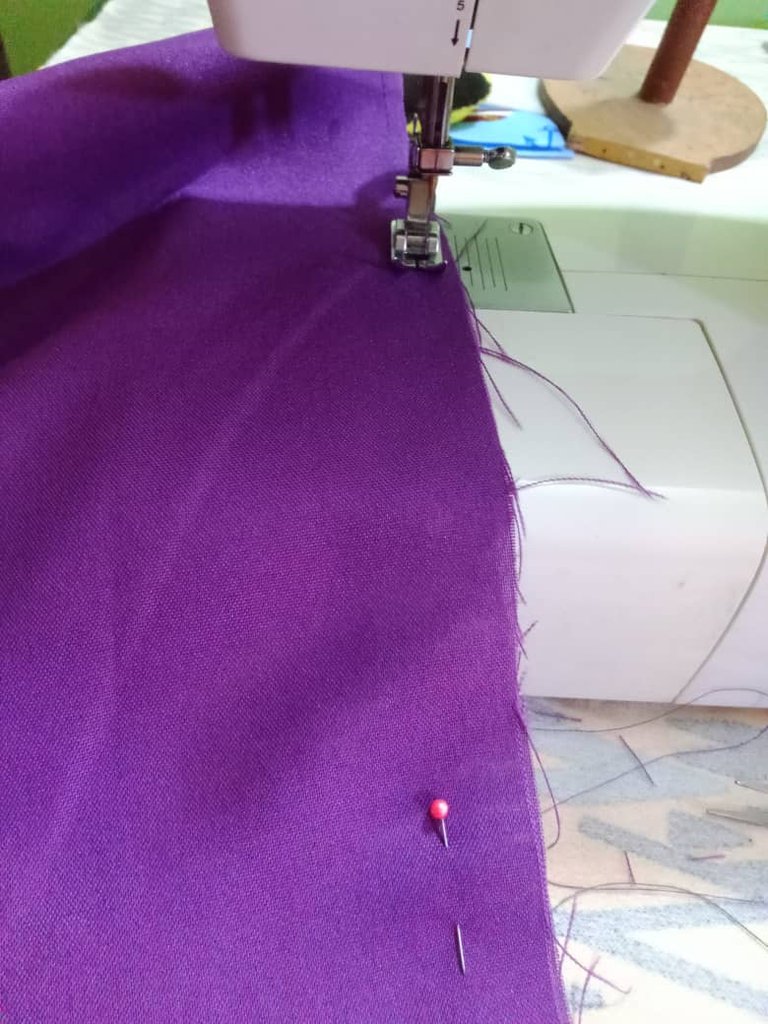
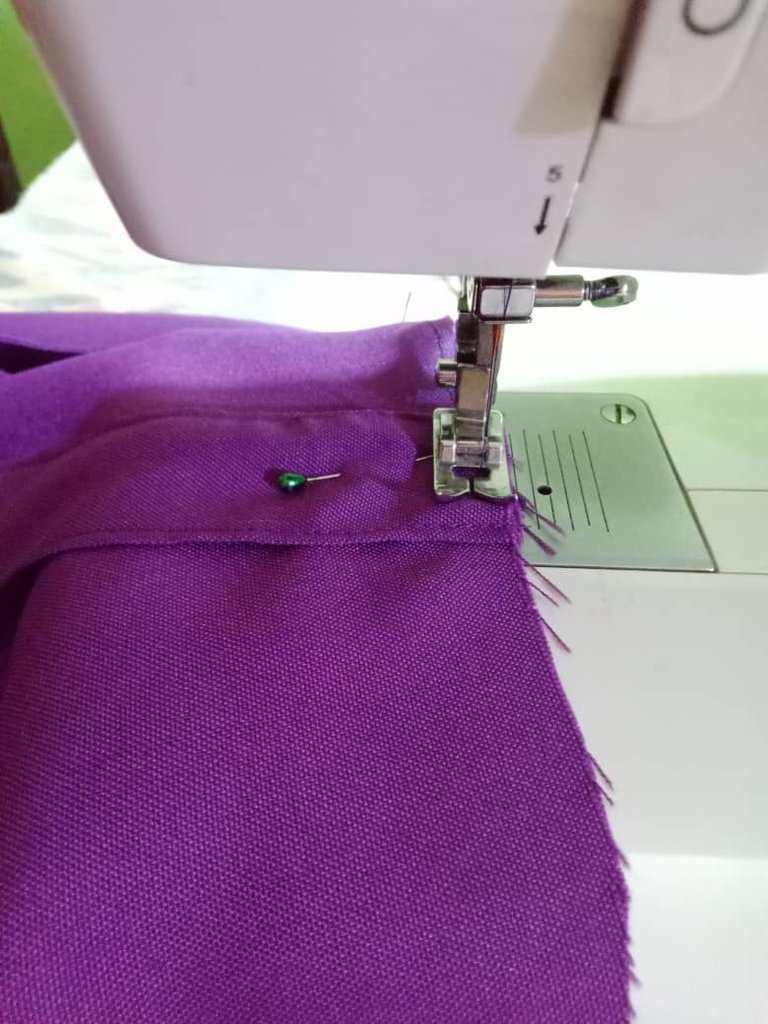
Once the triangles, were glued, I faced the large rectangles on the right side, sewed along the sides and bottom and turned them over.
Pegados los triángulos, enfrenté por el derecho los rectángulos grandes, cosí por los laterales y la parte inferior y volteé.
Then I sewed the handles 12 centimeters from the sides and folded 2 centimeters inward at the top.
Luego cosí las asas a 12 centímetros de los lados y doblando 2 centímetros hacia adentro en la parte superior.
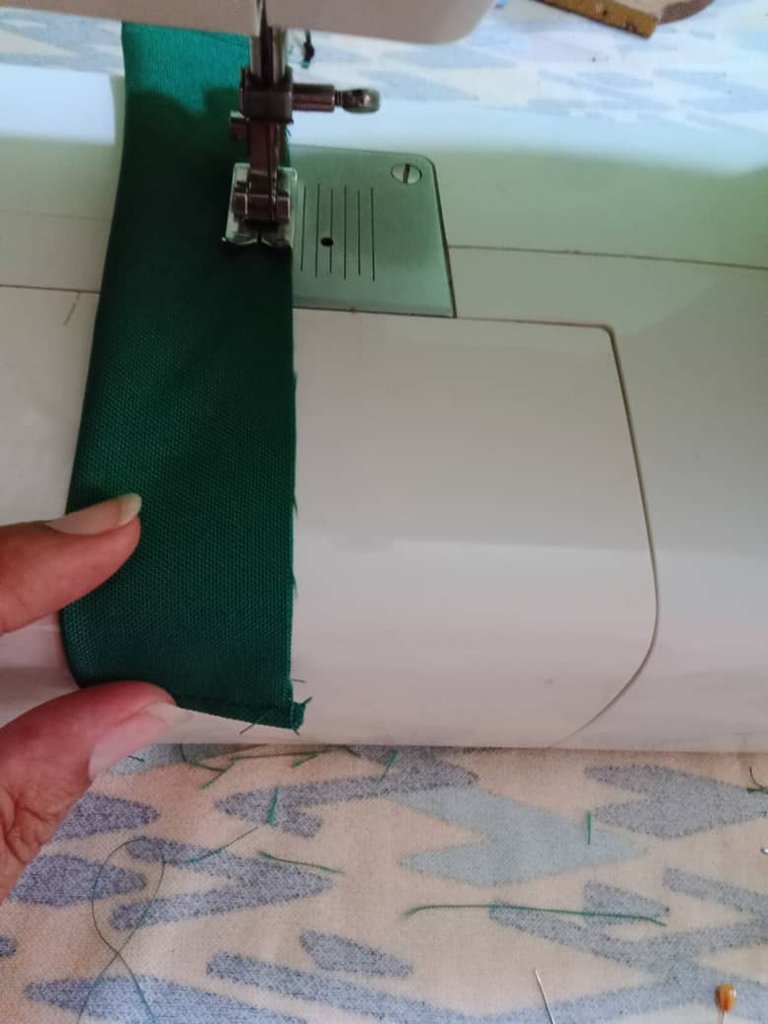
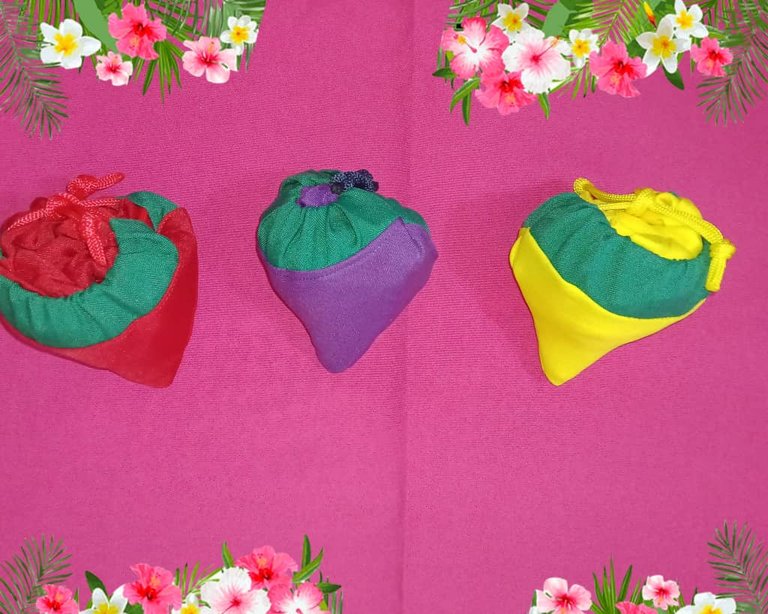
To finish I cut two strips of cord of 40 centimeters each, with a pin I passed it through the channel of the green fabric, and made a knot at the ends, so the decorative fruits are finished.
Para finalizar corté dos tiras de cordón de 40 centímetros cada una, con un alfiler lo pasé por el canal de la tela verde, e hice un nudo en las puntas, así están terminadas las frutas decorativas.

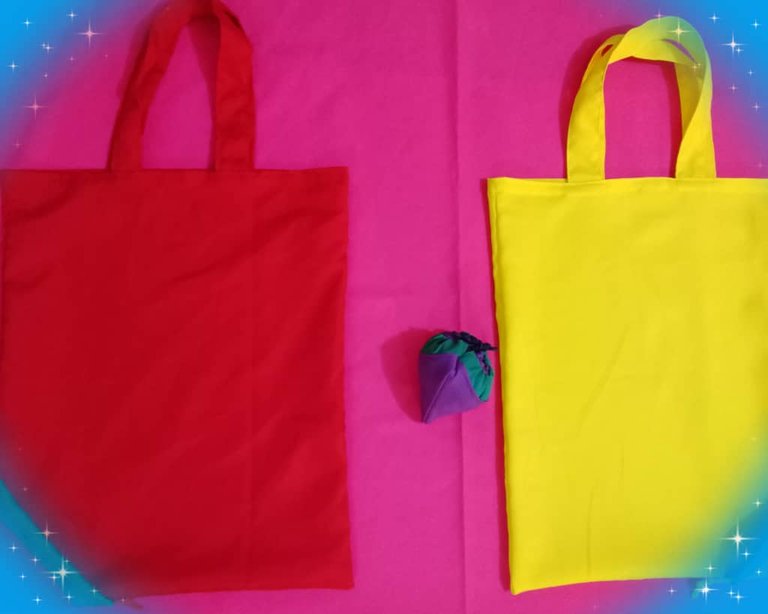
I loved the result of this project, the fruits have vibrant colors and are a perfect decoration for the kitchen, also, as I mentioned before, they can be used to do the shopping and again place them in the kitchen so that with their bright colors they decorate this space of the house, I hope you like them and are encouraged to make them.
Me encantó el resultado de este proyecto, las frutas tienen vibrantes colores y son un adorno perfecto para la cocina, también, como lo mencioné anteriormente, se pueden usar para hacer las compras y nuevamente colocarlas en la cocina para que con su llamativos colores adornen este espacio de la casa, espero sean de su agrado y se animen a realizarlas
¡Bendiciones!
Blessings!

Translated with https://www.deepl.com/translator
          All images are my own

   Todas las imágenes son de mi autoría.
Hola. Muy útiles y bonitas se ven estas bolsitas. Ahora casi todos andamos con nuestras bolsas cuando salimos de compras, así que no dudaria en usar una de estas. Muy lindas.
Saludos amiga, son unas bolsas muy útiles para decorar y también para las compras, además sencillas de hacer. 😊❤️
Feliz miércoles!
Nice colors you have chosen for the fabric bags and it's a good idea so you don't have to buy one when you go to the supermarket, good job, good luck in the contest.
Hi @monipk35, glad you liked them, the colors are beautiful and vibrant, the bag is useful for shopping and can be carried comfortably in your purse. 😊🌺
Greetings!
Gradioso!!!! Felicidades, quedó espectacular 👌
Hola bella, me alegra que te hayan gustado son útiles para decorar y hacer las compras. 🌺❤️
Saludos!
It is colorful, lovely, and nice. It looks great. It shows your skills. You did a great job! Keep it up!
selected by @rezoanulvibes
It's a nice project to decorate the kitchen and simple to do, also ideal for shopping. Grateful for the support @diyhub 😊🌺.
Greetings!
¡Justo lo que necesitaba! 😍 Hace años tuve un bolsito de estos y era muy practico tenerlo en el bolso, casualmente había pensado en elaborar uno pero como perdí el que tenía iba a tener que ingeniármelas para recrearlo jaja ¡Muchas gracias pro compartir el tutorial con nosotros! Te quedaron preciosos y perfectos para combinarlos con el outfit que lleves 😎✨
Hola amiga, me alegra que el tutorial sea de utilidad, estas bolsas son prácticas para las compras y se pueden llevar en la cartera, desde que las vi me gustaron, en mi cartera siempre llevo una. 😊🌺
Saludos!
Thanks a lot for the support @qurator and @brumest 🍁🤗
Greetings!
Lindo y útil proyecto, gracias por compartir tu proceso creativo. Saludos.
Saludos amiga, me alegra que te haya gusatado, es útil para las compras y decorar la cocina.
Feliz fin de semana!
A very beautiful and elegant art. Always respect the beautiful fabric used to make a great bag. Thank you very much for presenting each step in a smooth manner. Also, thank you for sharing your hard work by sewing on the machine. Welcome to the world of art. Beautiful art community respect.
Hi @mdakash62, it is a useful project in the kitchen and for shopping, the vibrant colors are eye catching and beautiful.
Greetings!
You are always most welcome my pleasure
Thanks for stopping by.
You are always most welcome my pleasure
muy bonito y creativo!
very nice and creative!
Hola amiga, me alegra que te hayan gustado, son útiles y sencillas de hacer.
Saludos! ❤️🌺
You have chose some vibrant and beautiful colors, it makes your work look so lovely.
I wish you best of luck in the contest. !DIY
Cheers @funshee, love the colors, they are eye catching and bring out the fruits. 🌺❤️
Happy weekend!
Thank you very much 🥰🙏
🙏😊