Male Light Healer Version / Holozing Fanart Eng-Esp
This is the way

English
Español
Reference
Process/Proceso
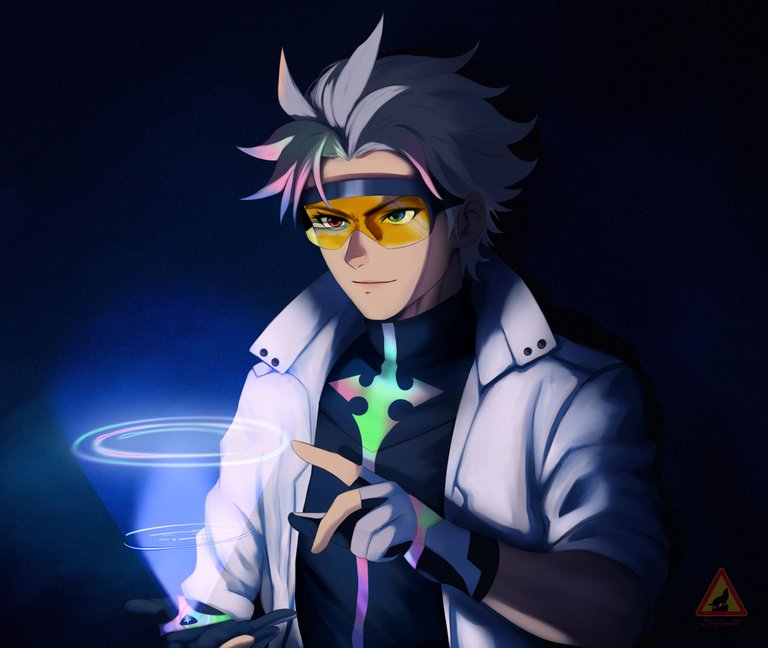
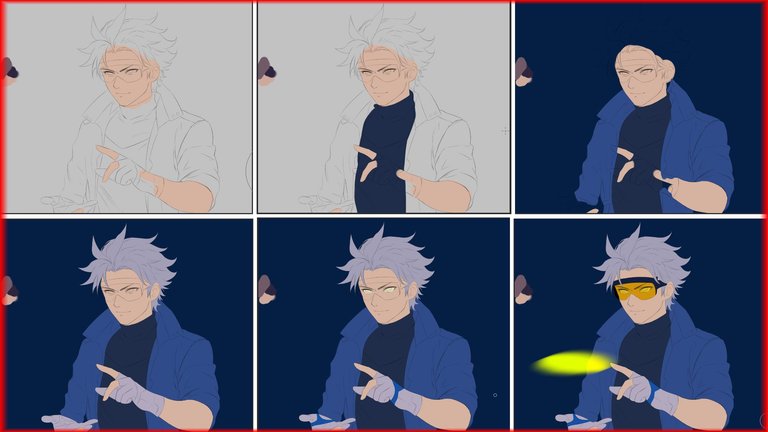
Originally I had thought to do it in a well lit installation with a technological touch but when I made the sketch of the hologram I thought it would look great if it had contrast and that was the only light source.
we created the sketch and then the lineart without adding the hologram.
Originalmente habia pensado hacerlo en una instalacion bien iluminada con un toque tecnologico pero al hacer el boceto del holograma pense que iba a quedar genial si tenia contraste y esa fuera la unica fuente de luz.
creamos el boceto y posteriormente el lineart sin agregar el holograma.
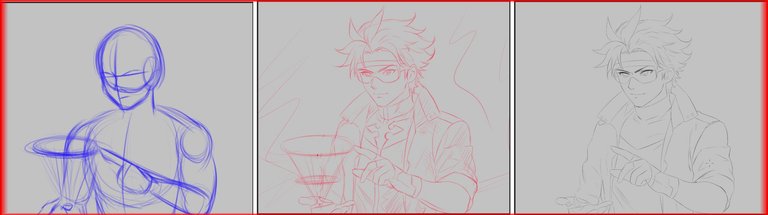
We added the base colors, here I had an idea of what I was going to do, I got a palette of dark skin colors which we were adding, all the rest of the character I tried to place cold tones that is to say approaching the blue tone.
Agregamos los colores base, aqui tenia una idea de lo que iba a hacer, consegui una paleta de colores de piel en oscuridad la cual fuimos agregando, todo el resto del personaje trate de colocarle tonos frios es decir hacercandonos al tono azul.
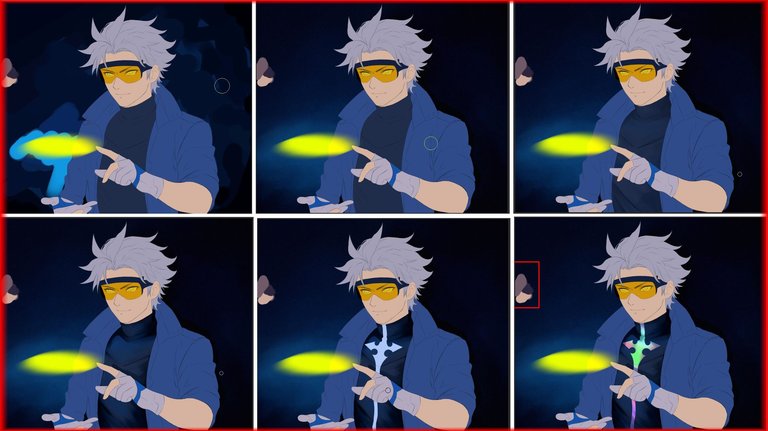
The background in spite of not being complex has small variations in dark blue tones which we will blur having in mind always of where the source of blue comes from.
when finishing with it I apply the noise effect being this the only layer of the drawing in having that effect.
we continue with the clothes of the character and on this we make the design of its central adornment in several tones, on that layer we apply a layer in multiply effect and with blue color we make the shades.
here it was when this idea came to my mind.
and if I make the shades using a layer like this? that is to say a unique shade for all the character instead of making them separately.
El fondo a pesar de no ser complejo tiene pequeñas variaciones en tonos azul oscuro las cuales difuminaremos teniendo en cuenta siempre de donde viene la fuente de zul.
al terminar con el le aplique el efecto ruido siendo esta la unica capa del dibujo en tener ese efecto.
seguimos con la ropa del personaje y sobre esta hacemos el diceño de su adorno central en varios tonos, sobre esa capa aplicamos una capa en efecto multiplicar y con color azul hacemos las sombras.
aqui fue cuando me vino esa idea a la mente.
¿ y si hago las sombras usando una capa asi? es decir una sombra unica para todo el personaje en lugar de hacerlas por separado.
After blurring the skin I decided to add more details in the central area, the general shadow layer will take care of the rest of the shadows, mostly the hair.
in the end this was the result, a mix of the two techniques to achieve it.
Despues de difuminar la piel decidi agregar mas detalles en la zona central, la capa de sombra general se encargara del resto de las sombras mayormente la del cabello.
al final este fue el resultado, una mezcla de las dos tecnicas para lograrlo.
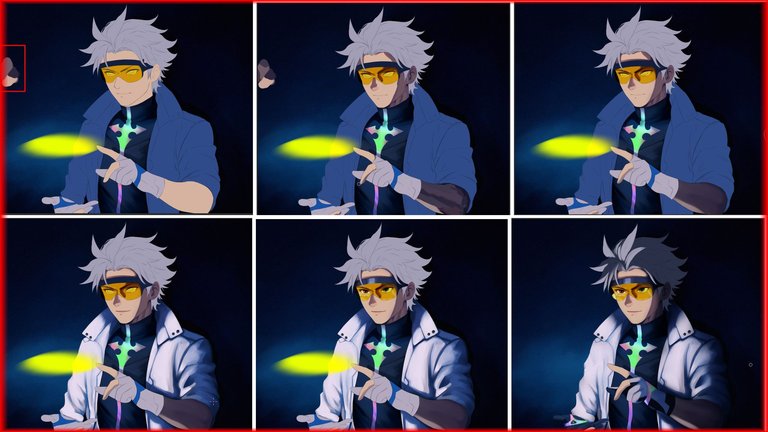
To create the effect of the hologram we change the yellow disk with a glow effect this being in white or lighter color we give the blur effect.
now we draw with the neon brush something similar to the visible parts of the hologram.
on these layers we apply others of glow with the form of exit of the hologram.
once this ready we add more glows in the lenses and other zones.
after correcting and giving the last details this was the final result friends.
Para crear el efecto del holograma cambiamos el disco amarillo con un efecto de brillo este al estar en color blanco o mas claro le damos el efecto difuminar.
ahora dibujamos con el pincel de neon algo parecido a las partes visibles del holograma.
sobre estas capas aplicamos otras de brillo con la forma de salida del holograma.
una vez esto listo agregamos mas brillos en los lentes y otras zonas.
despues de corregir y dar los ultimos detalles este fue el resultado final amigos.
Friends we got to the end, what did you think? i'm still practicing this kind of things. i think i can apply a couple of them to future projects.
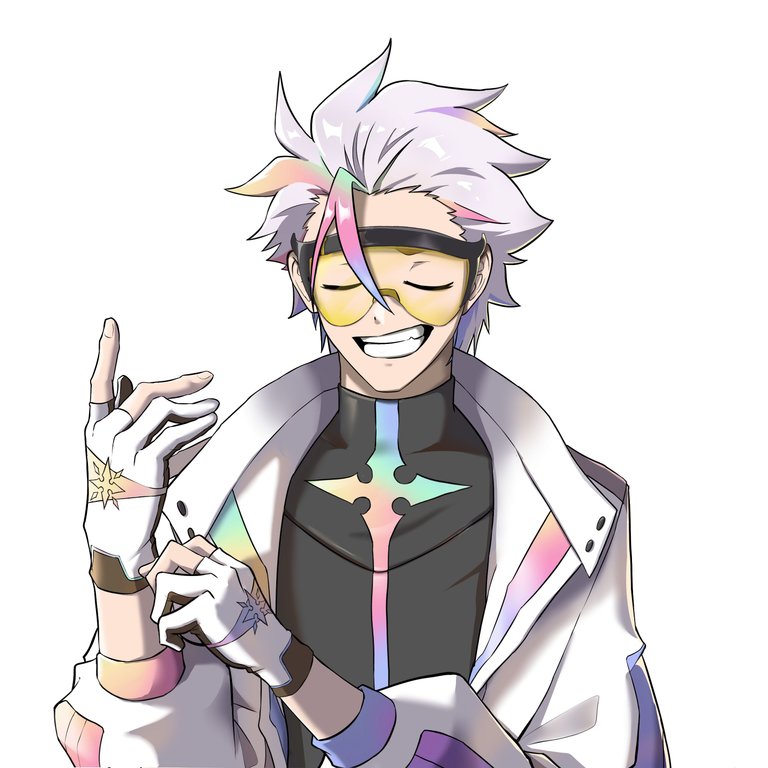
something i wanted to mention before i leave is that this and the last illustrations have some relation between them, i think they will serve me as a base idea for a future manga project, i'm also trying to convince a friend to join that idea XD maybe we'll achieve something. .. I'll be informing you about that.
now it's your turn, tell me what you think? I'll be reading them in the comment box.
until a new opportunity, see you cowboys!
Amigos llegamos al final, que les parecio? aun sigo practicando este tipo de cosas. creo que puedo aplicar un par de ellas a futuros proyectos.
algo que queria mencionarles antes de irme es que esta al igual que las ultimas ilustraciones tienen cierta relacion entre si creo que me serviran como base de idea para un futuro proyecto manga, tambien estoy tratando de convencer a un amigo que se una a esa idea XD tal vez logremos algo... les estare informando sobre eso.
ahora el turno es para ti, cuentame que te a parecido ? los estare leyendo en la caja de comentario.
hasta una nueva oportunidad, Nos vemos vaqueros!
Tools:
- CLIP STUDIO
- Inspiroy H640 Pen Tablets
- Corel PHOTO-PAINT 2019
- www.deepl.com/translator

Sometimes we just need to try new things. We never can tell what the outcome maybe but it’s worth giving a shot just like this fanart of yours. Great work friend, well done.
selected by @ibbtammy
Ahhhh 😍 The best hairstyle for Light Healer! You did great on the glow effect!
!PIZZA
$PIZZA slices delivered:
@jijisaurart(1/10) tipped @sephiwolf
Come get MOONed!