Un homenaje a la naturaleza: Manualidad de flores con abejas 🐝 🐝🌸🌺 [esp/eng]
Saludos queridos amigos de DIYHUB, es un placer estar por acá compartiendo con ustedes parte de mis manualidades, en esta oportunidad quiero hacer mi primera participación para el concurso del mes de agosto:
Intern. Honeybee Day 🐝 🐝🌸🌺
Cuando pensamos en abejas, lo primero que nos viene a la mente es la dulce miel 🍯, pero si pensamos un poco, estos pequeños insectos voladores son mucho más que simples productoras de miel. las abejas son arquitectas, y sobre todo, guardianas vitales de nuestro planeta.
Su rol en la polinización es fundamental para la vida, asegurando la existencia de innumerables plantas y cultivos que alimentan tanto a animales como a nosotros, los humanos, y es por eso que sentí la motivación de hacer unas lindas flores con abejas simbolizando el momento de la polinización, ven y te comparto el paso a paso:
Greetings, dear friends of DIYHUB, it's a pleasure to be here sharing some of my crafts with you. This time, I want to make my first entry for the August contest.
Intern. Honeybee Day 🐝 🐝🌸🌺
When we think of bees, the first thing that comes to mind is sweet honey 🍯, but if we think about it for a moment, these tiny flying insects are much more than just honey producers. Bees are architects, and above all, vital guardians of our planet.
Their role in pollination is fundamental to life, ensuring the existence of countless plants and crops that feed both animals and us humans. That's why I felt motivated to make some beautiful flowers with bees symbolizing the moment of pollination. Come and I'll share the step-by-step instructions with you:
MATERIALES
MATERIALS
Llevo un buen tiempo viendo la elaboración de las flores eternas y nunca me había atrevido a hacer algunas, hace un tiempo compré algunas cintas y las guardé con la esperanza de algún día poder hacer mis propias flores eternas, y hoy les ha llegado su momento, Para la elaboración de estas flores vamos a utilizar cinta de Razo de dos tonos de color diferente, el proceso para hacerlas ya lo he visto en muchas partes tanto en videos de TikTok, como en Pinterest y también aquí en la plataforma de Hive, por supuesto a estas flores le voy a colocar mi toque personal, también me gustó la idea de hacer este tipo de flor para colocarlas como decoración en mi hogar y lucirlas en la mesita de mi sala, aquí te dejo la lista de materiales a utilizar:
- Cinta de Razo de dos colores de 5 cm de ancho
- Silicon
- Tijera
- Cinta métrica
- encendedor
- Vela
- palitos de altura
- foami
I've been watching the creation of eternal flowers for a while now, but I've never dared to try my hand at making one. A while back, I bought some ribbons and saved them in the hope of one day being able to make my own eternal flowers, and today their time has come. To make these flowers, we're going to use satin ribbon in two different colors. I've seen the process for making them many times over, both in TikTok videos and on Pinterest, and also here on the Hive platform. Of course, I'm going to add my personal touch to these flowers. I also liked the idea of making this type of flower to use as decoration in my home and display them on my living room table. Here's the list of materials you'll need:
- 5cm wide two-color satin ribbon
- Silicone
- Scissors
- Measuring tape
- Lighter
- Candle
- Tall sticks
- Foam

PASO A PASO
STEP BY STEP
𝓟𝓐𝓢𝓞 1
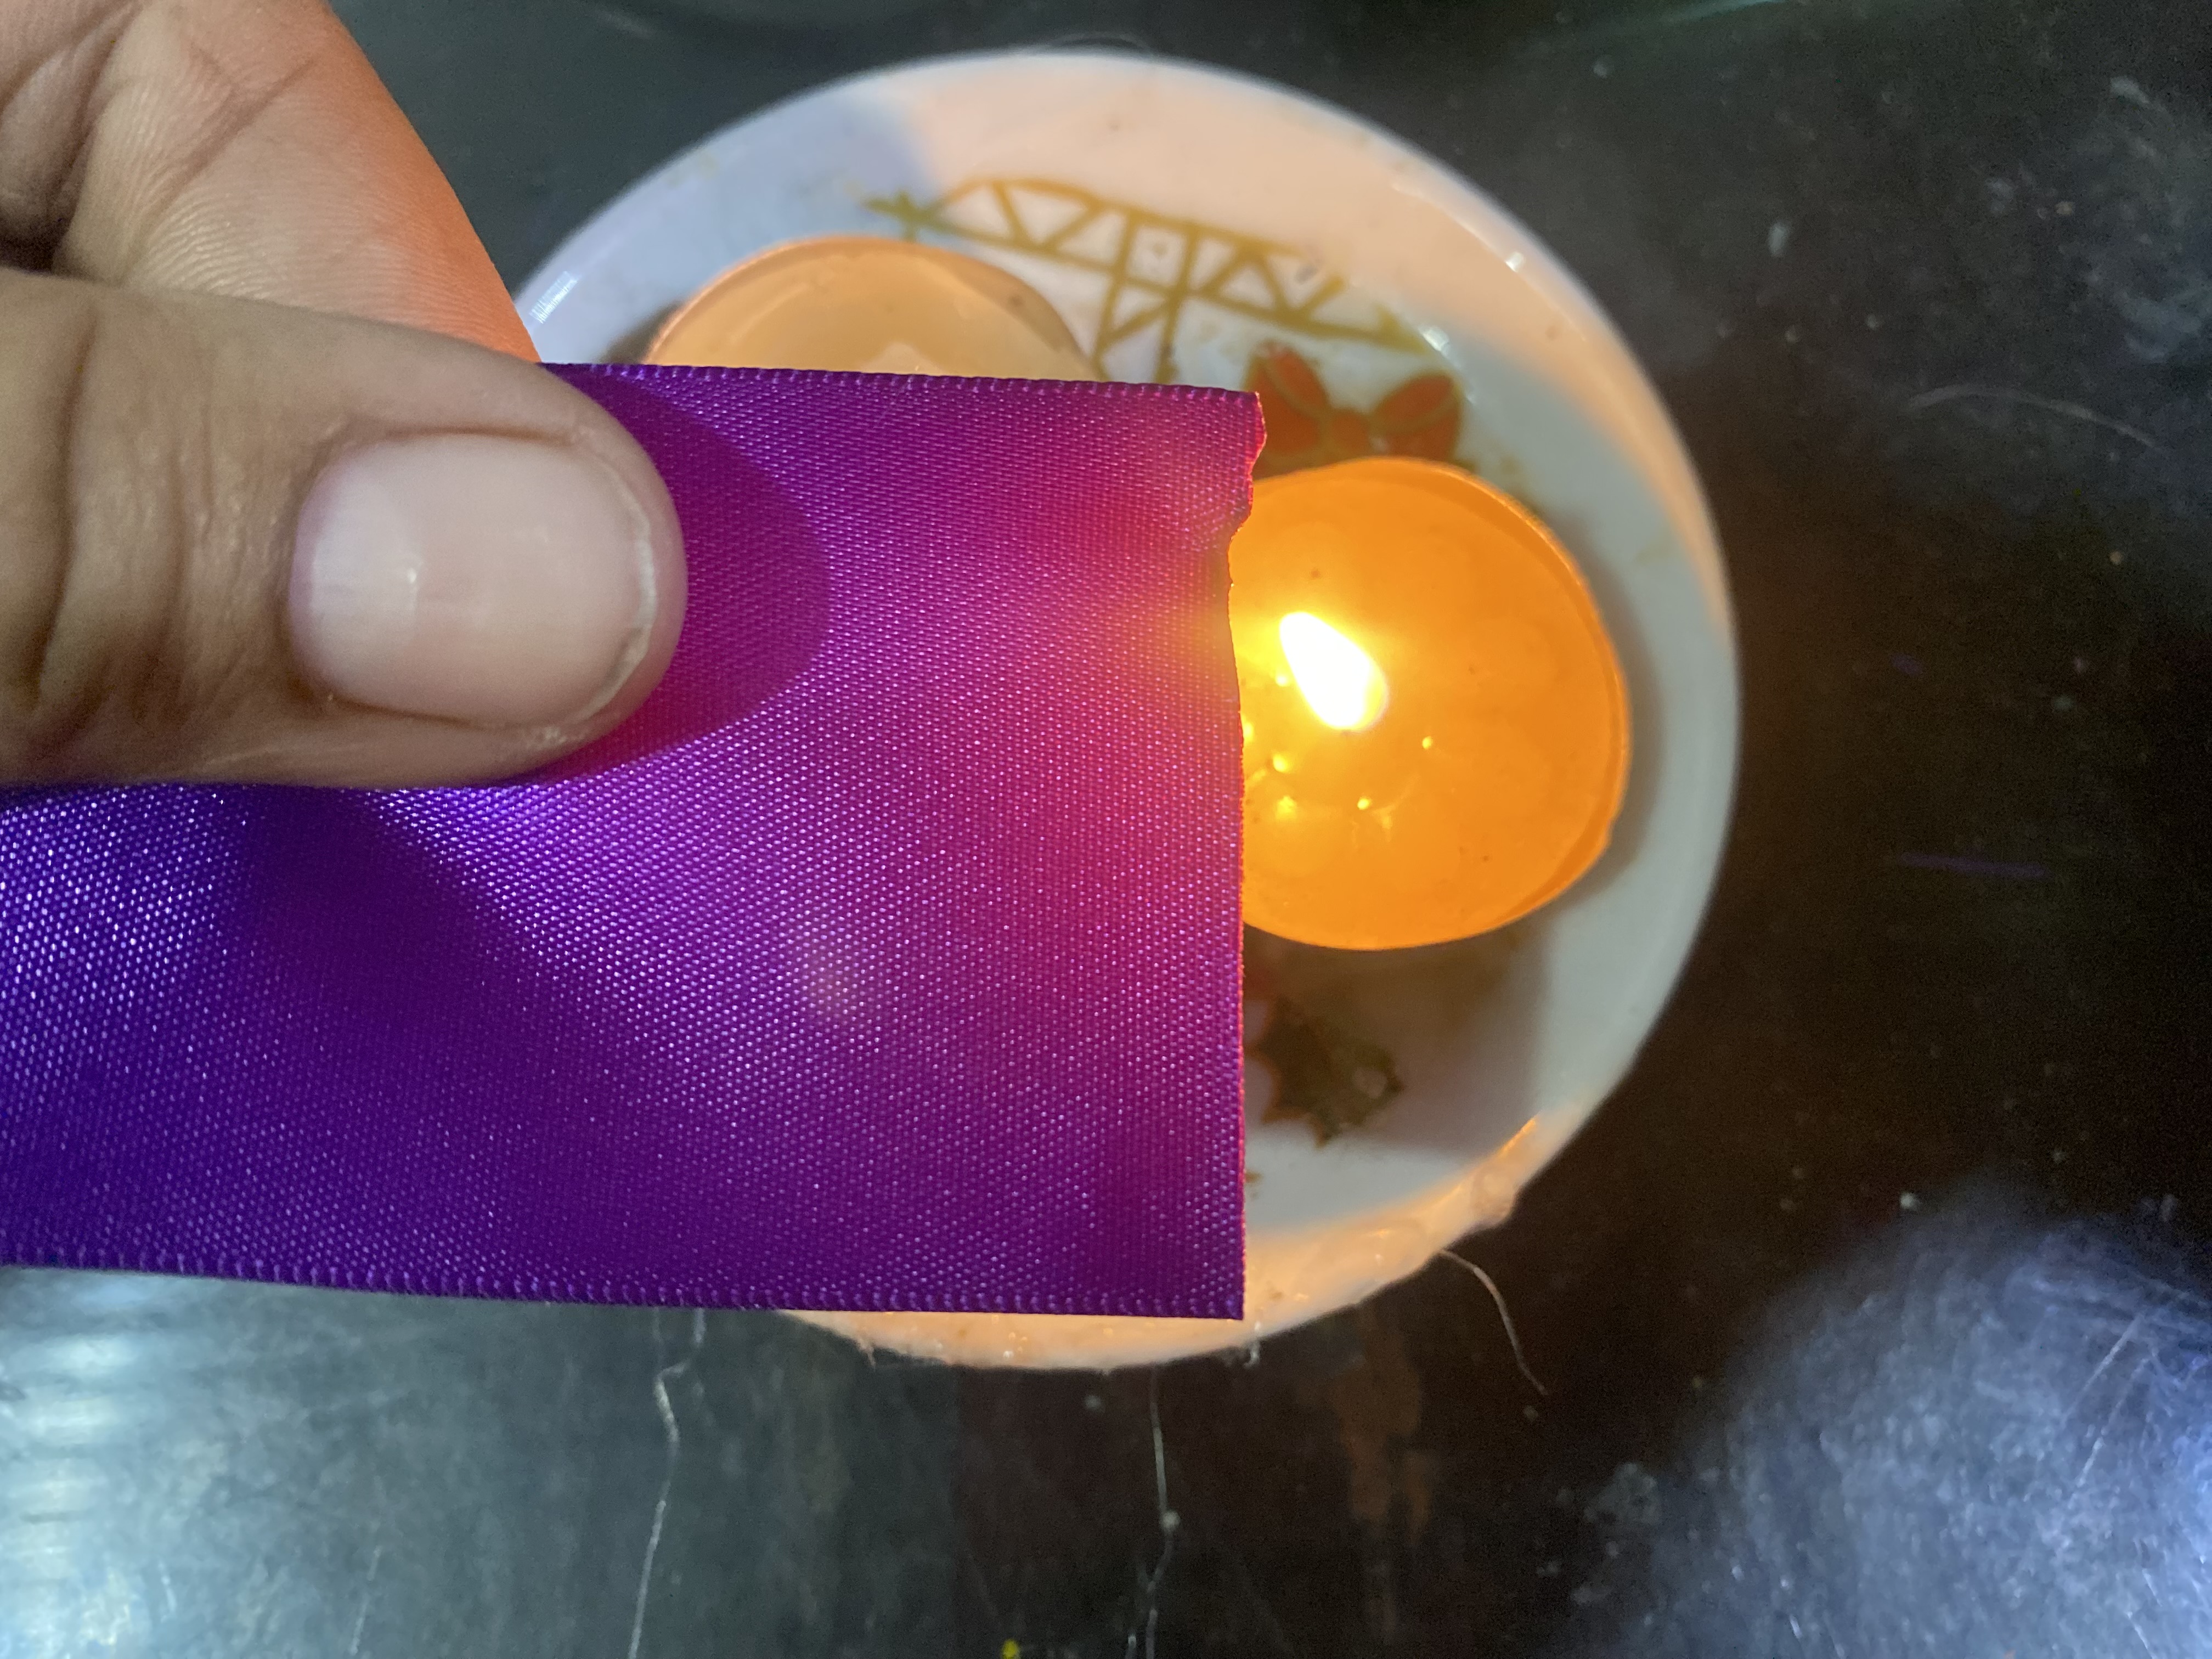
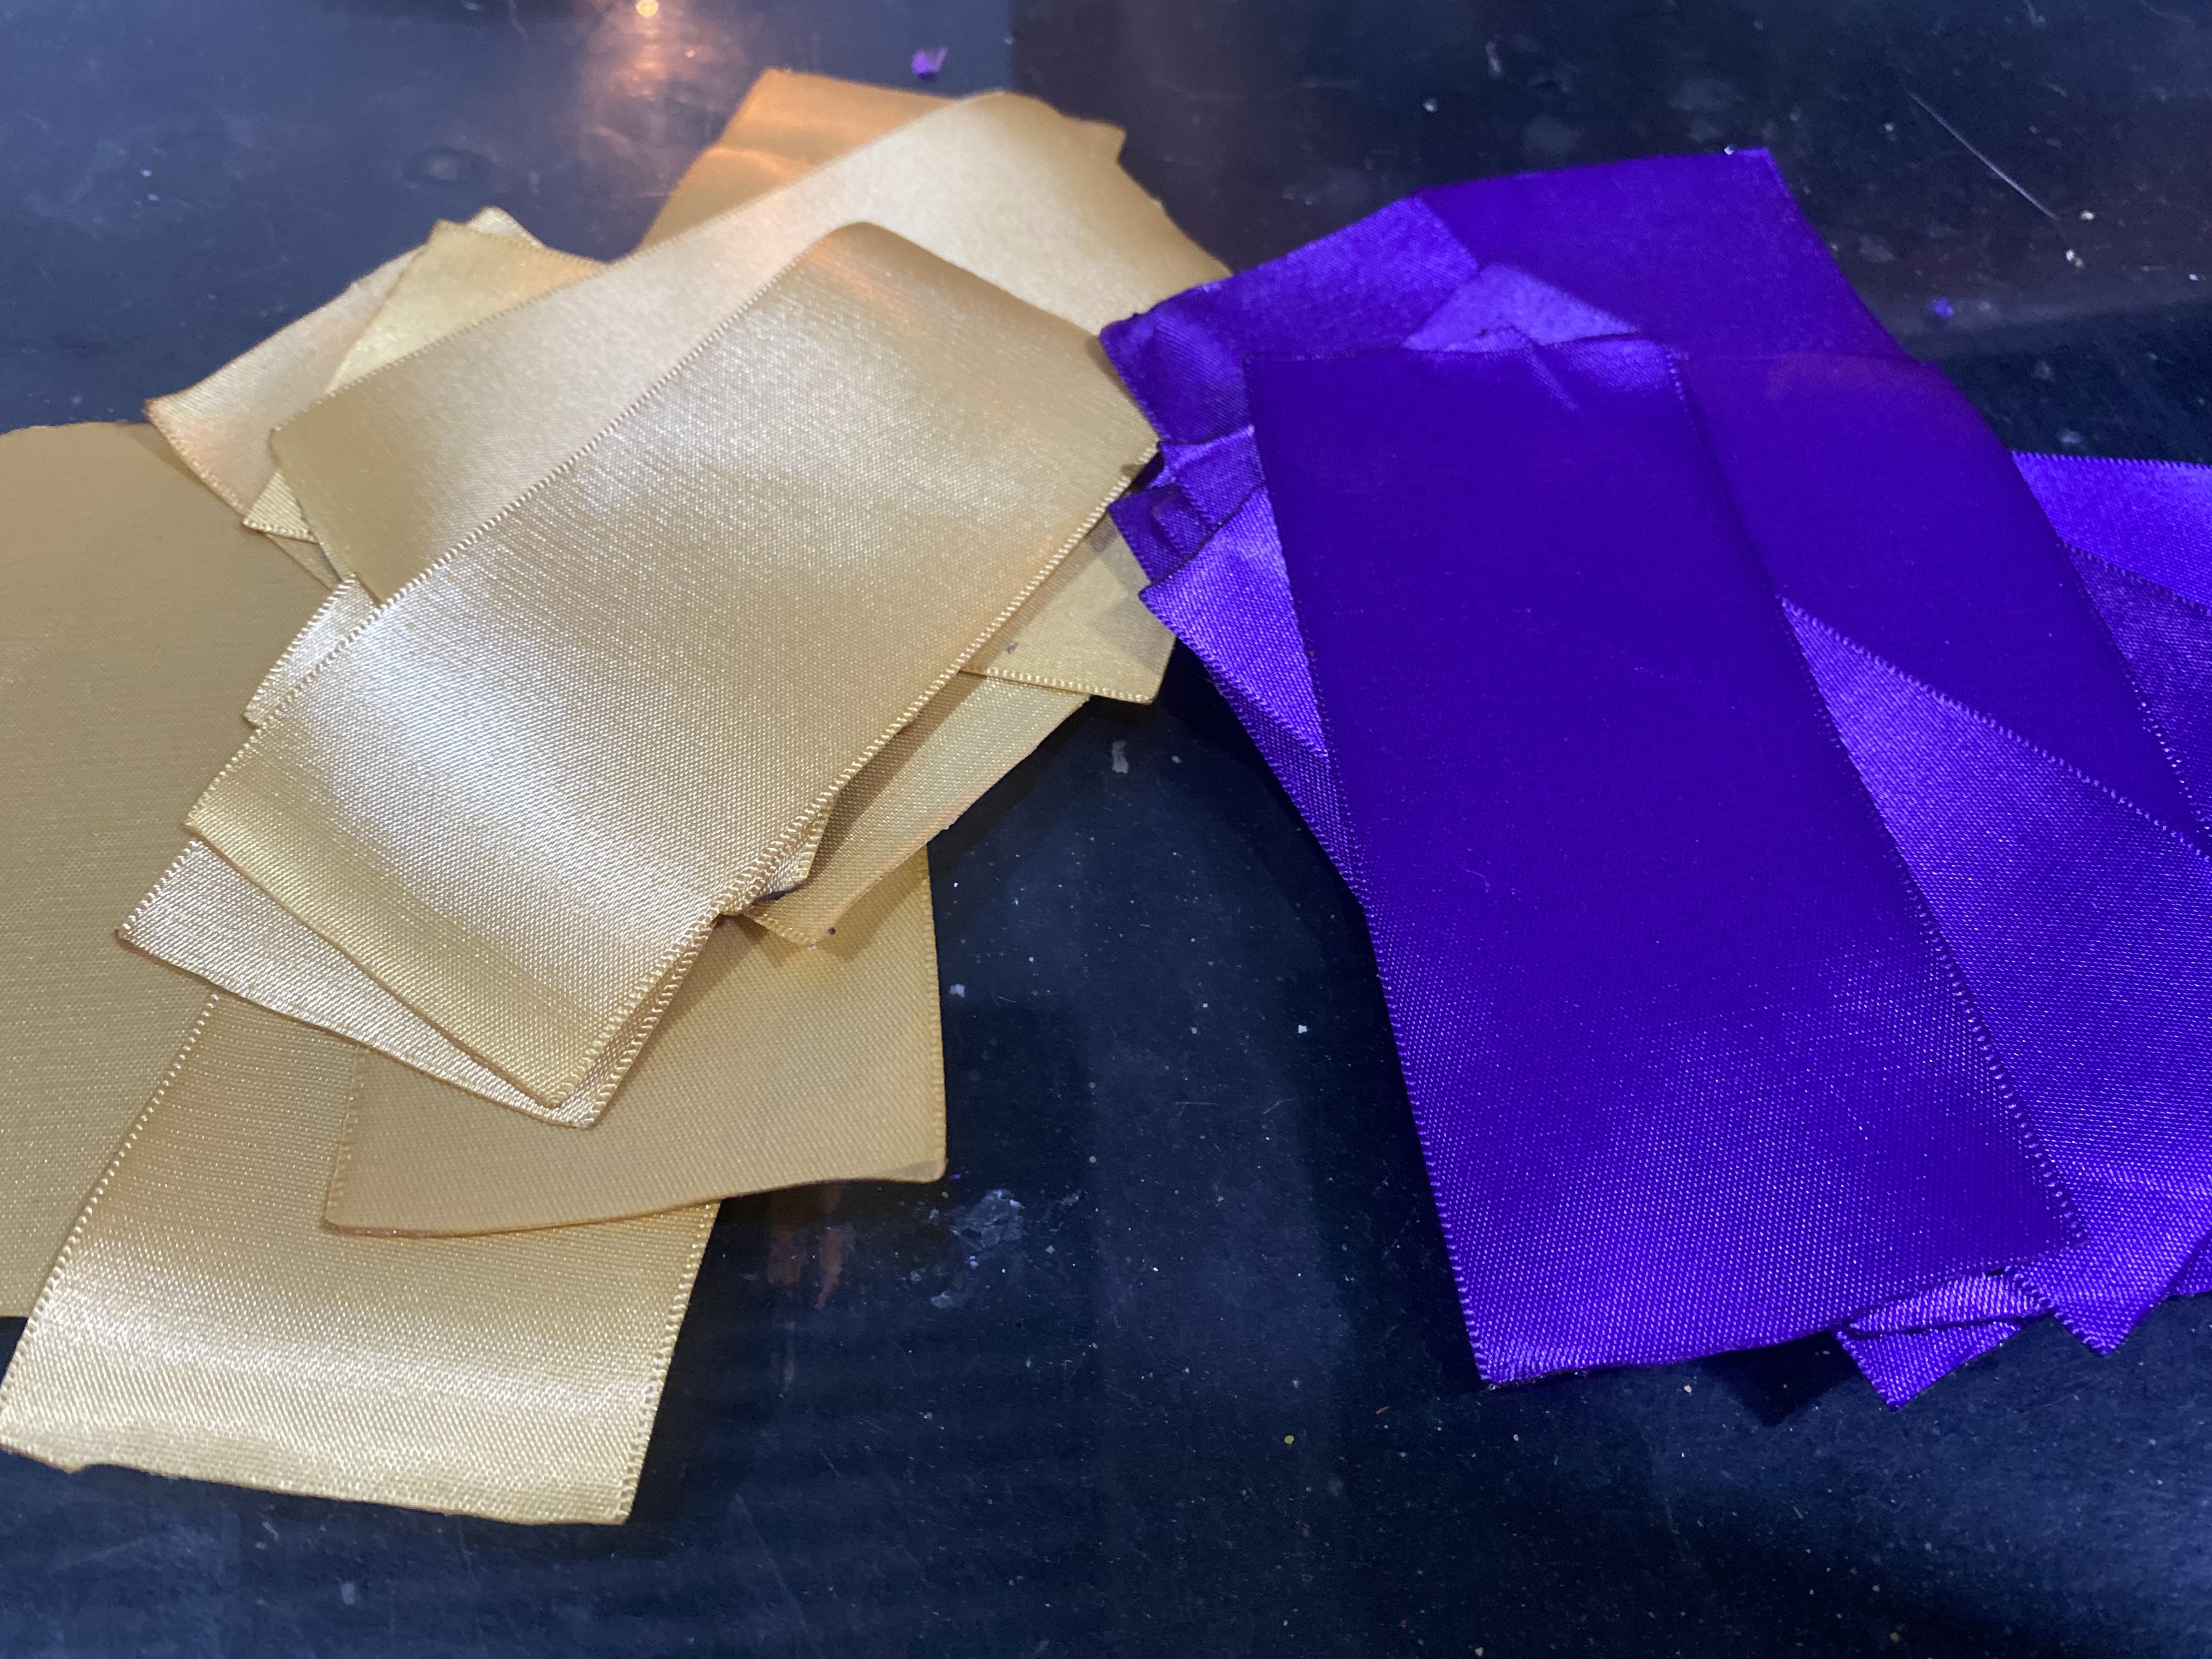
Para comenzar esta linda manualidad vamos a cortar la cinta para el tamaño adecuado para cada pétalo de la flor, la cortaremos al doble de su medida de ancho, en mi caso mi cinta mide 5 cm de ancho así que la cortaré 10 cm de largo, la cantidad de pétalos que va a llevar cada flor va a depender del gusto de cada quien en mi caso le voy a colocar 15 pétalos a cada una.
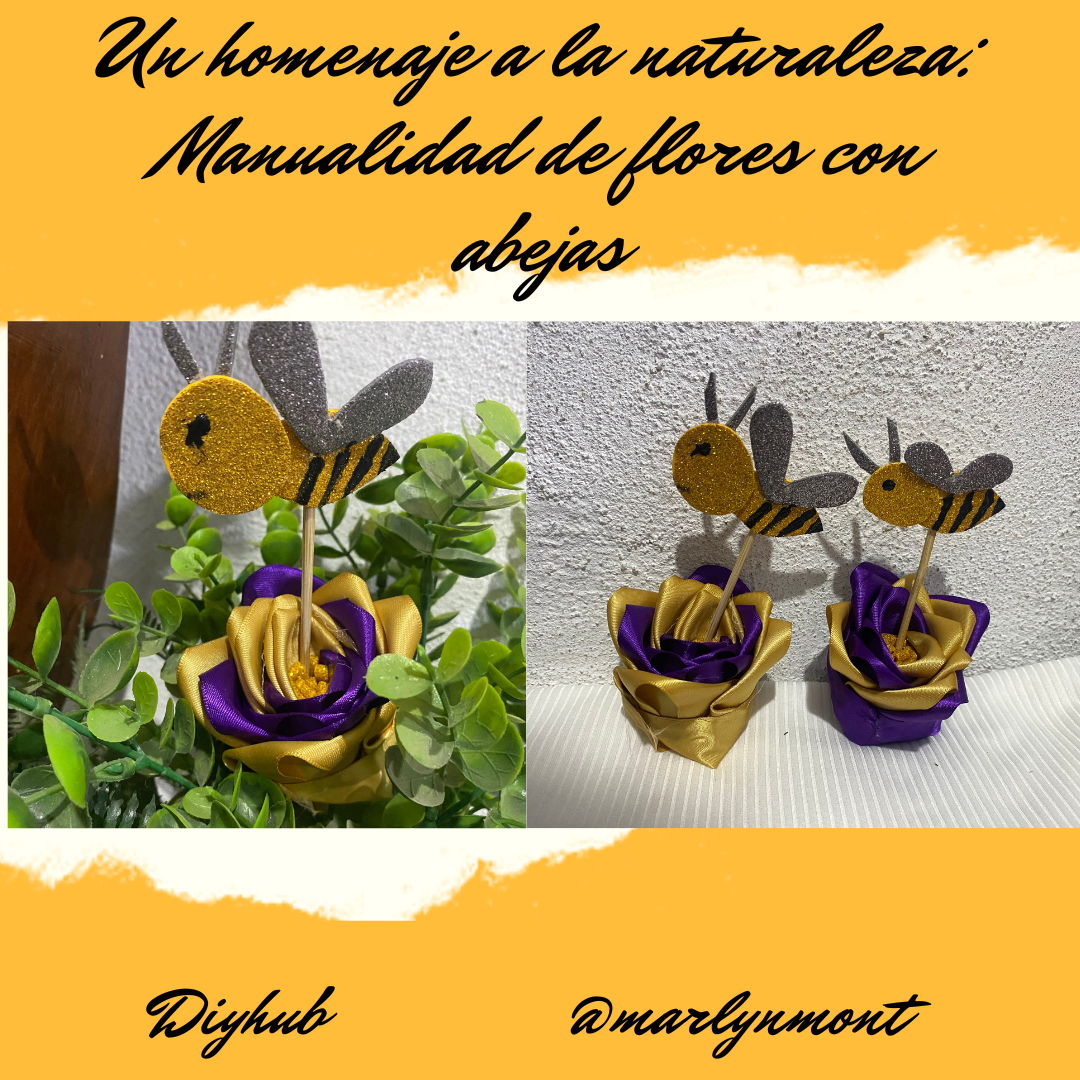
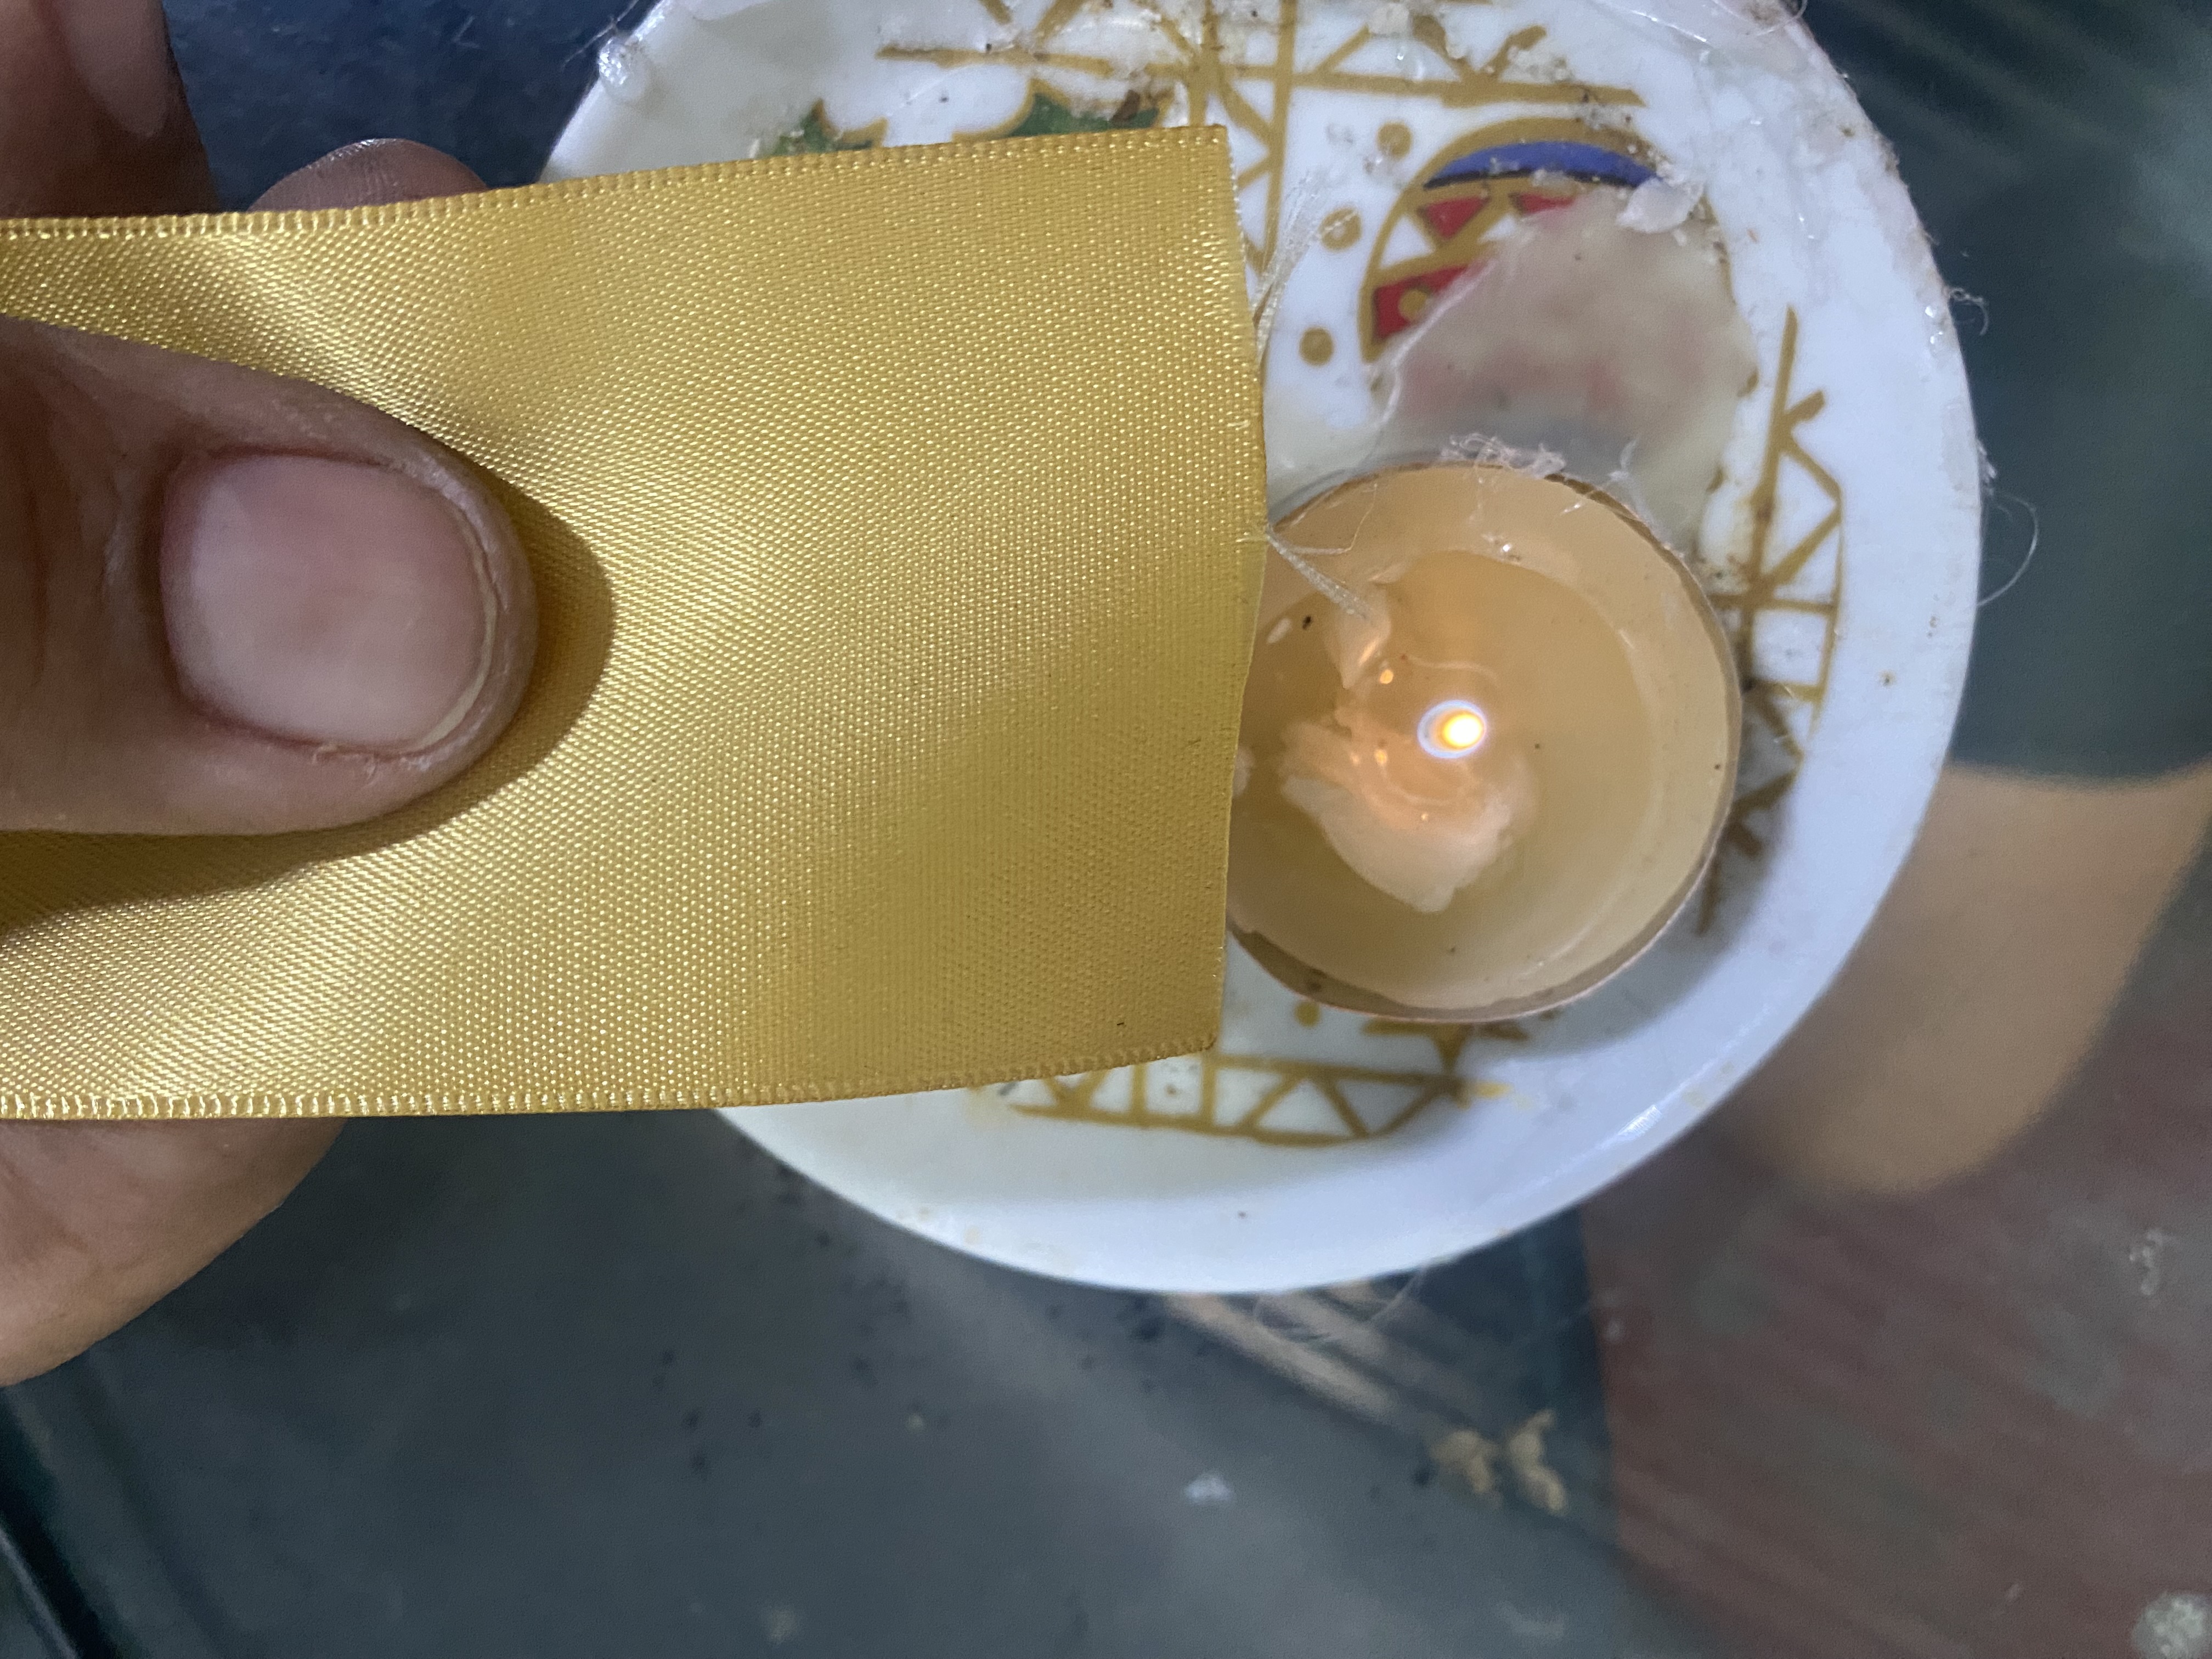
Una vez tengamos listos todos los cortes de cinta vamos a proceder a quemarlas en las orillas para evitar que se deshilache, yo conseguí un plato pequeño de vidrio allí coloqué una velita de esas que son pequeñas la encendí y fui pasando cada pieza de cinta por ambos lados para sellar bien.
To begin this lovely craft, we'll cut the ribbon to the appropriate size for each flower petal. We'll cut it to twice its width. In my case, my ribbon was 5 cm wide, so I'll cut it 10 cm long. The number of petals each flower will have will depend on each person's taste. In my case, I'll add 15 petals to each flower.
Once we have all the ribbon cuts ready, we'll proceed to burn the edges to prevent fraying. I got a small glass plate, placed one of those small candles there, lit it, and ran each piece of ribbon over both sides to seal it well.
 |  |
|---|---|
 |  |
𝓟𝓐𝓢𝓞 2
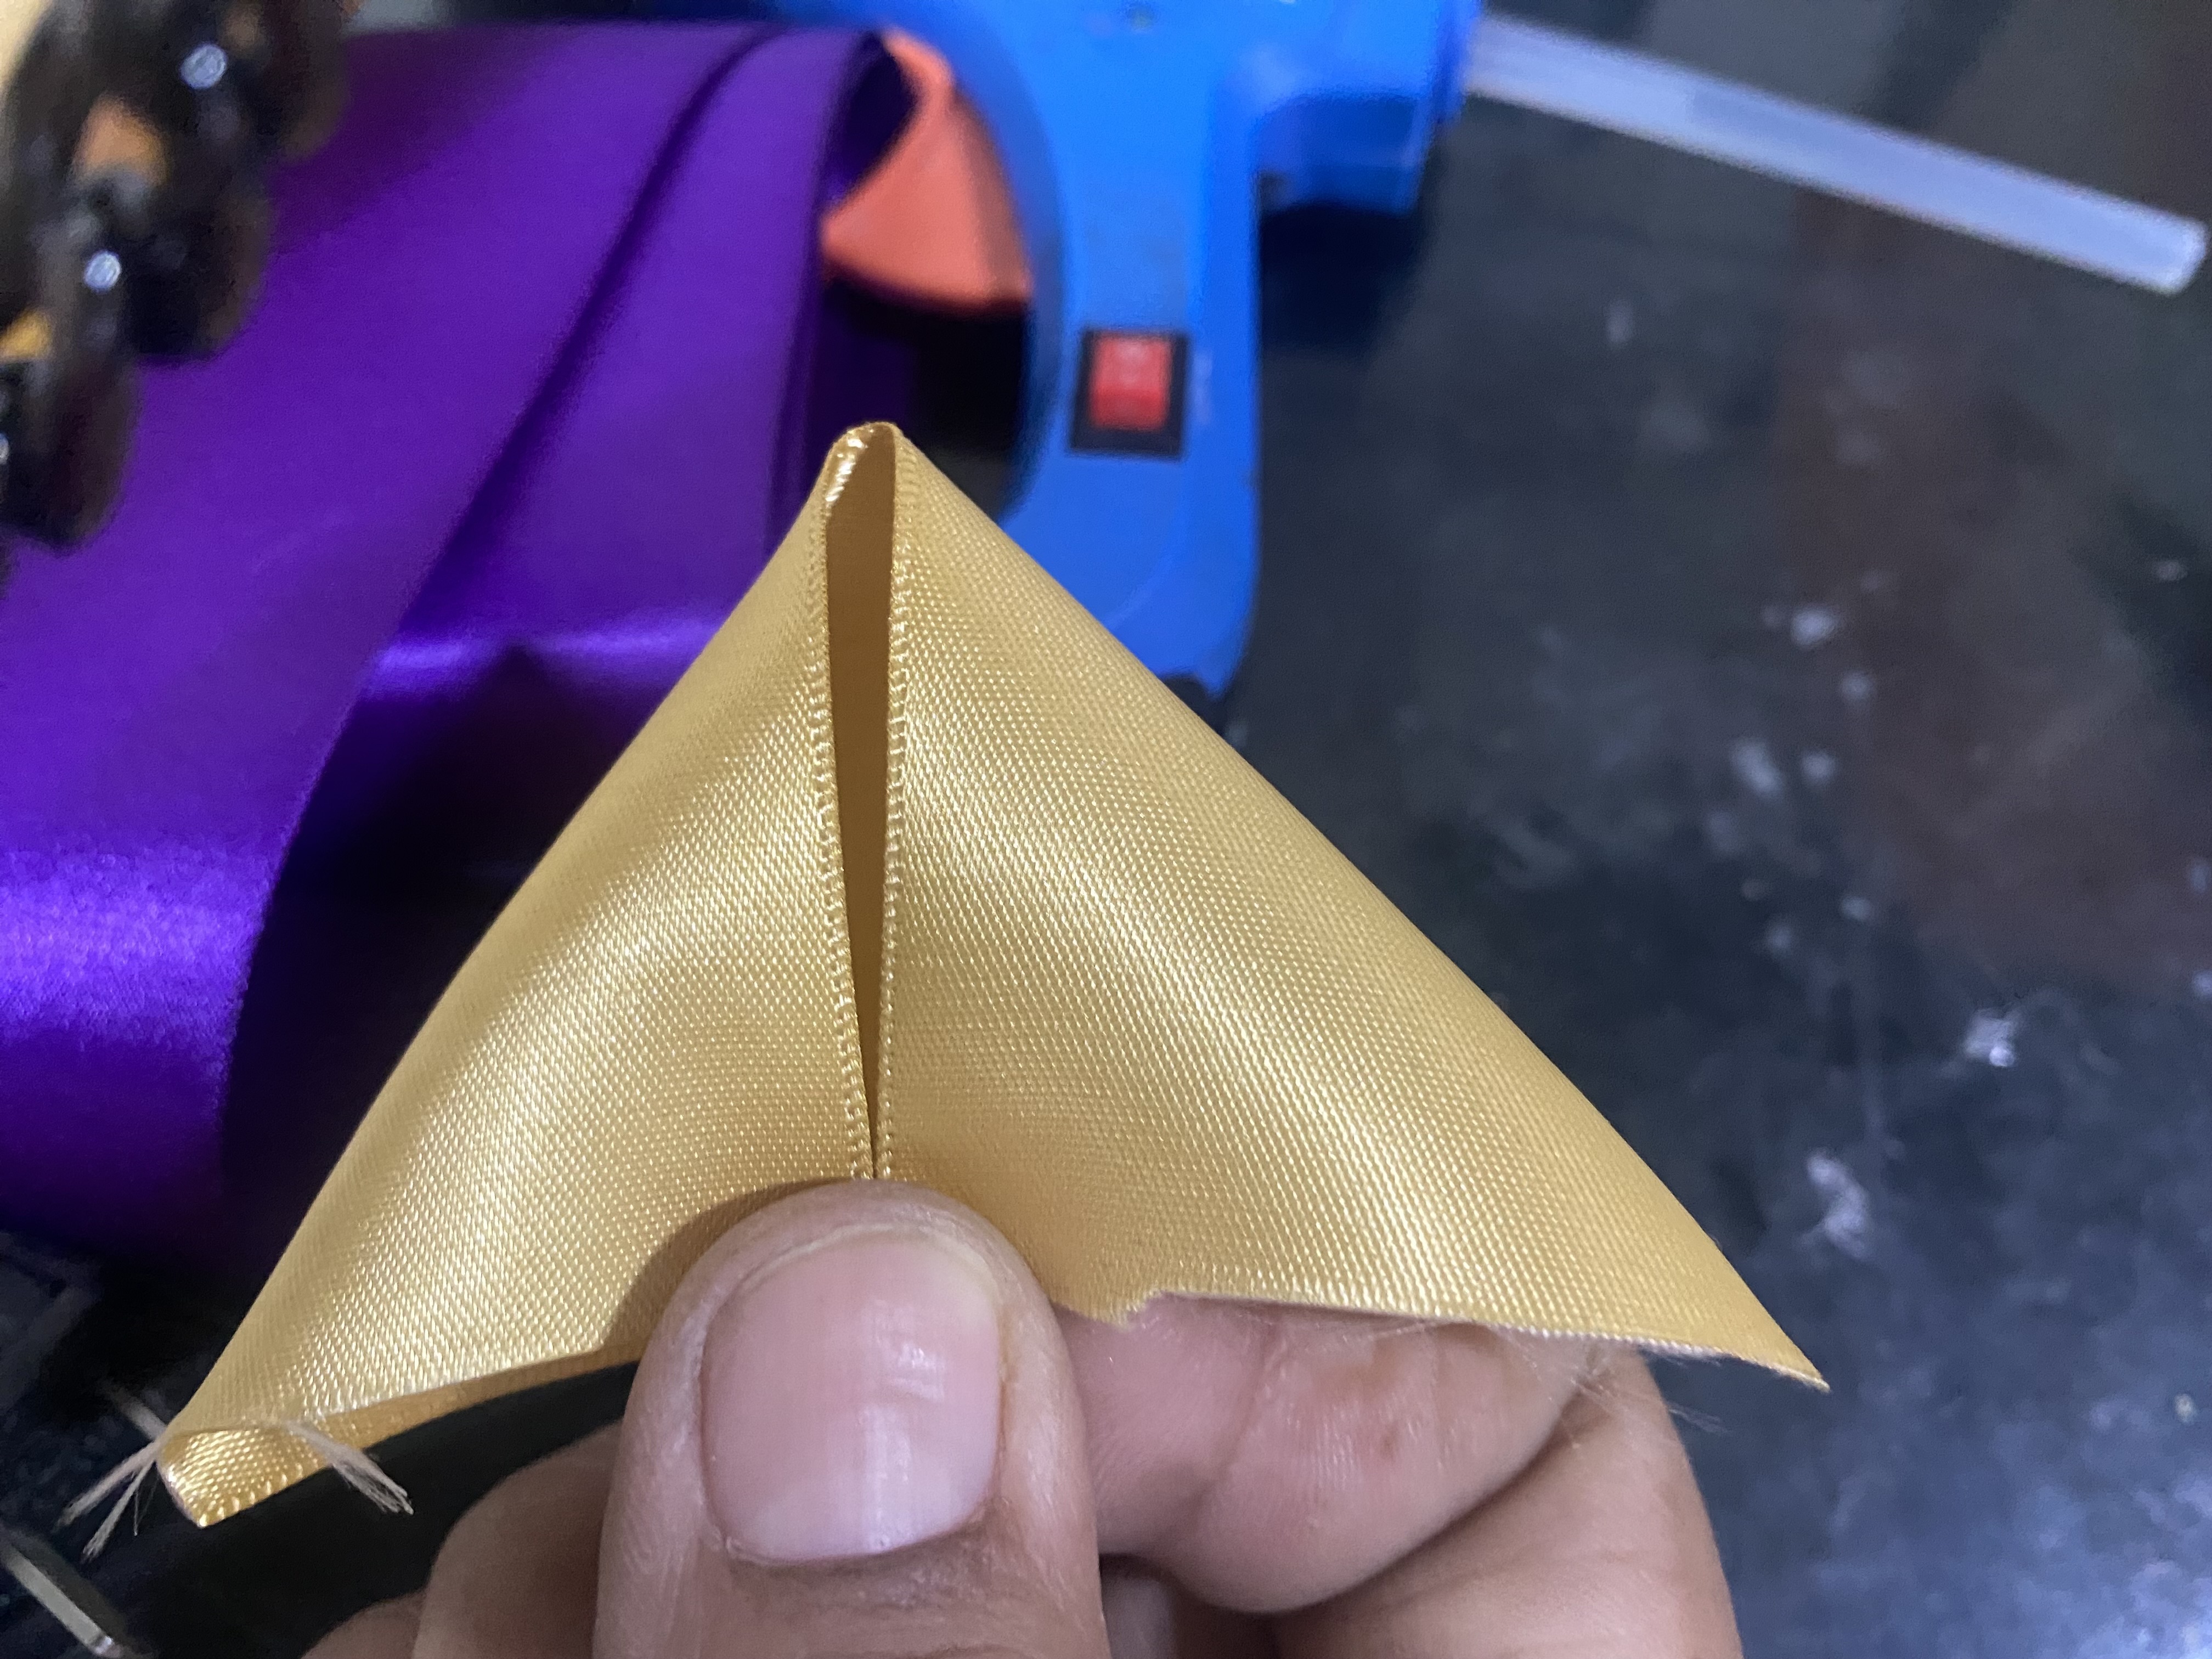
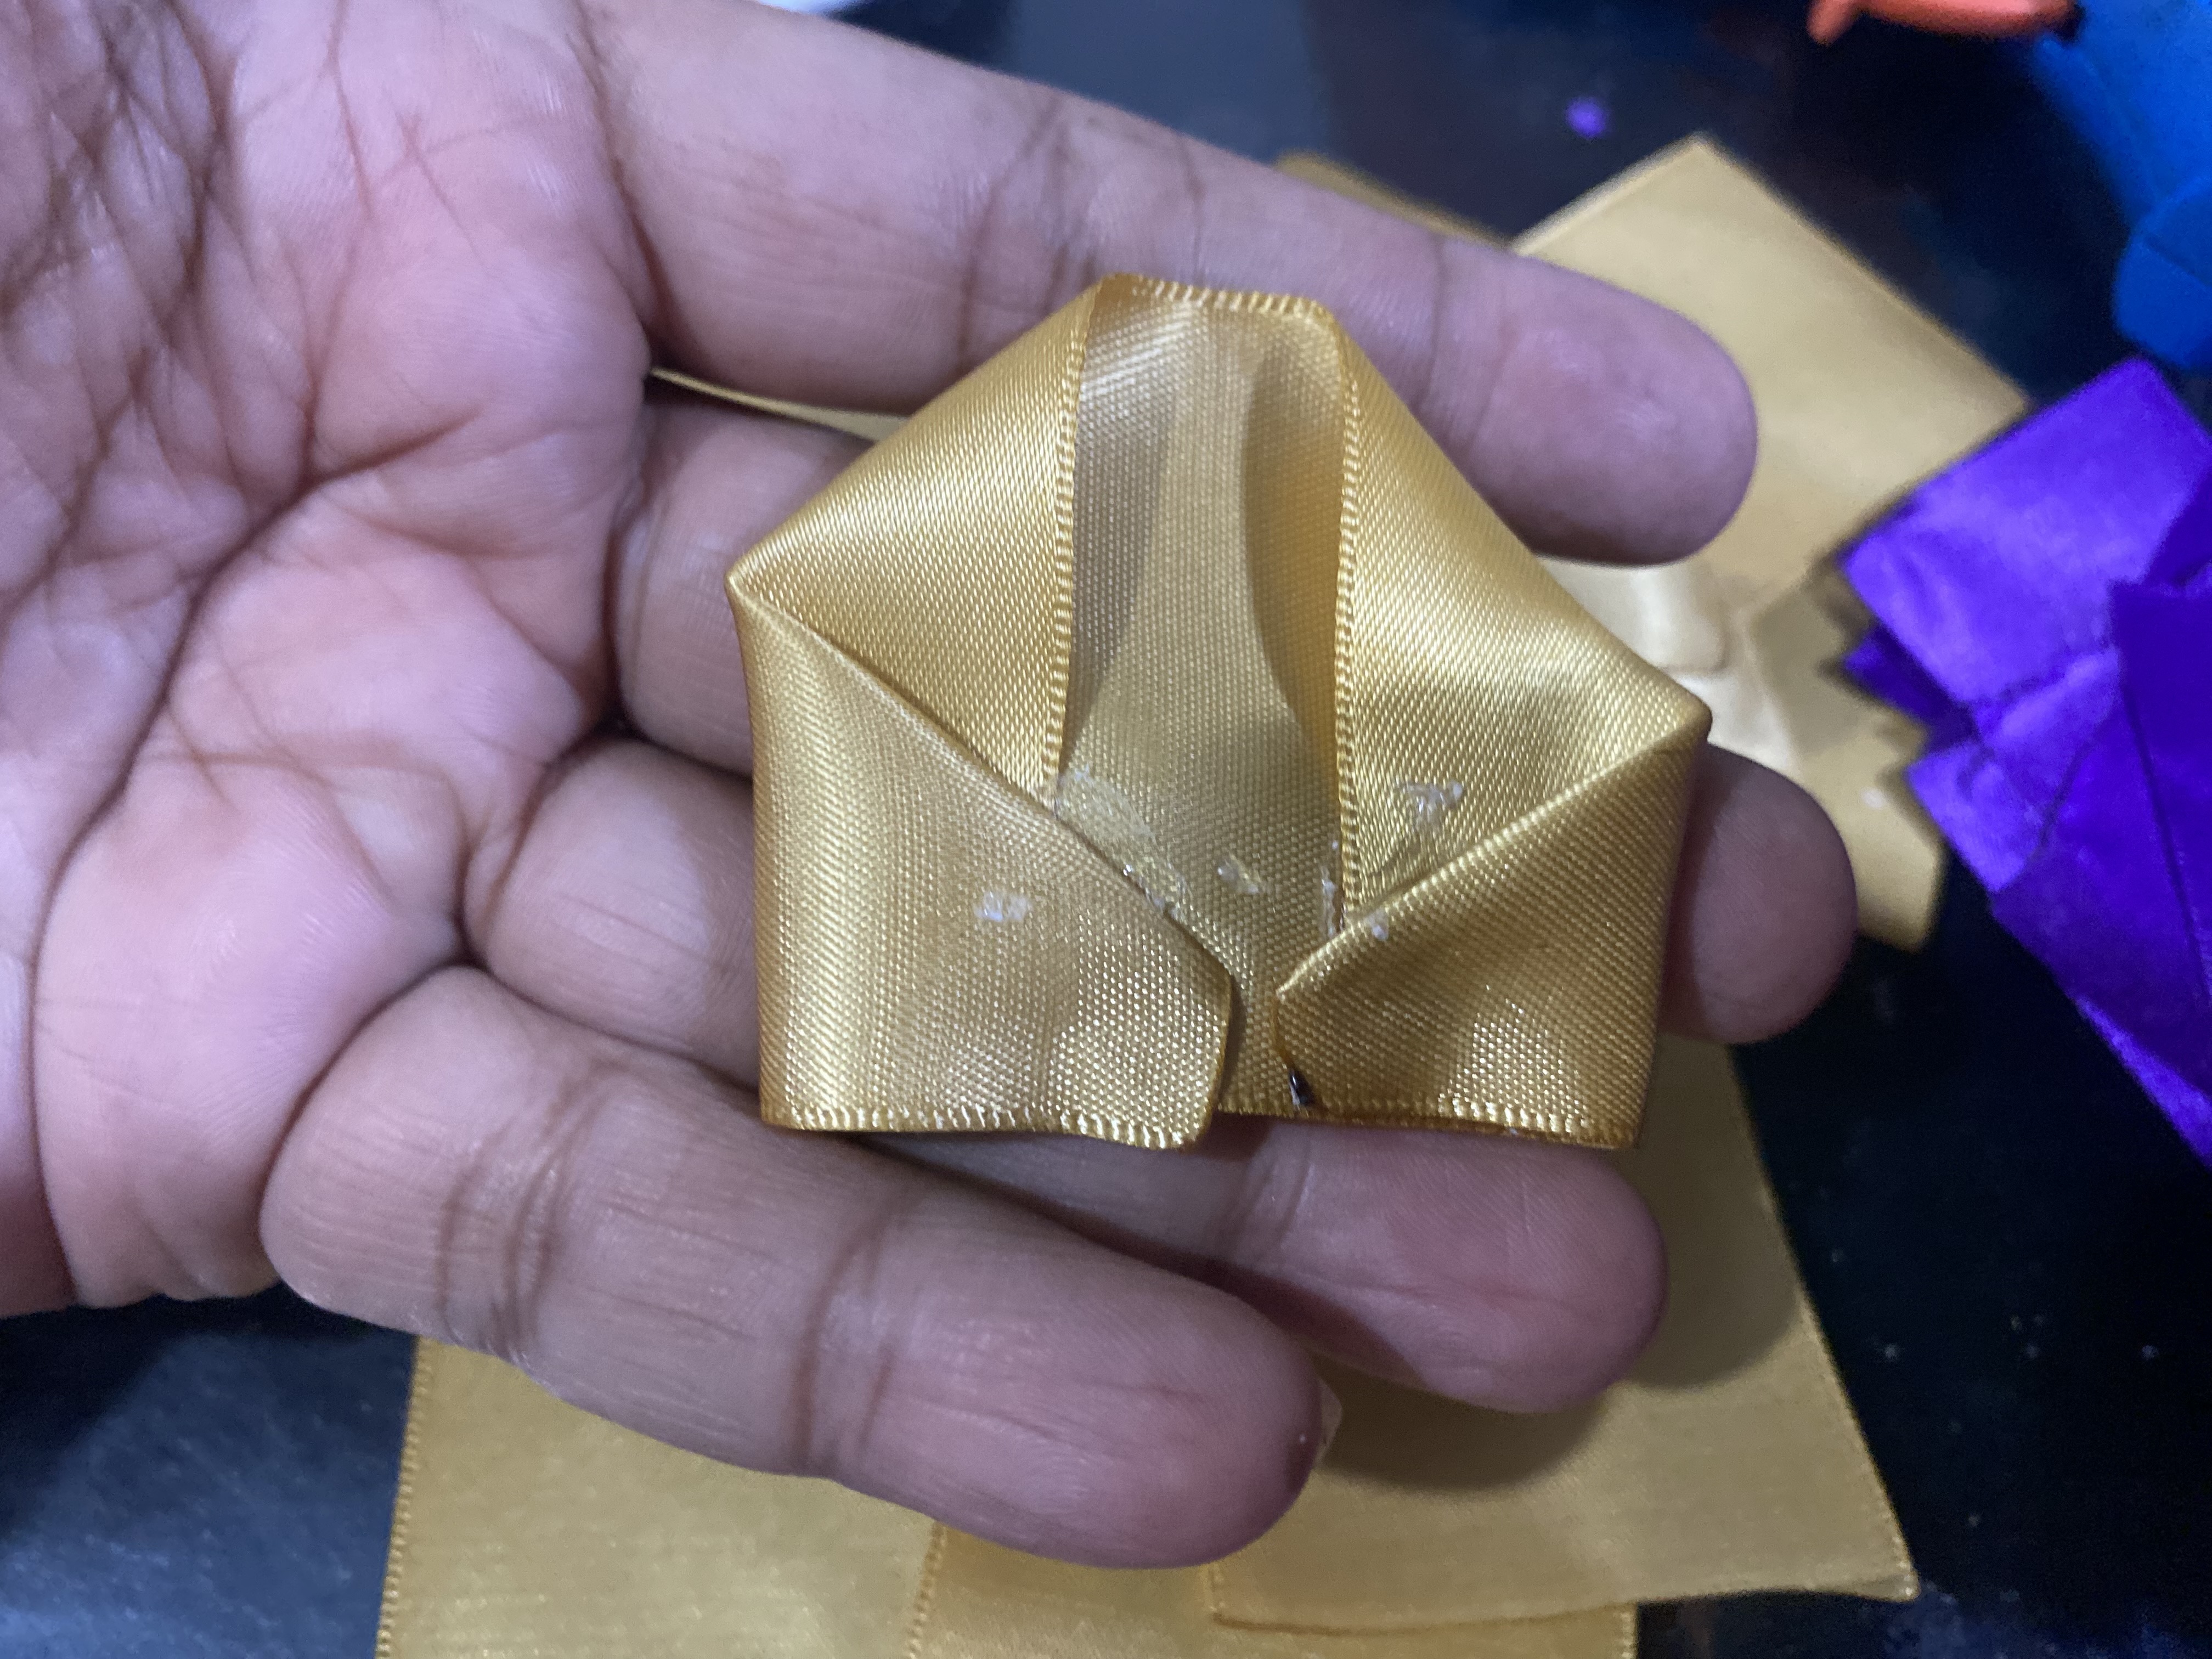
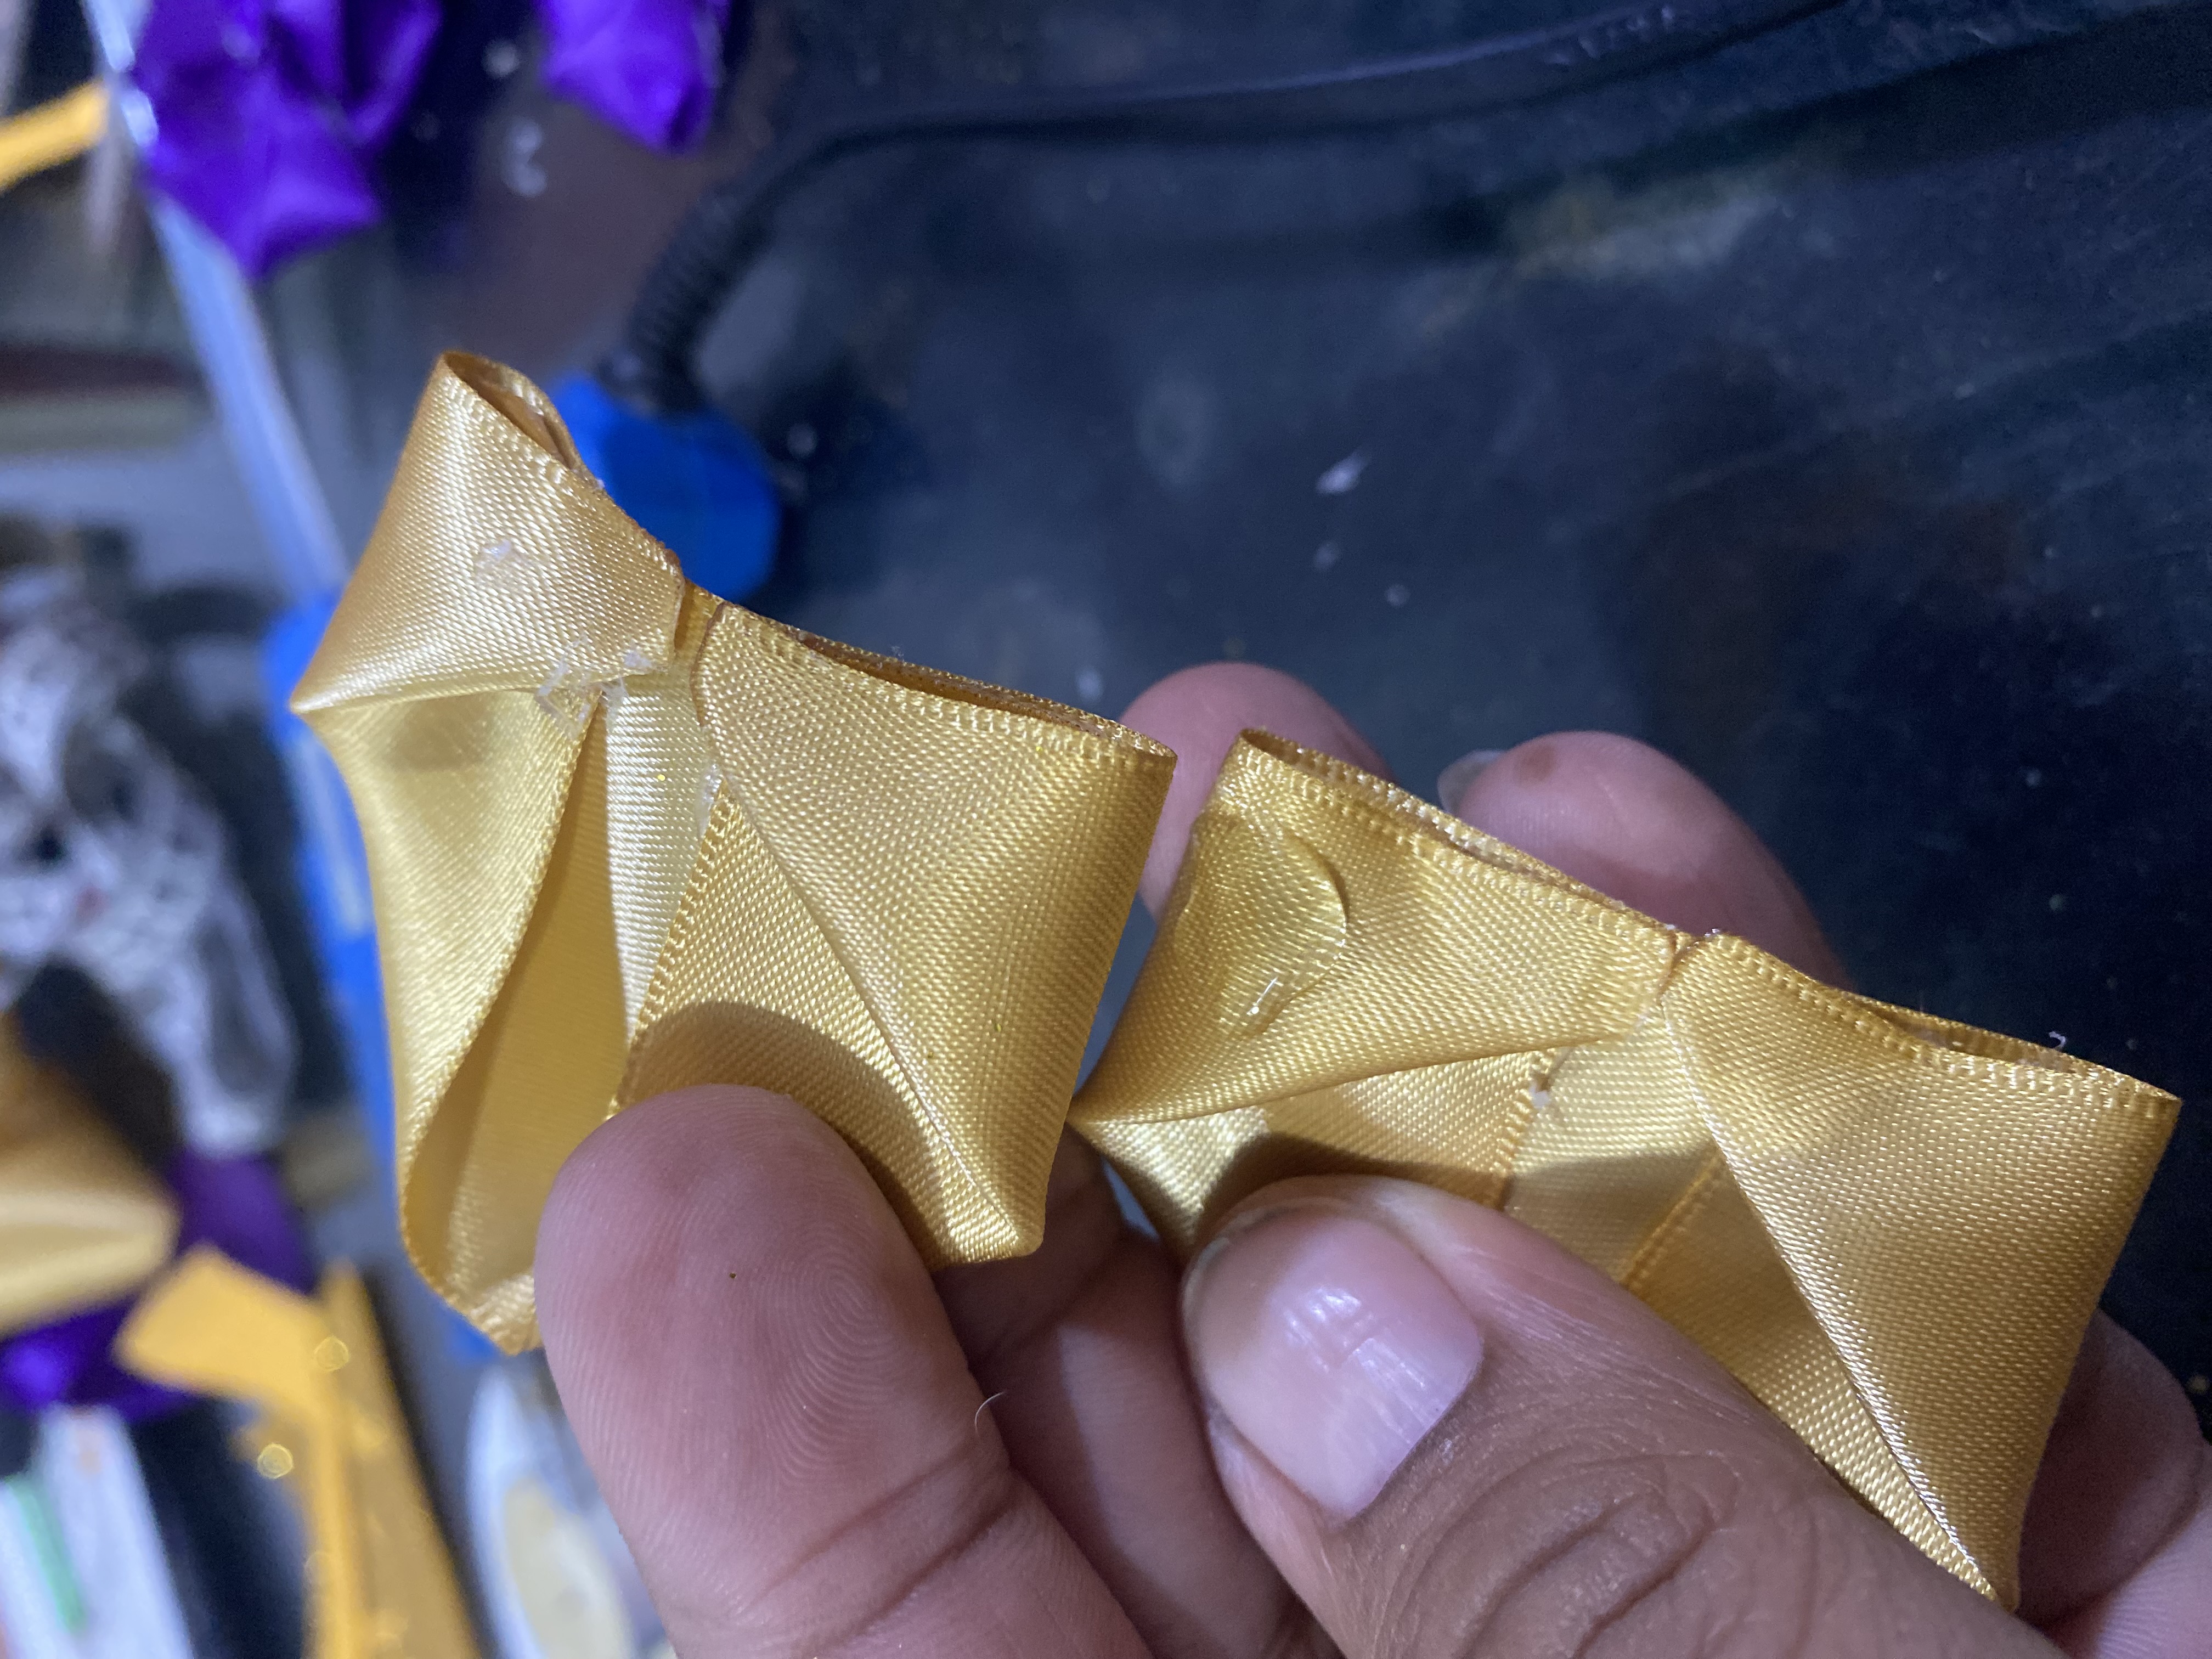
Para nuestro segundo paso vamos a comenzar a hacer los pétalos, vamos a poner un punto de Silicon en una de las esquinas superiores y vamos a doblar formando como un triángulo, el mismo procedimiento lo hacemos con la otra esquina superior, luego vamos a poner otro punto de Silicon en la punta que queda inferior y vamos a doblar hacia el centro, el mismo procedimiento lo hacemos con la otra punta inferior en mis imágenes les muestro cómo debe quedar.
For our second step we are going to start making the petals, we are going to put a dot of Silicon on one of the upper corners and we are going to fold it forming a triangle, we do the same procedure with the other upper corner, then we are going to put another dot of Silicon on the lower tip and we are going to fold it towards the center, we do the same procedure with the other lower tip in my images I show you how it should look.
 |  |
|---|---|
 |  |
𝓟𝓐𝓢𝓞 3
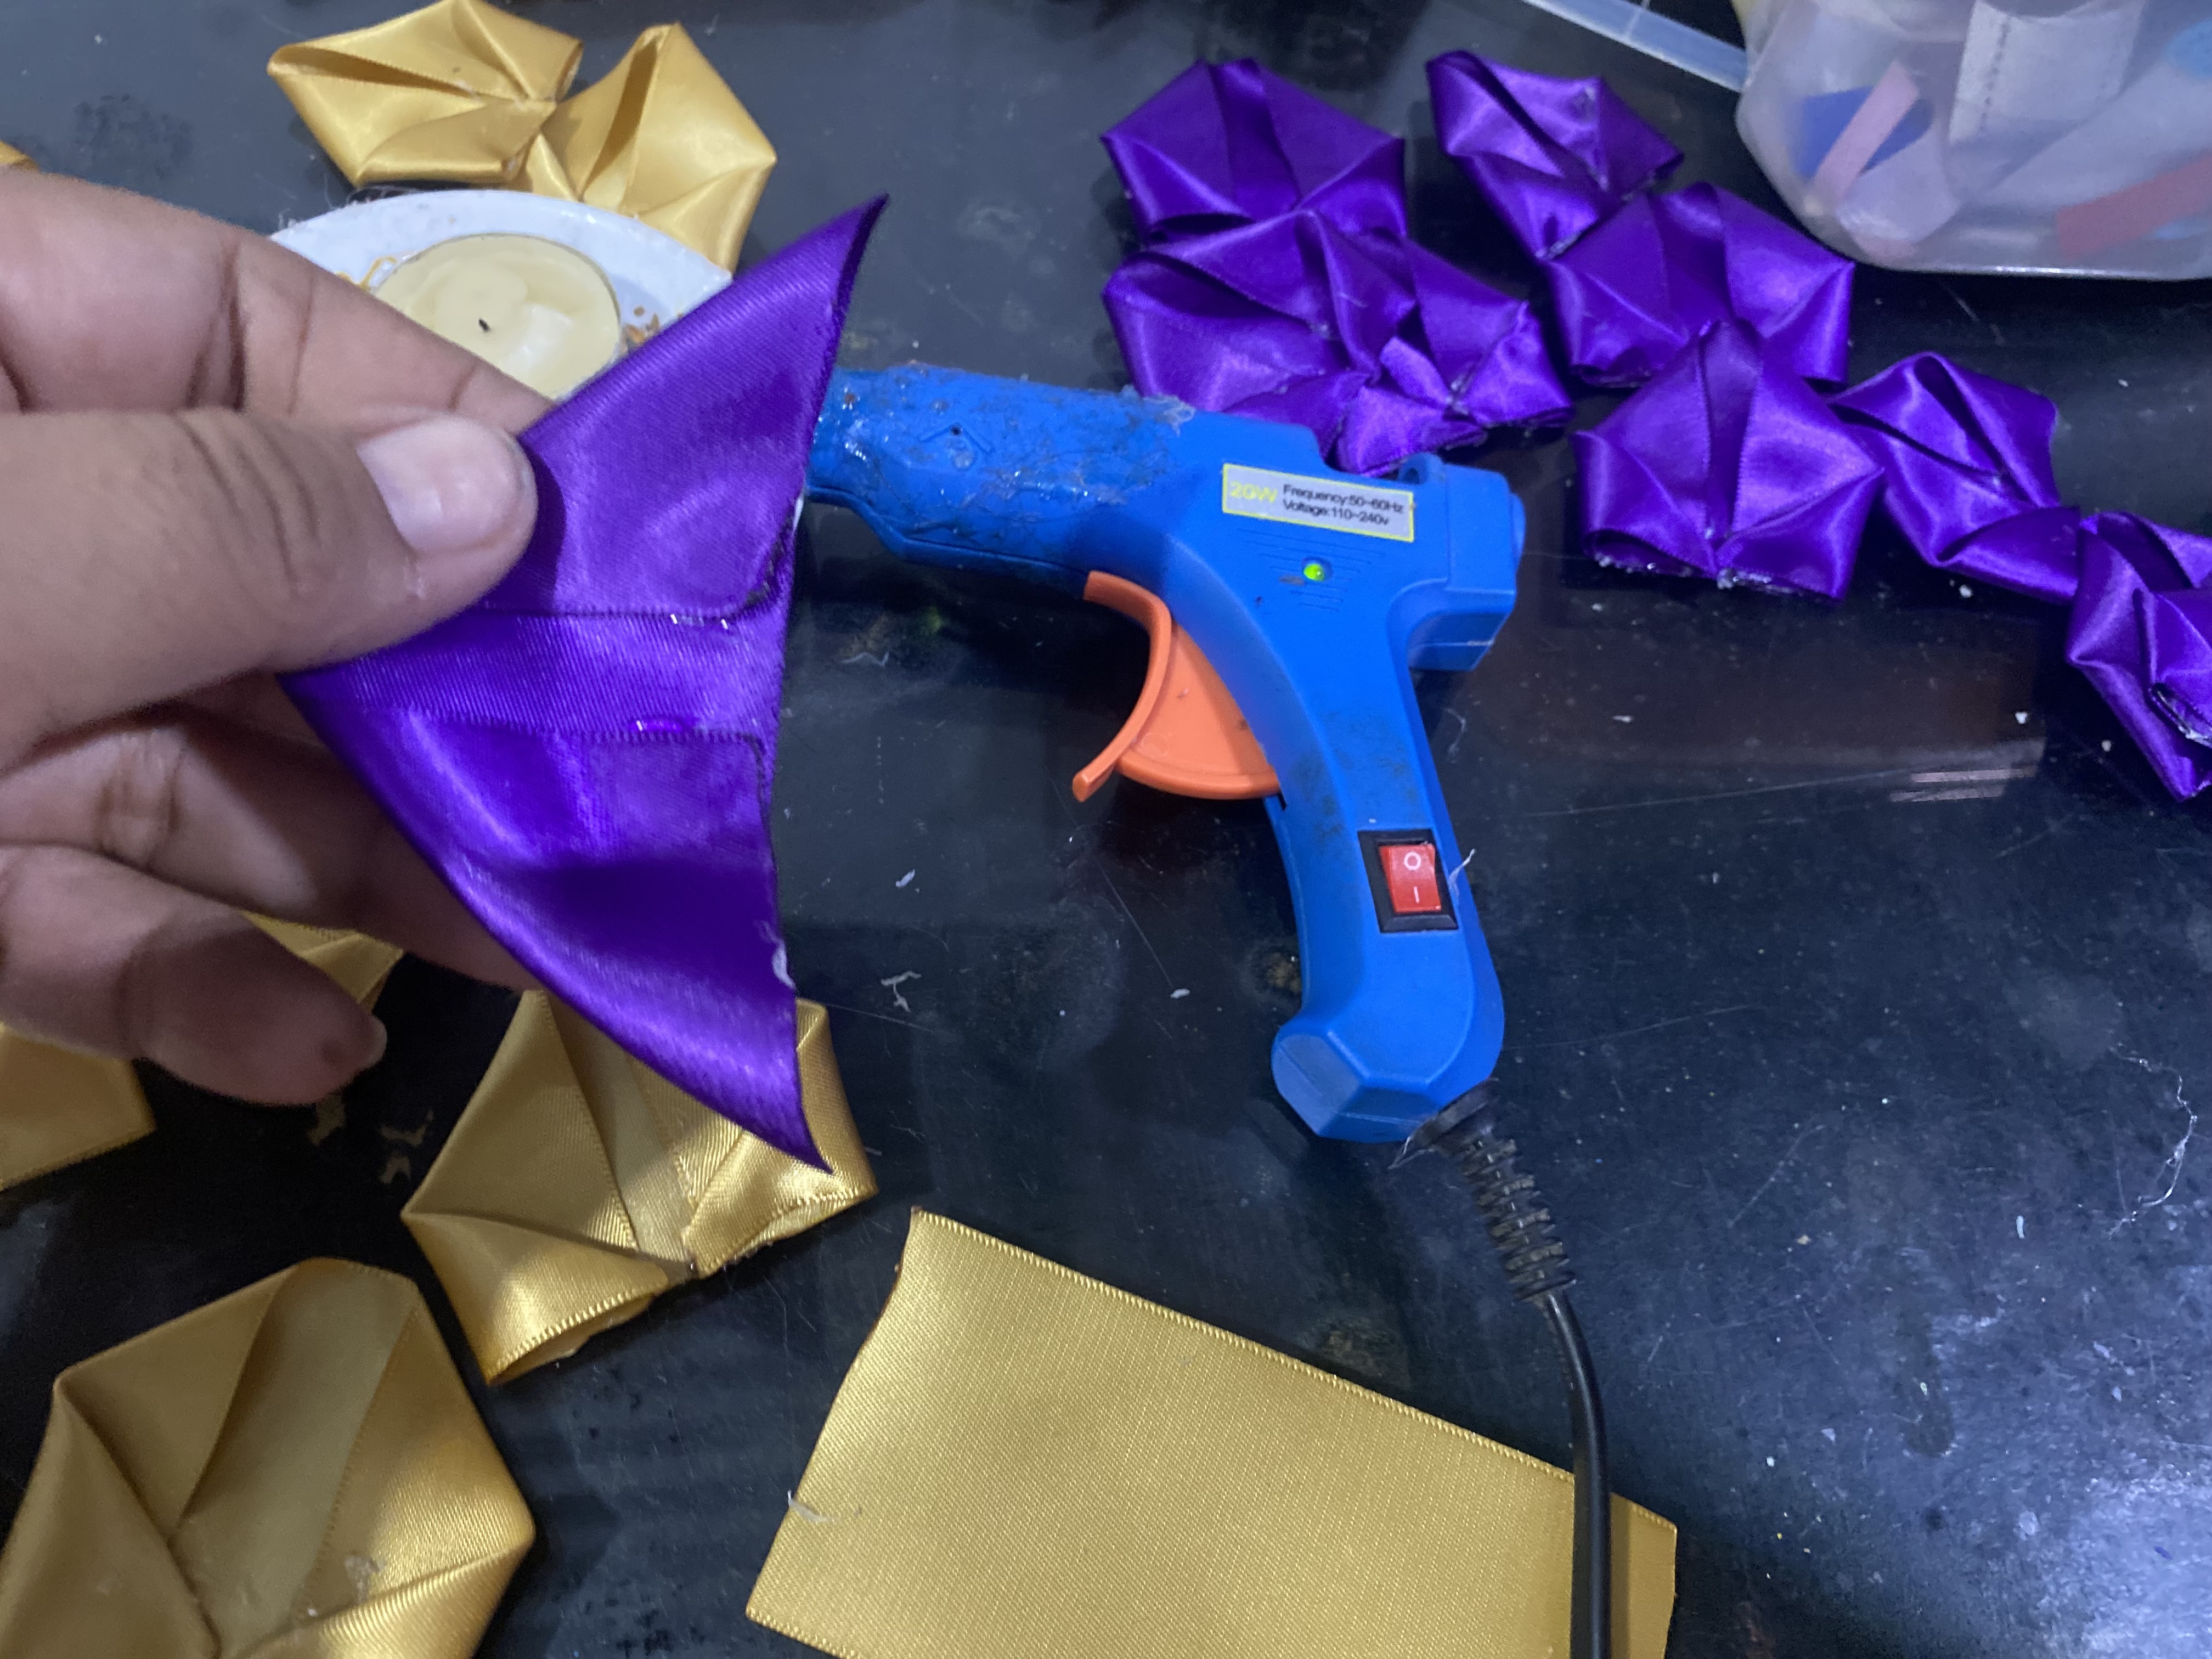
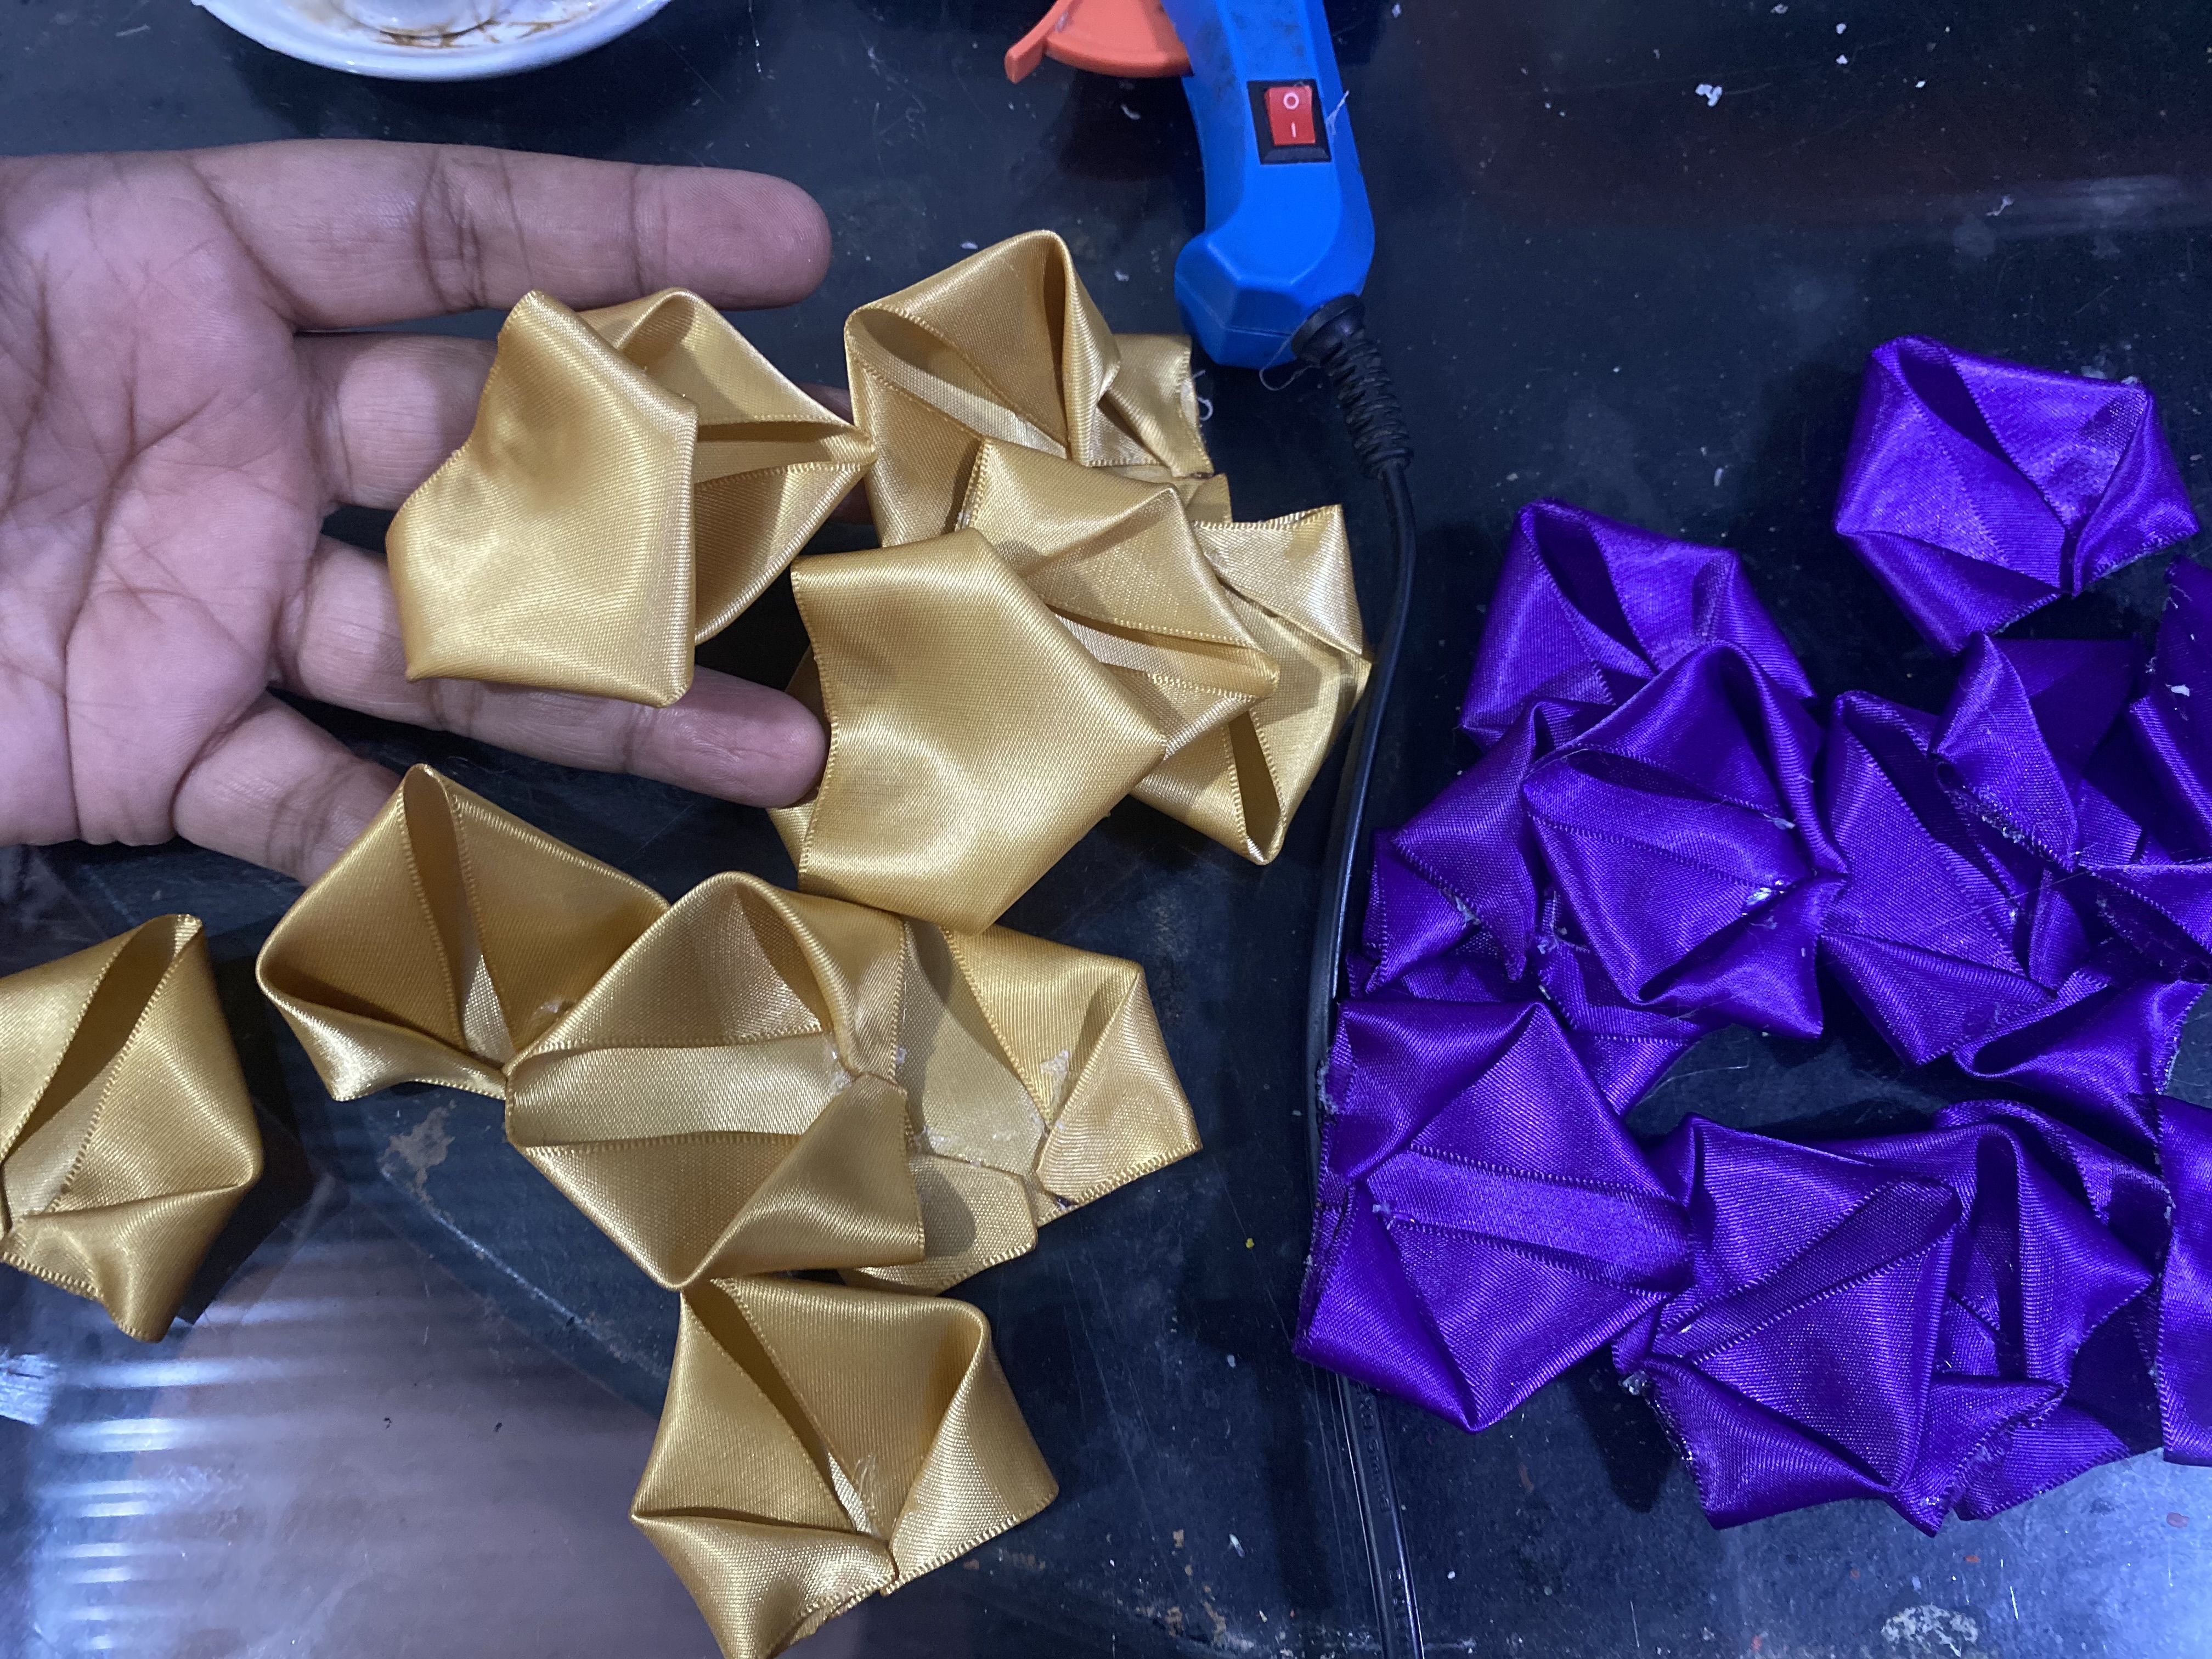
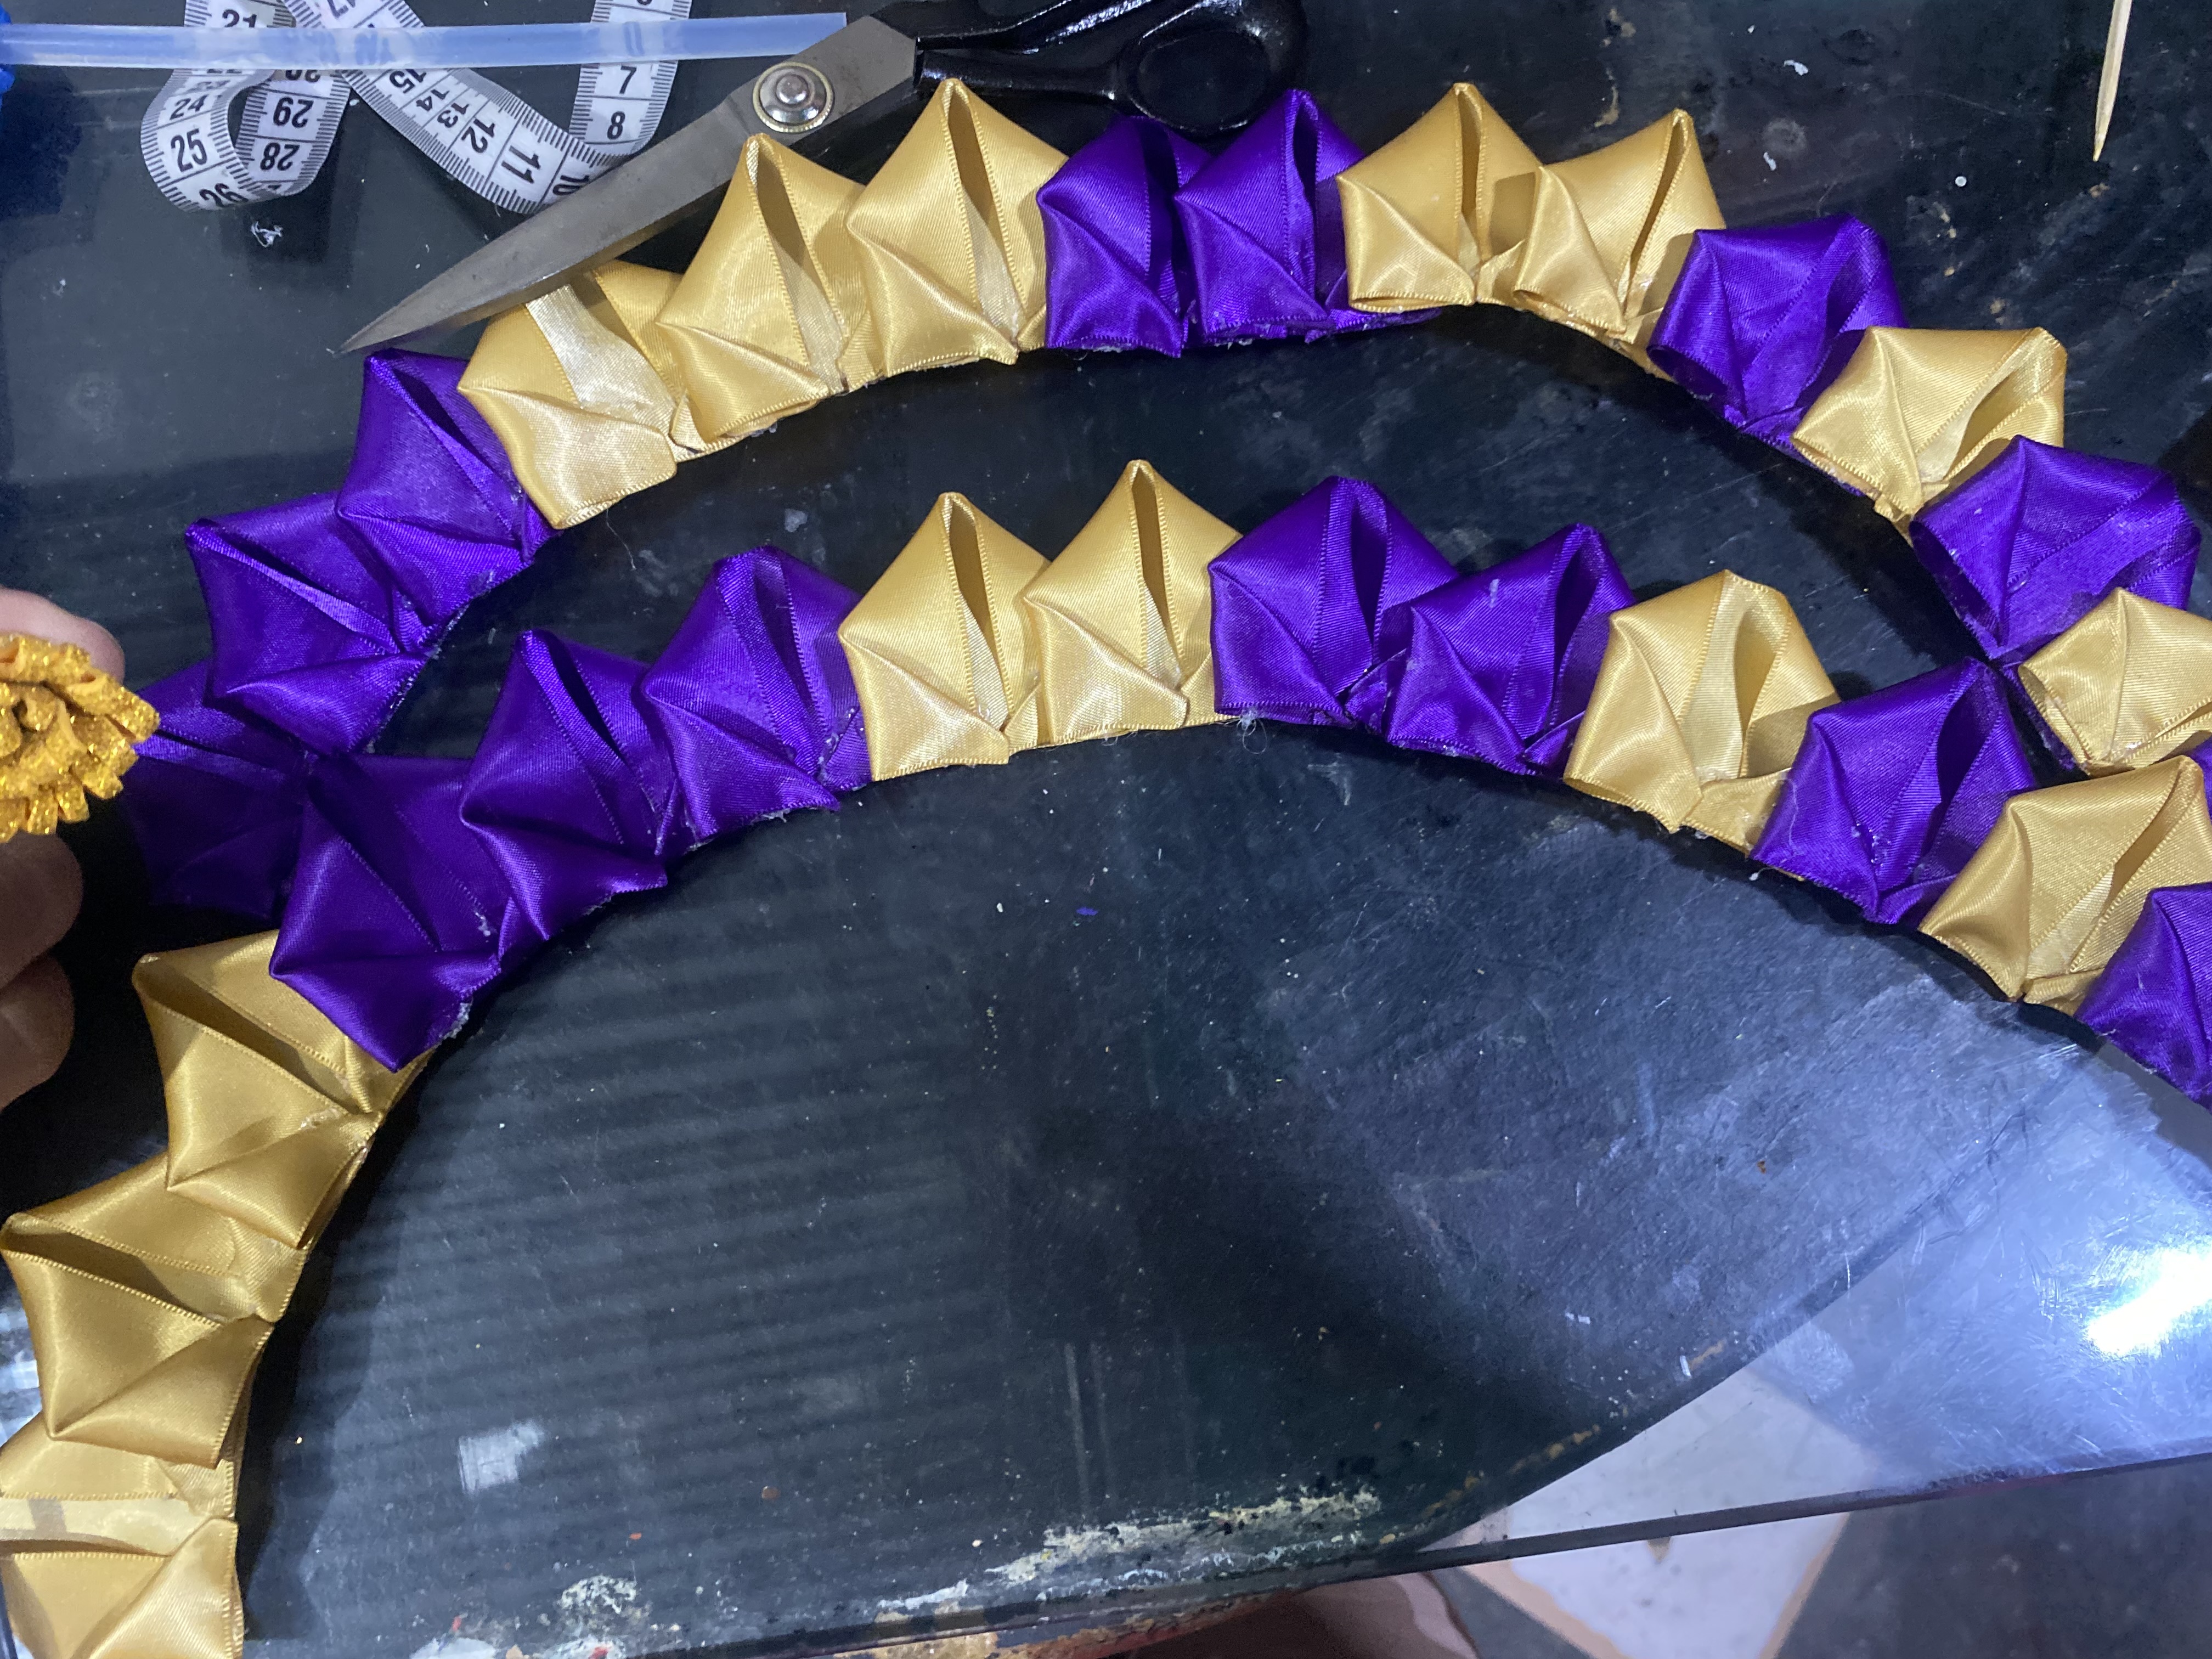
Para nuestro tercer paso vamos a proceder a pegar todos los pétalos, vamos a hacer una secuencia entre colores, comenzando por pegar tres pétalos de un color, luego seguimos con tres pétalos de otro color, luego pegamos dos del primer color y luego dos del segundo color y para finalizar vamos a pegar un pétalo de un color y un pétalo de otro color en total serán cinco pétalos de colores intercalados, yo hice dos tiras de pétalo una comenzando por el color morado y la otra comenzando por el color dorado.
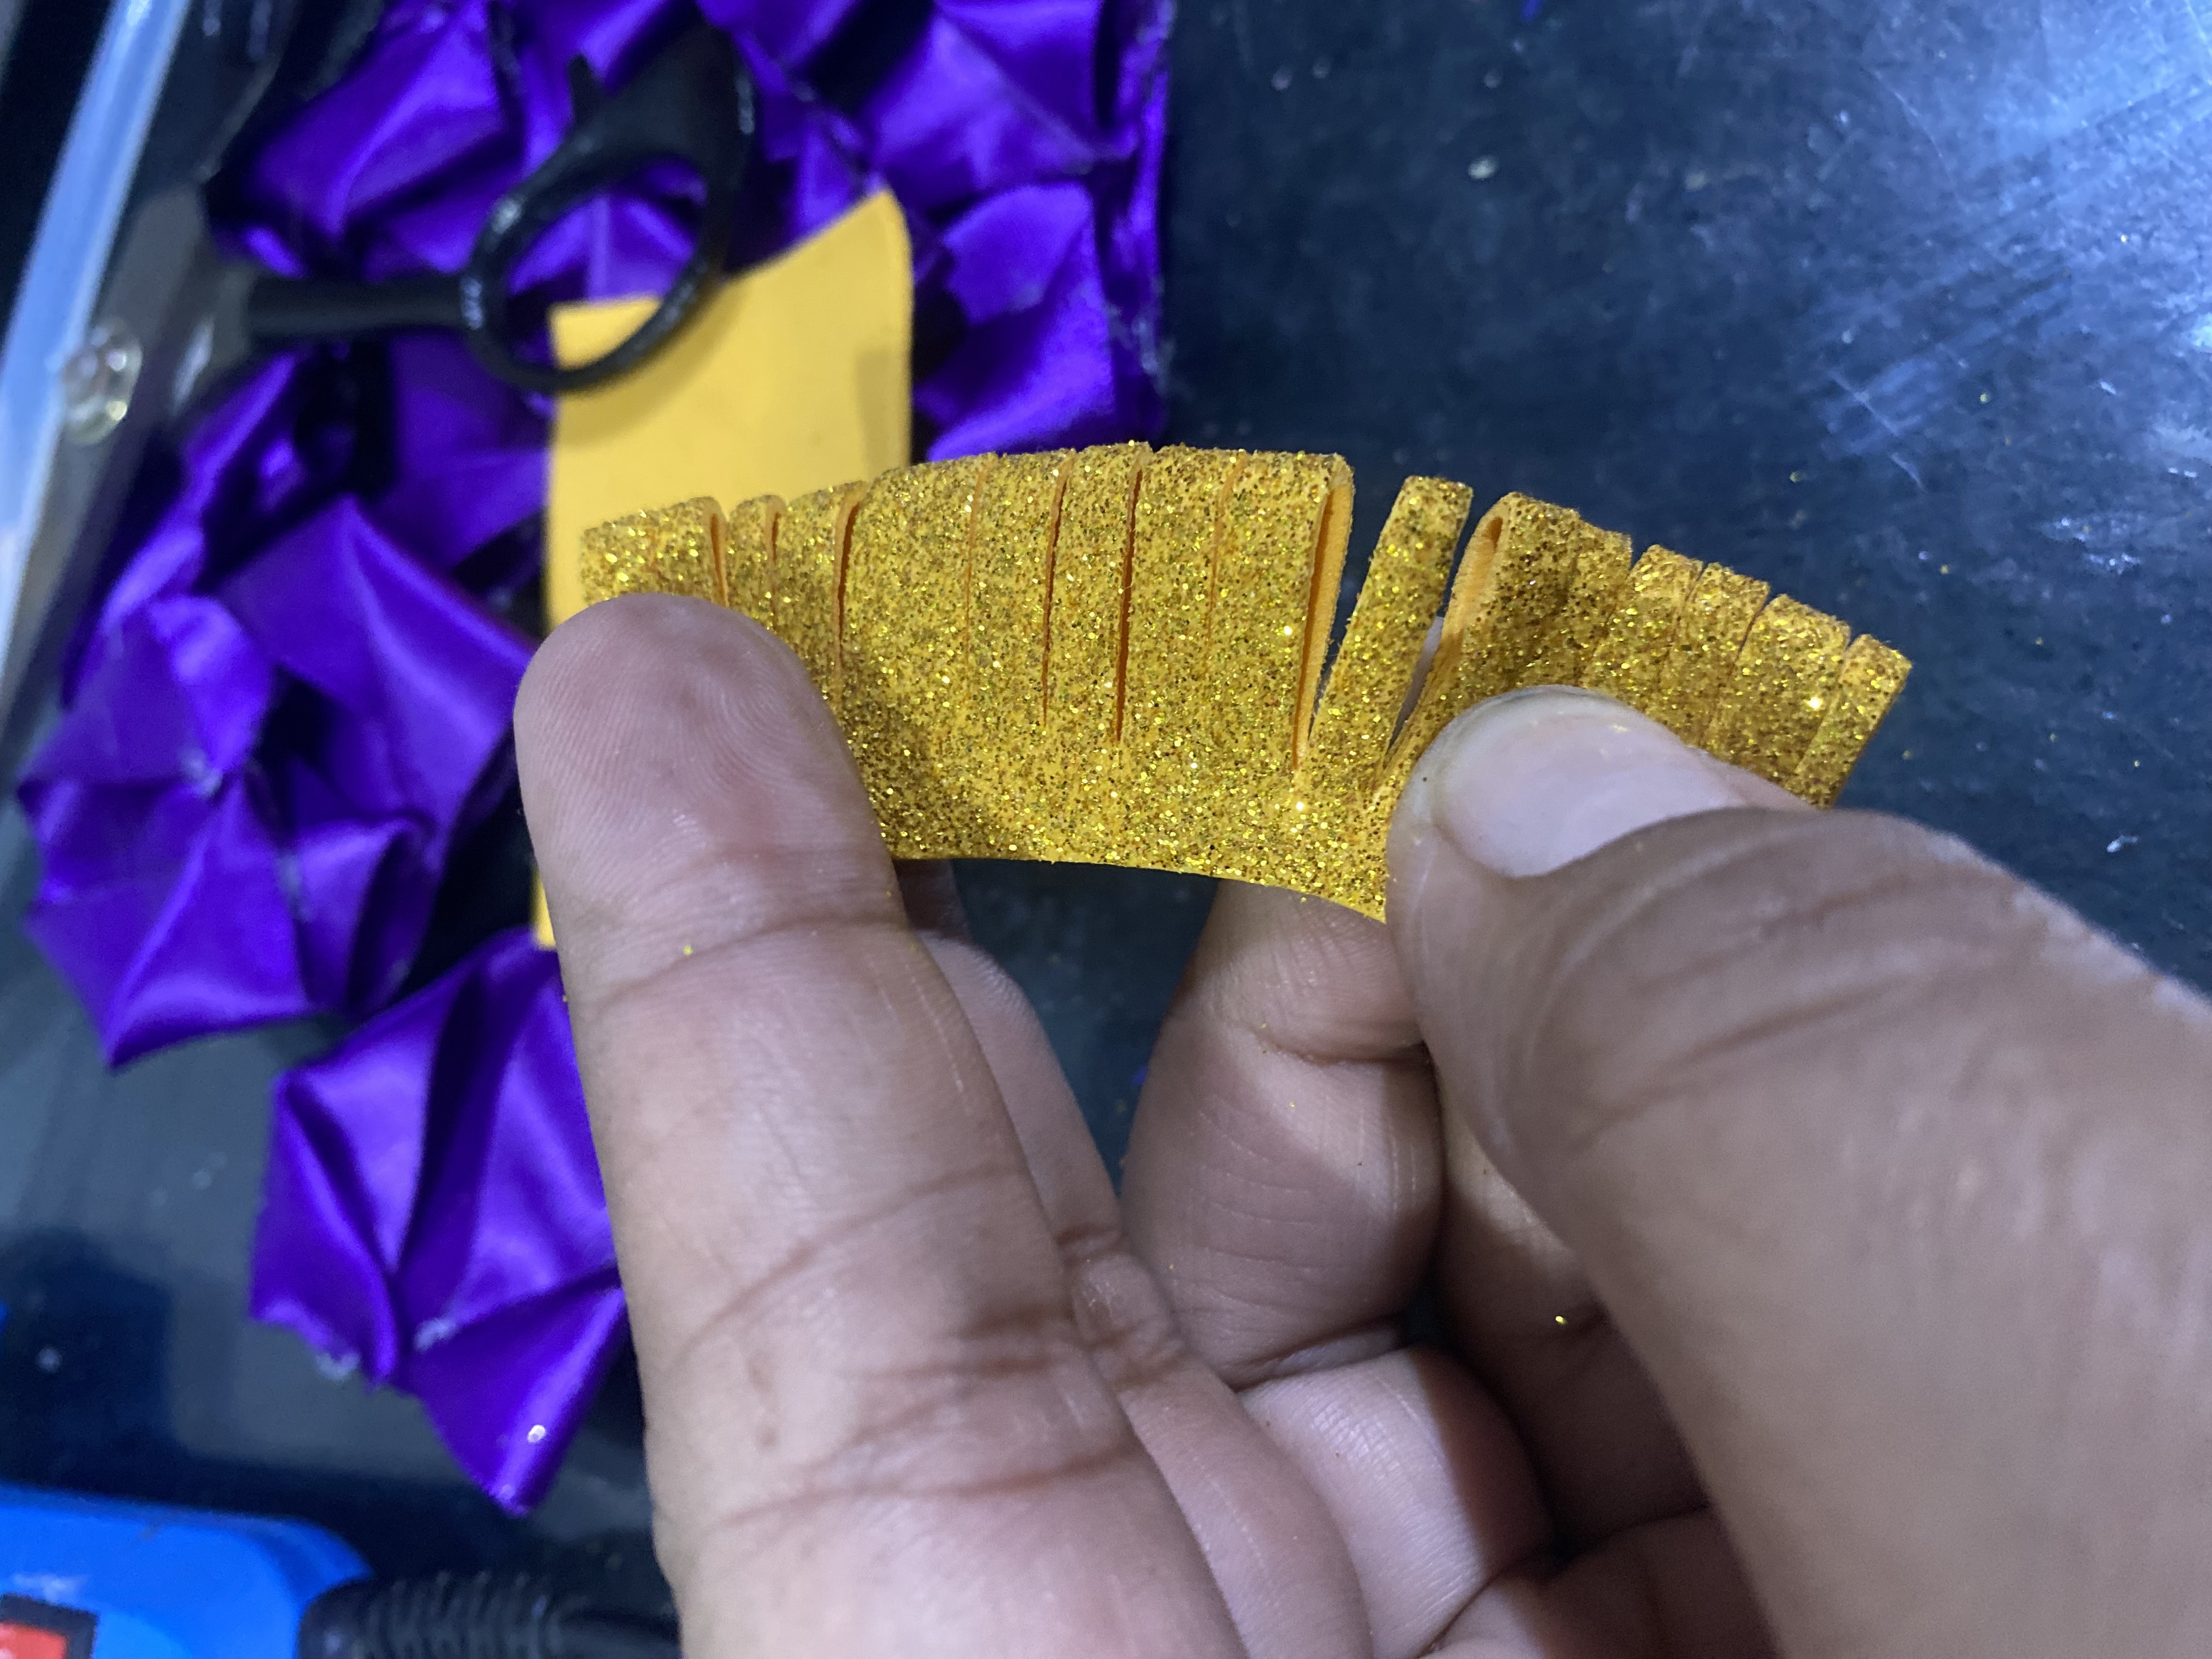
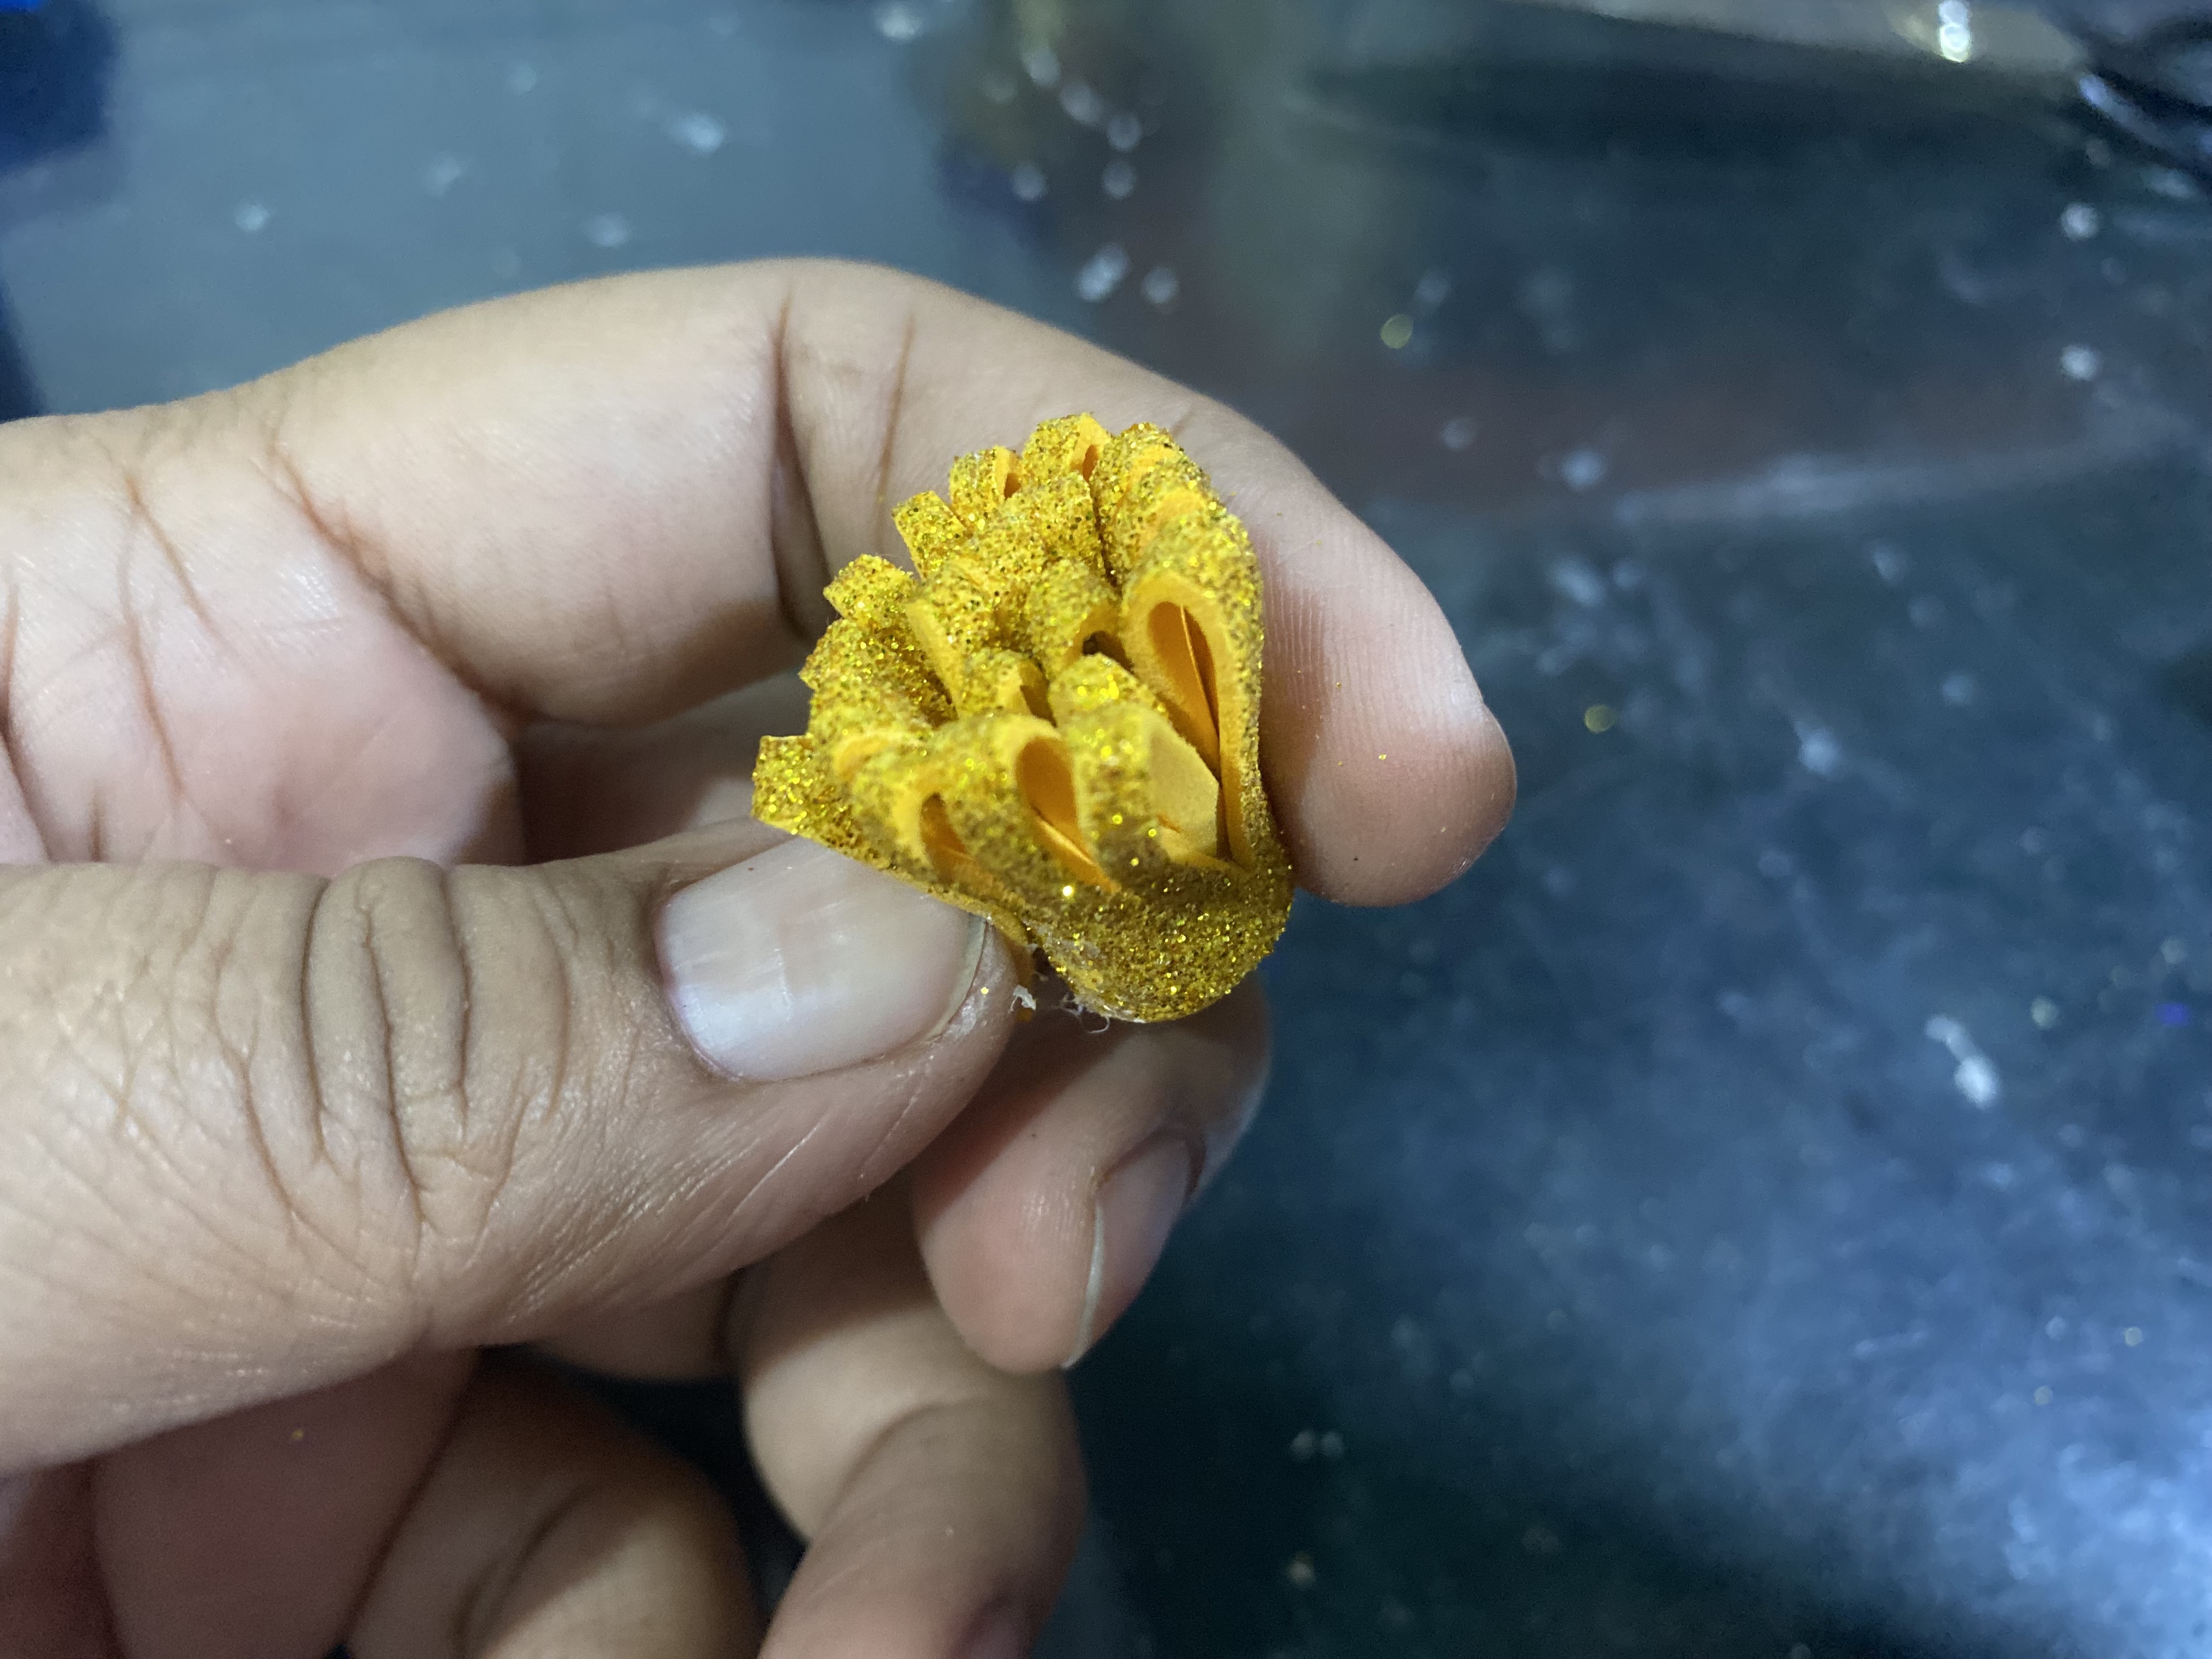
Con un pequeño pedazo de foami de 5 cm de ancho por 5 cm de largo lo vamos a doblar a la mitad le vamos a hacer muchos cortes en vertical sin llegarlos al final luego pegamos y enrollamos para hacer el centro de nuestra flor
For our third step, we're going to glue all the petals together. We're going to create a sequence of colors. We're starting by gluing three petals of one color, then continue with three petals of another color. Then, we'll glue two of the first color and then two of the second. Finally, we'll glue one petal of one color and one petal of another color. A total of five petals, each with alternating colors. I made two strips of petals, one starting with purple and the other with gold.
Using a small piece of foam, 5 cm wide by 5 cm long, we're going to fold it in half. We're going to make many vertical cuts, not reaching the end. Then, we'll glue and roll it up to make the center of our flower.
 |  |
|---|---|
 |  |
𝓟𝓐𝓢𝓞 4
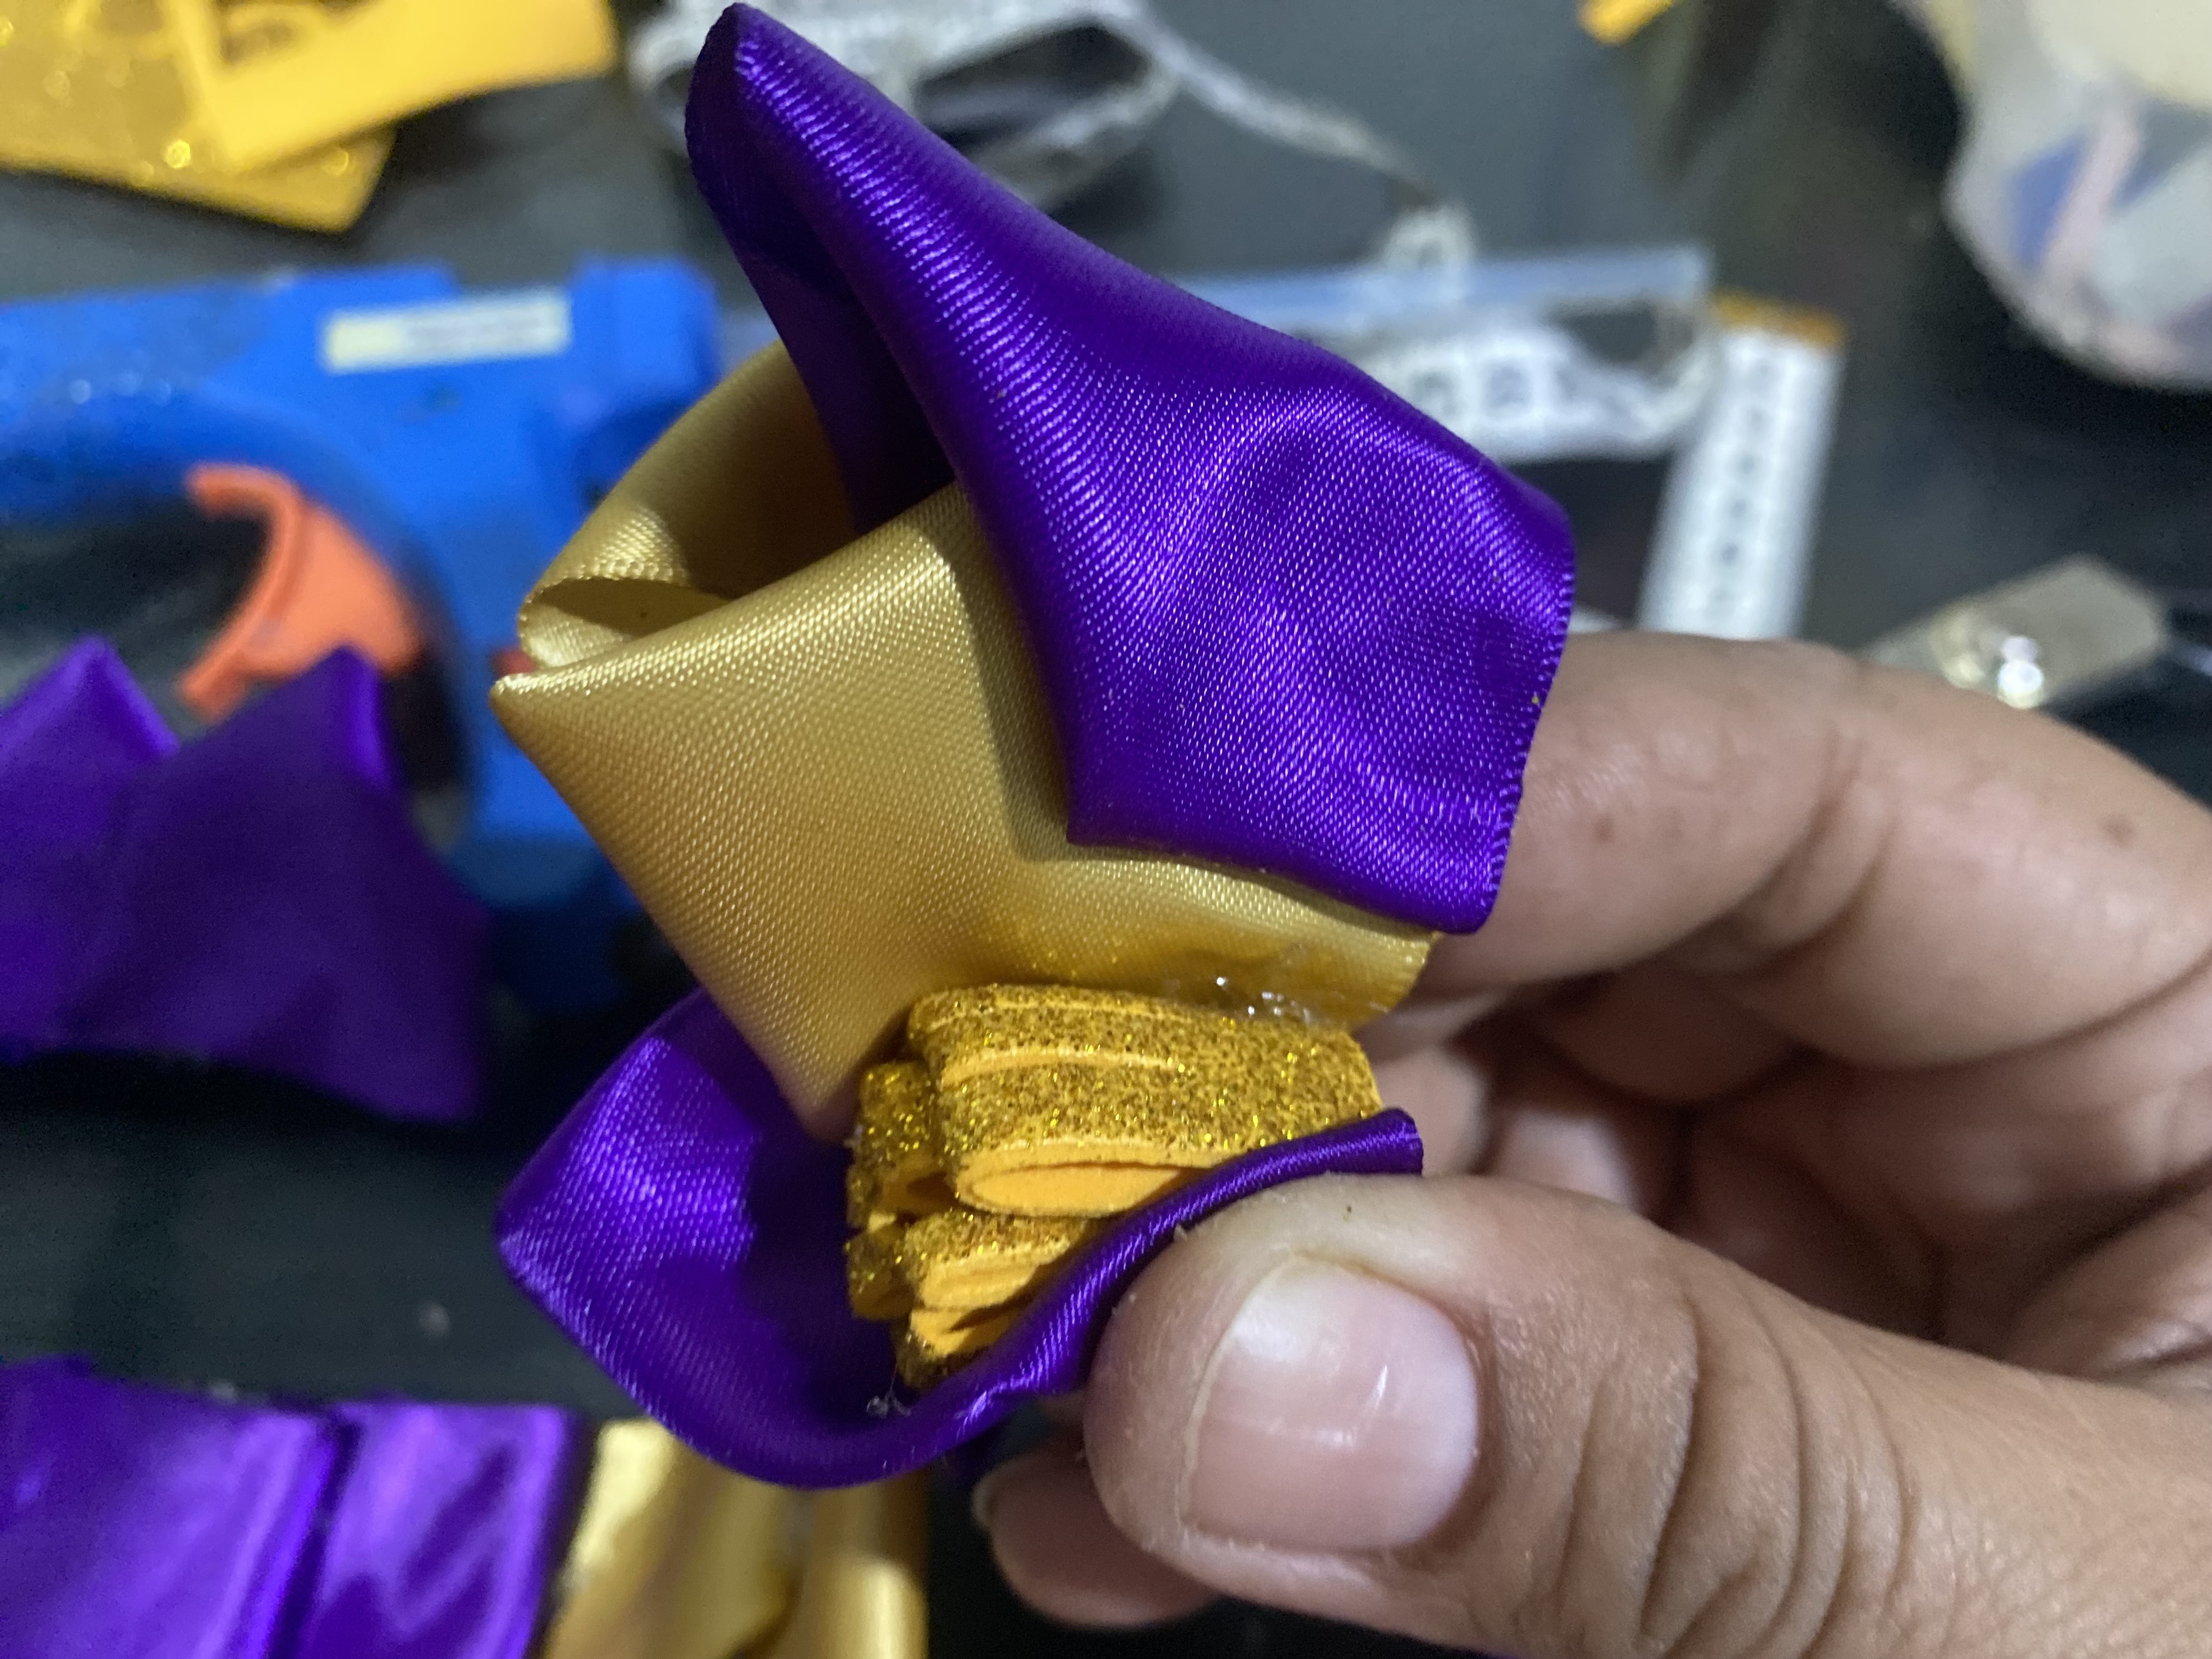
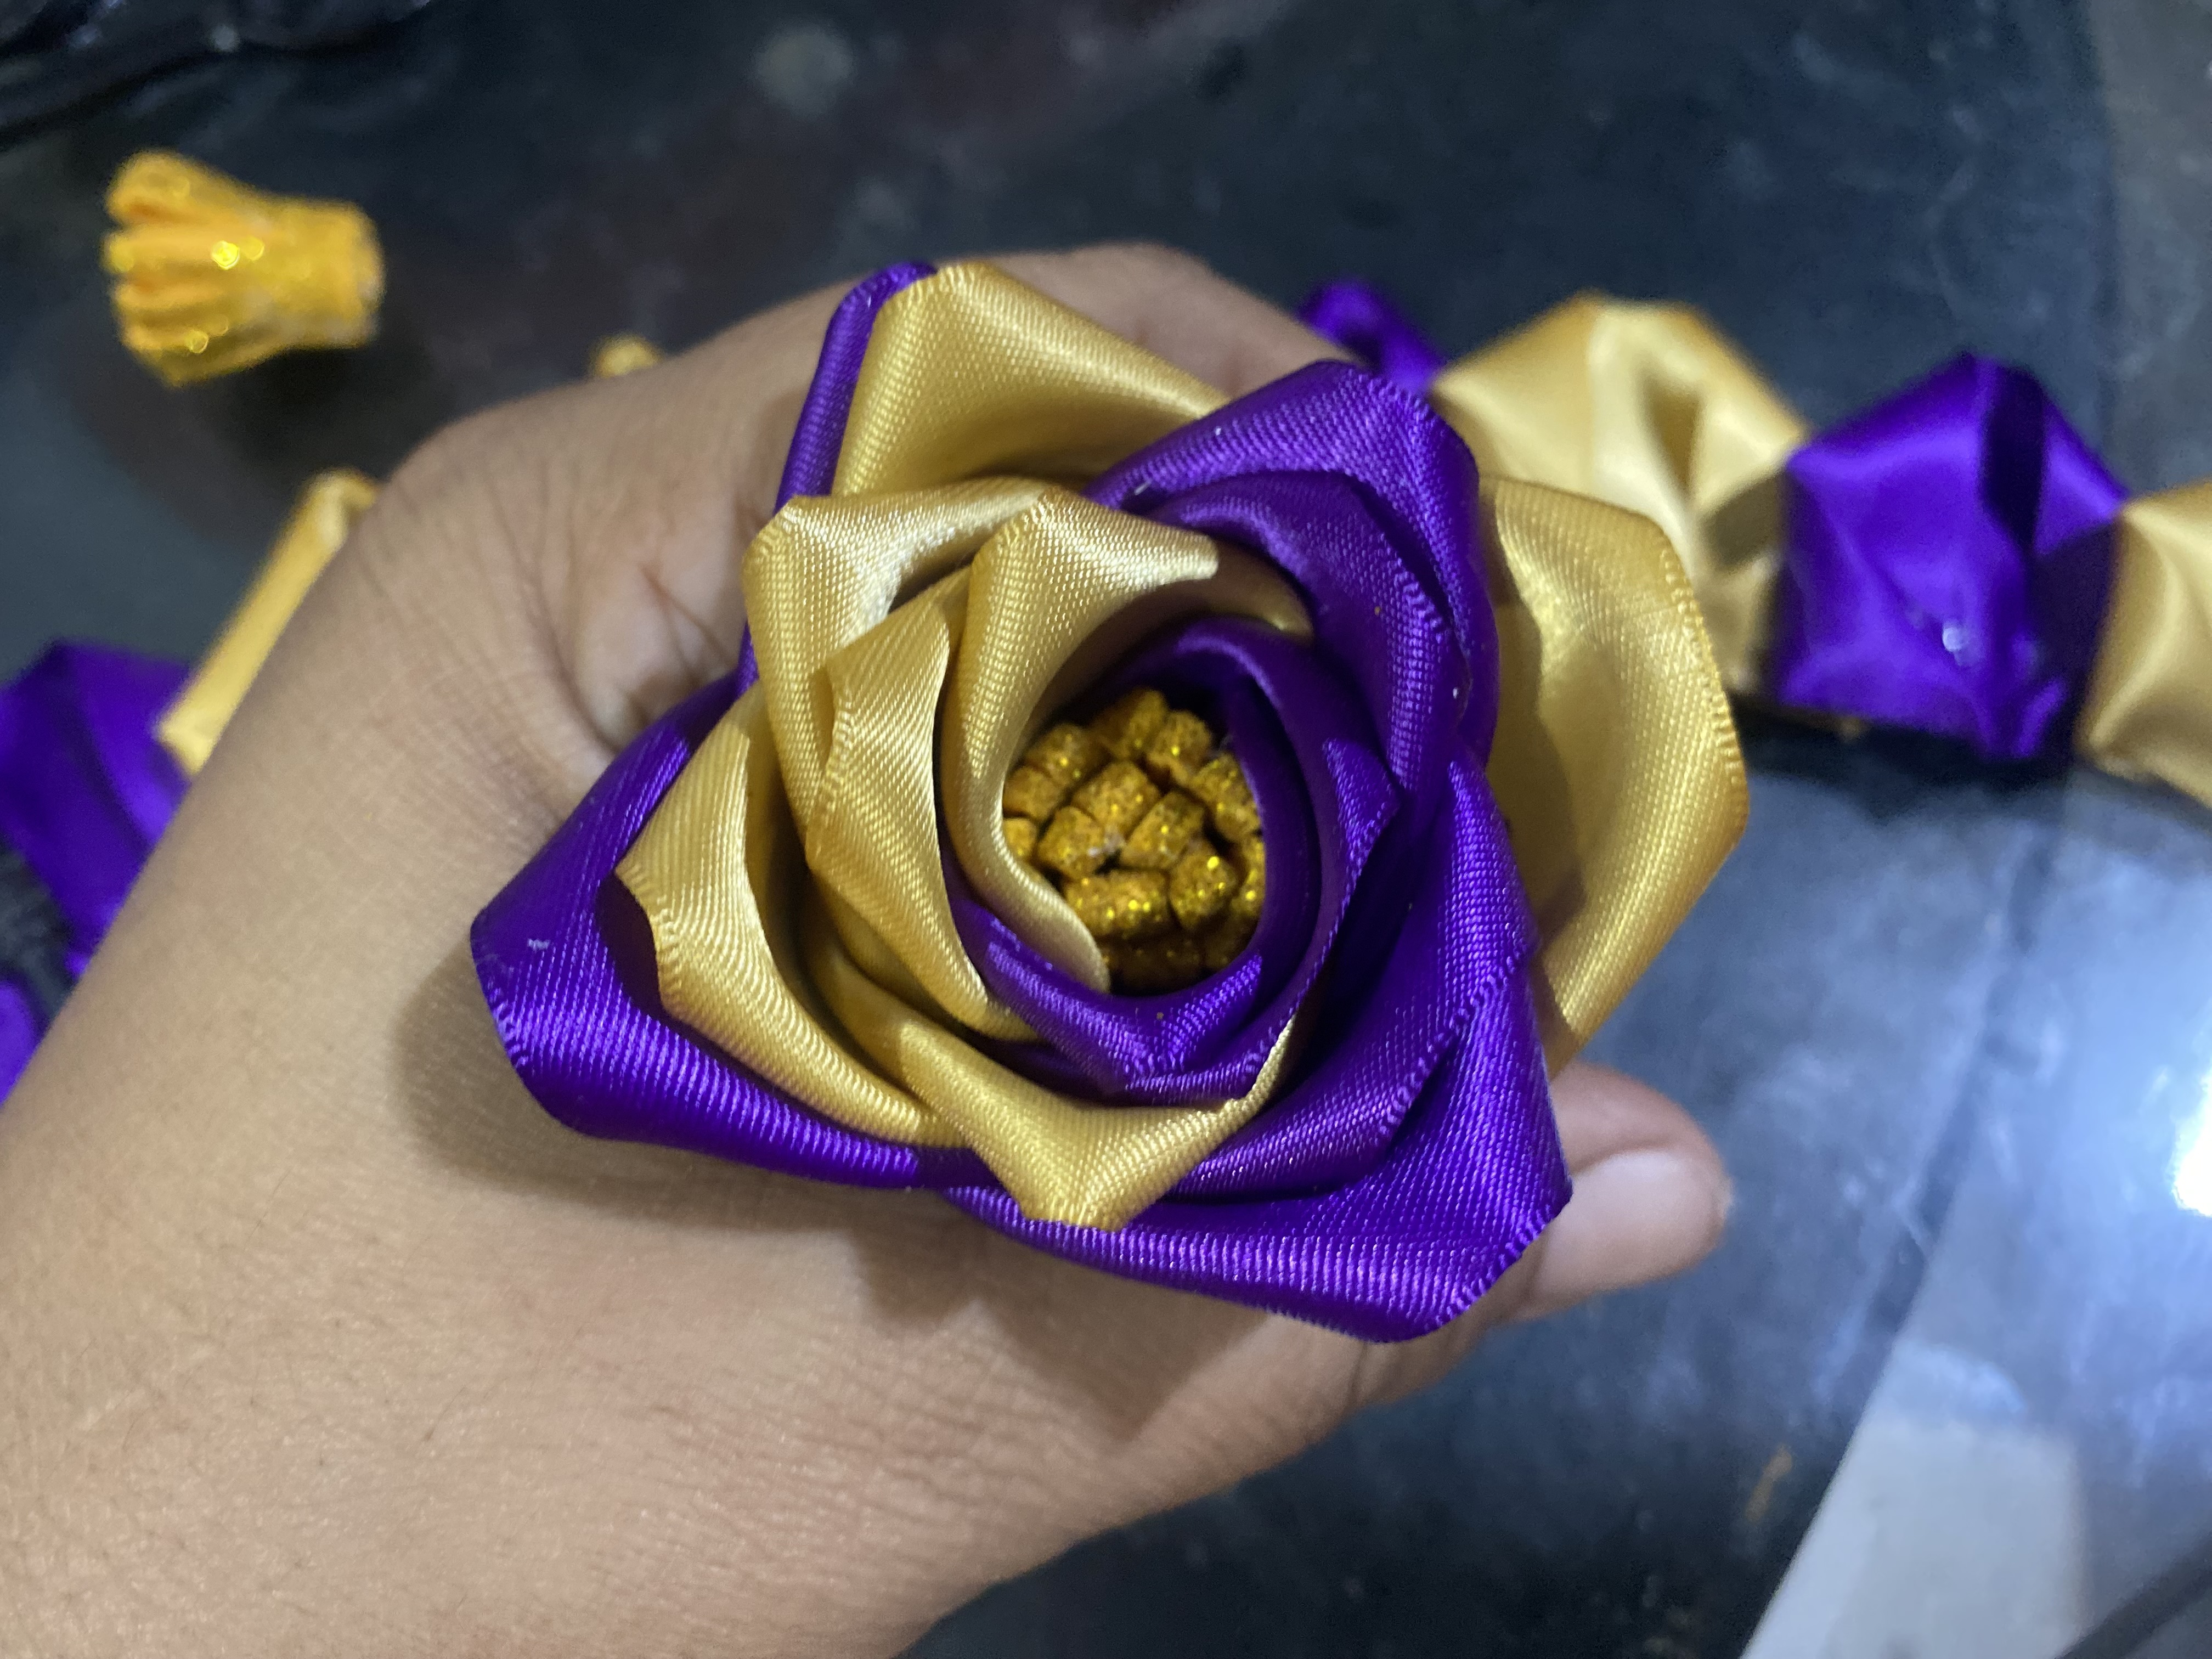
Para este cuarto paso vamos a armar nuestra flor vamos a comenzar pegando los pétalos al centro de la flor y luego le vamos colocando Silicon por toda la orilla inferior de los pétalos y lavamos girando alrededor y allí automáticamente dará la forma de esta hermosa flor de dos colores, para finalizarla en el fondo le colocamos cinta para cubrir Los detalles, no las quise hacer con palito ya que las quiero como decoración para mi mesita de la sala
For this fourth step we are going to assemble our flower, we are going to start by gluing the petals to the center of the flower and then we are going to place Silicon all over the lower edge of the petals and we wash it turning it around and there it will automatically give the shape of this beautiful two-colored flower, to finish it at the bottom we put tape to cover the details, I did not want to make them with a stick since I want them as decoration for my living room table
 |  |
|---|---|
 |
𝓟𝓐𝓢𝓞 5
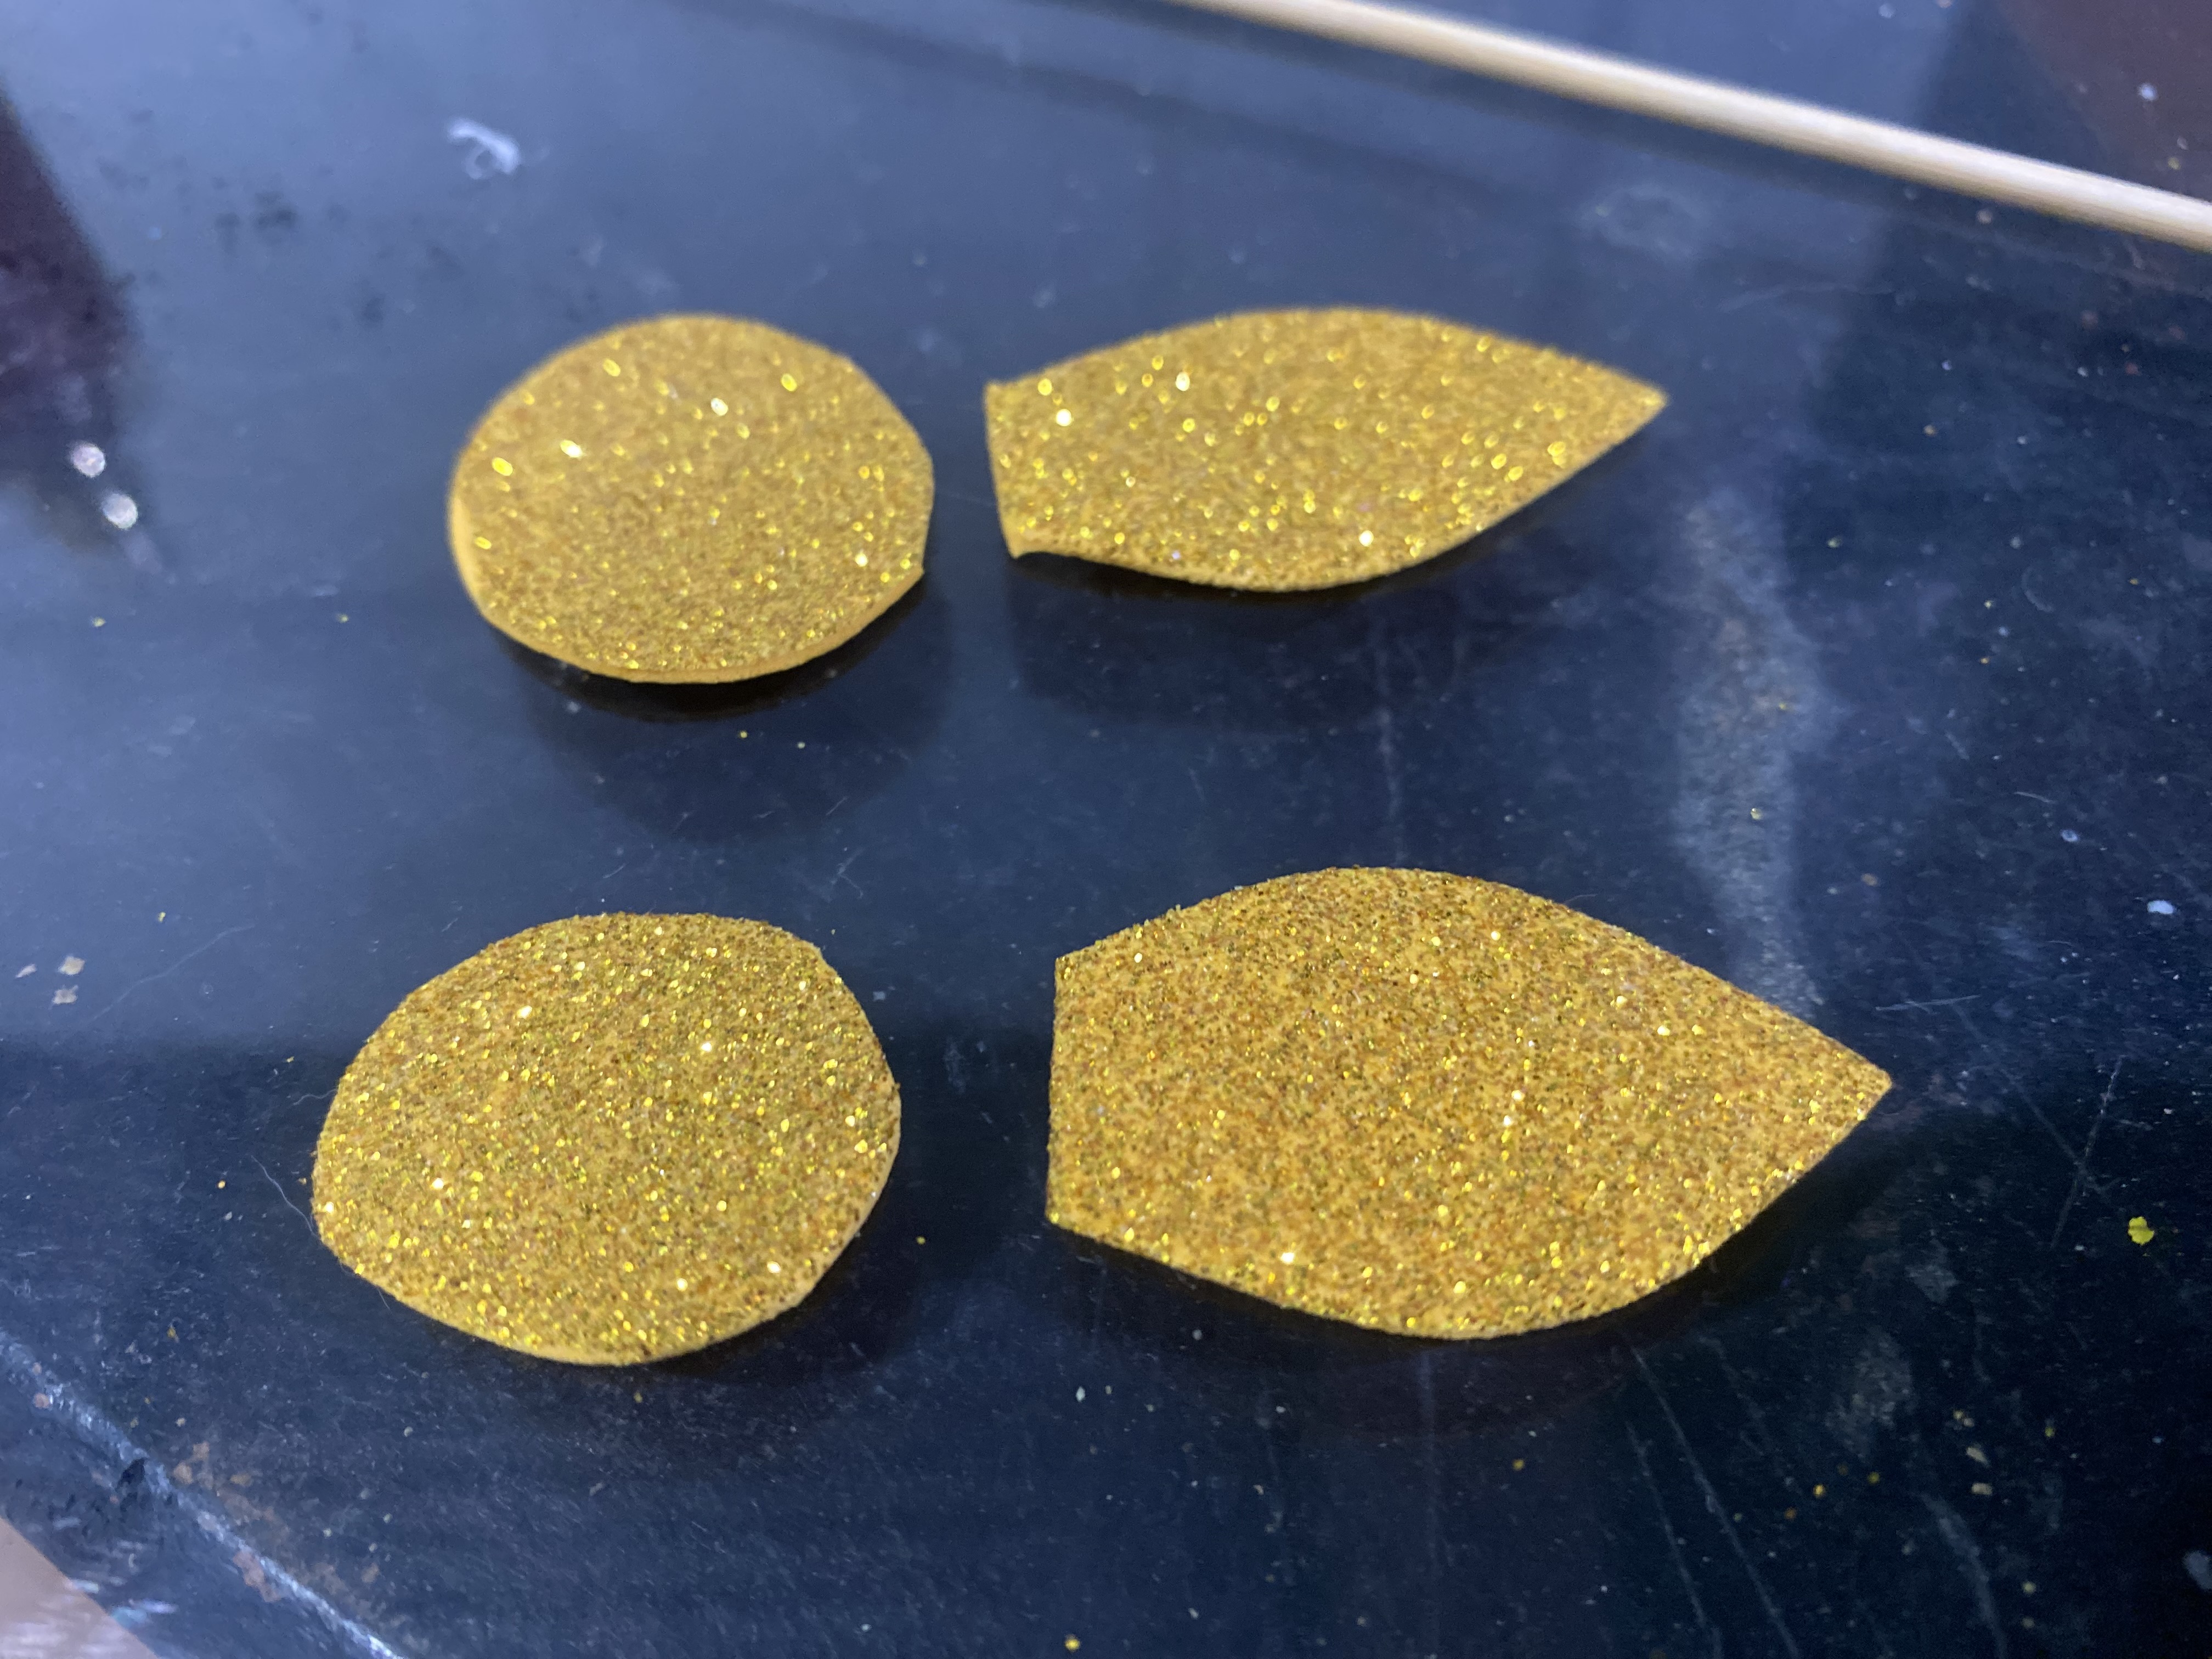
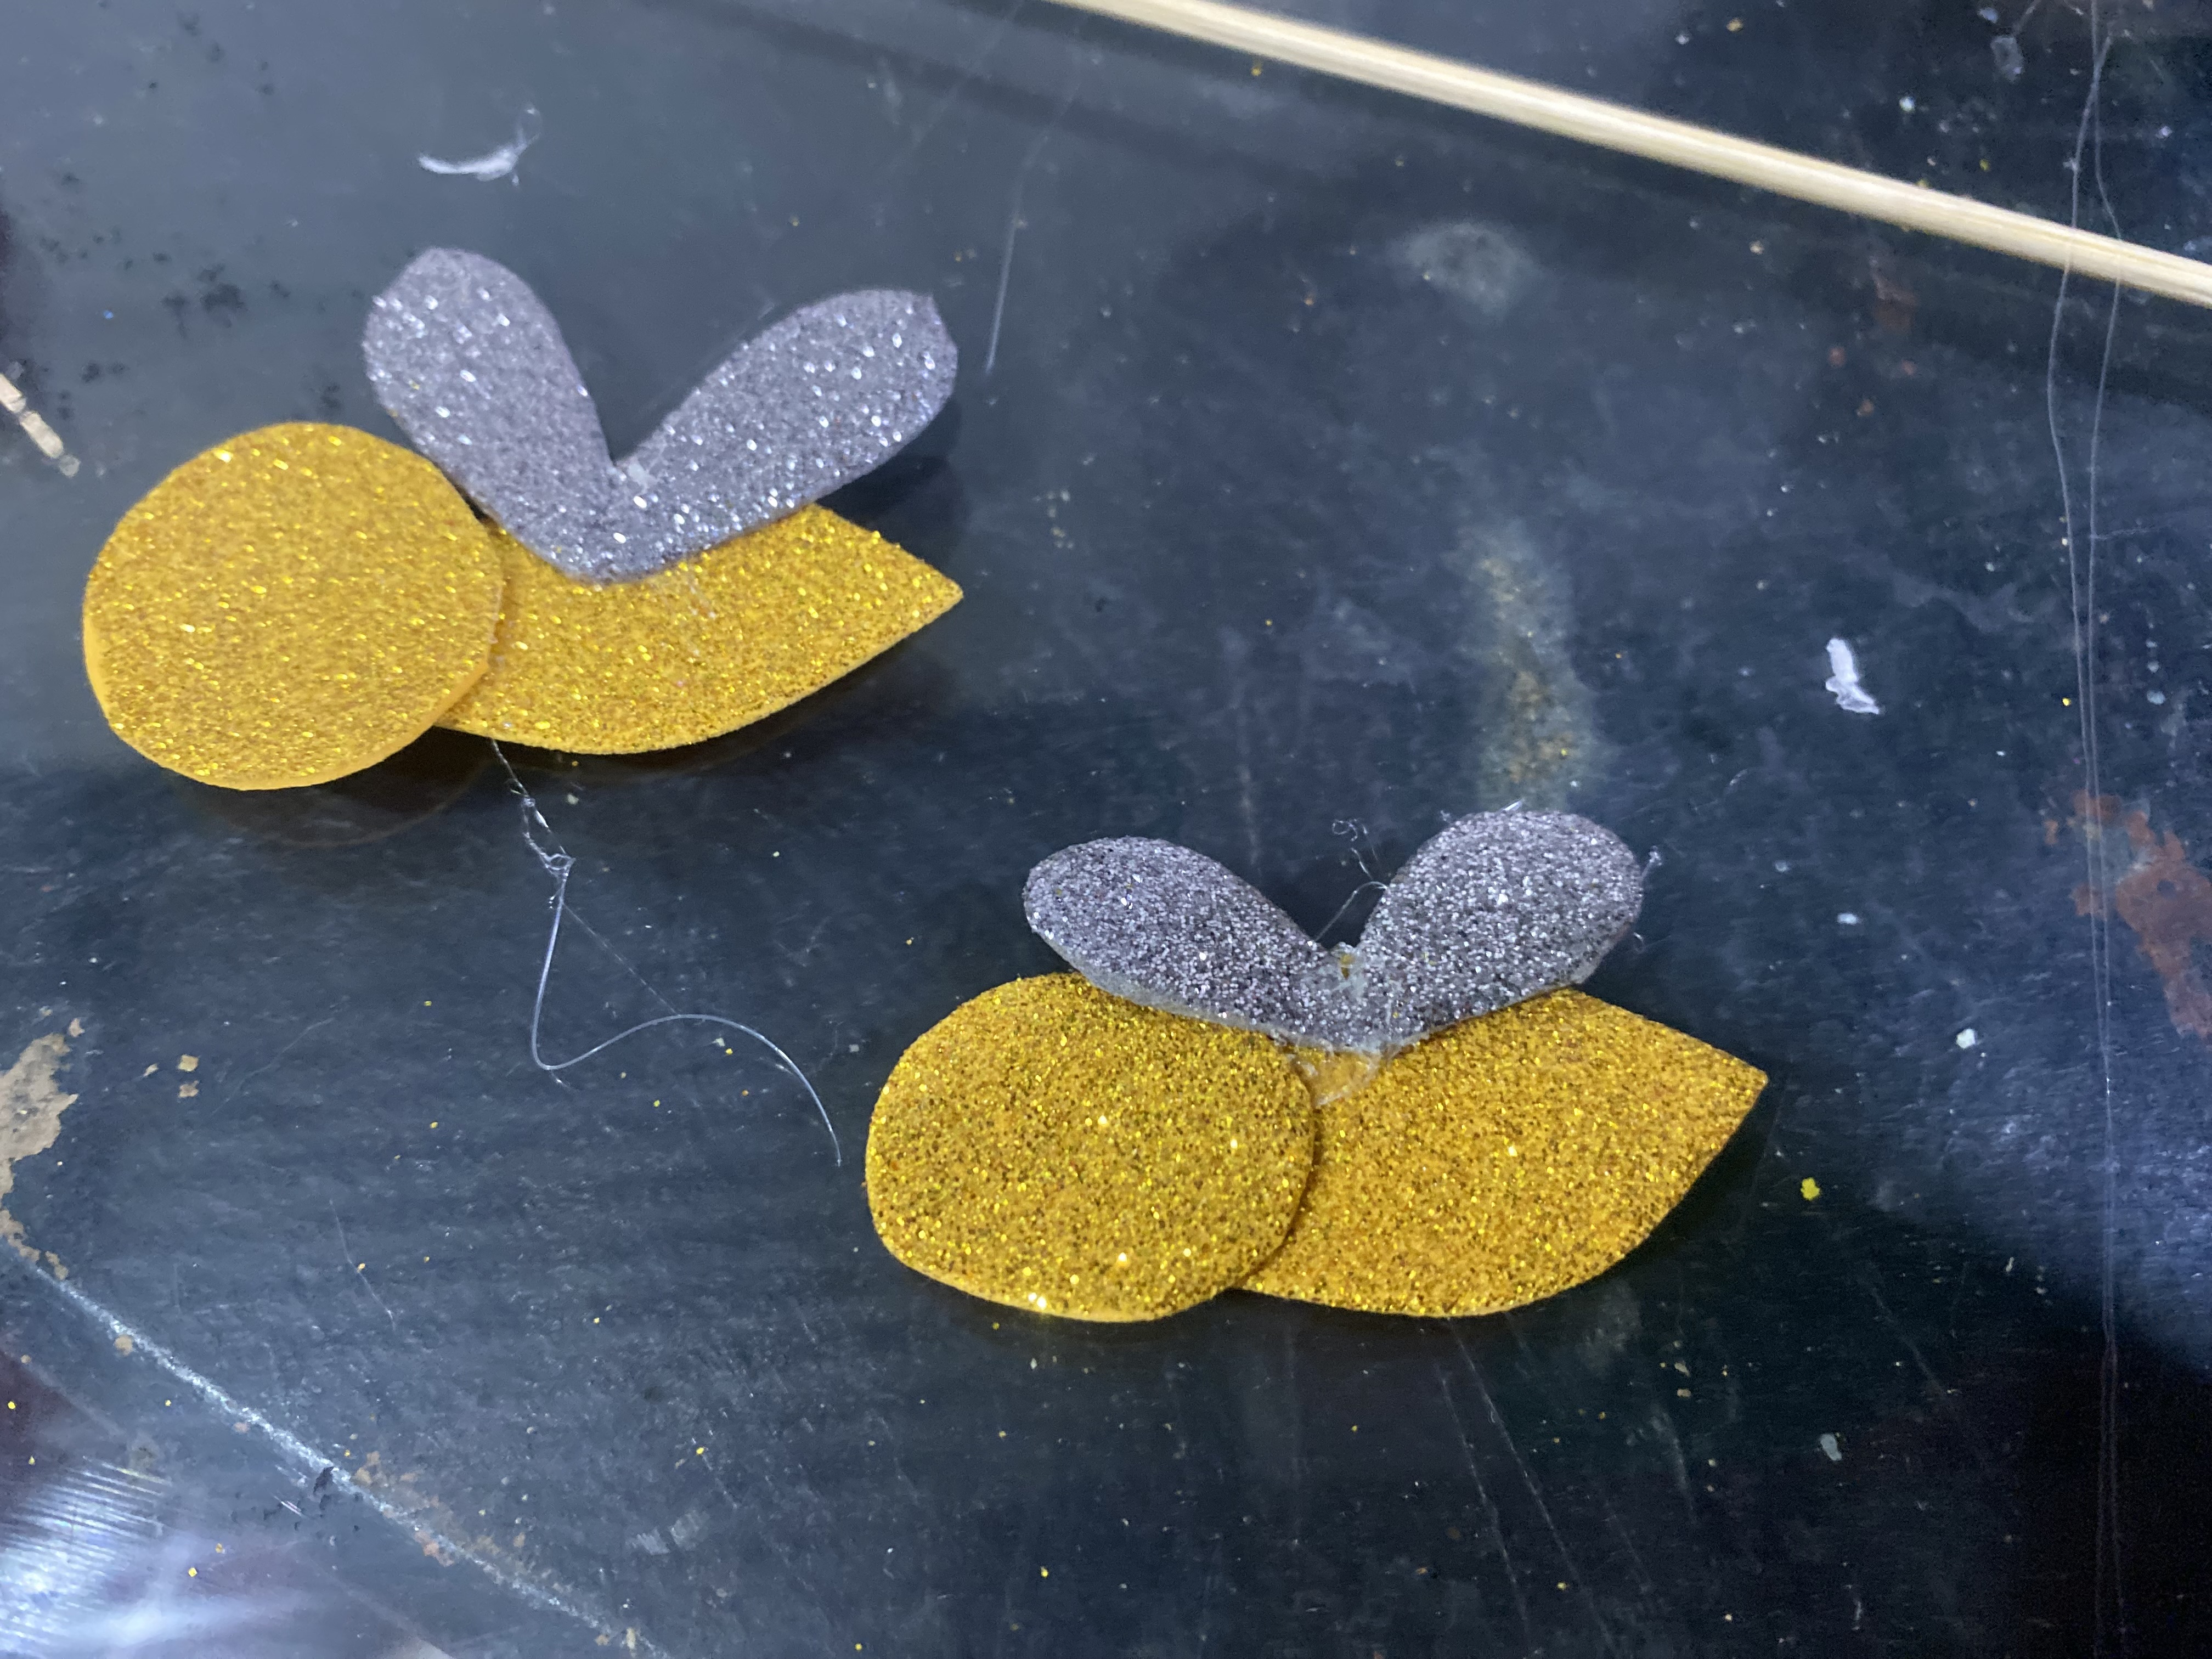
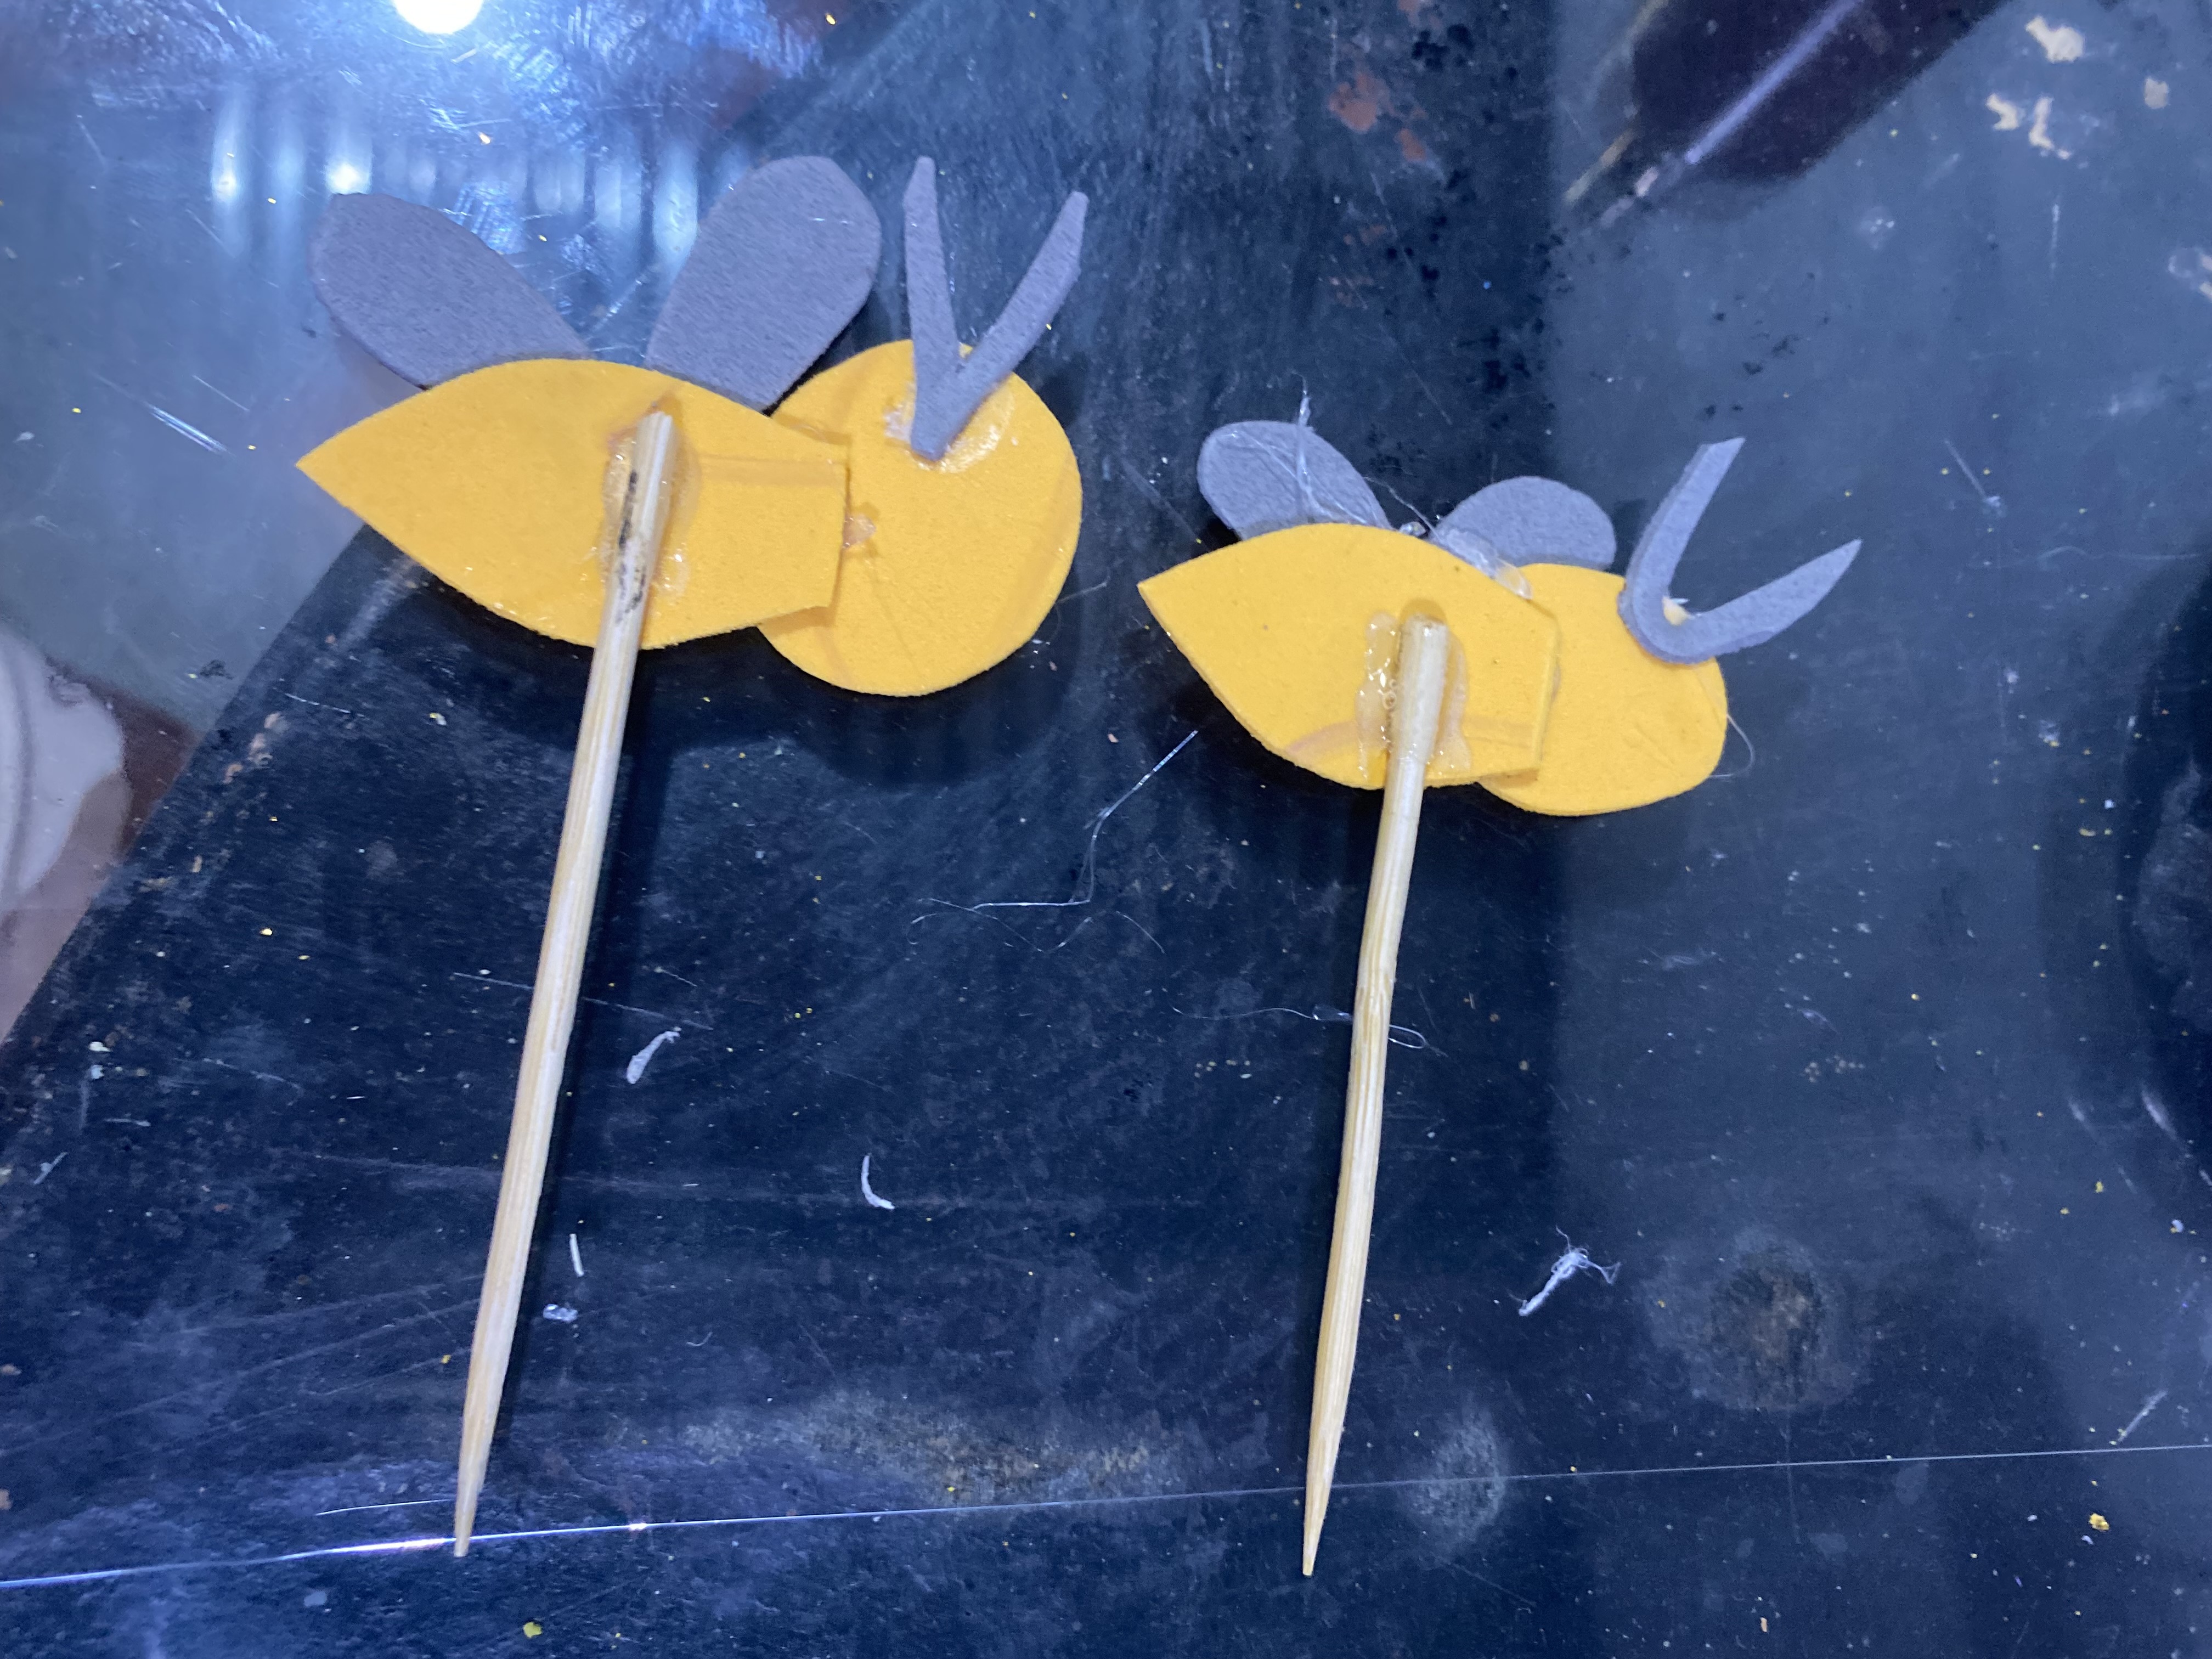
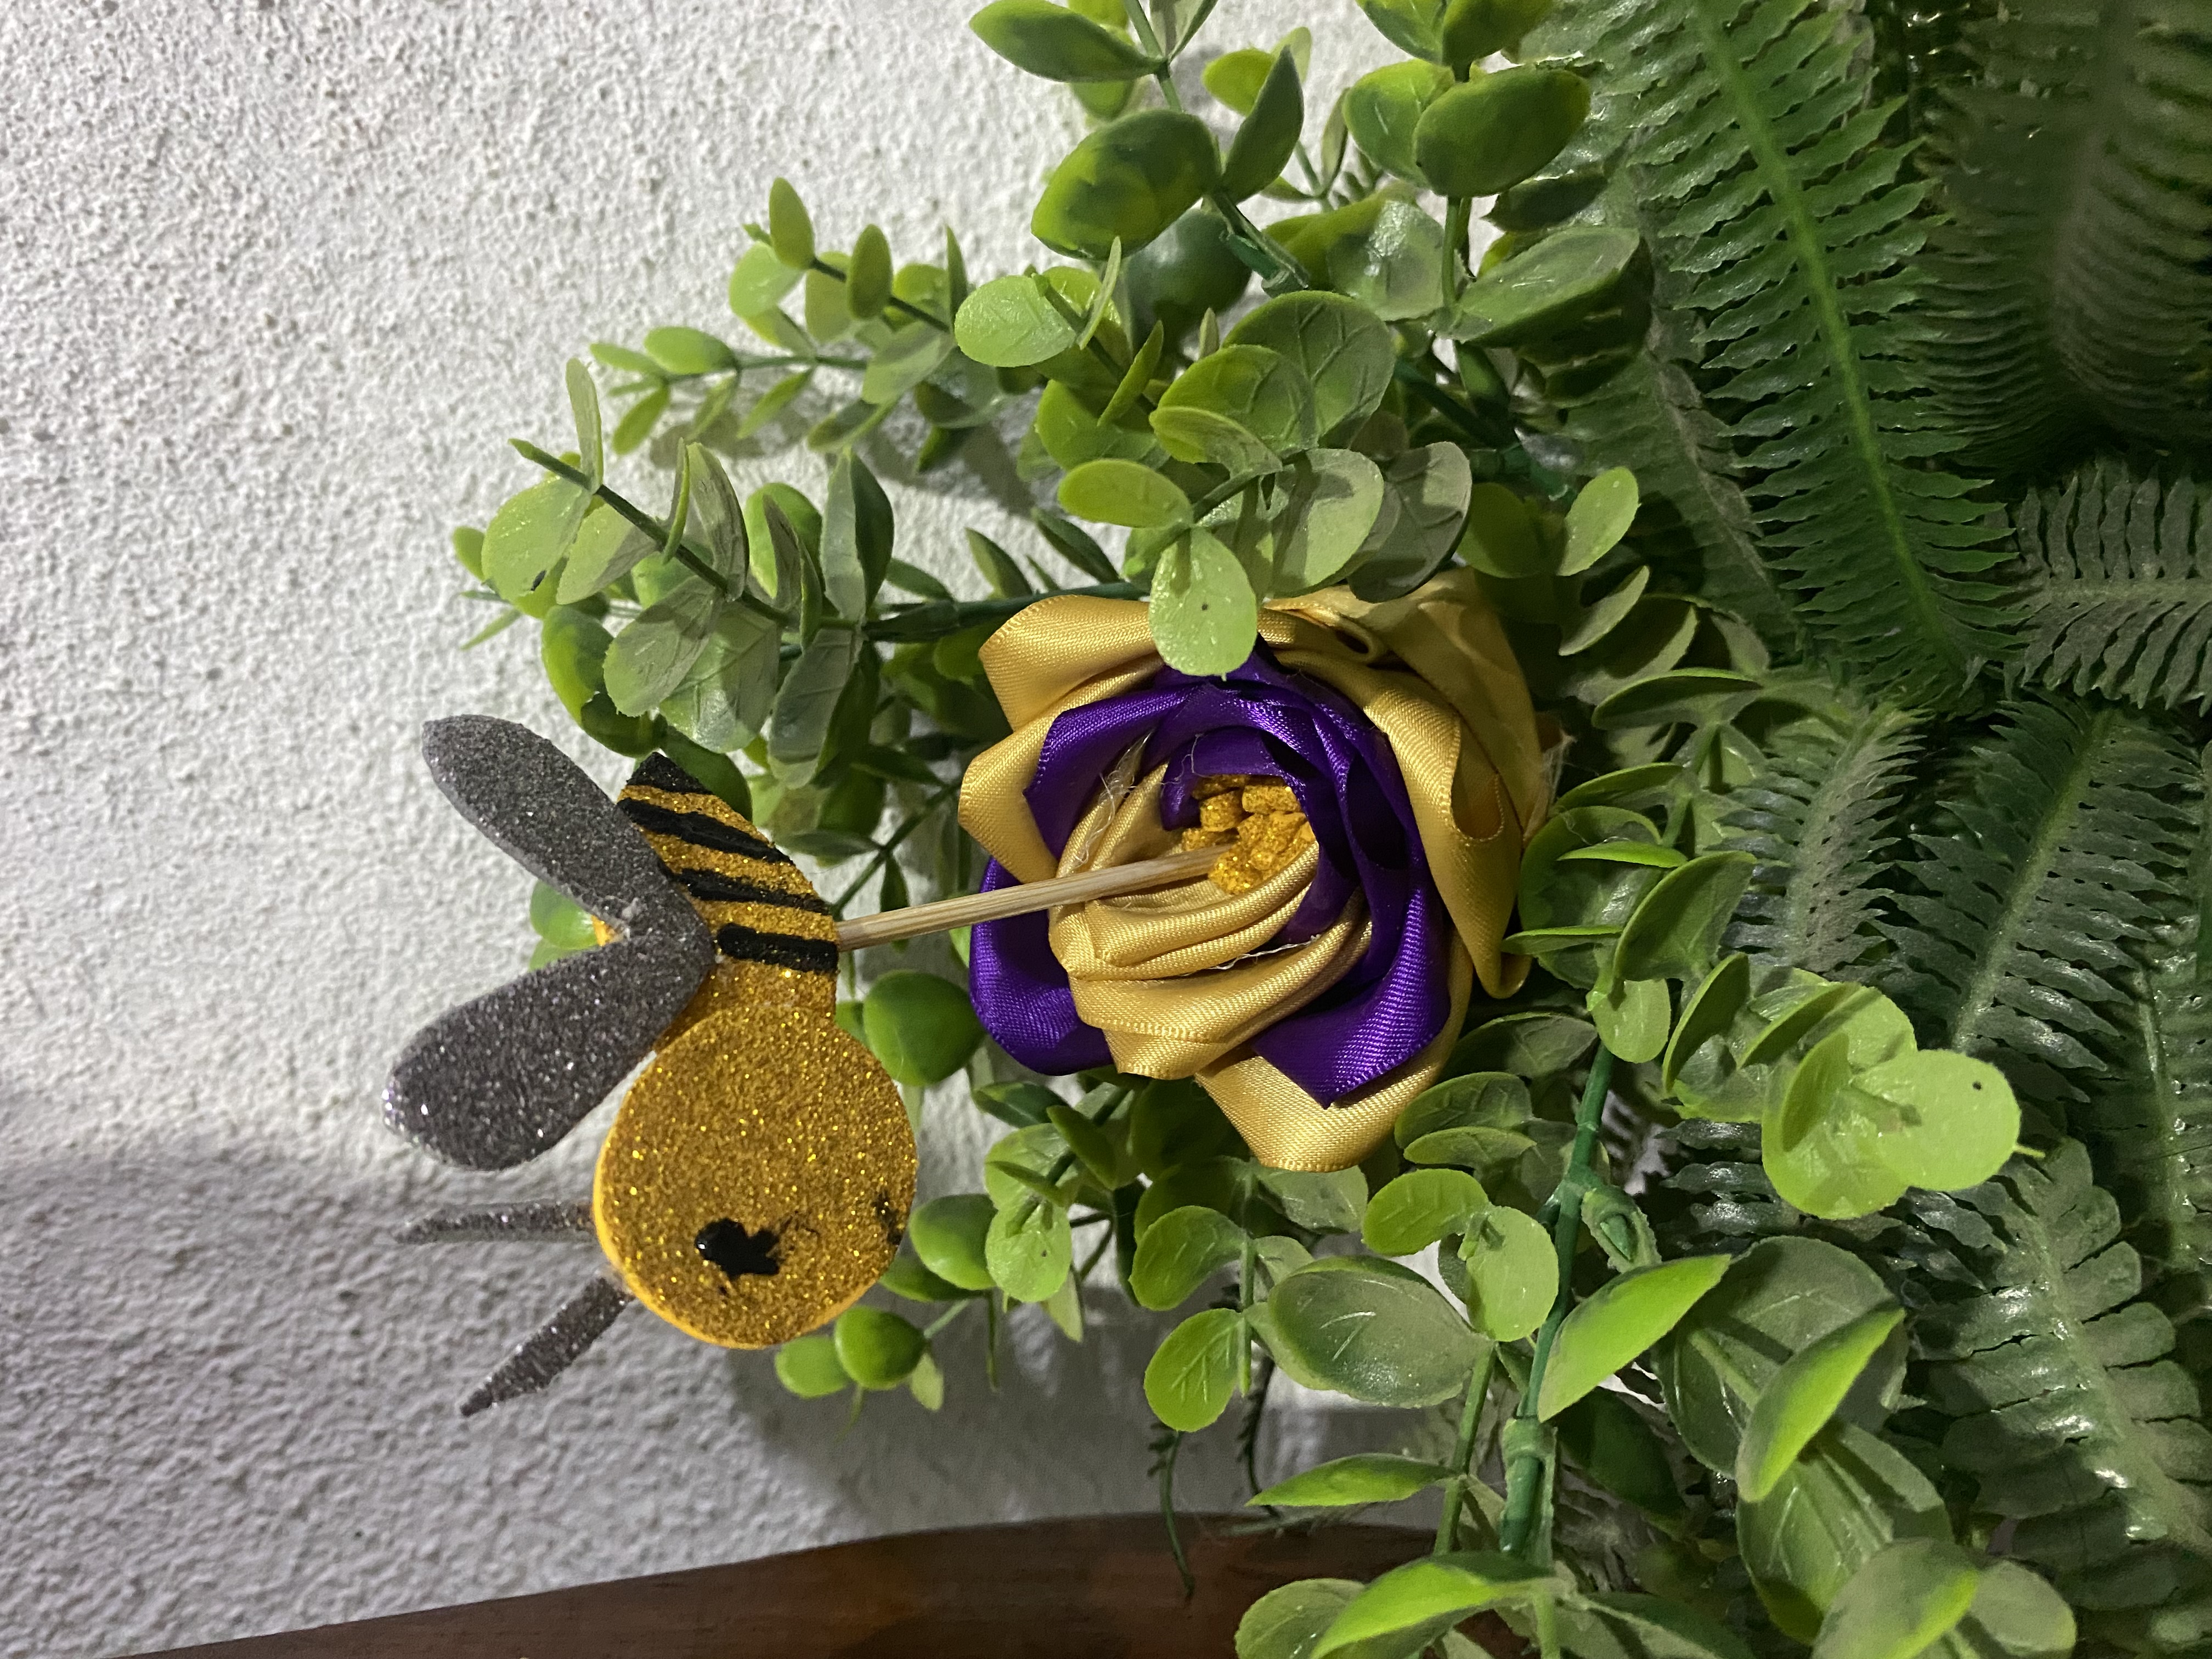
Para el quinto y último paso vamos a hacer el detalle de abejita para nuestra flor, esta abejita será la simbolización de la polinización de la flor, para esto vamos a cortar una ruedita pequeña de Fami dorado y le hacemos la figura del cuerpo con su pequeño aguijón, con Fami de otro color vamos a hacerle la forma de las alitas y de las antenas, pegamos todo con Silicon y luego le hacemos los detalles de el ojito y las rayas del cuerpo en negro, le pegamos por la parte de atrás un pequeño trozo de palito de altura, si es posible utiliza la parte que tiene la punta ya que así será más fácil introducirla en la flor, una vez lista la colocamos en el centro de nuestra flor y así ya está lista está linda decoración
For the fifth and last step we are going to make the bee detail for our flower, this bee will be the symbolization of the pollination of the flower, for this we are going to cut a small wheel of golden Fami and make the figure of the body with its small stinger, with Fami of another color we are going to make the shape of the wings and the antennas, we glue everything with Silicon and then we make the details of the eye and the stripes of the body in black, we glue a small piece of stick on the back, if possible use the part that has the tip since it will be easier to insert it into the flower, once ready we place it in the center of our flower and that's it, this beautiful decoration is ready
 |  |
|---|---|
 |  |
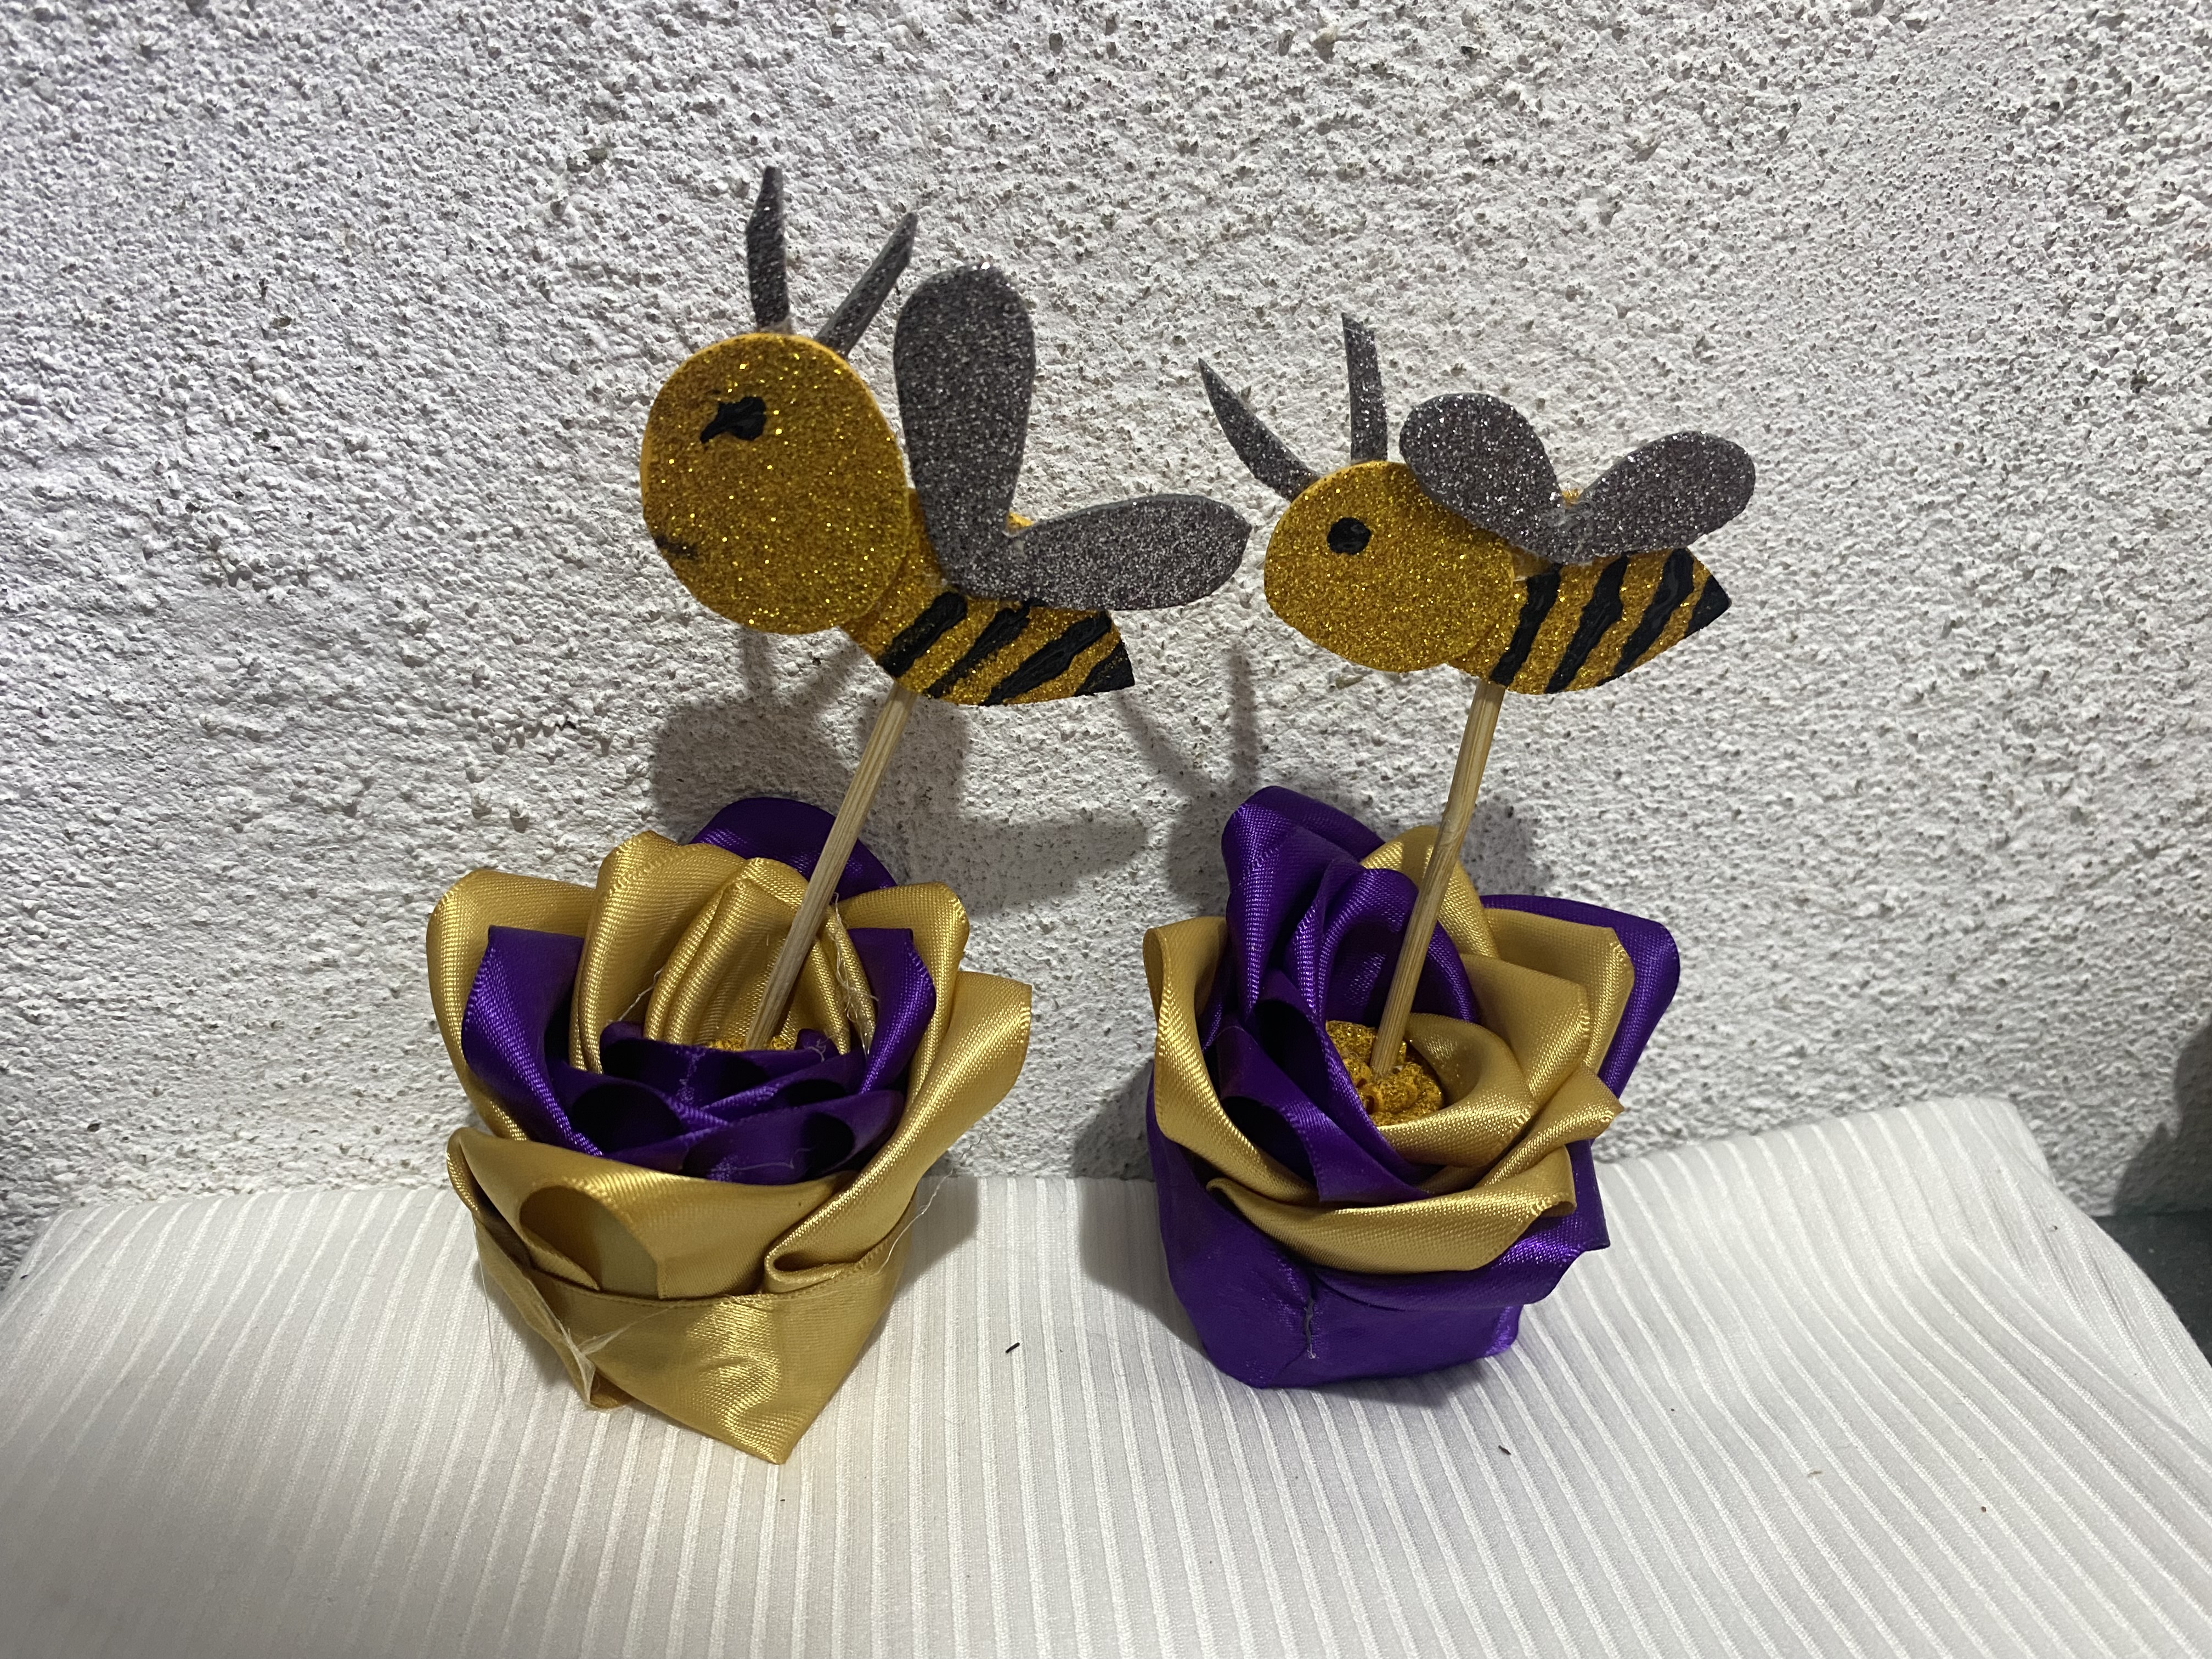
Éste es un pequeño homenaje al importante trabajo que hacen las pequeñas abejas, Polin an nuestras flores para que podamos obtener alimentos de los árboles, espero les haya gustado esta linda manualidad, eso es todo por hoy me despido deseándoles muchos éxitos y bendiciones, hasta otra oportunidad 🐝🌺
This is a small tribute to the important work that the little bees do, they pollinate our flowers so that we can get food from the trees, I hope you liked this cute craft, that's all for today I say goodbye wishing you much success and blessings, until another opportunity 🐝🌺

las fotos aquí compartidas son de mi propiedad tomadas con mi teléfono iPhone 11, la edición fue hecha en Canva, para la traducción del inglés utilice el traductor de Google
What a beautiful homage to nature. The piece shows great harmony and respect for the environment. Great work.
selected by @stevenson7
Thank you very much ☺️
It's super cute 🥰🥰🥰
Thank you
You did amazingly well dear friend
Thank you for sharing this with us
Thank you Friend 😊
Delegate your Hive Power to Ecency and earn
100% daily curation rewards in $Hive!
Que hermoso estas abejota y el de talle de la rosa
Gracias 🥰
Genial trabajo de manualidad amigo suerte en el concurso
an amazing work that deserves a thumbs up. It looks like a real bee flying in the air about to approach a flower.
Thank you very much friend 😊
que bonito, genial para decorar
how pretty, great to decorate
Gracias ☺️