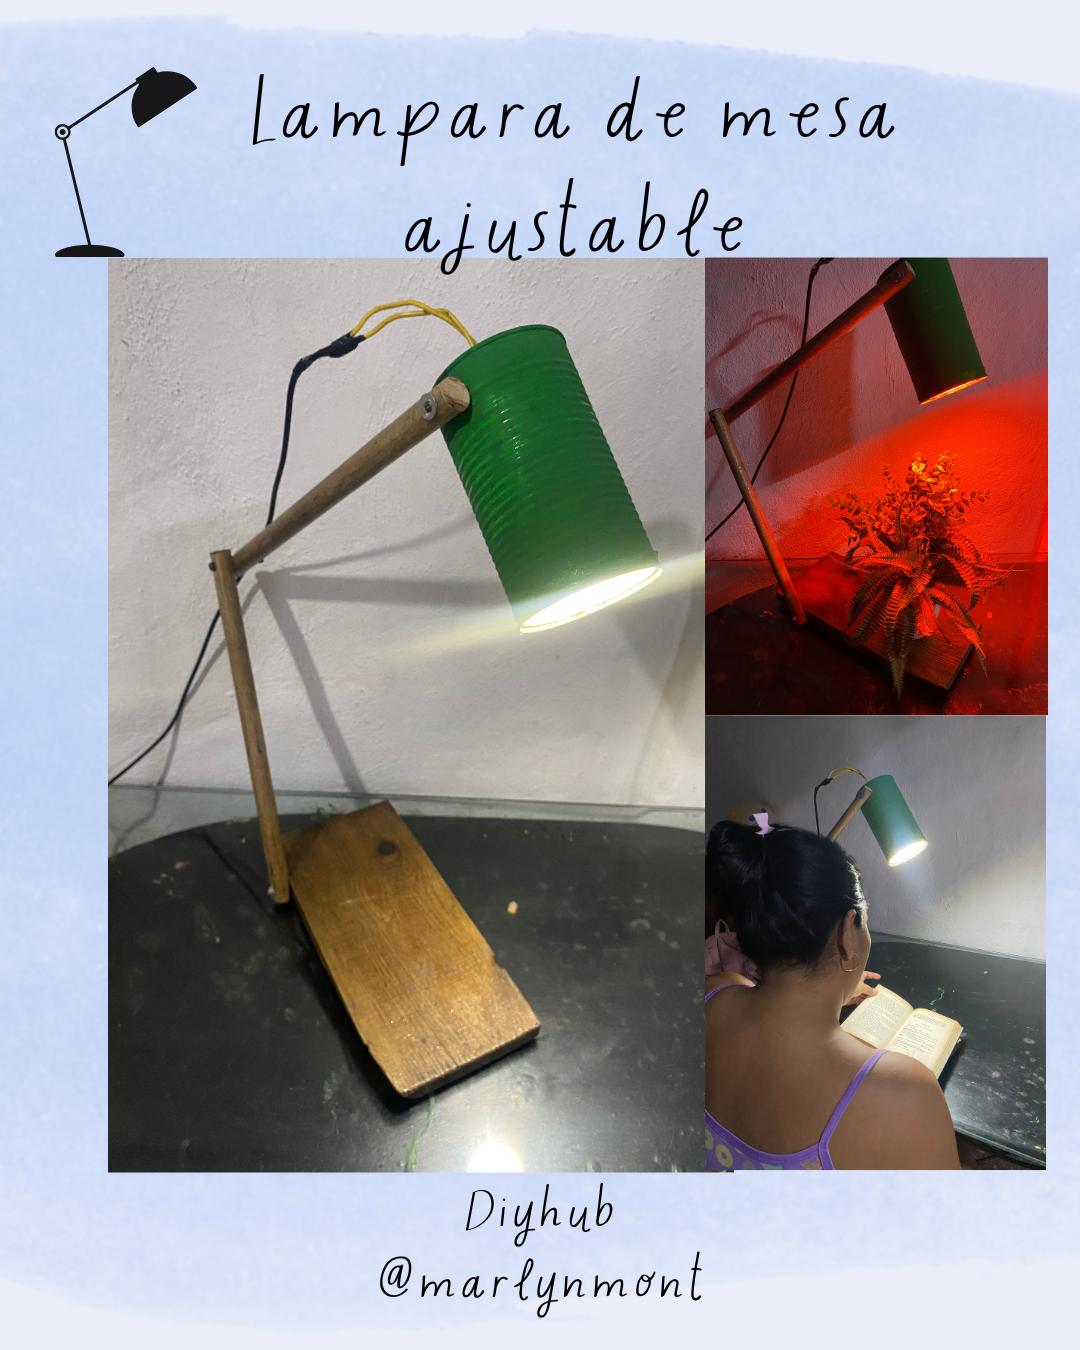
Lámpara de mesa ajustable ⚒️🪚♻️ [eng/esp]
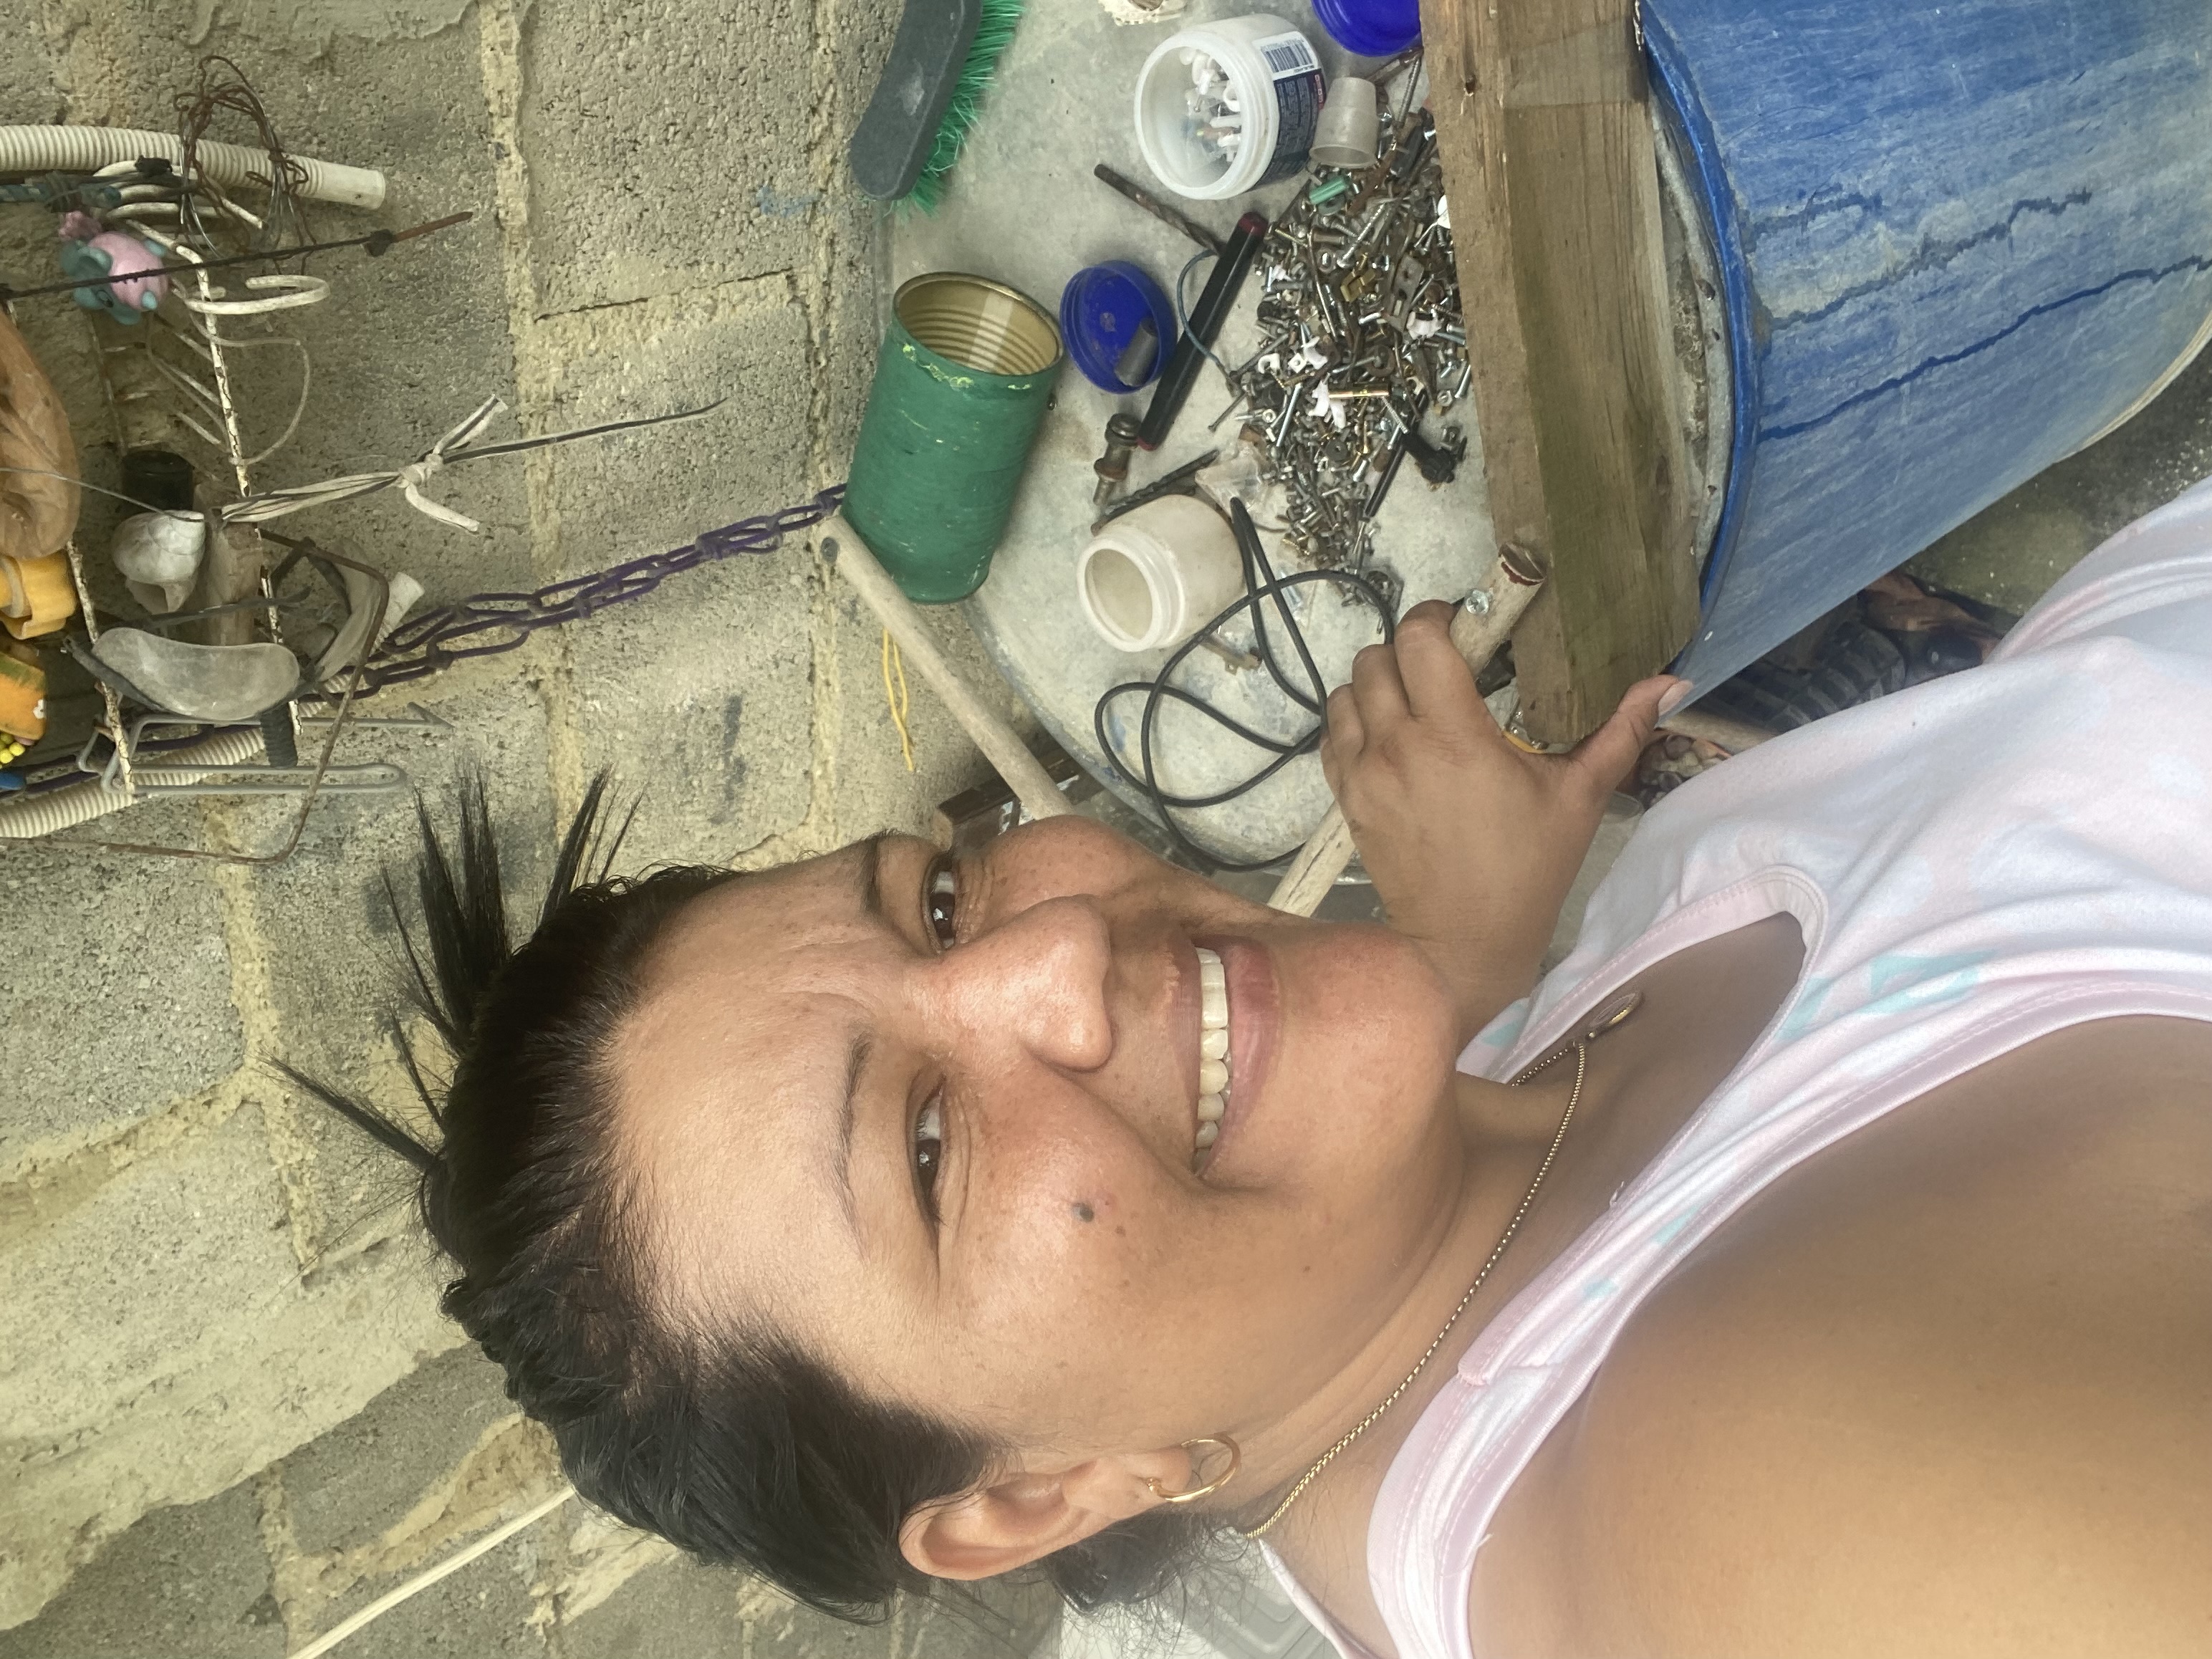
Greetings, dear friends of DIYHUB, we're still in the trend of recycling and creating. Today I'm here to share my second entry in the June Contest . Recycling, Upcycling and Repairing 🛠️🔨✏️🪚❤️♻️
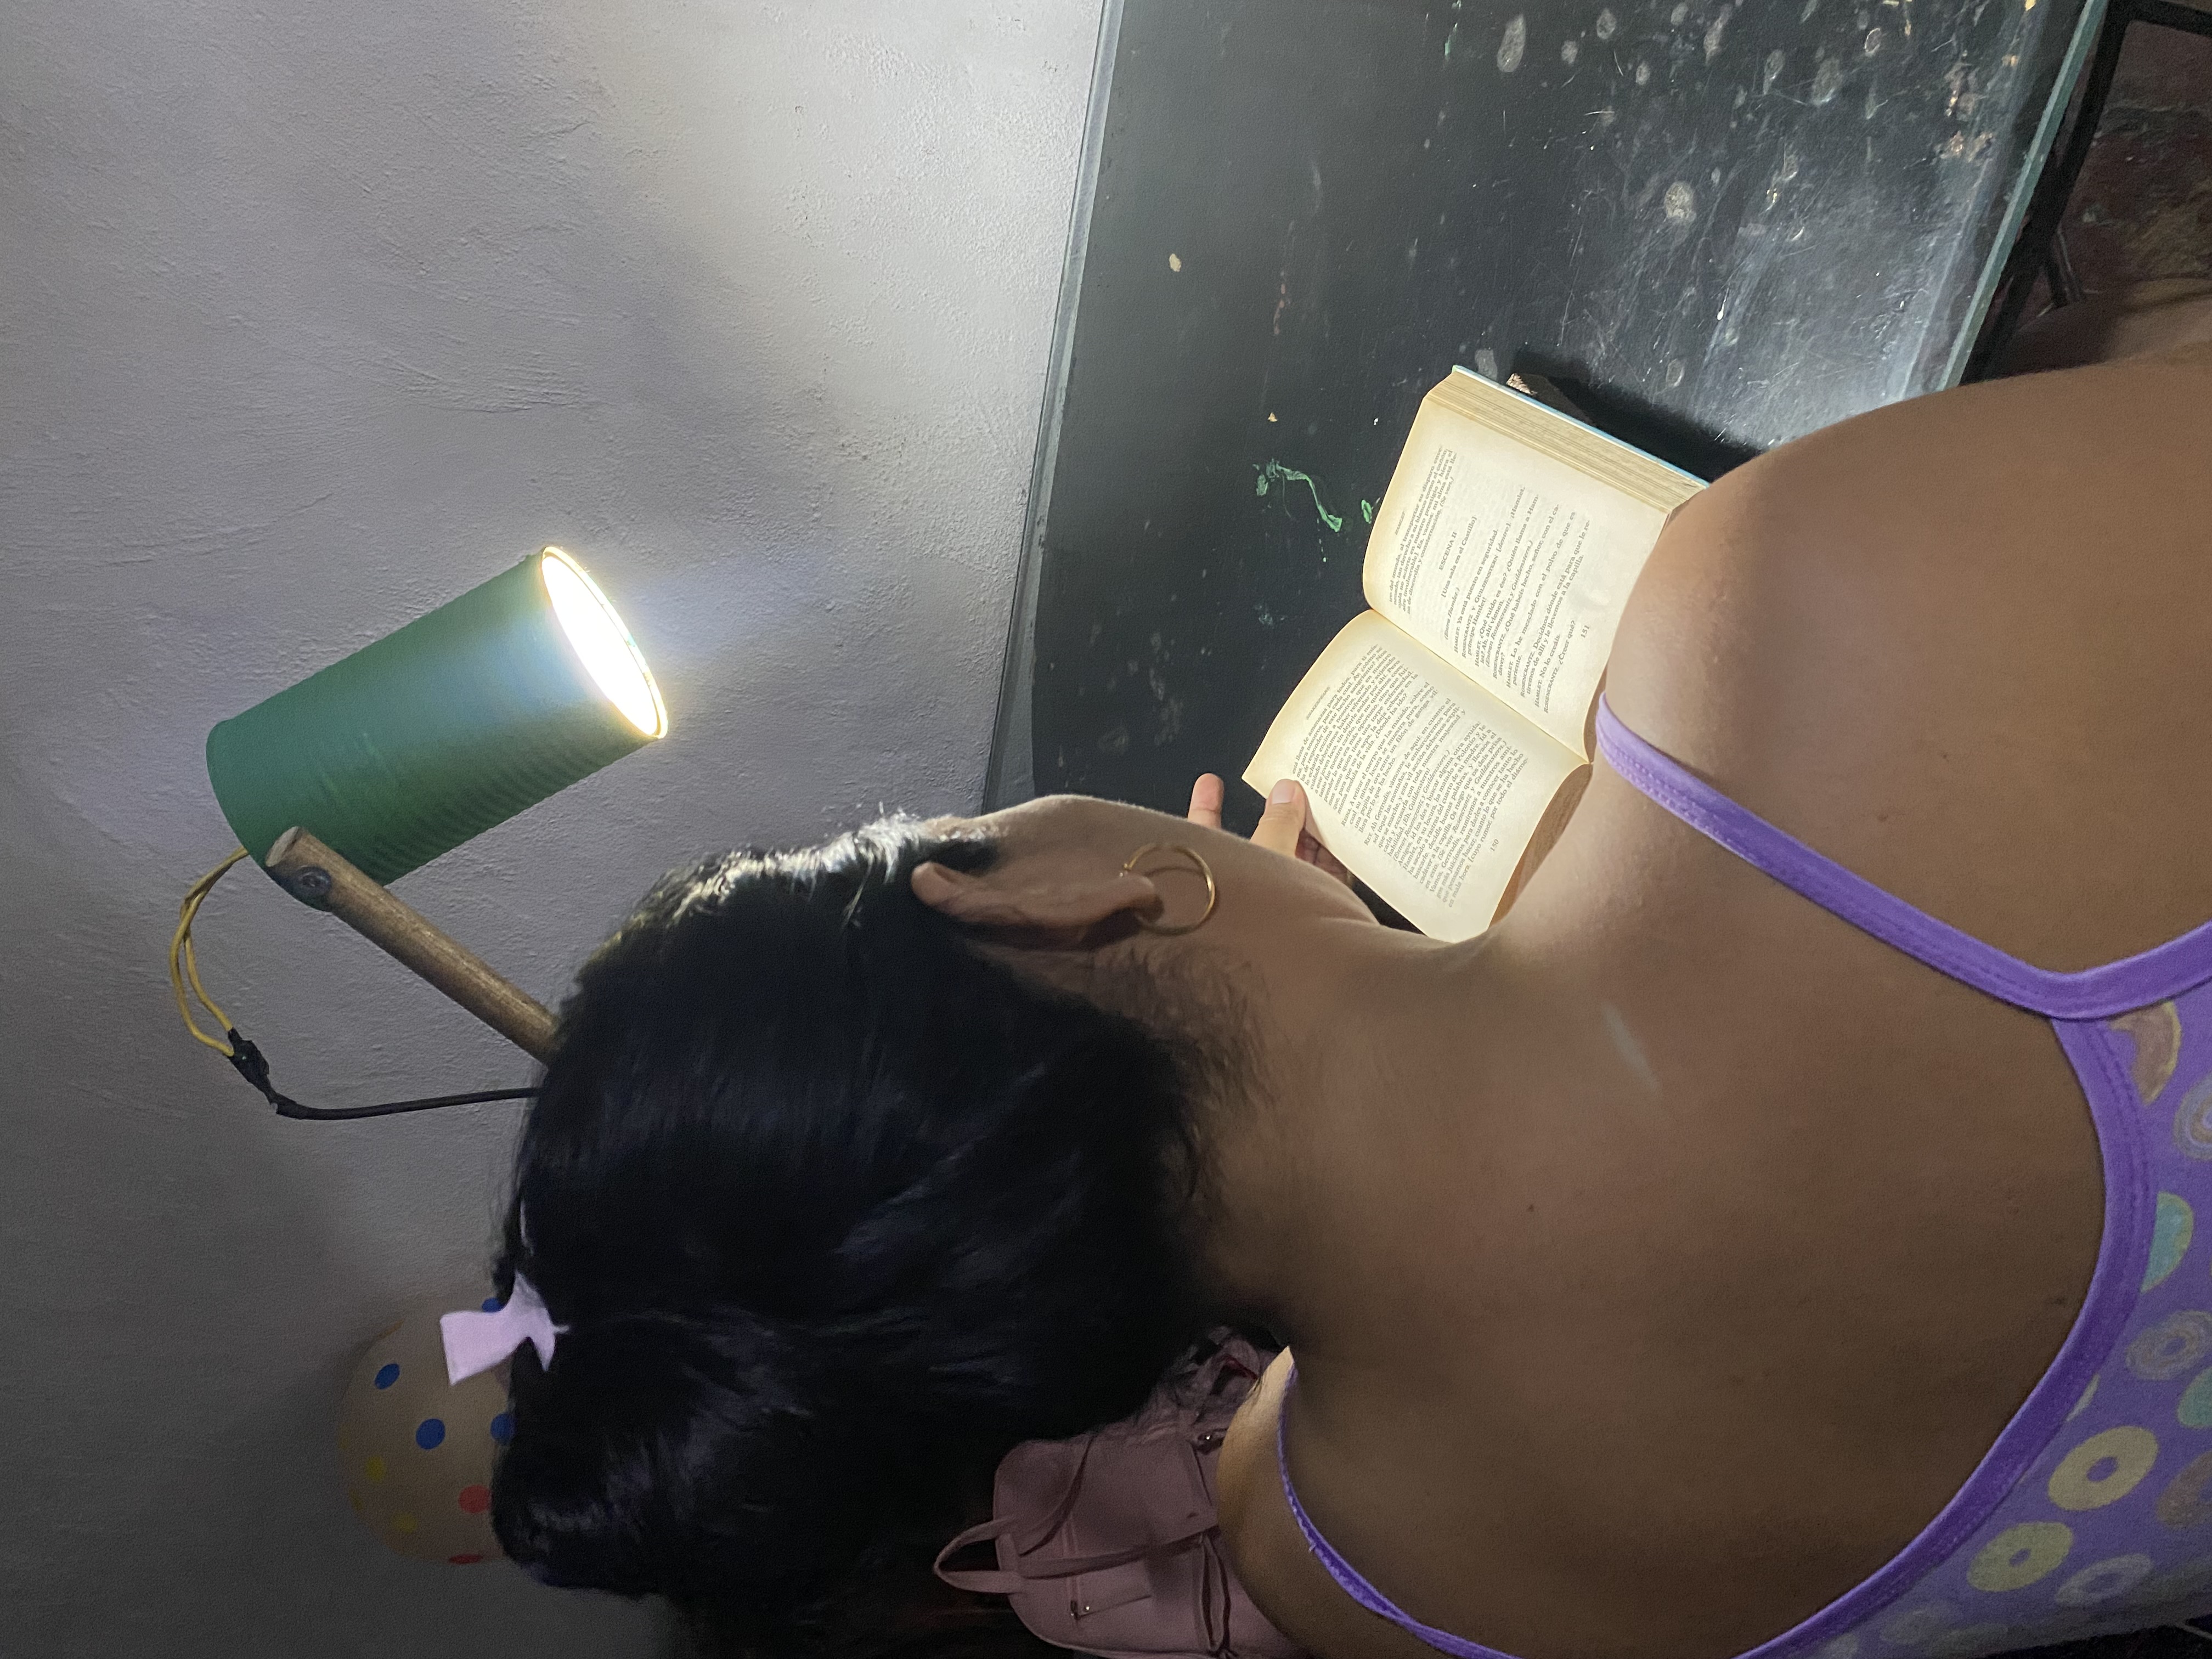
For a long time, I've wanted a table lamp, one of those that you can point in different directions, something like the ones in the Pixar commercials, the ones that appear at the beginning of some movies. That style of lamp you can point in different directions while you're doing some kind of work, so the light hits you directly where you want it. I searched through all my materials to create it and got to work. Here are the steps:
Saludos queridos amigos de DIYHUB, seguimos en la onda de reciclar y crear, hoy vengo por acá a dejarles mi segunda Participación en el Concurso del mes de junio “Recycling, Upcycling and Repairing” 🛠️
Desde hace tiempo he querido una lámpara de mesa de esas que puedes ponerla en diferentes direcciones, algo así como la de la publicidad de Pixar, esa que sale al comienzo de algunas películas, ese estilo de lámparas que puedes dirigir a diferentes lugares mientras estás haciendo algún tipo de trabajo y que la luz te llegue directamente a donde deseas, busqué entre todos mis materiales para poder crearla y me puse manos a la obra, aquí les dejo el paso a paso:
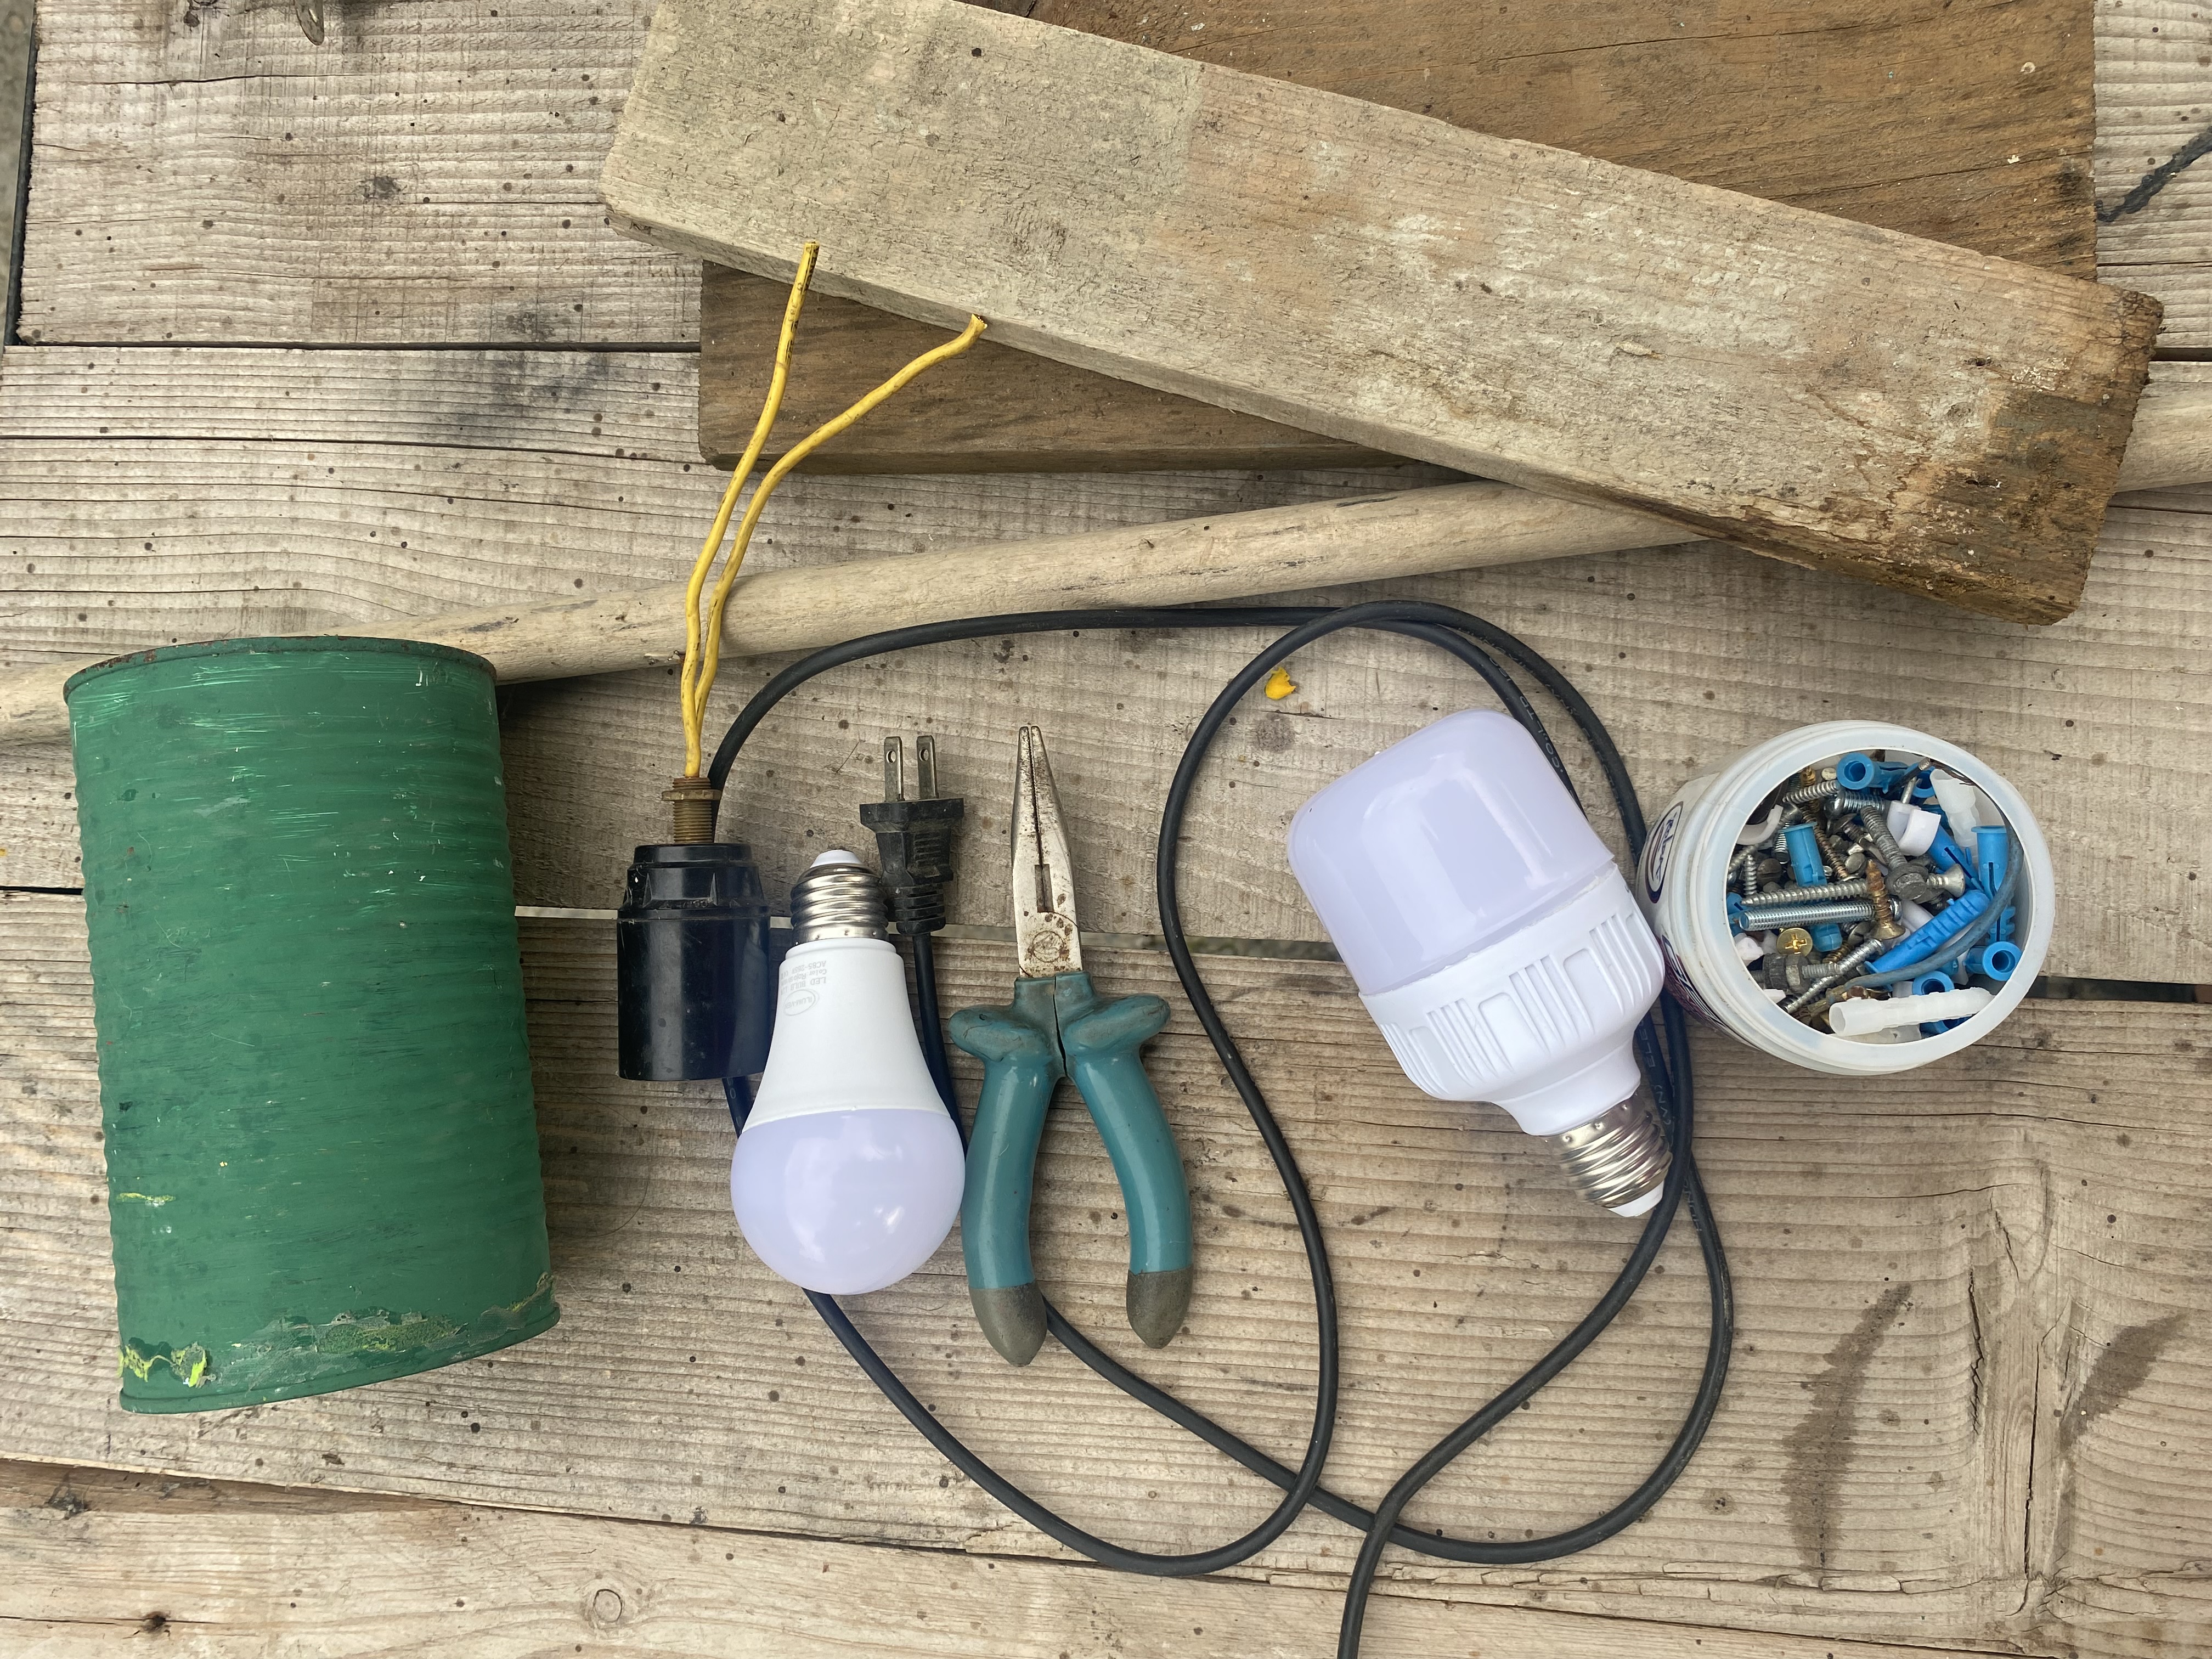
MATERIALES
MATERIALS
This type of lamp is very practical because you can keep it on your desk, or in my case, I want to put it on my tables where I have the sewing machines. It will also be useful for my crafts, for taking photographs, or even to decorate a space since you can put a colored light bulb in it and it will look great. The best part is that we can make it with things we probably have lying around the yard and that we can put to good use. Here is the list of materials to use:
- Wood of any type, a rectangular one for the base in the size of your preference and others that are thin (in my case, I will use a broomstick).
- Screws of different sizes
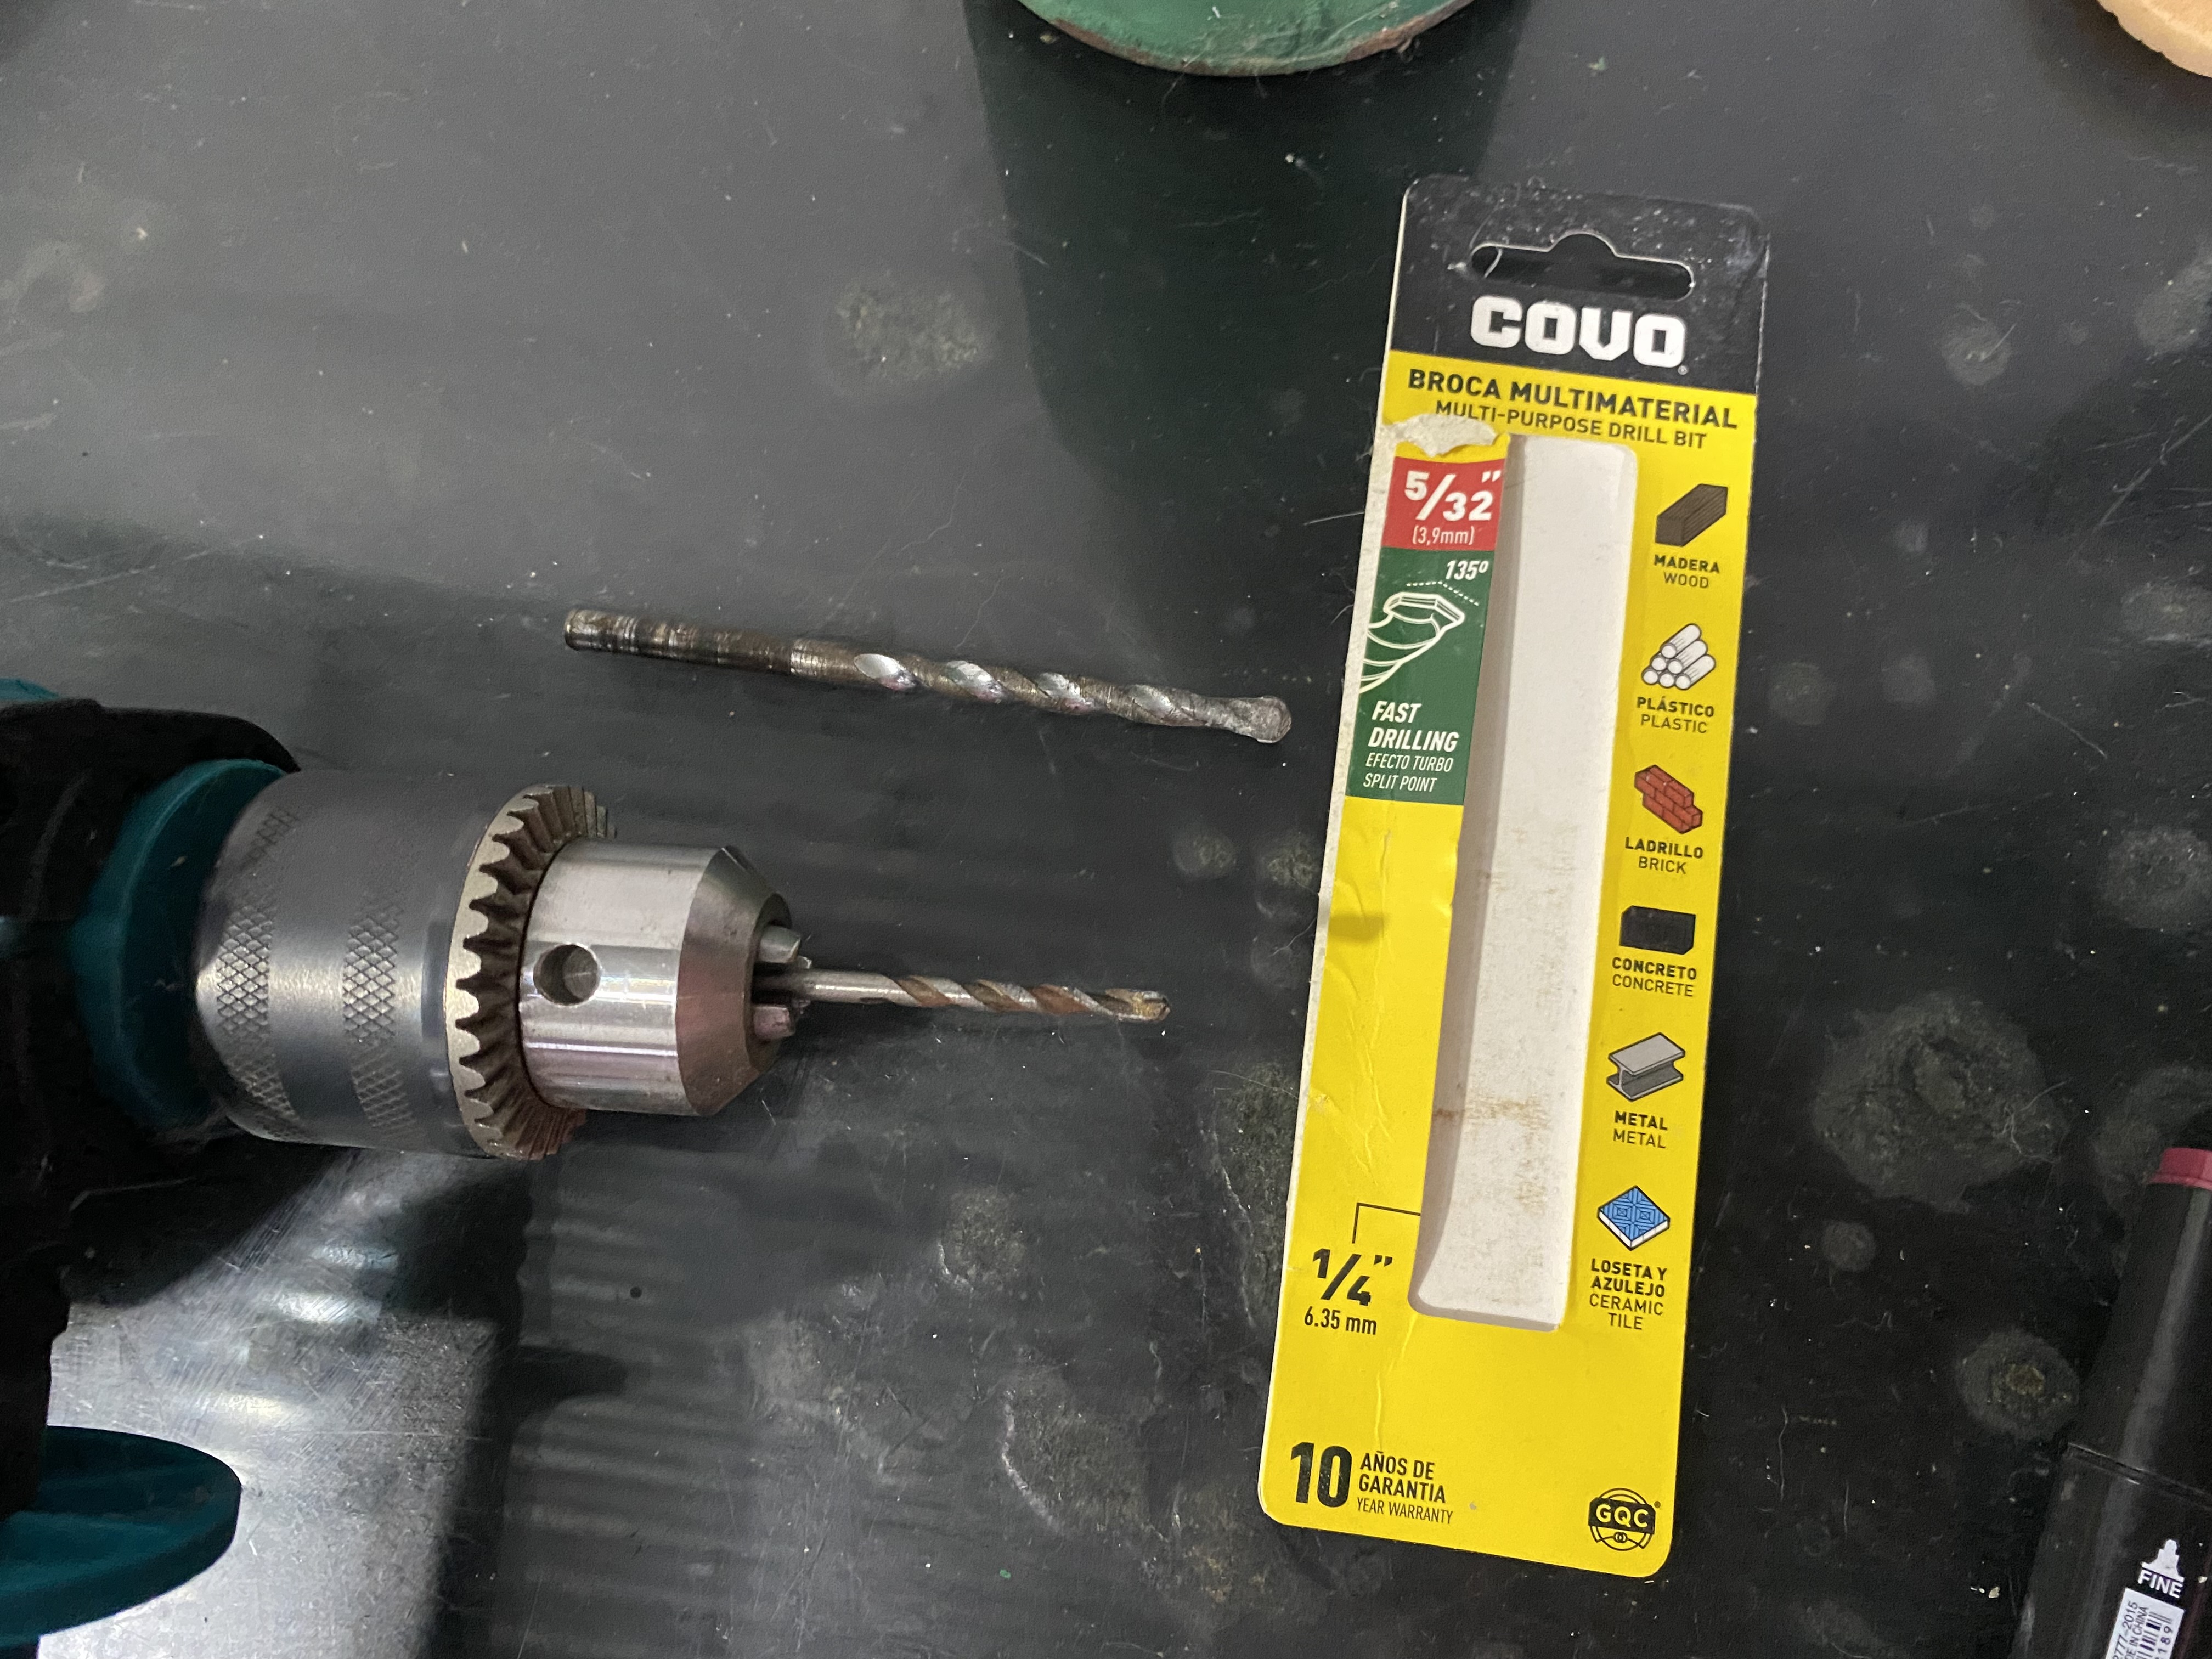
- Drill
- Saw
- A can
- A piece of wire (in my case, I will use the wire from an old fan that already has a plug).
- A socket for a light bulb
- A light bulb
- Paints or gasoline and anime to make homemade varnish.
Éste tipo de lámparas es muy práctica ya que la puedes tener en tu escritorio o en mi caso la deseo para ponerla en mis mesas donde tengo las máquinas de coser, también me servirá para mis manualidades, para tomar fotografías o hasta para decorar algún espacio ya que puedes colocarle un bombillo de color y quedará muy bien, lo mejor de todo es que la podemos hacer con cosas que seguramente tenemos tiradas en el patio y que podemos darle un buen uso, aquí te dejo la lista de materiales a utilizar :
- Maderas de cualquier tipo, una rectangular para la base del tamaño de su preferencia y otras que sean delgadas en mi caso utilizaré un palo de escoba
- Tornillos de diferentes tamaños
- Taladro
- serrucho
- Una lata
- Un trozo de cable, en mi caso voy a utilizar el cable de un viejo ventilador que ya tiene enchufe
- Un Socate para bombillo
- Un bombillo
- pinturas o gasolina y anime para hacer barniz casero
PASO A PASO
STEP BY STEP
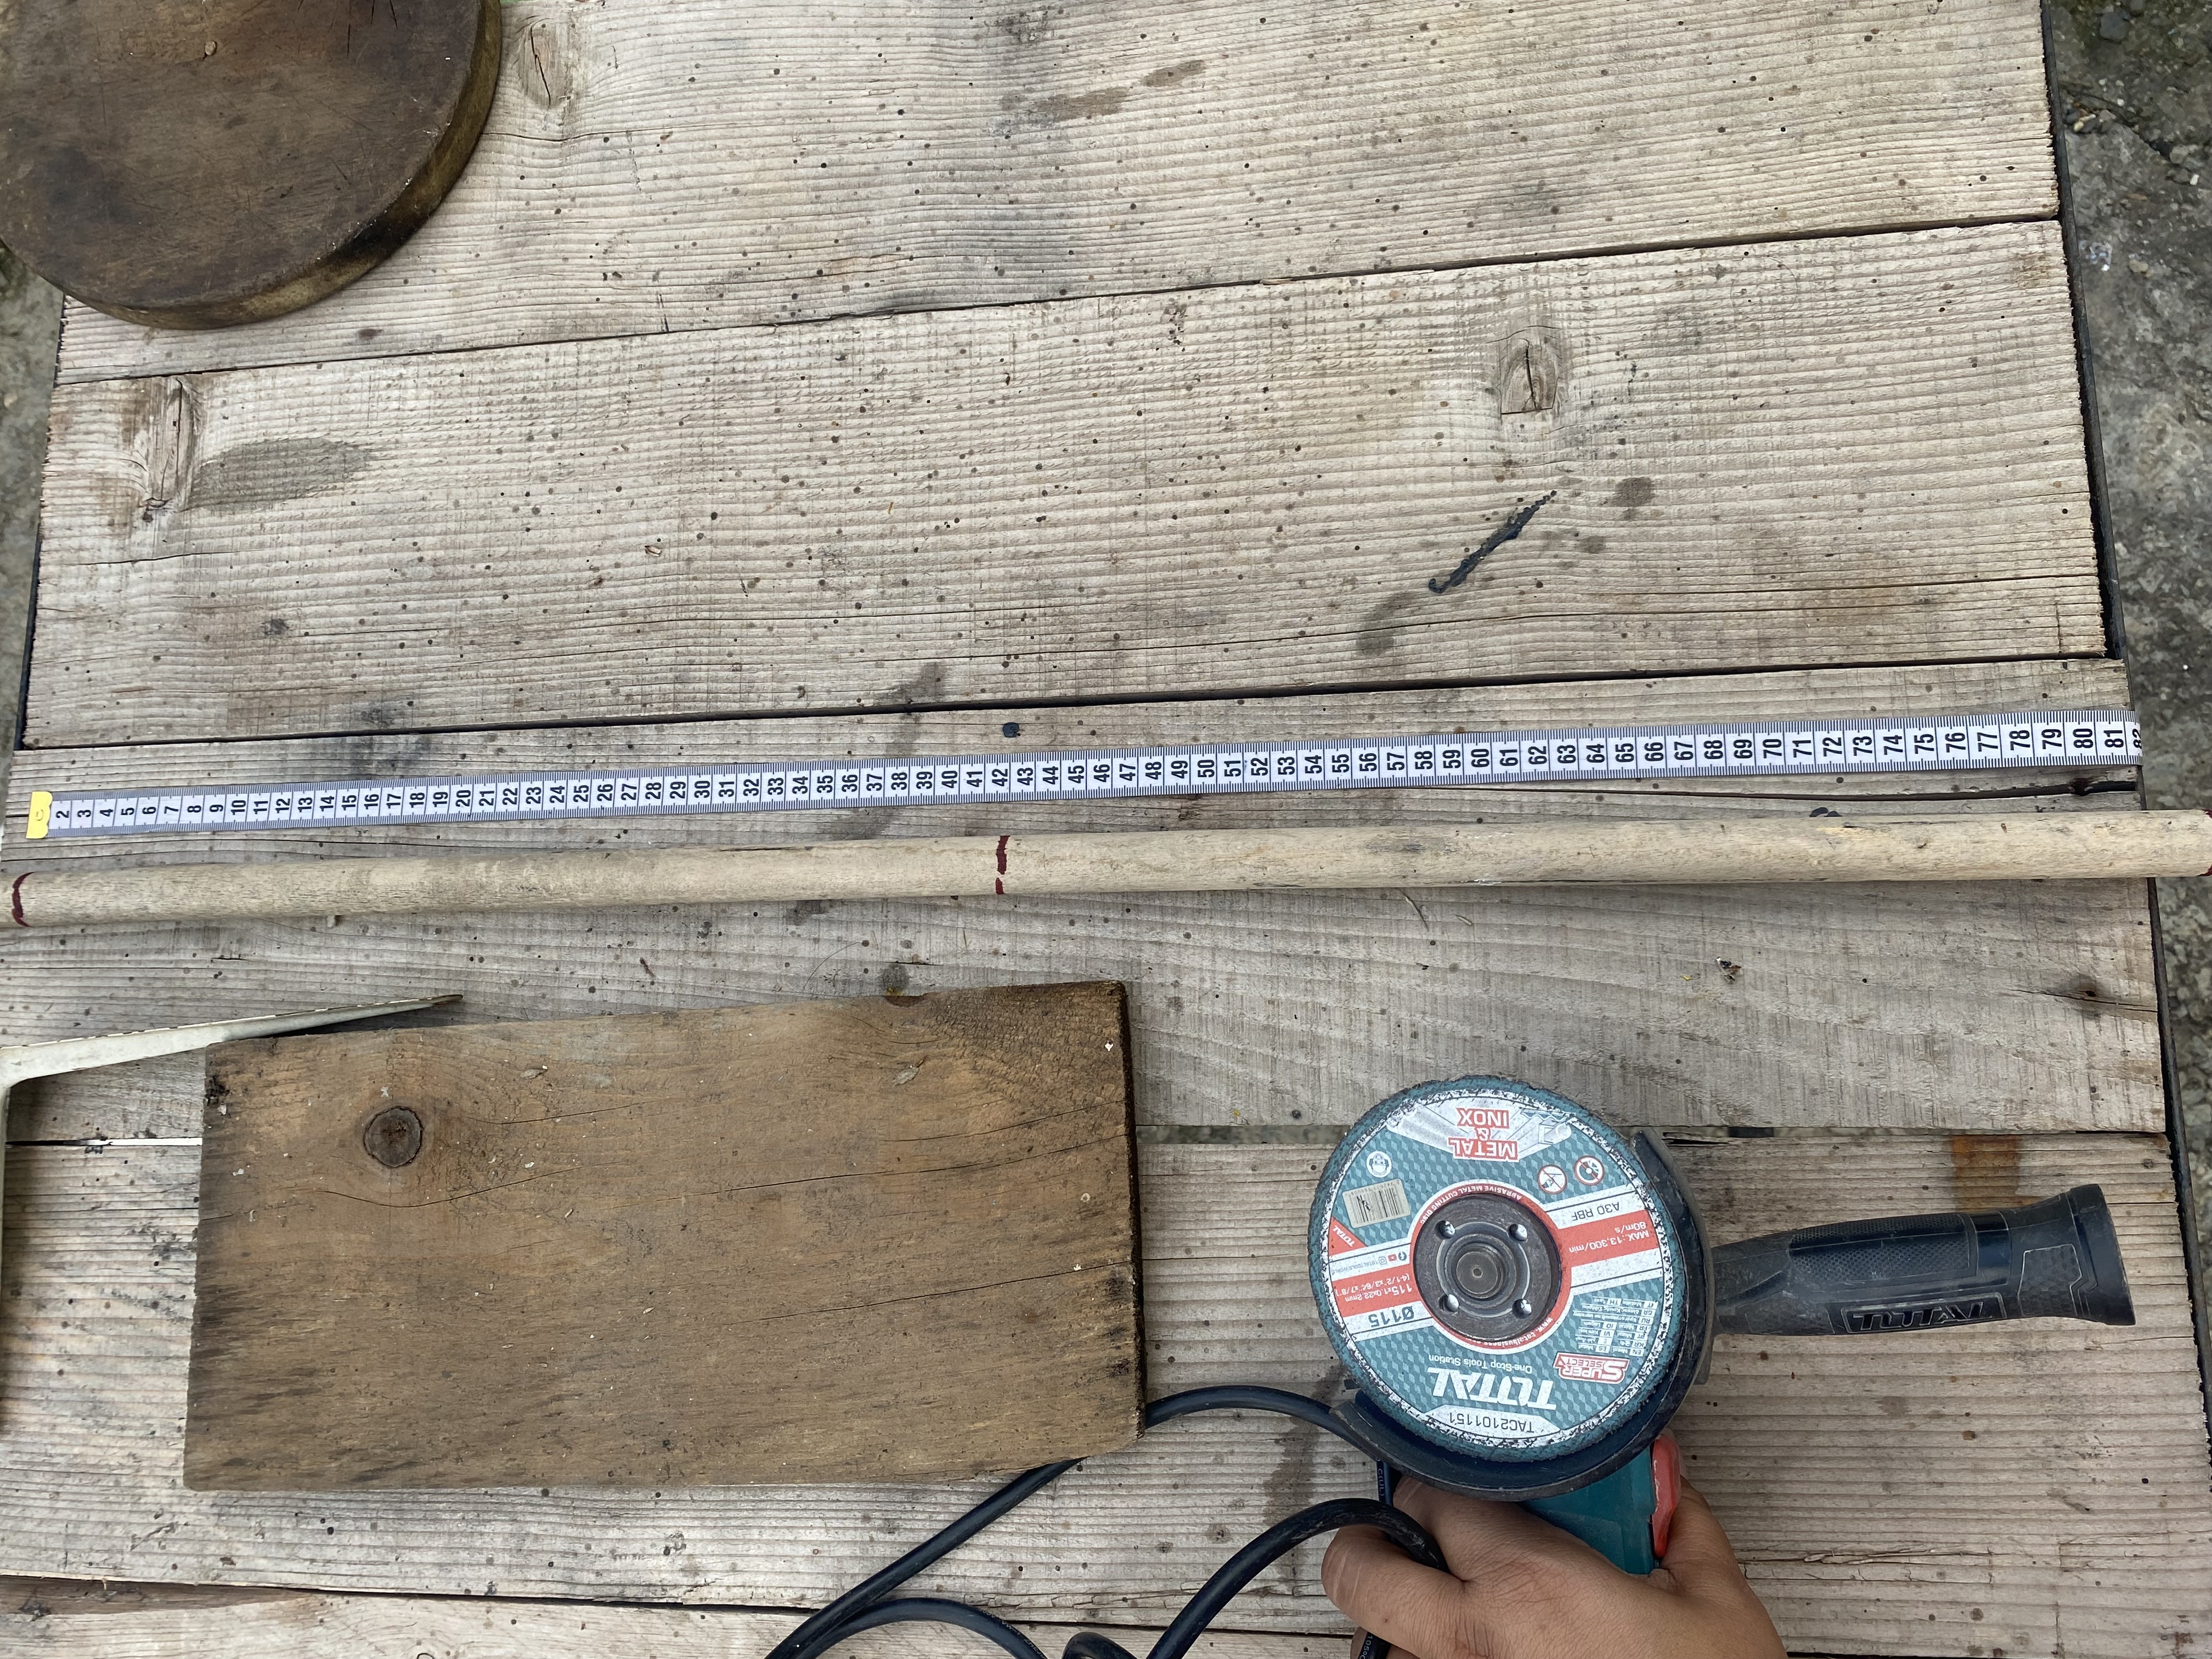
𝓟𝓐𝓢𝓞 1
We'll start by defining the base for our lamp. In this case, I'm going to use a piece of wood I found in my yard (I have a lot of materials in my yard, including many cuts of wood of different sizes and thicknesses). It measures 35 cm long by 16 cm wide. I liked this wood for the base because it's a bit heavy, and it's ideal since it has to support the weight of the light bulb stand.
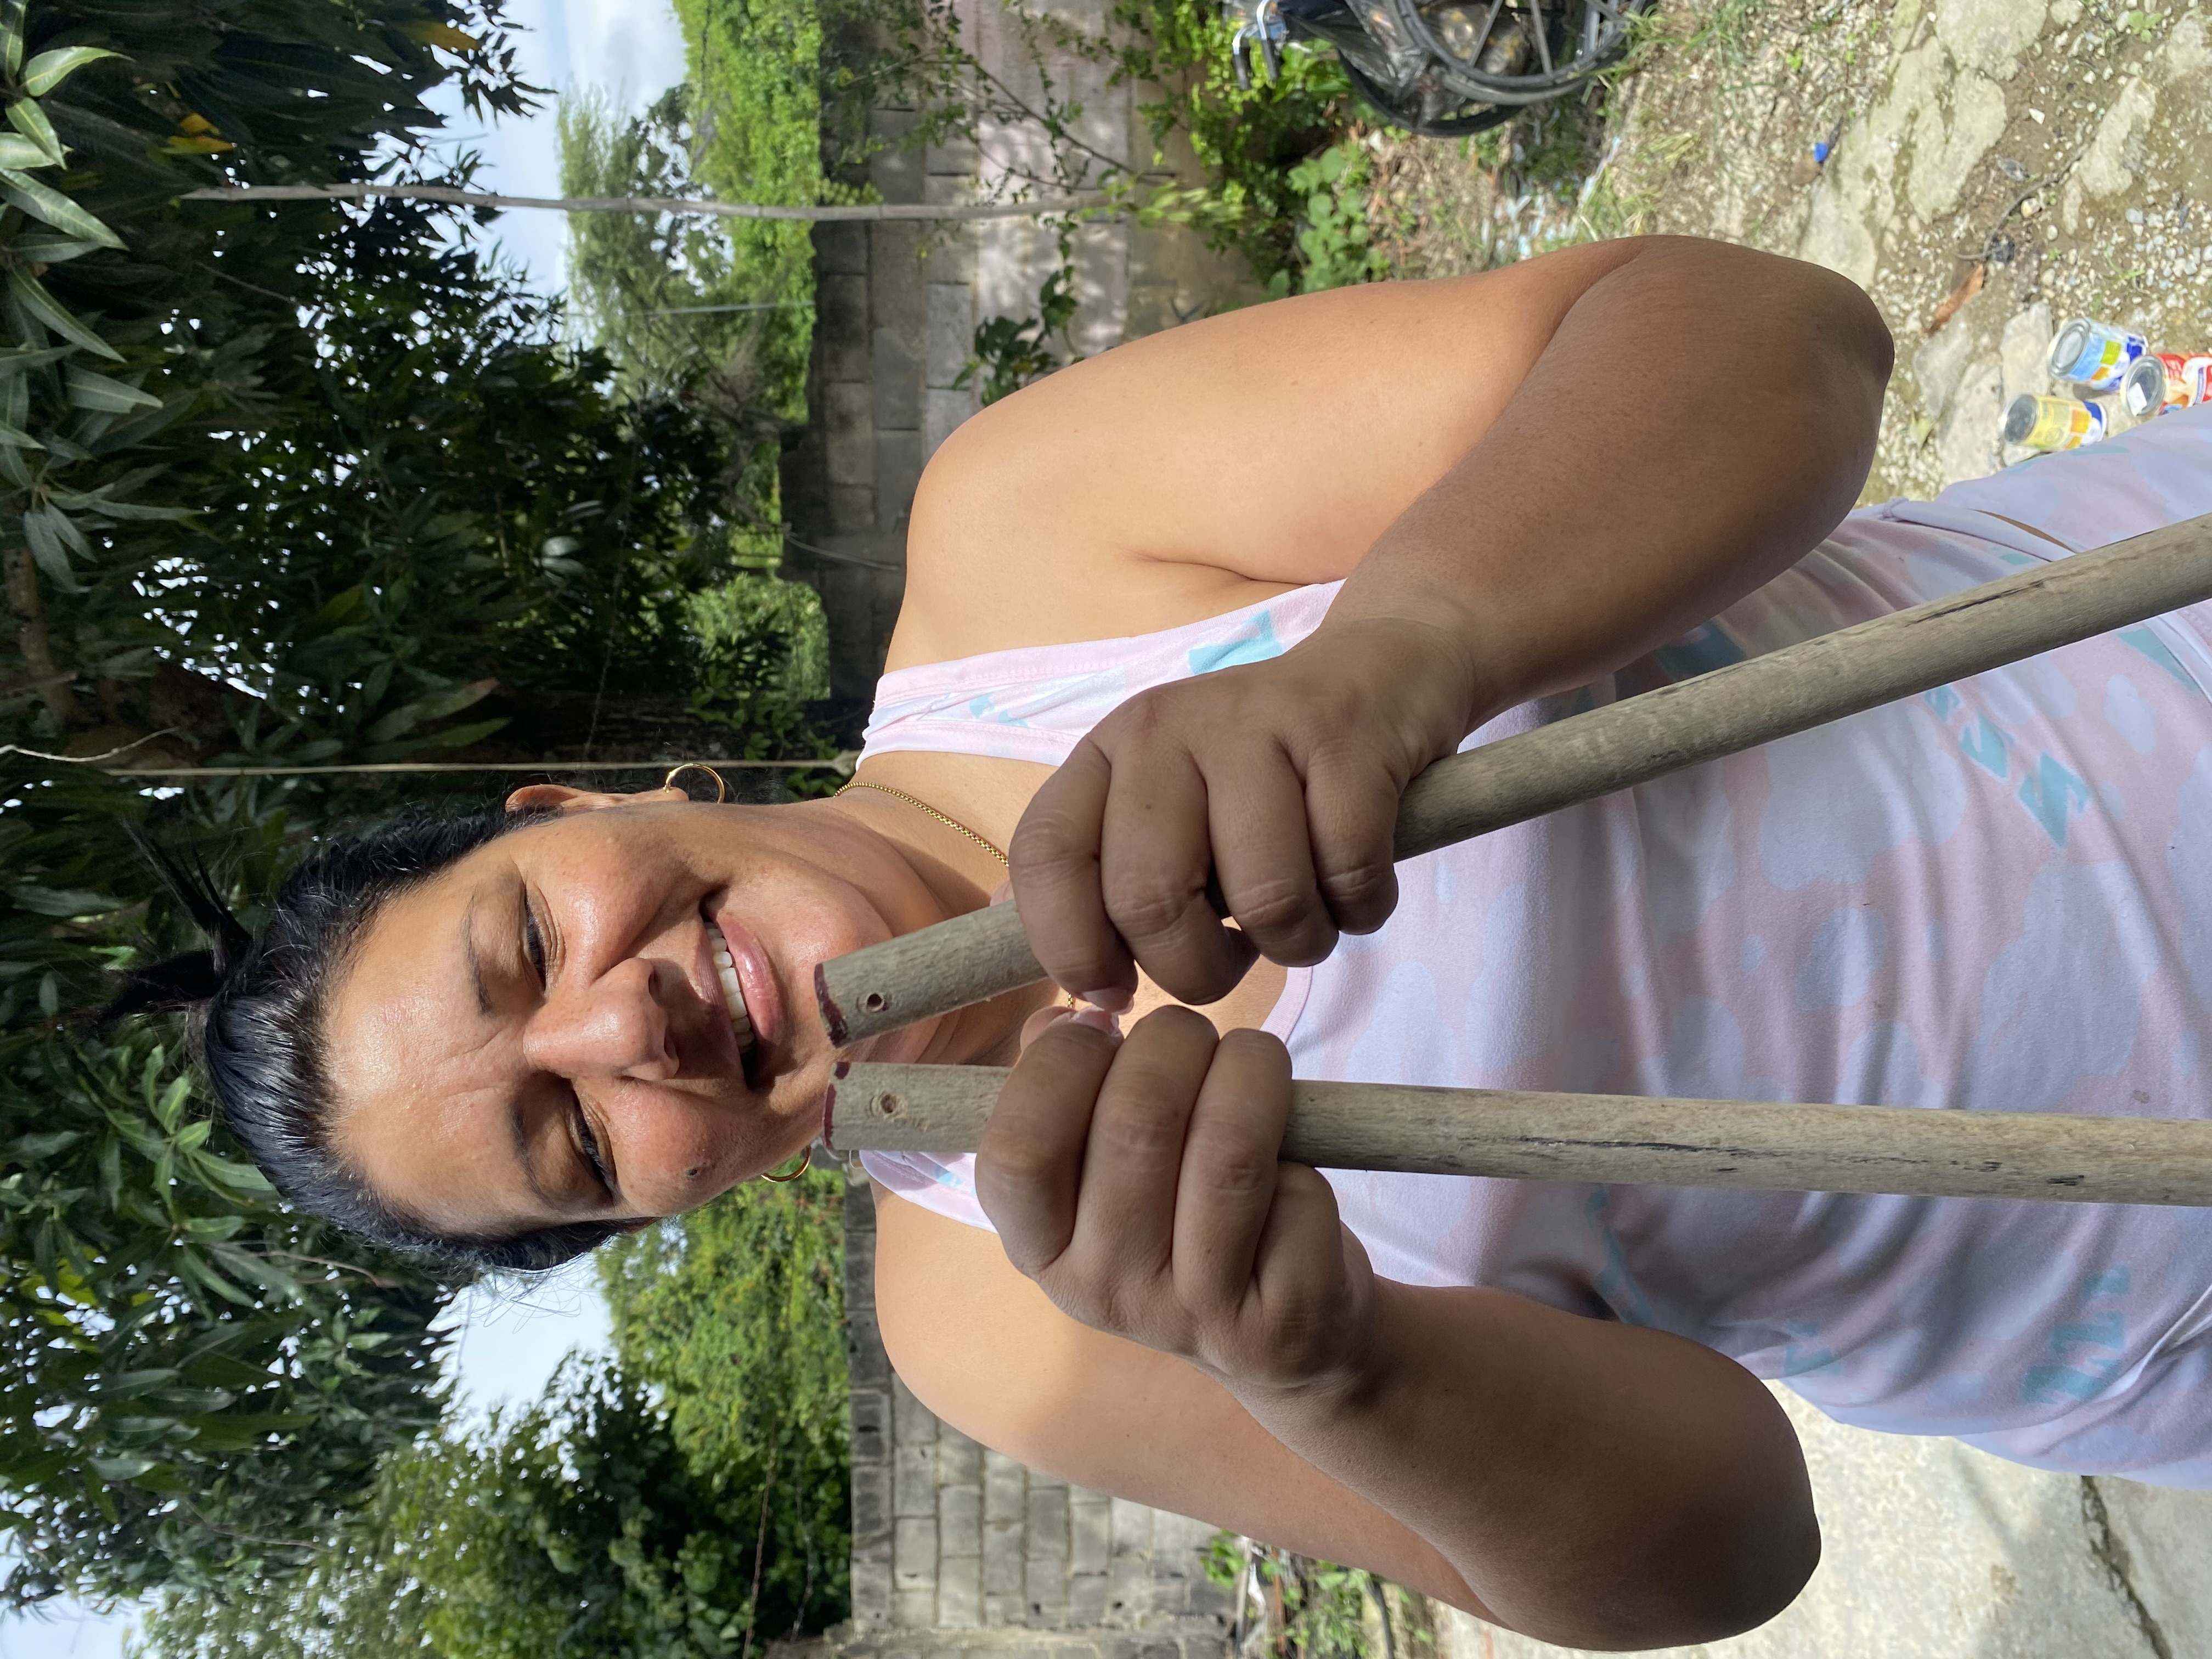
We'll use a broom handle that we're not using. We'll cut two pieces of broom handle to the size of your preference. In my case, I want the lamp to be a bit long, so I'm going to make each piece of stick 40 cm.
Comenzaremos definiendo la base para nuestra lámpara, en este caso yo voy a utilizar una madera que conseguí en mi patio (en mi patio tengo muchos materiales entre ellos muchos cortes de madera de diferentes tamaños y grosores), está mide 35 cm de largo por 16 cm de ancho, me gustó esta madera para la base ya que es un poco pesada y es lo ideal ya que ella debe soportar el peso del paral para el bombillo.
Utilizaremos un palo de escoba que no estemos utilizando, vamos a cortar 2 pedazos de palo de escoba al tamaño de su preferencia, en mi caso quiero que me quede un poco larga la lámpara así que lo voy a hacer de 40 cm cada pieza de palo.
 |  |
|---|
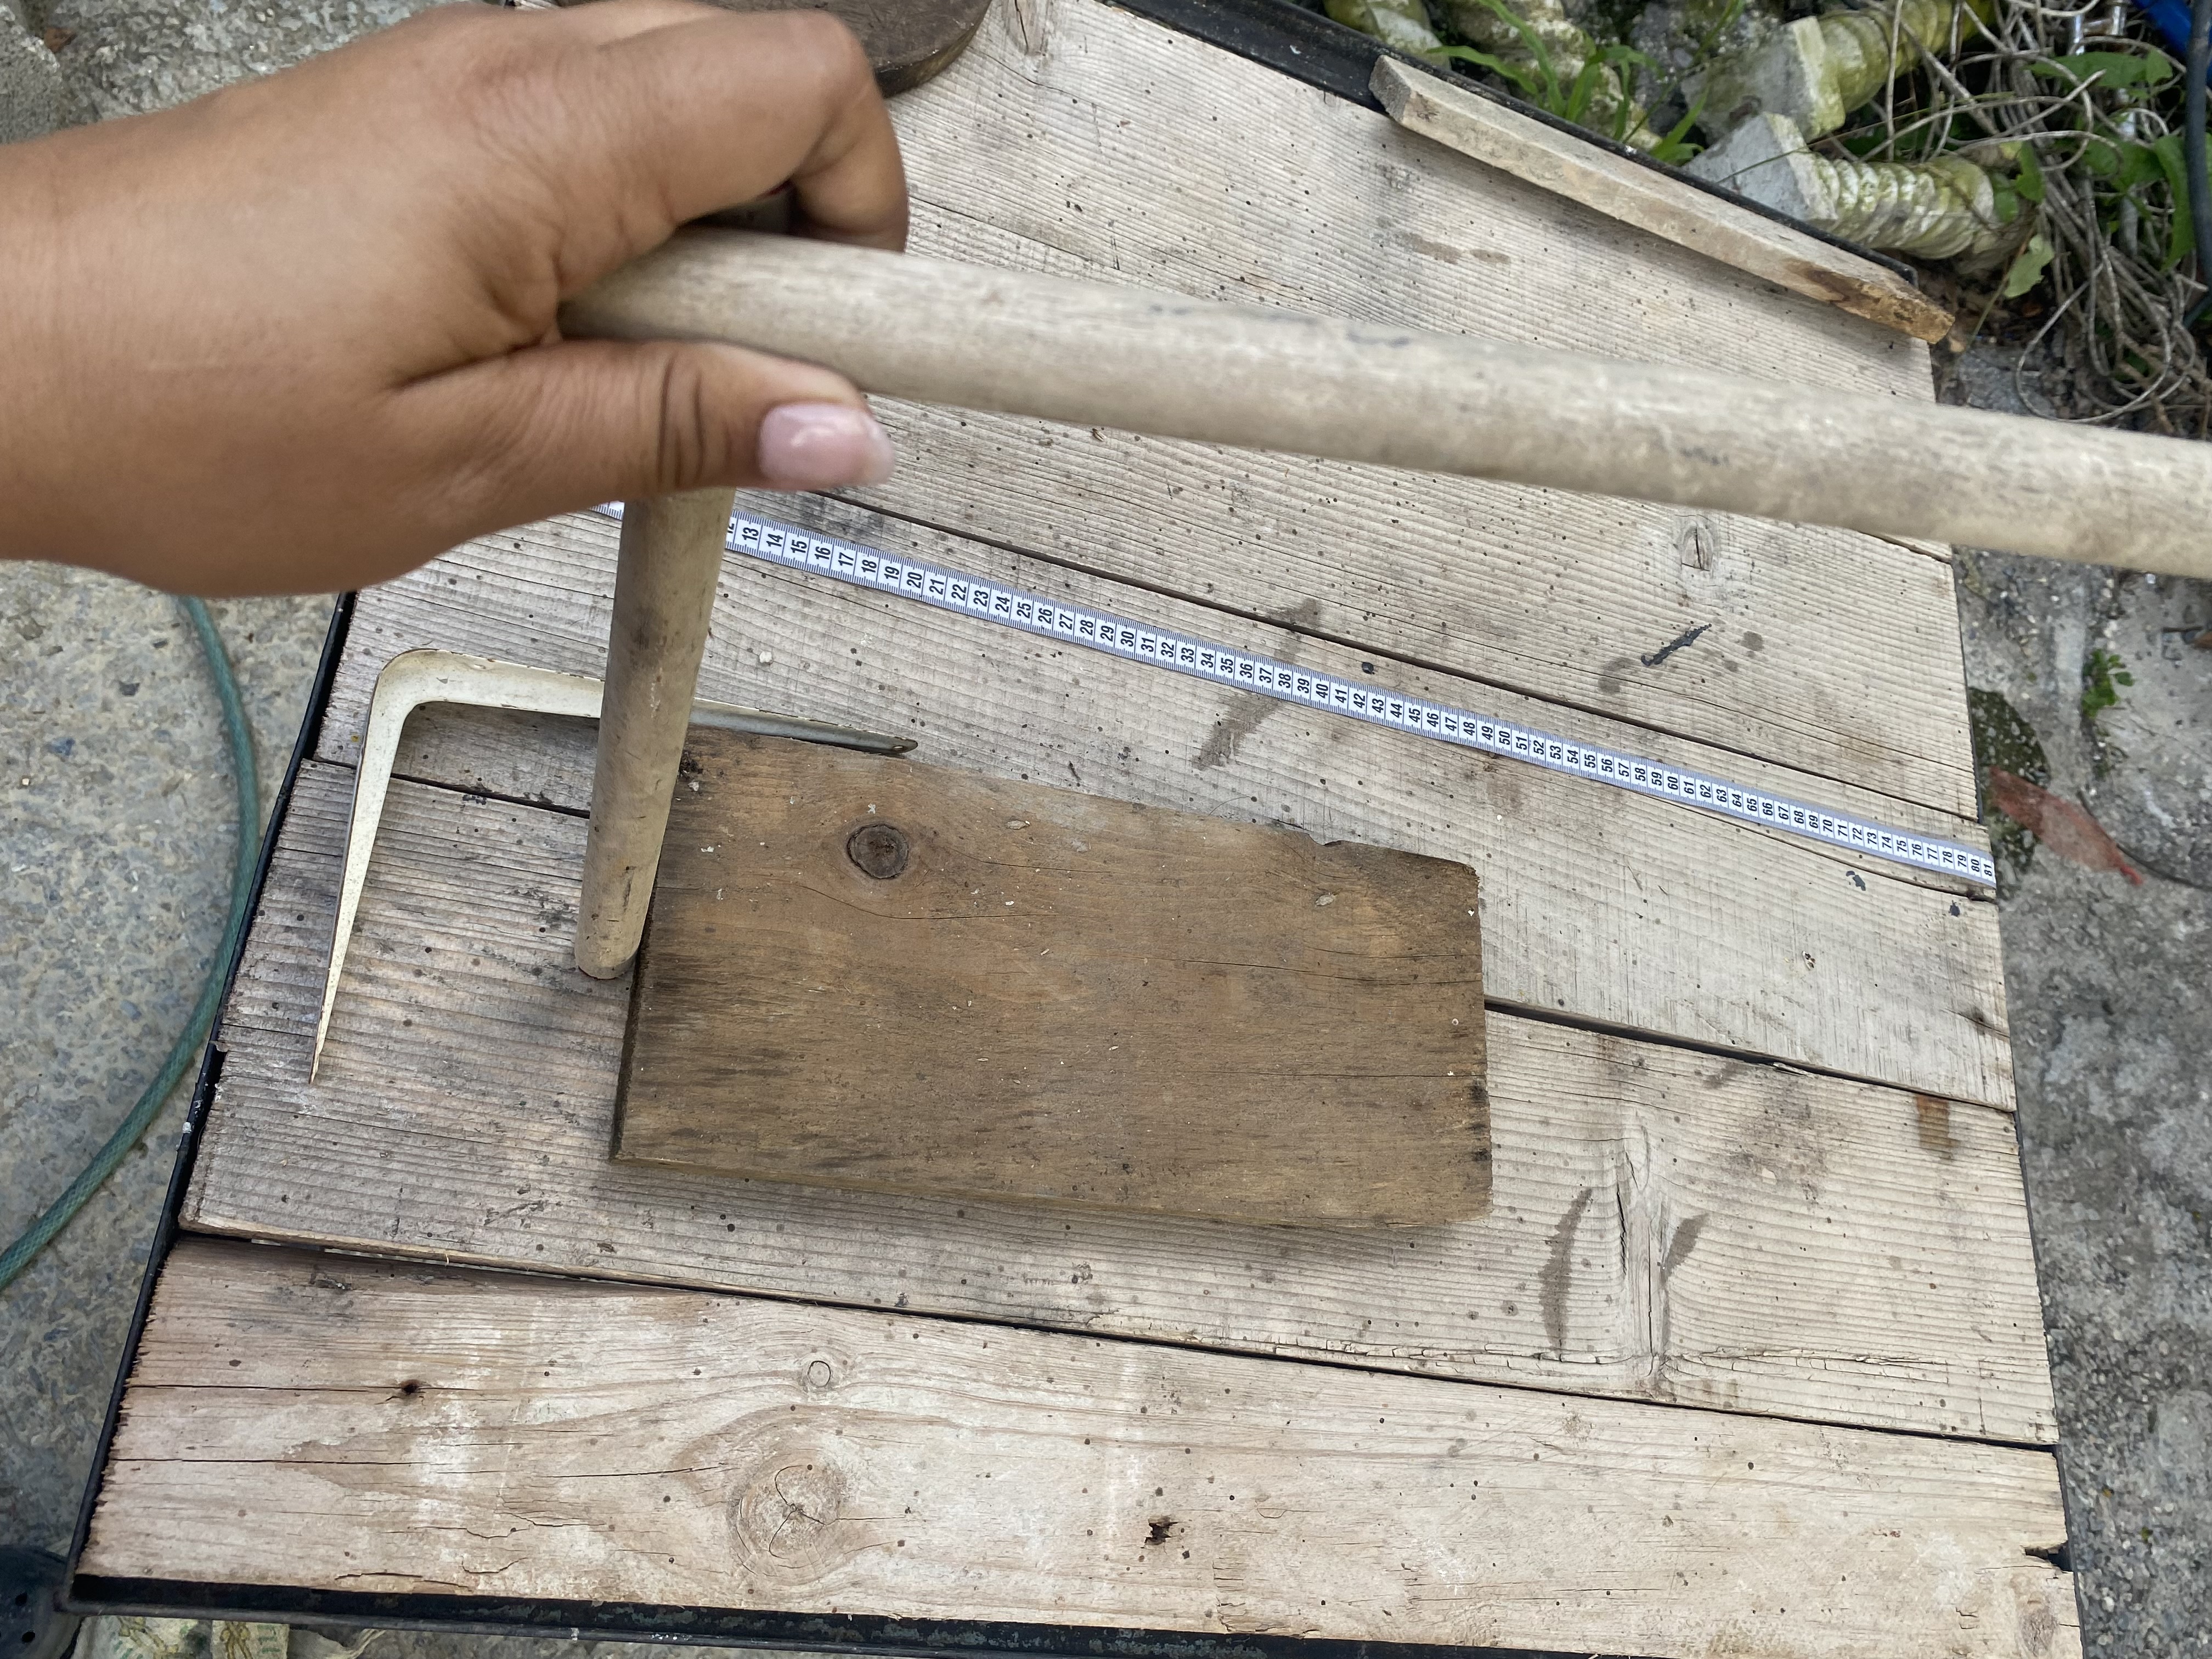
𝓟𝓐𝓢𝓞 2
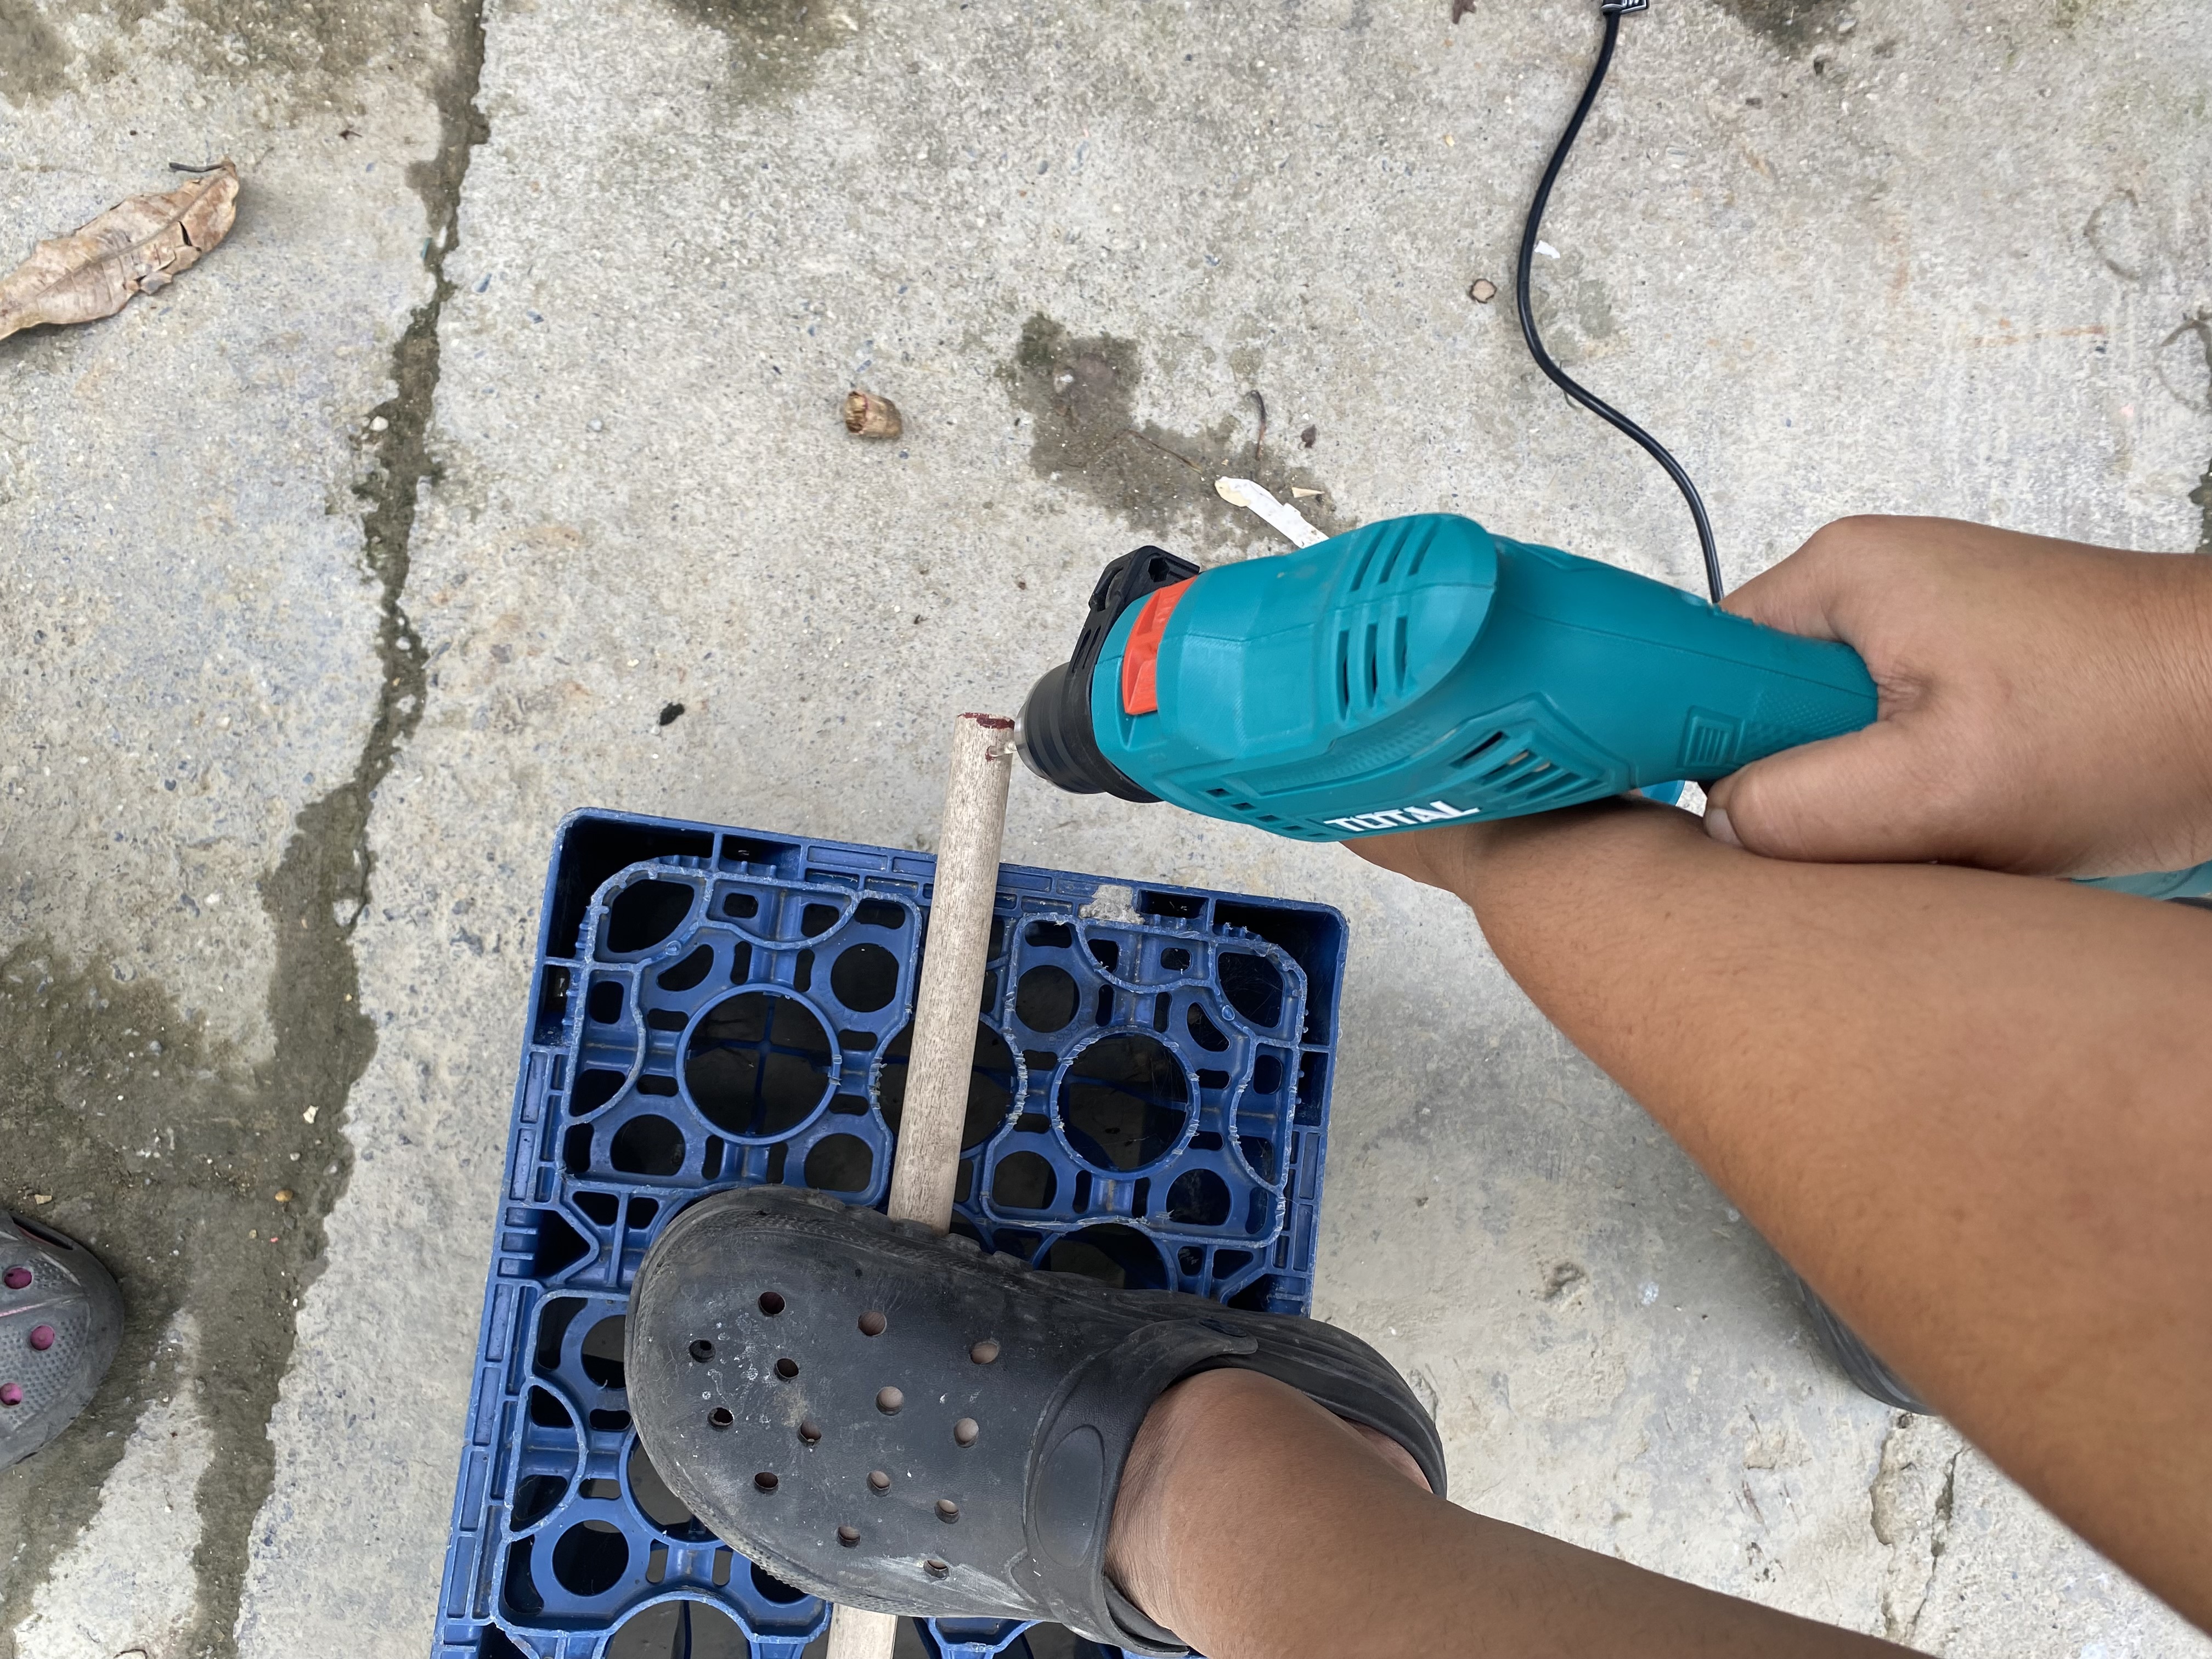
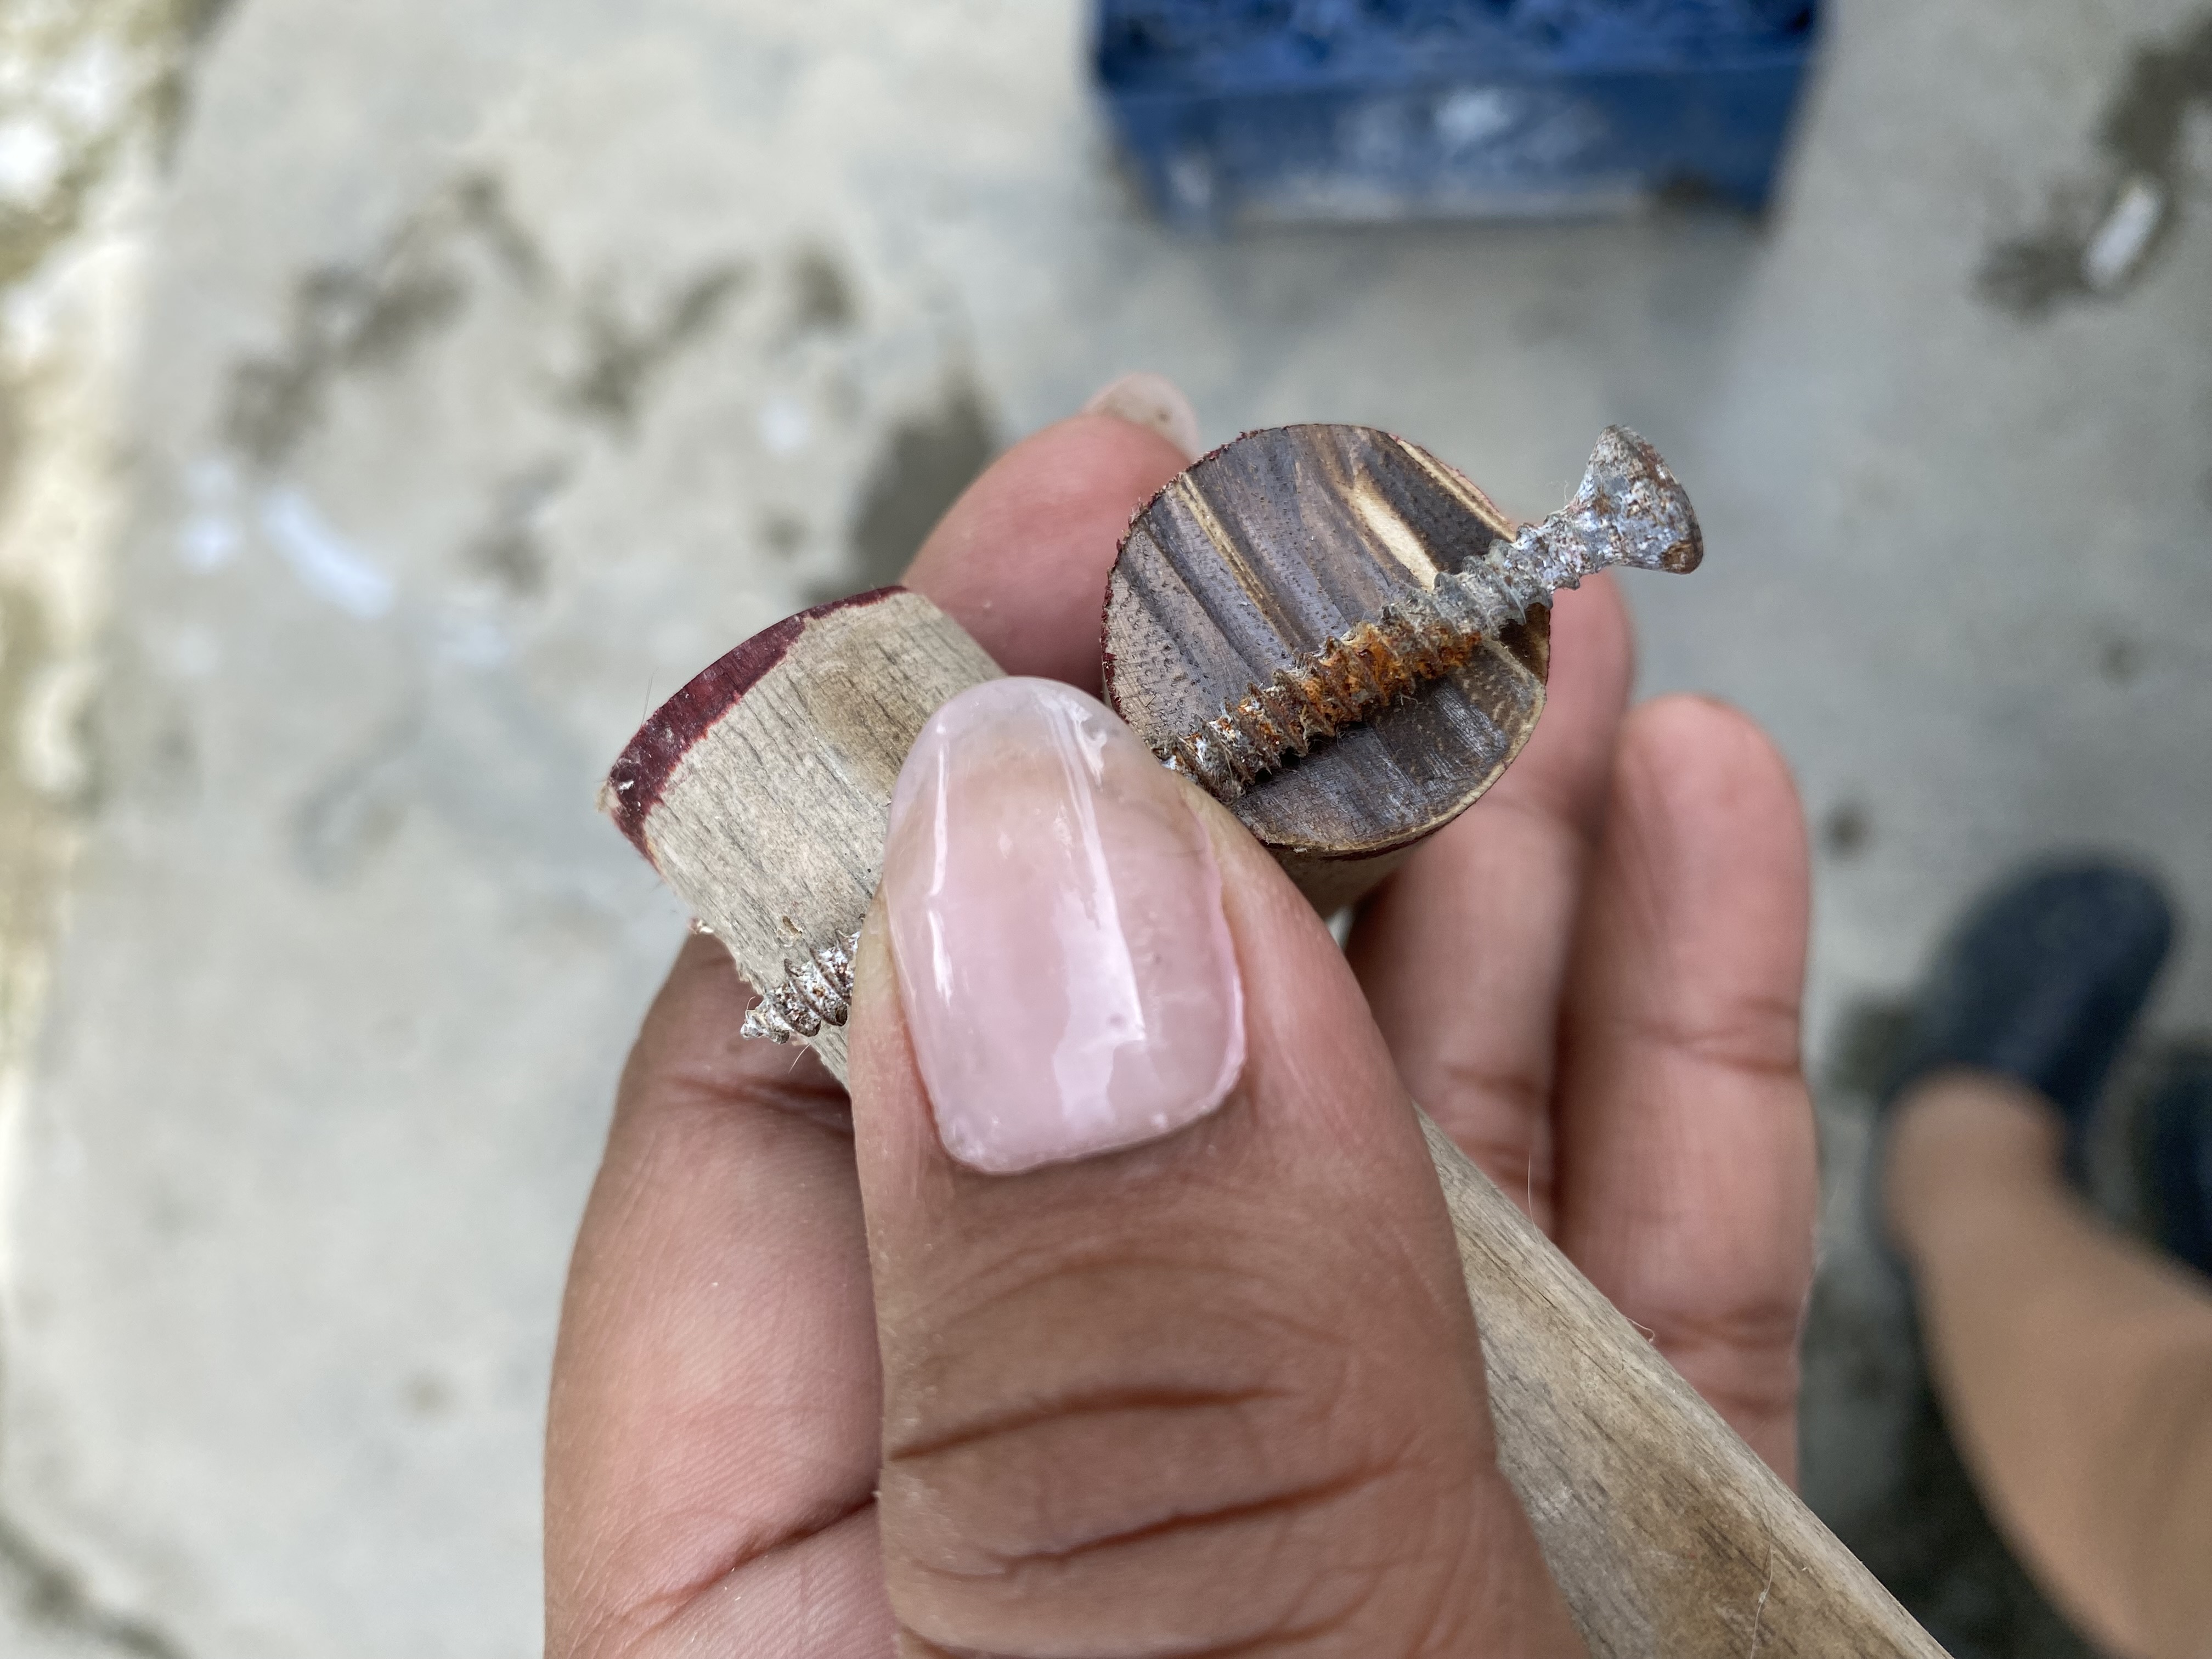
In the next step we are going to make the mechanism that will allow our lamp to move in different directions, for this we are going to open a hole at each end of each piece of stick that passes through it, I will do these with a drill, as I do not have much experience using the drill first I used a screw to open a small hole and make it easier for me when passing it through with the drill, then I saw that it was quite simple and I did it without fear 😊, I opened the hole in each piece of stick at a distance of approximately 1 cm from the edge.
En el siguiente paso vamos a hacer el mecanismo que hará que nuestra lámpara pueda moverse en diferentes direcciones, para esto vamos a abrirle un orificio en cada punta a cada pieza de palo que lo traspase, estos los haré con un taladro, como no tengo mucha experiencia utilizando el taladro primero utilicé un tornillo para abrir un pequeño orificio y que se me hiciera más fácil al momento de traspasarlo con el taladro , luego vi que era bastante sencillo y lo hice sin miedo 😊, le abrí el orificio a cada pieza de palo a una distancia aproximadamente de 1 cm desde la orilla.
 |  |
|---|---|
 |  |
𝓟𝓐𝓢𝓞 3
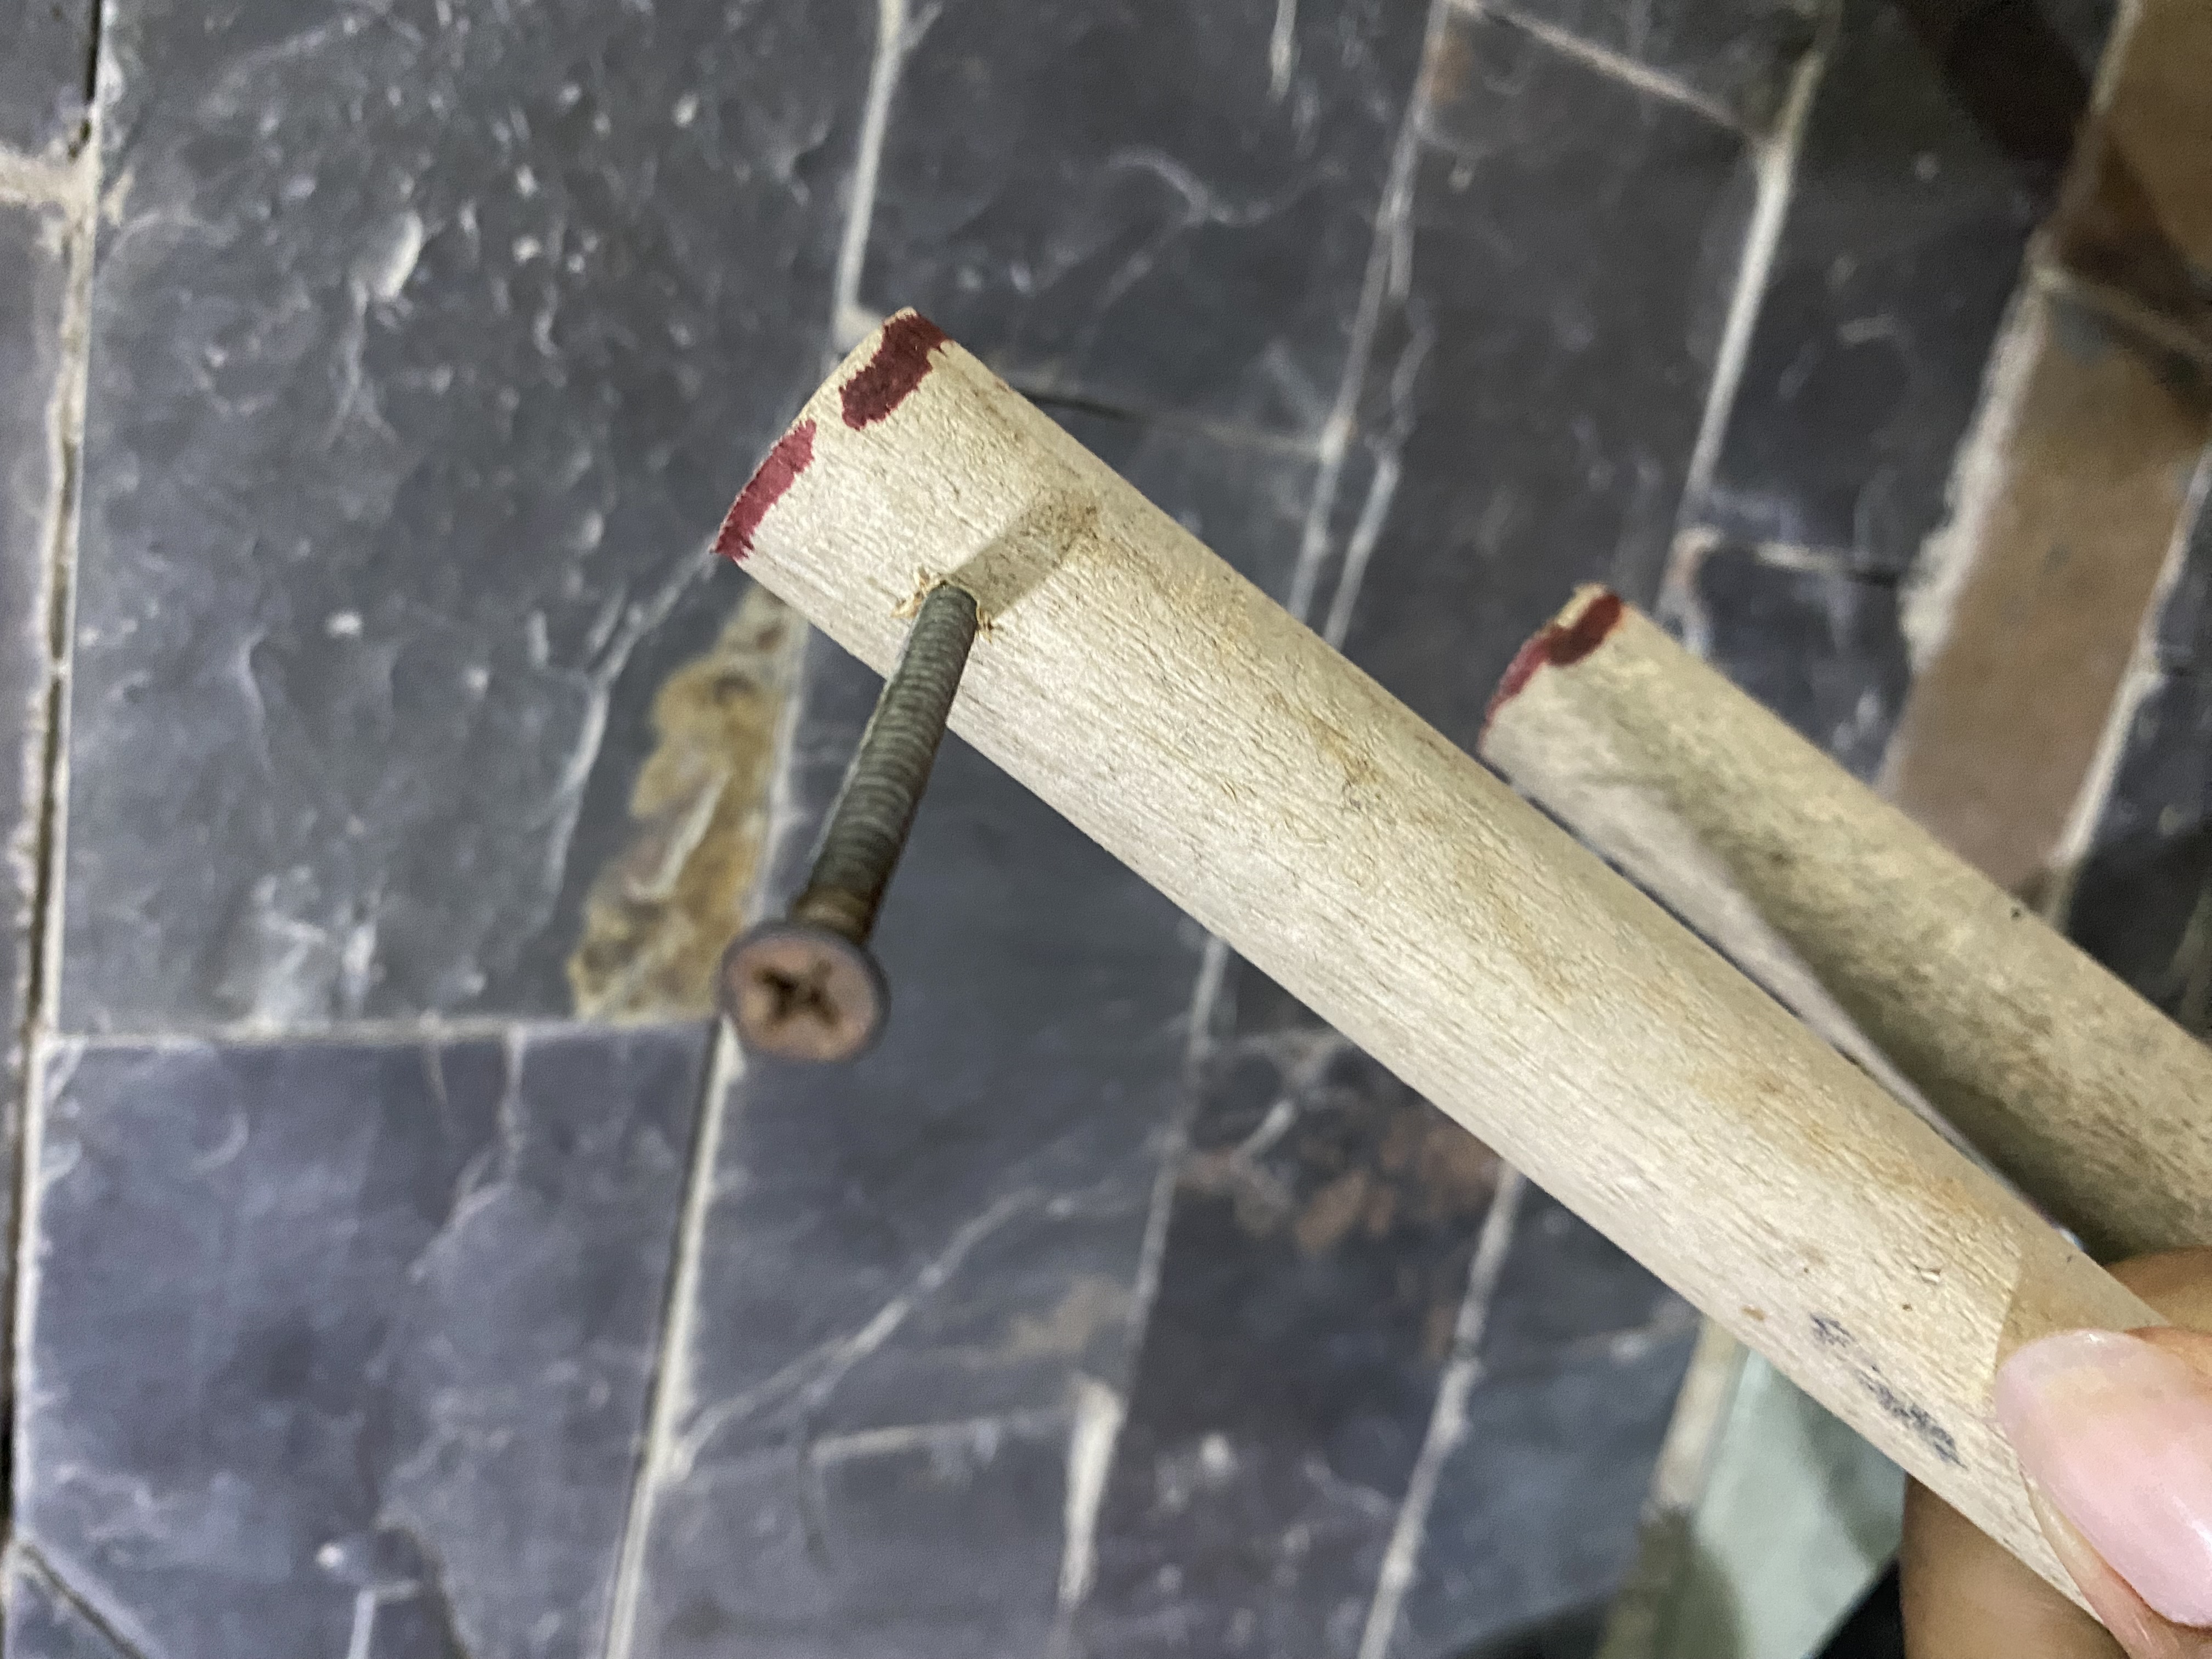
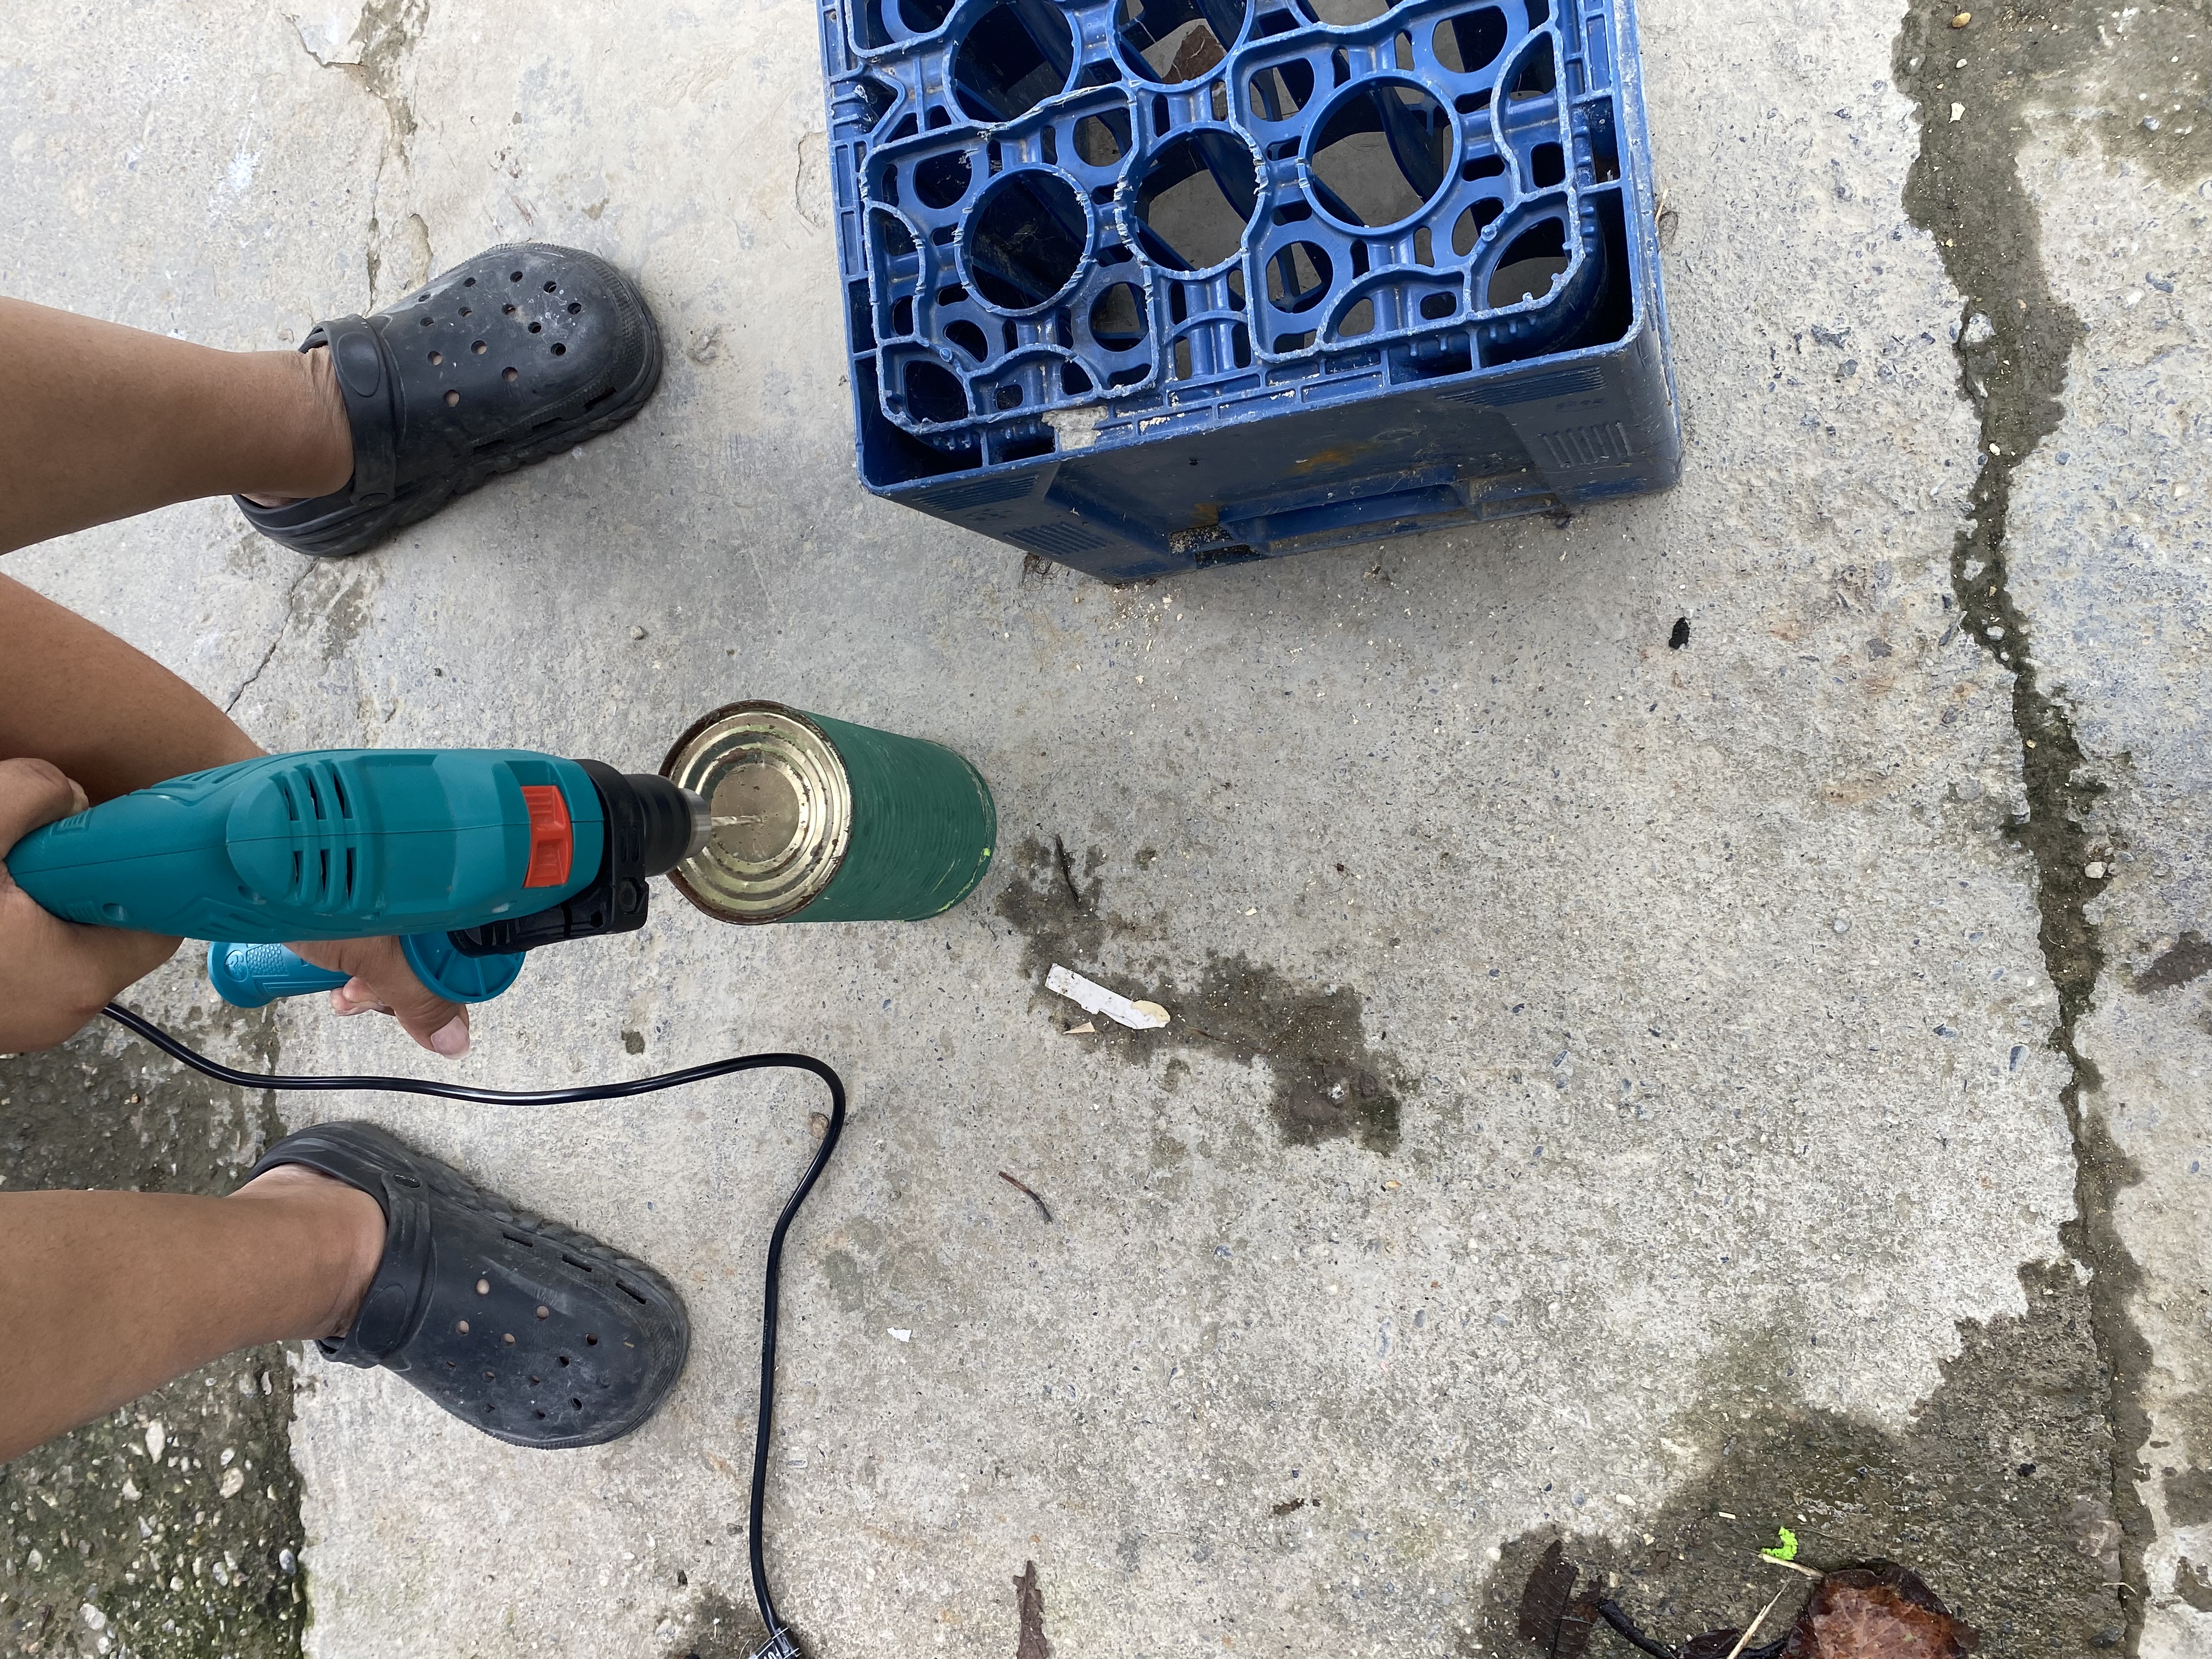
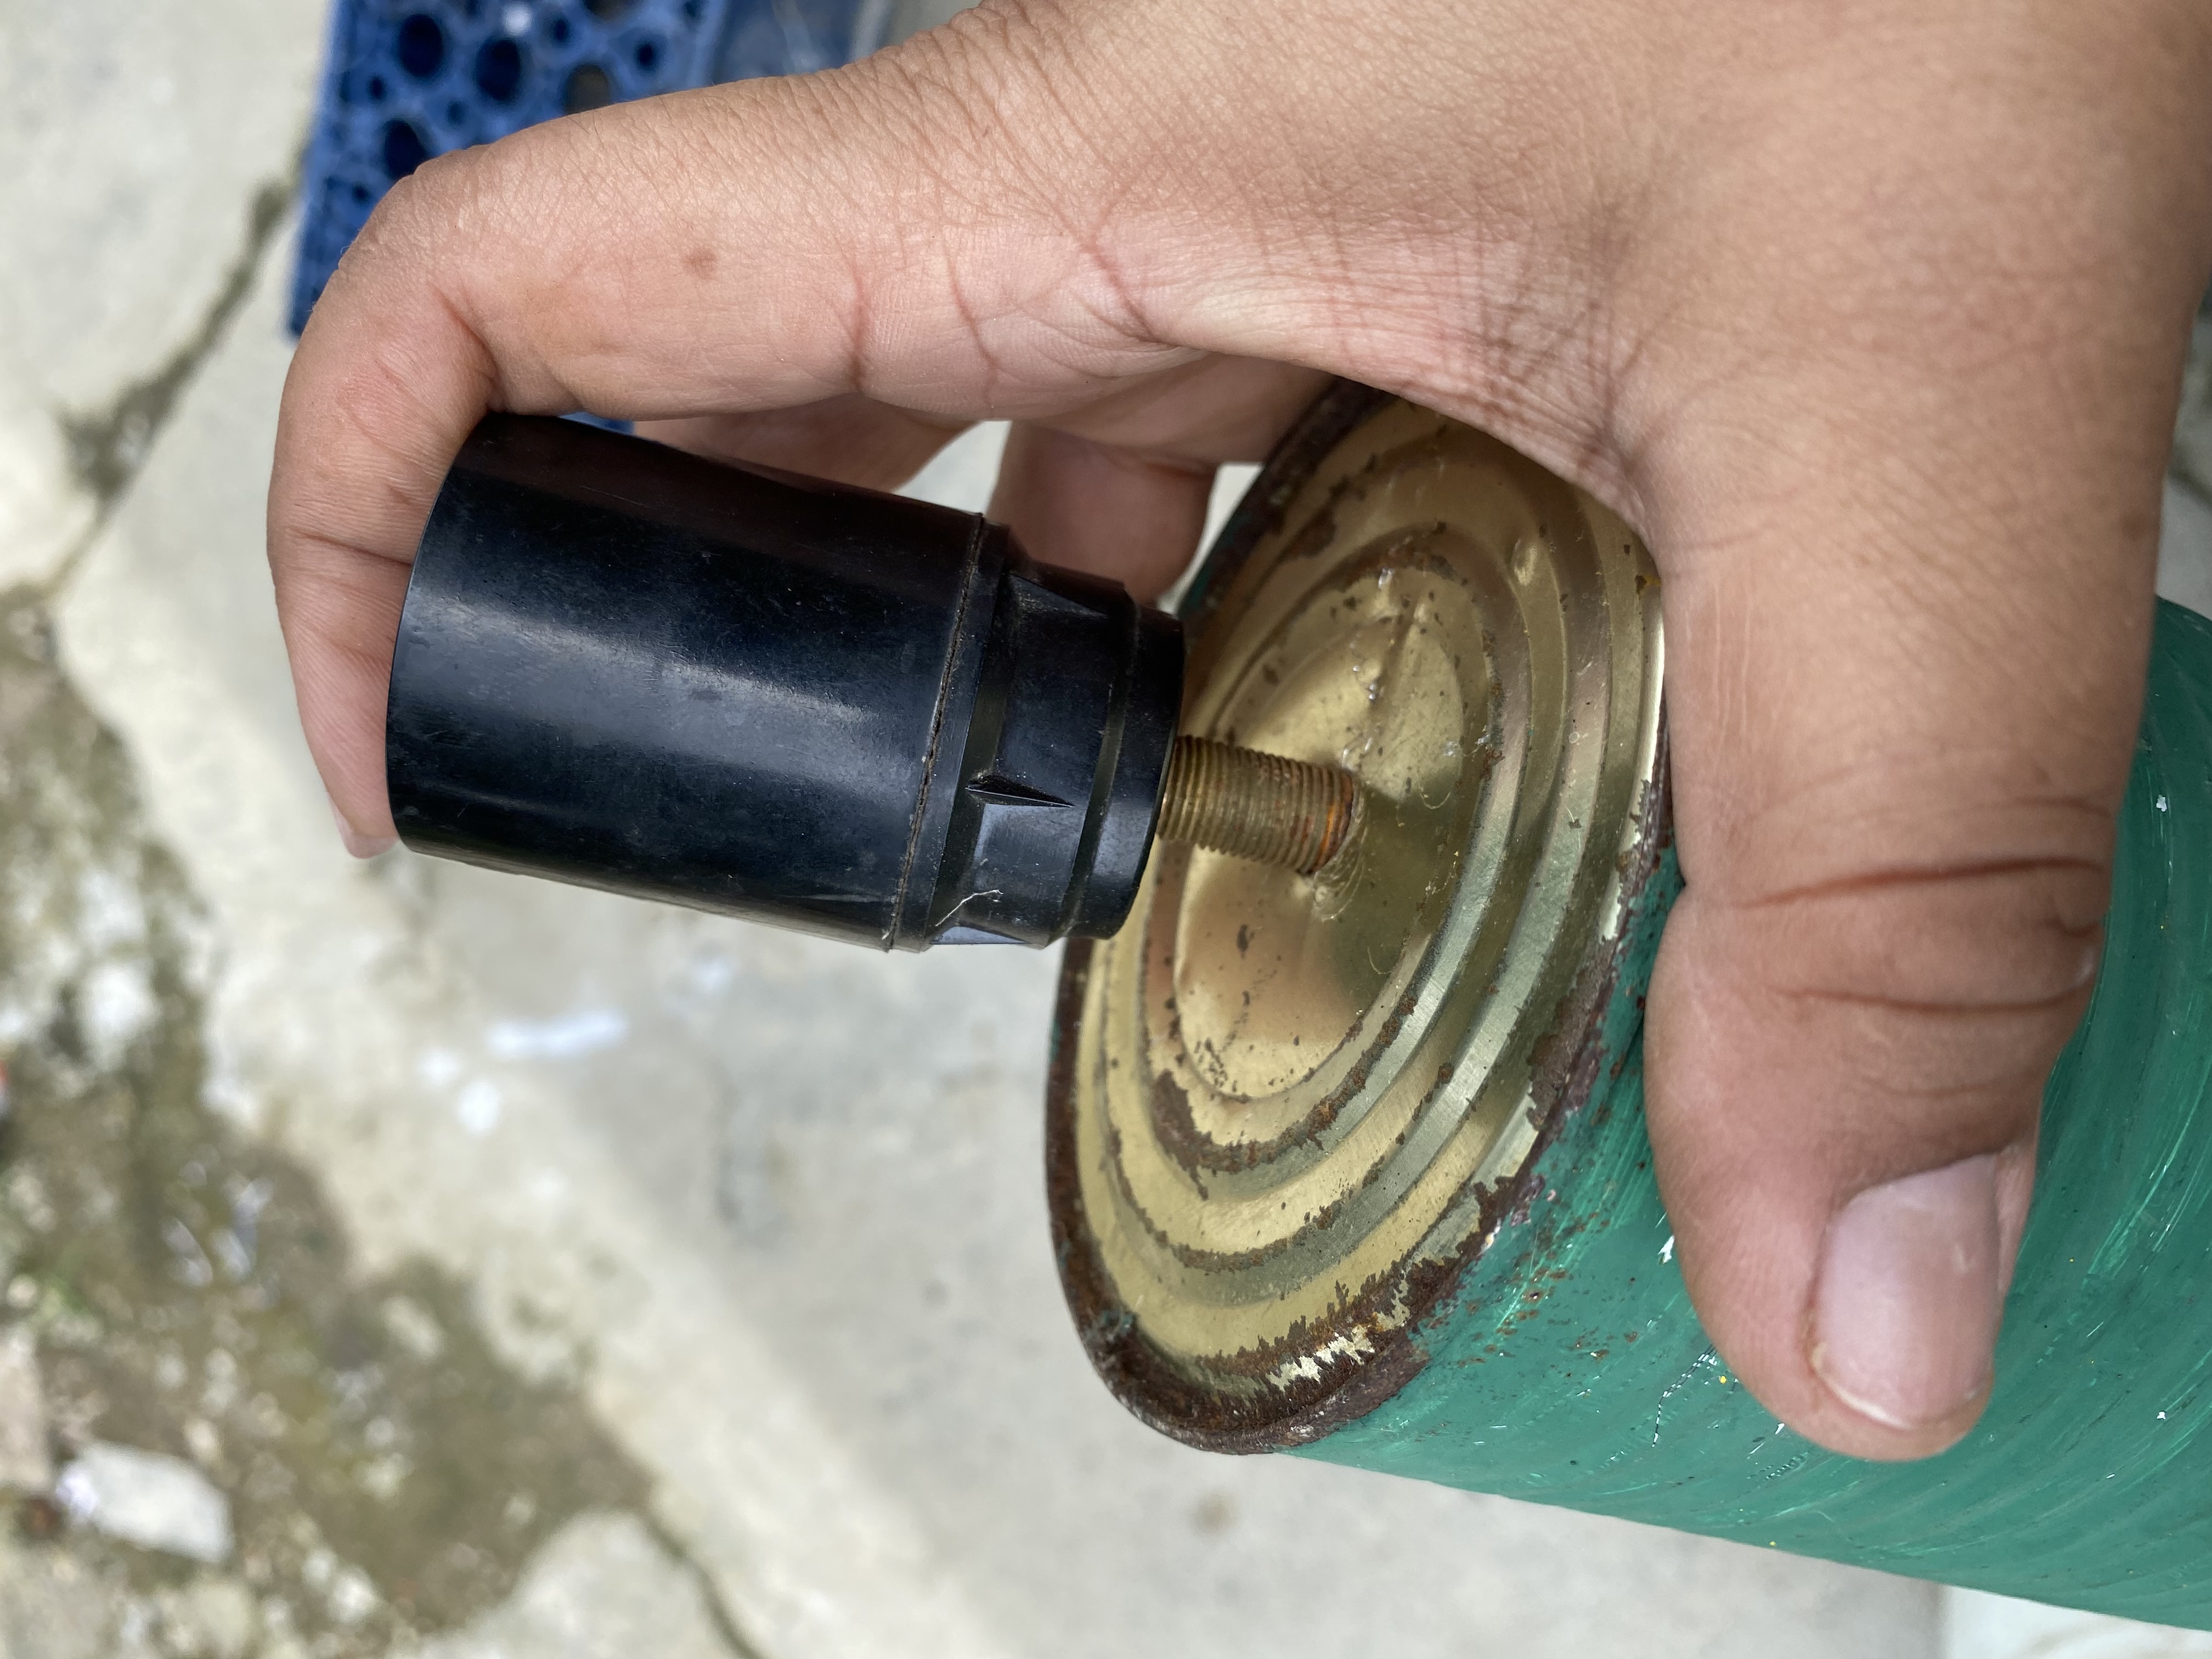
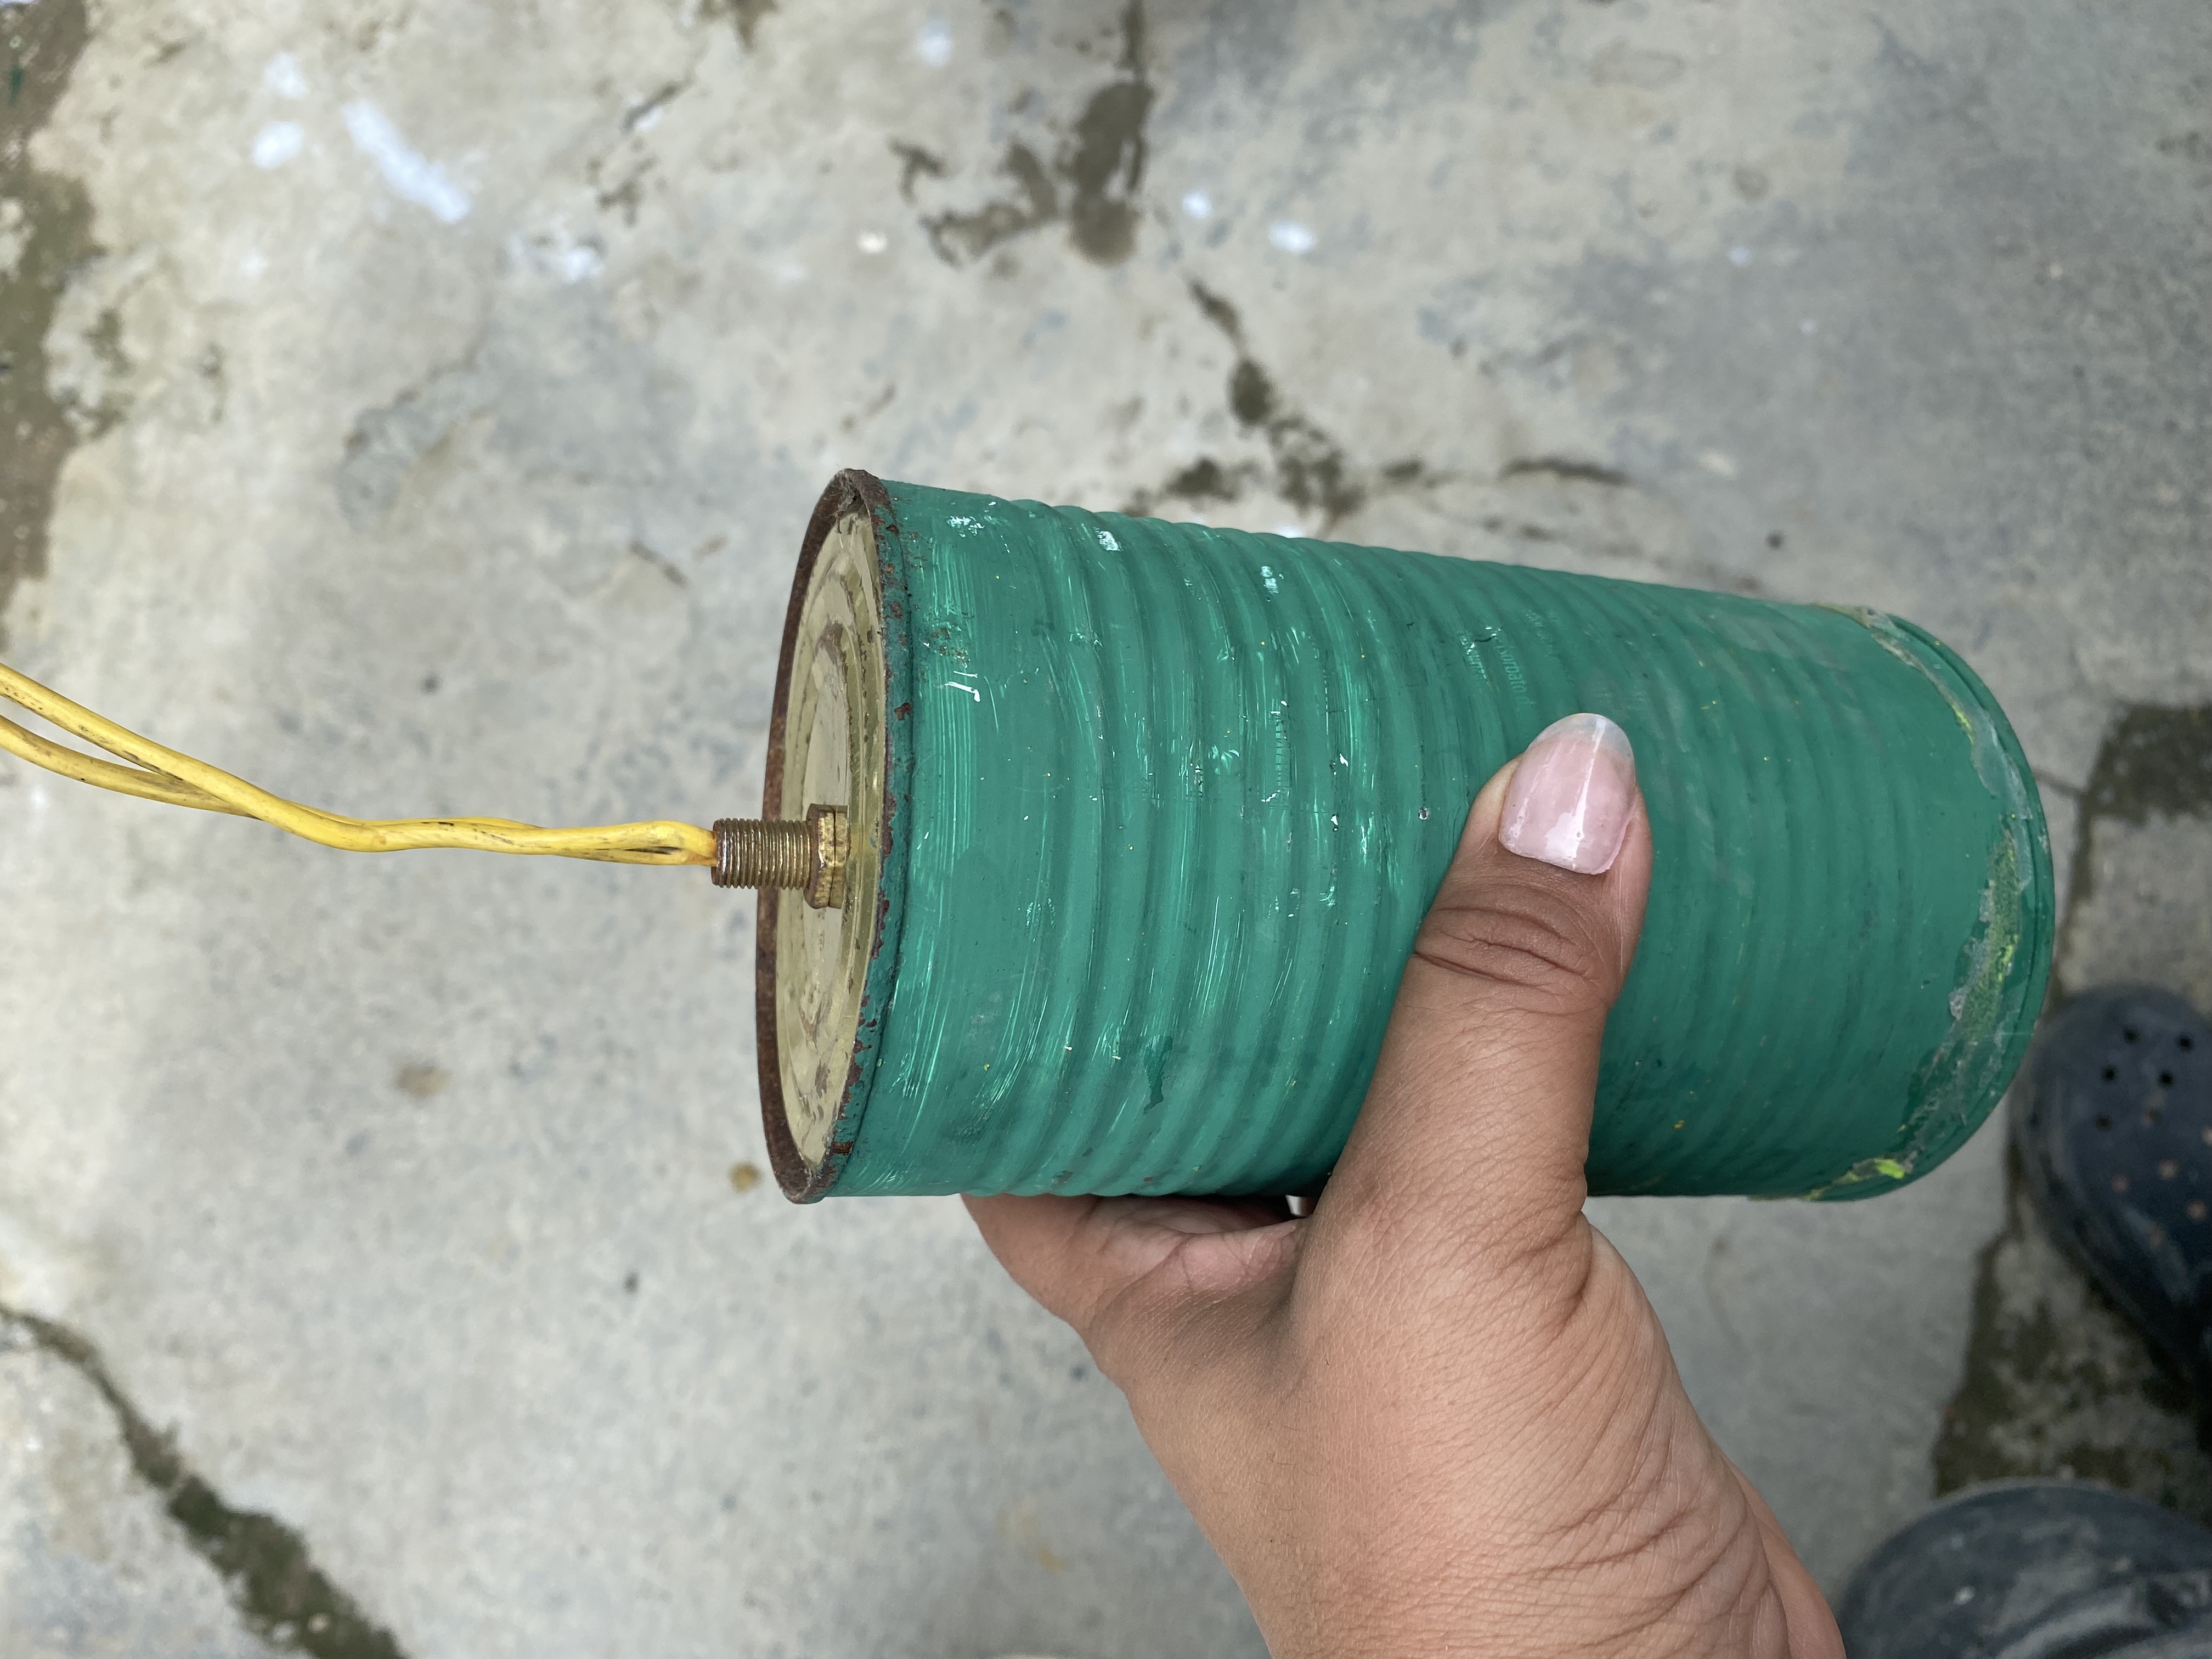
We're going to drill a hole in the side of the can so it can rotate when it's connected to the pole. We'll also drill a hole in the bottom to thread the wires for the light bulb socket through. I got a socket that comes with a special thread and nut to attach it to the can. I drilled the hole until I got the ideal size. To attach the can to the pole, I used a screw and nut.
The ideal for the mobility of the lamp sticks is to use screws with nuts since these will help adjust each movable piece, I had several failures since first I placed a screw that joined the two sticks, but this did not give the necessary adjustment to hold, then I looked for and managed to get other screws with nuts, I usually save all the screws I get, I have many containers full of screws of different sizes, I put a thicker bit on the drill so that it could fit the screw I got, I put it in and achieved the perfect fit I need.
Vamos a abrirle un orificio a la lata por un costado para que esta al unirla con el palo pueda girar, también le abriremos un orificio en el fondo por donde pasaremos los cables del socate de bombillo, yo conseguí un socate que trae rosca y tuerca especial para fijarlo a la lata, fui abriendo el orificio hasta que logré el tamaño ideal, para fijar la lata al palo utilicé un tornillo con tuerca.
Lo ideal para la movilidad de los palos de la lámpara es que utilicemos un tornillos con tuerca ya que éstos ayudarán al ajuste de cada pieza movible, tuve varias fallas ya que primero le coloqué un tornillo que me uniera los dos palos, pero este no le daba el ajuste necesario para que se sostuviera, luego busqué y logré conseguir otros tornillos con tuercas, acostumbro a guardar todos los tornillos que voy consiguiendo tengo muchos envases llenos de tornillos de diferentes tamaños, le coloqué una mecha al taladro más gruesa para que pudiera encajar el tornillo que conseguí, se lo coloqué y logré el ajuste perfecto que necesito.
 |  |
|---|---|
 |  |
| --- | --- |
 |  |
𝓟𝓐𝓢𝓞 4
In this step, we'll attach the pole to the lamp base. We'll do this on one side of the wooden base. We'll screw it into the base and tighten it securely. We'll connect the wire to the light bulb socket and test it to see if it works.
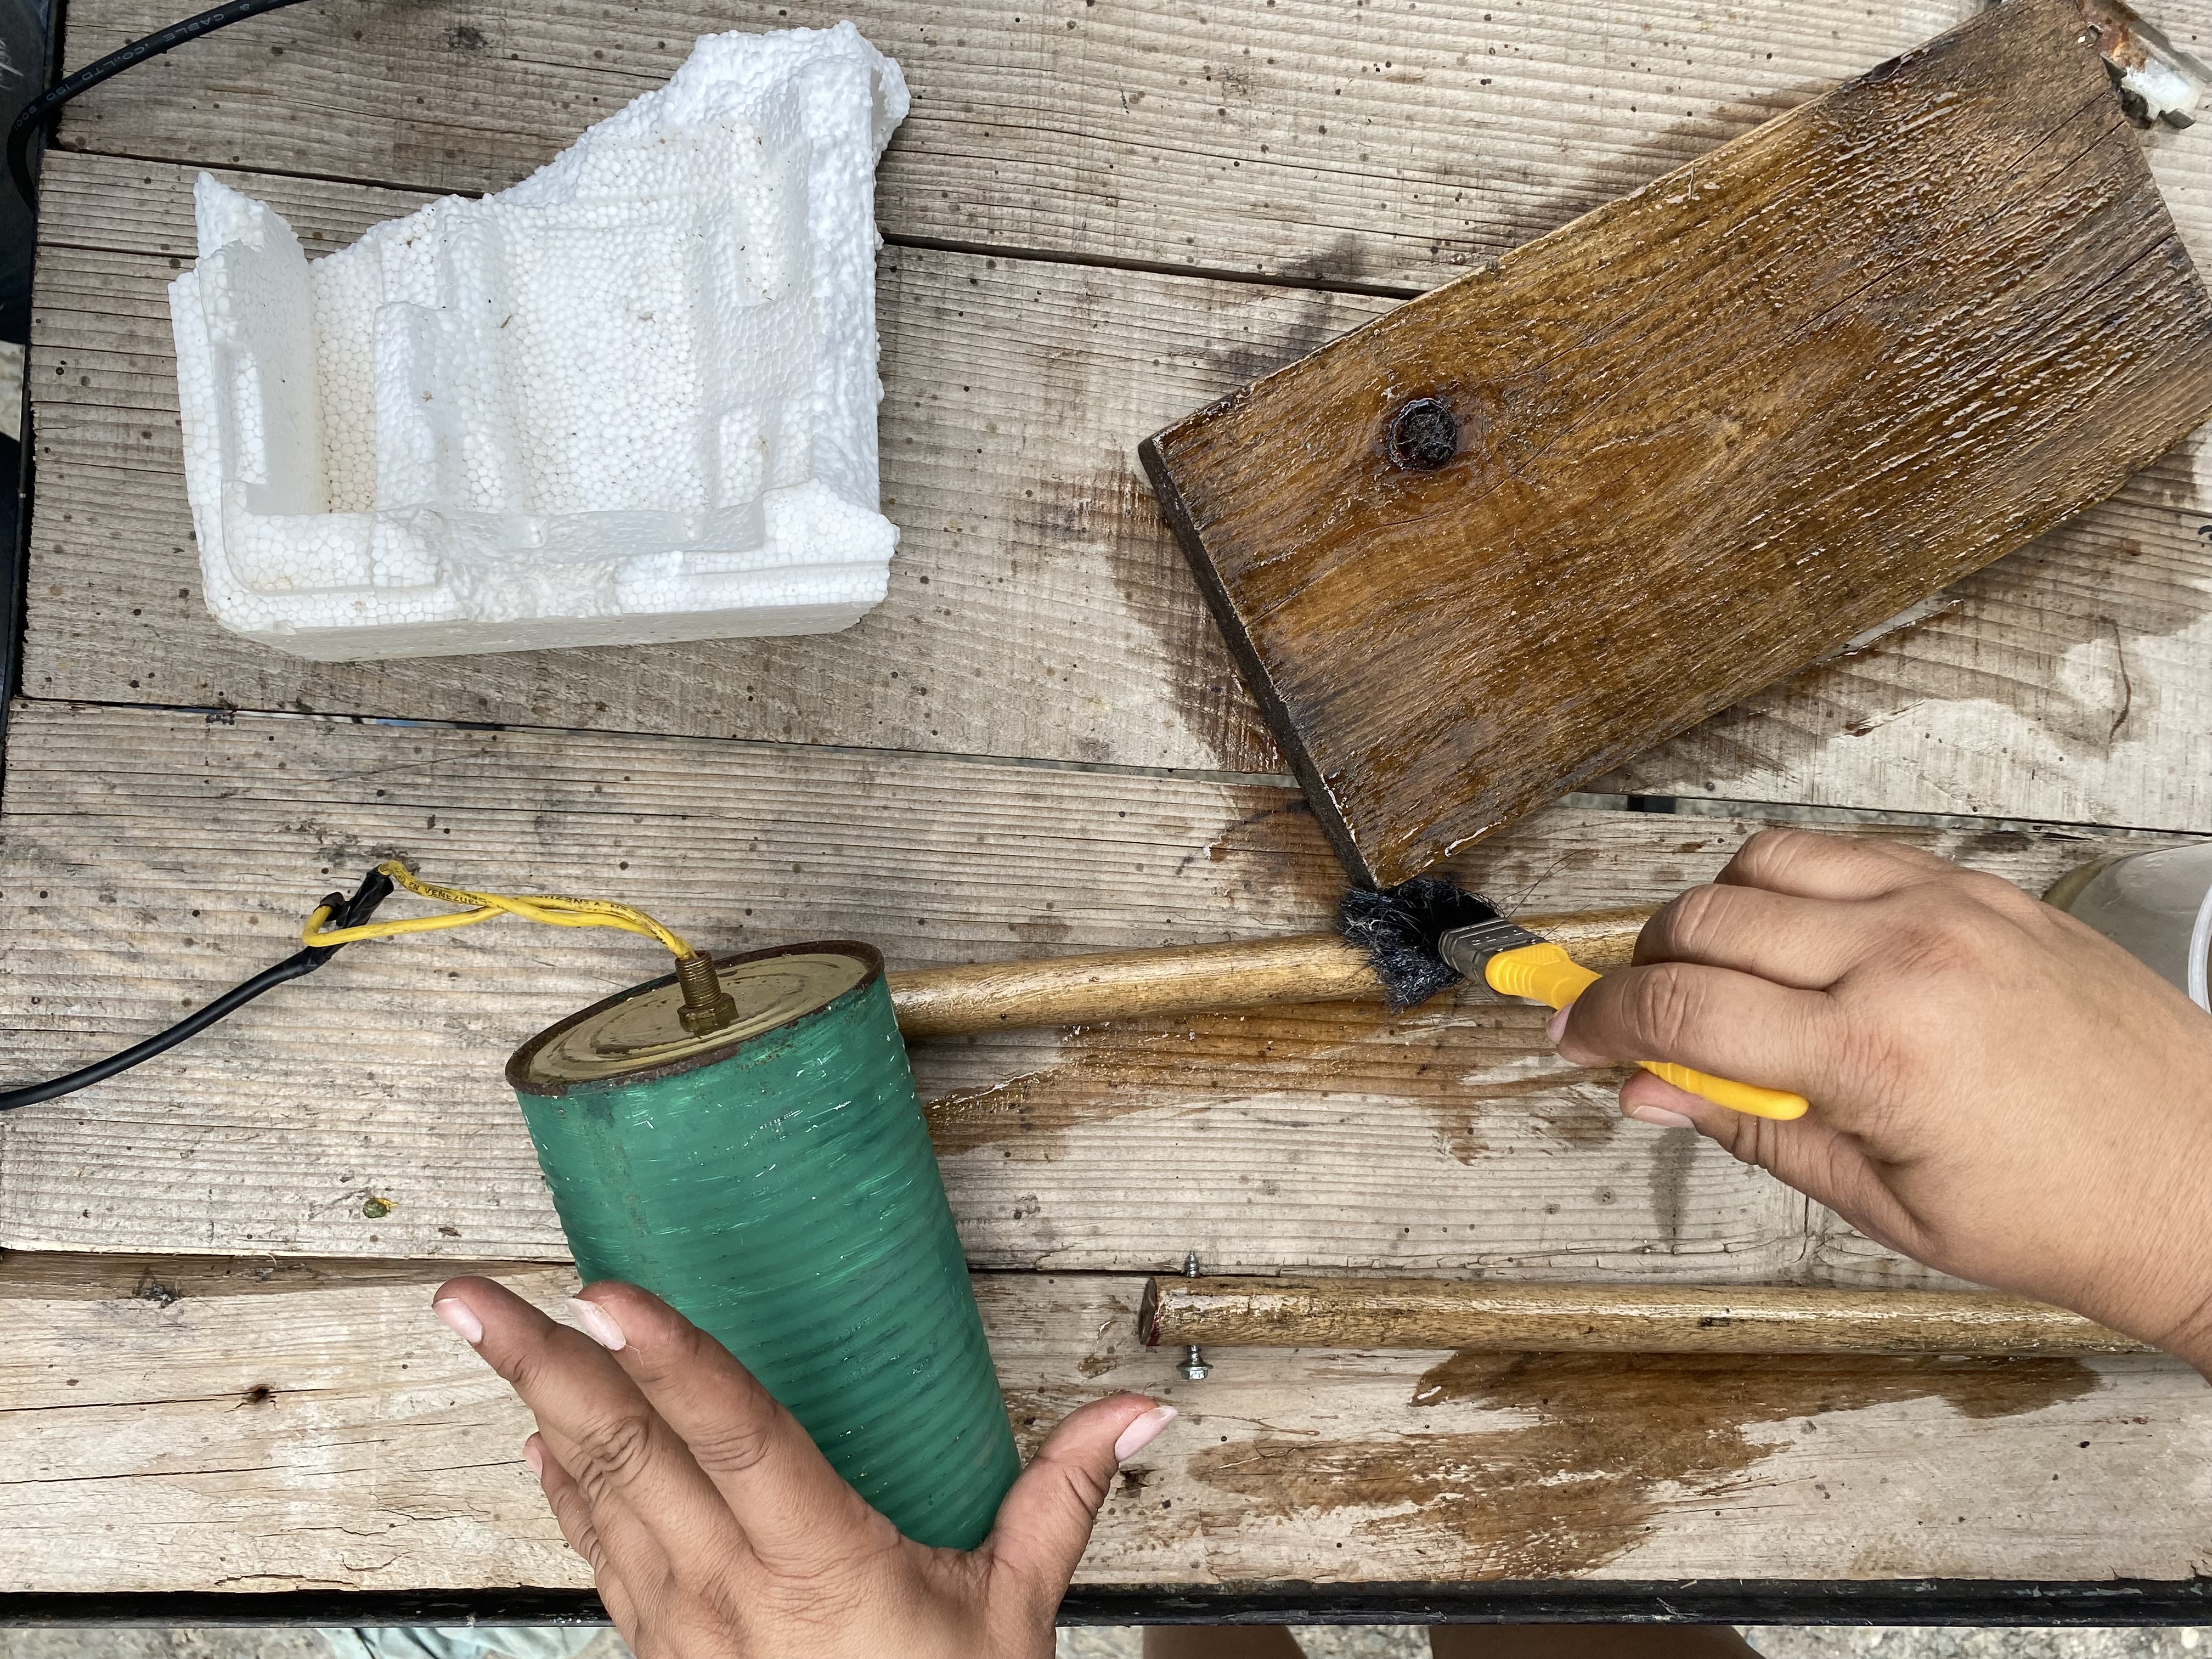
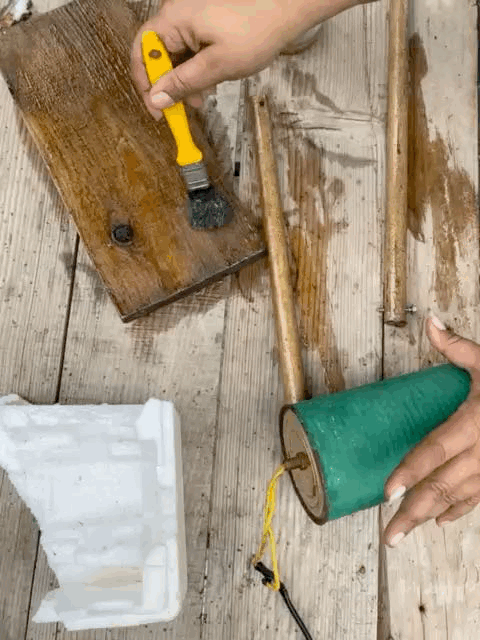
When we have everything ready, we can paint it. I took it apart so I could paint it. For this, I used homemade varnish, which is made by mixing gasoline with pieces of anime. This forms a kind of gum, which acts as varnish. We apply it with a brush to the previously sanded wood.
En este paso vamos a fijar el palo a la base de la lámpara, esto lo vamos a hacer por un costado de la madera base, le traspasamos un tornillo uniendo el palo a la base y apretamos bien, conectamos el cable al socate del bombillo y hacemos la prueba a ver si funciona.
Cuando ya tengamos todo listo podemos pintarlo, yo lo desarmé para poder pintarlo, para esto utilicé el barniz casero, el cual se hace mezclando gasolina con trozos de anime, este forma como un chicle el cual es el que hace la función como si fuese barniz, lo vamos aplicando con una brocha a la madera previamente lijada
 |  |
|---|
𝓟𝓐𝓢𝓞 5
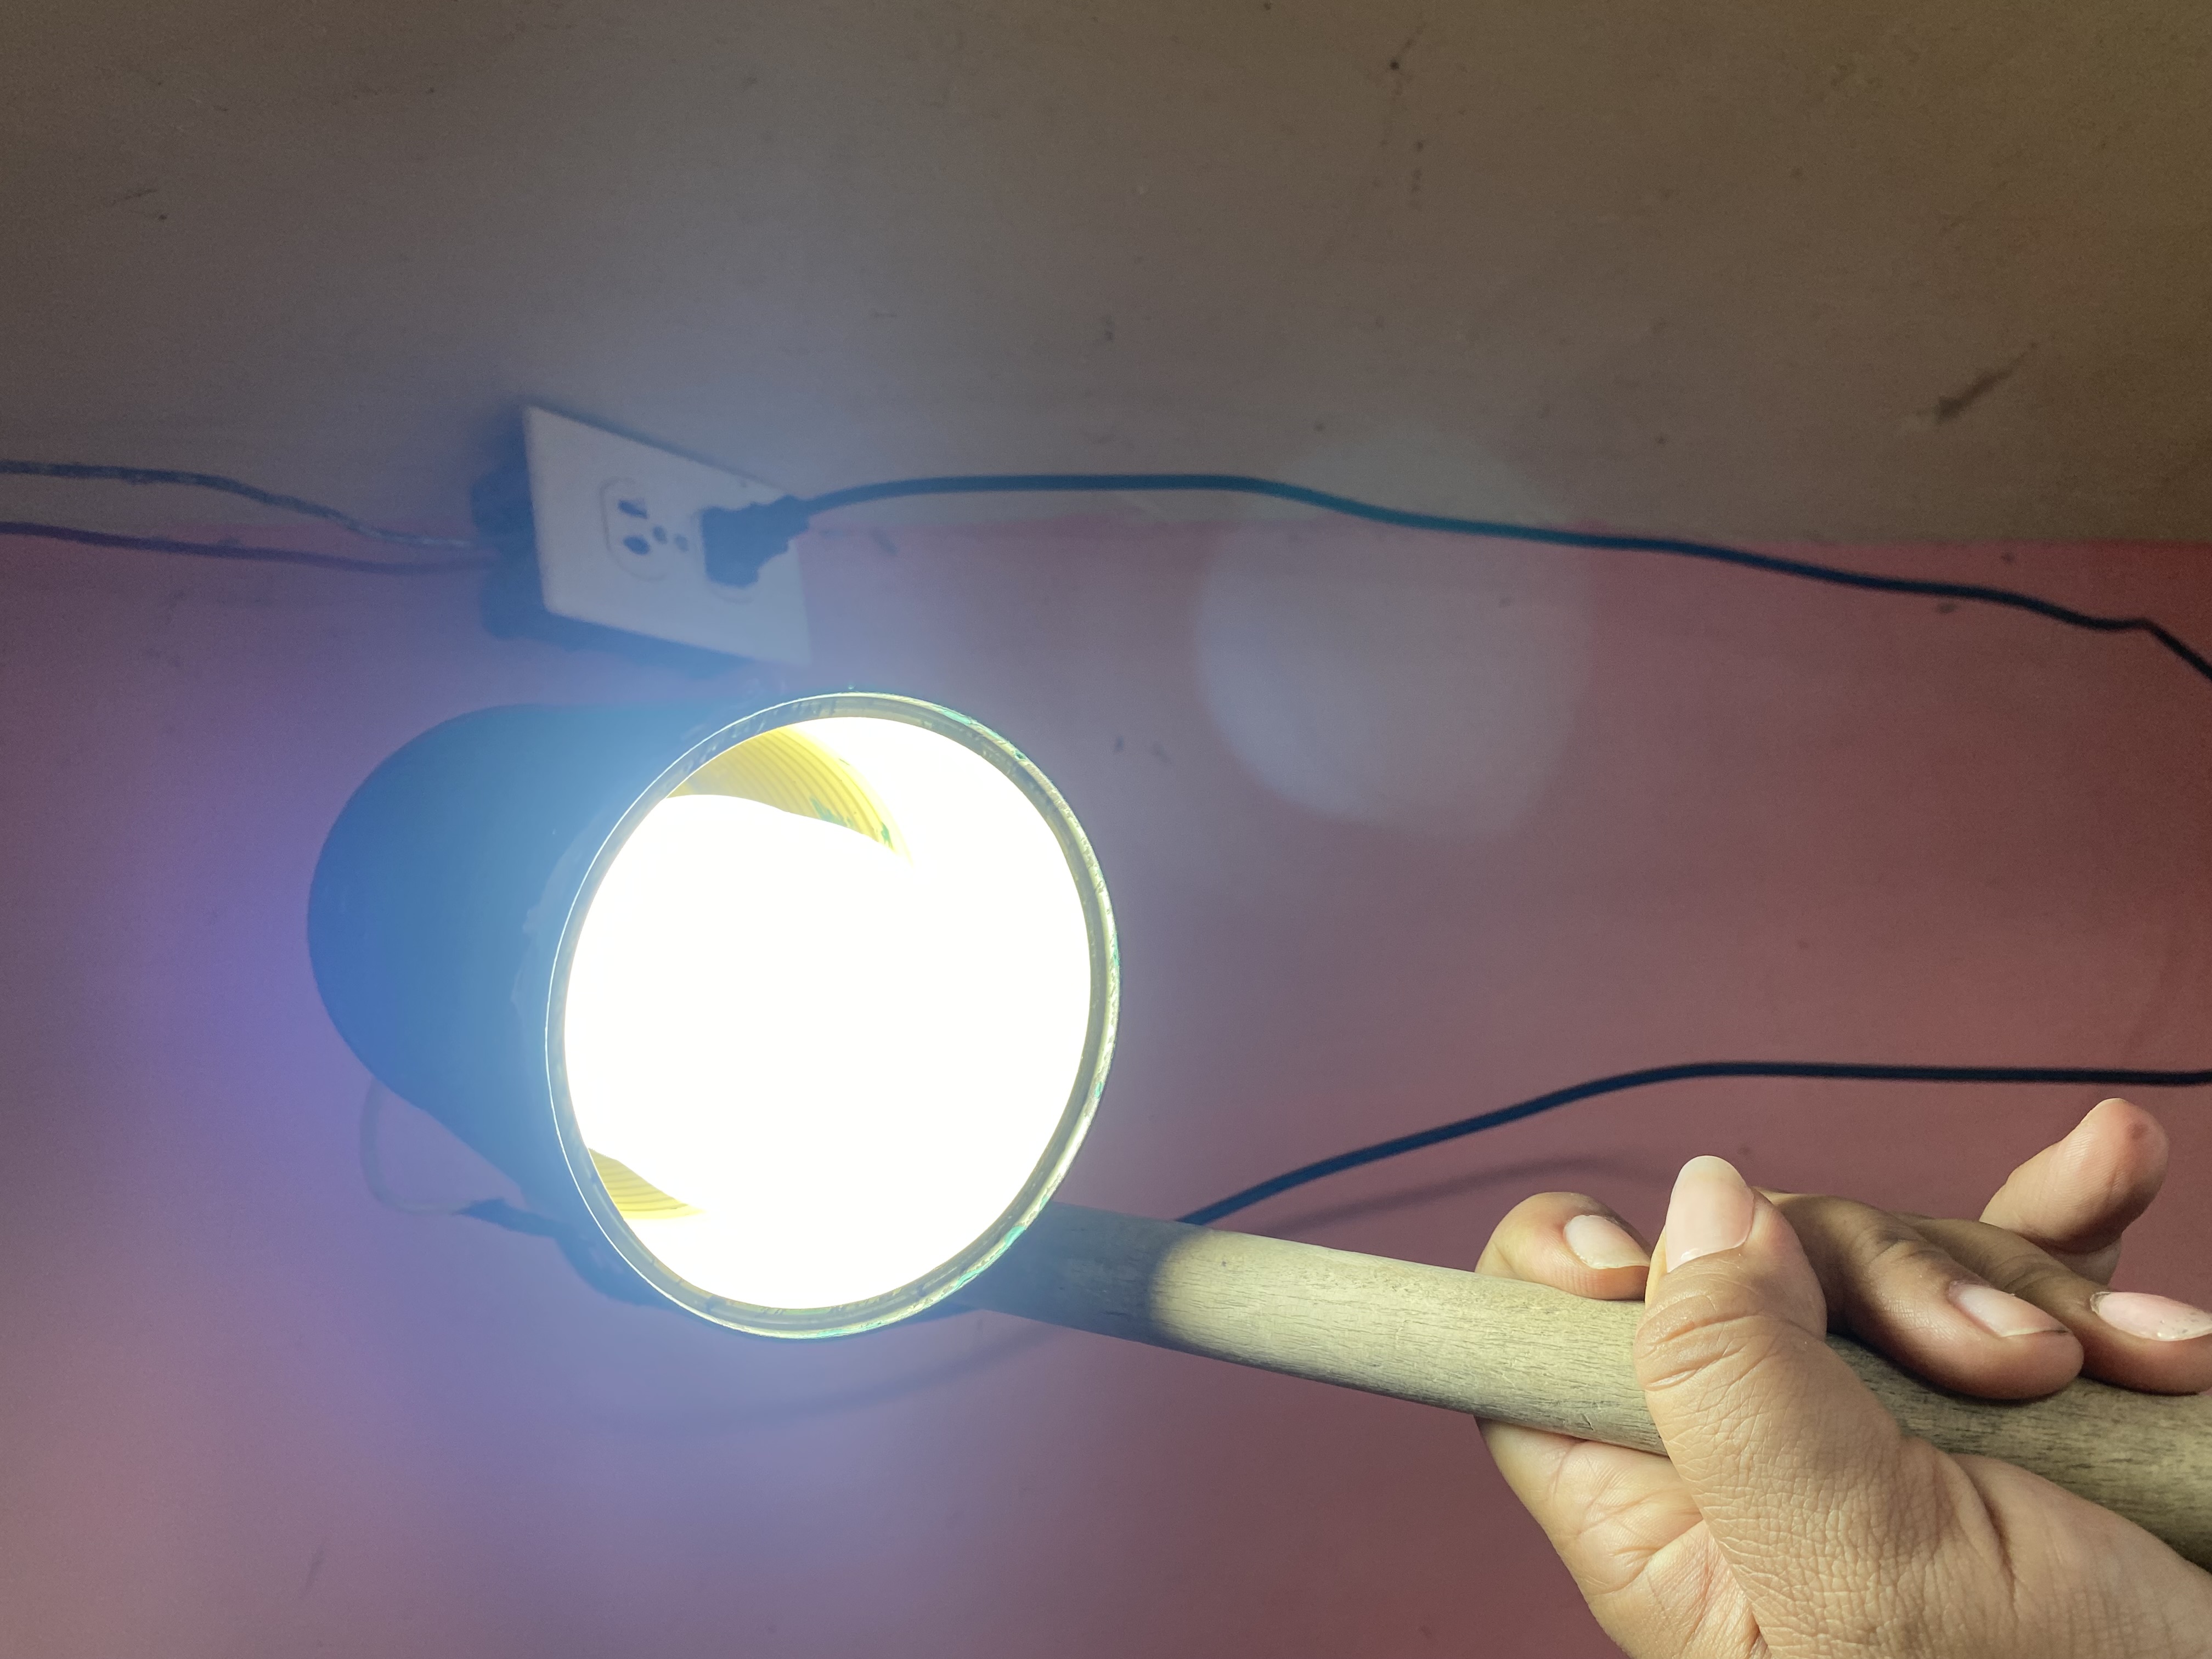
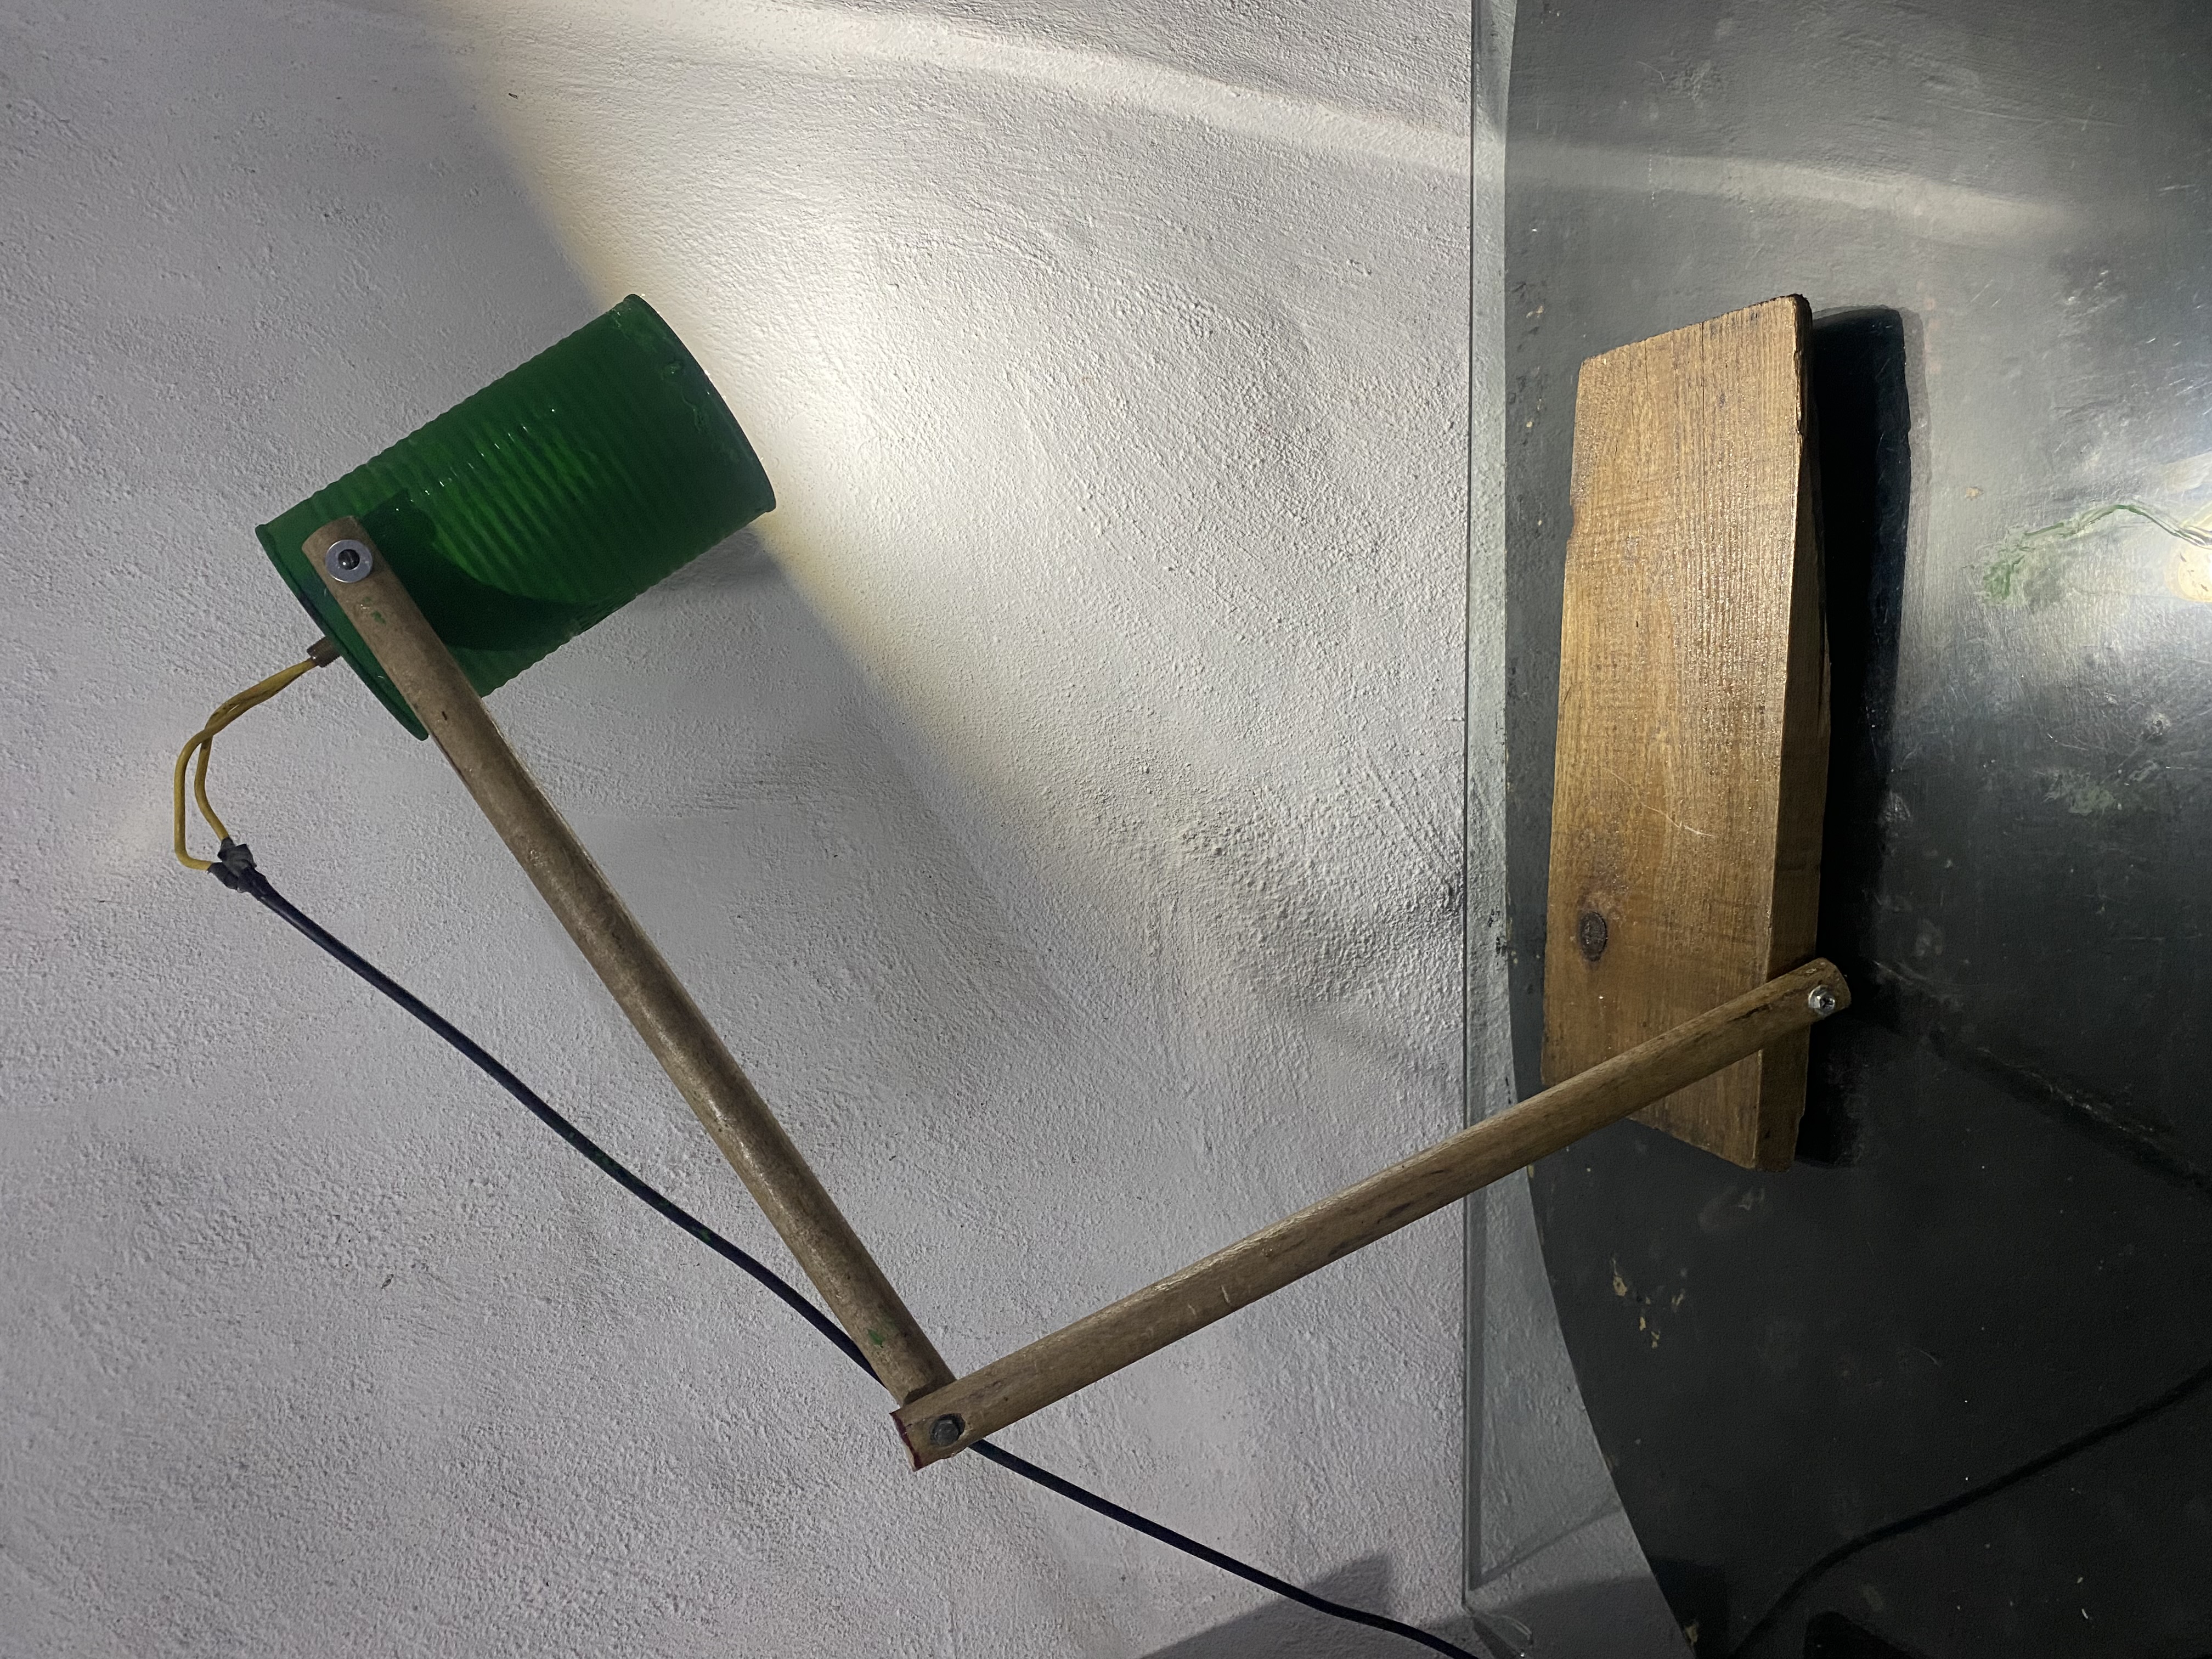
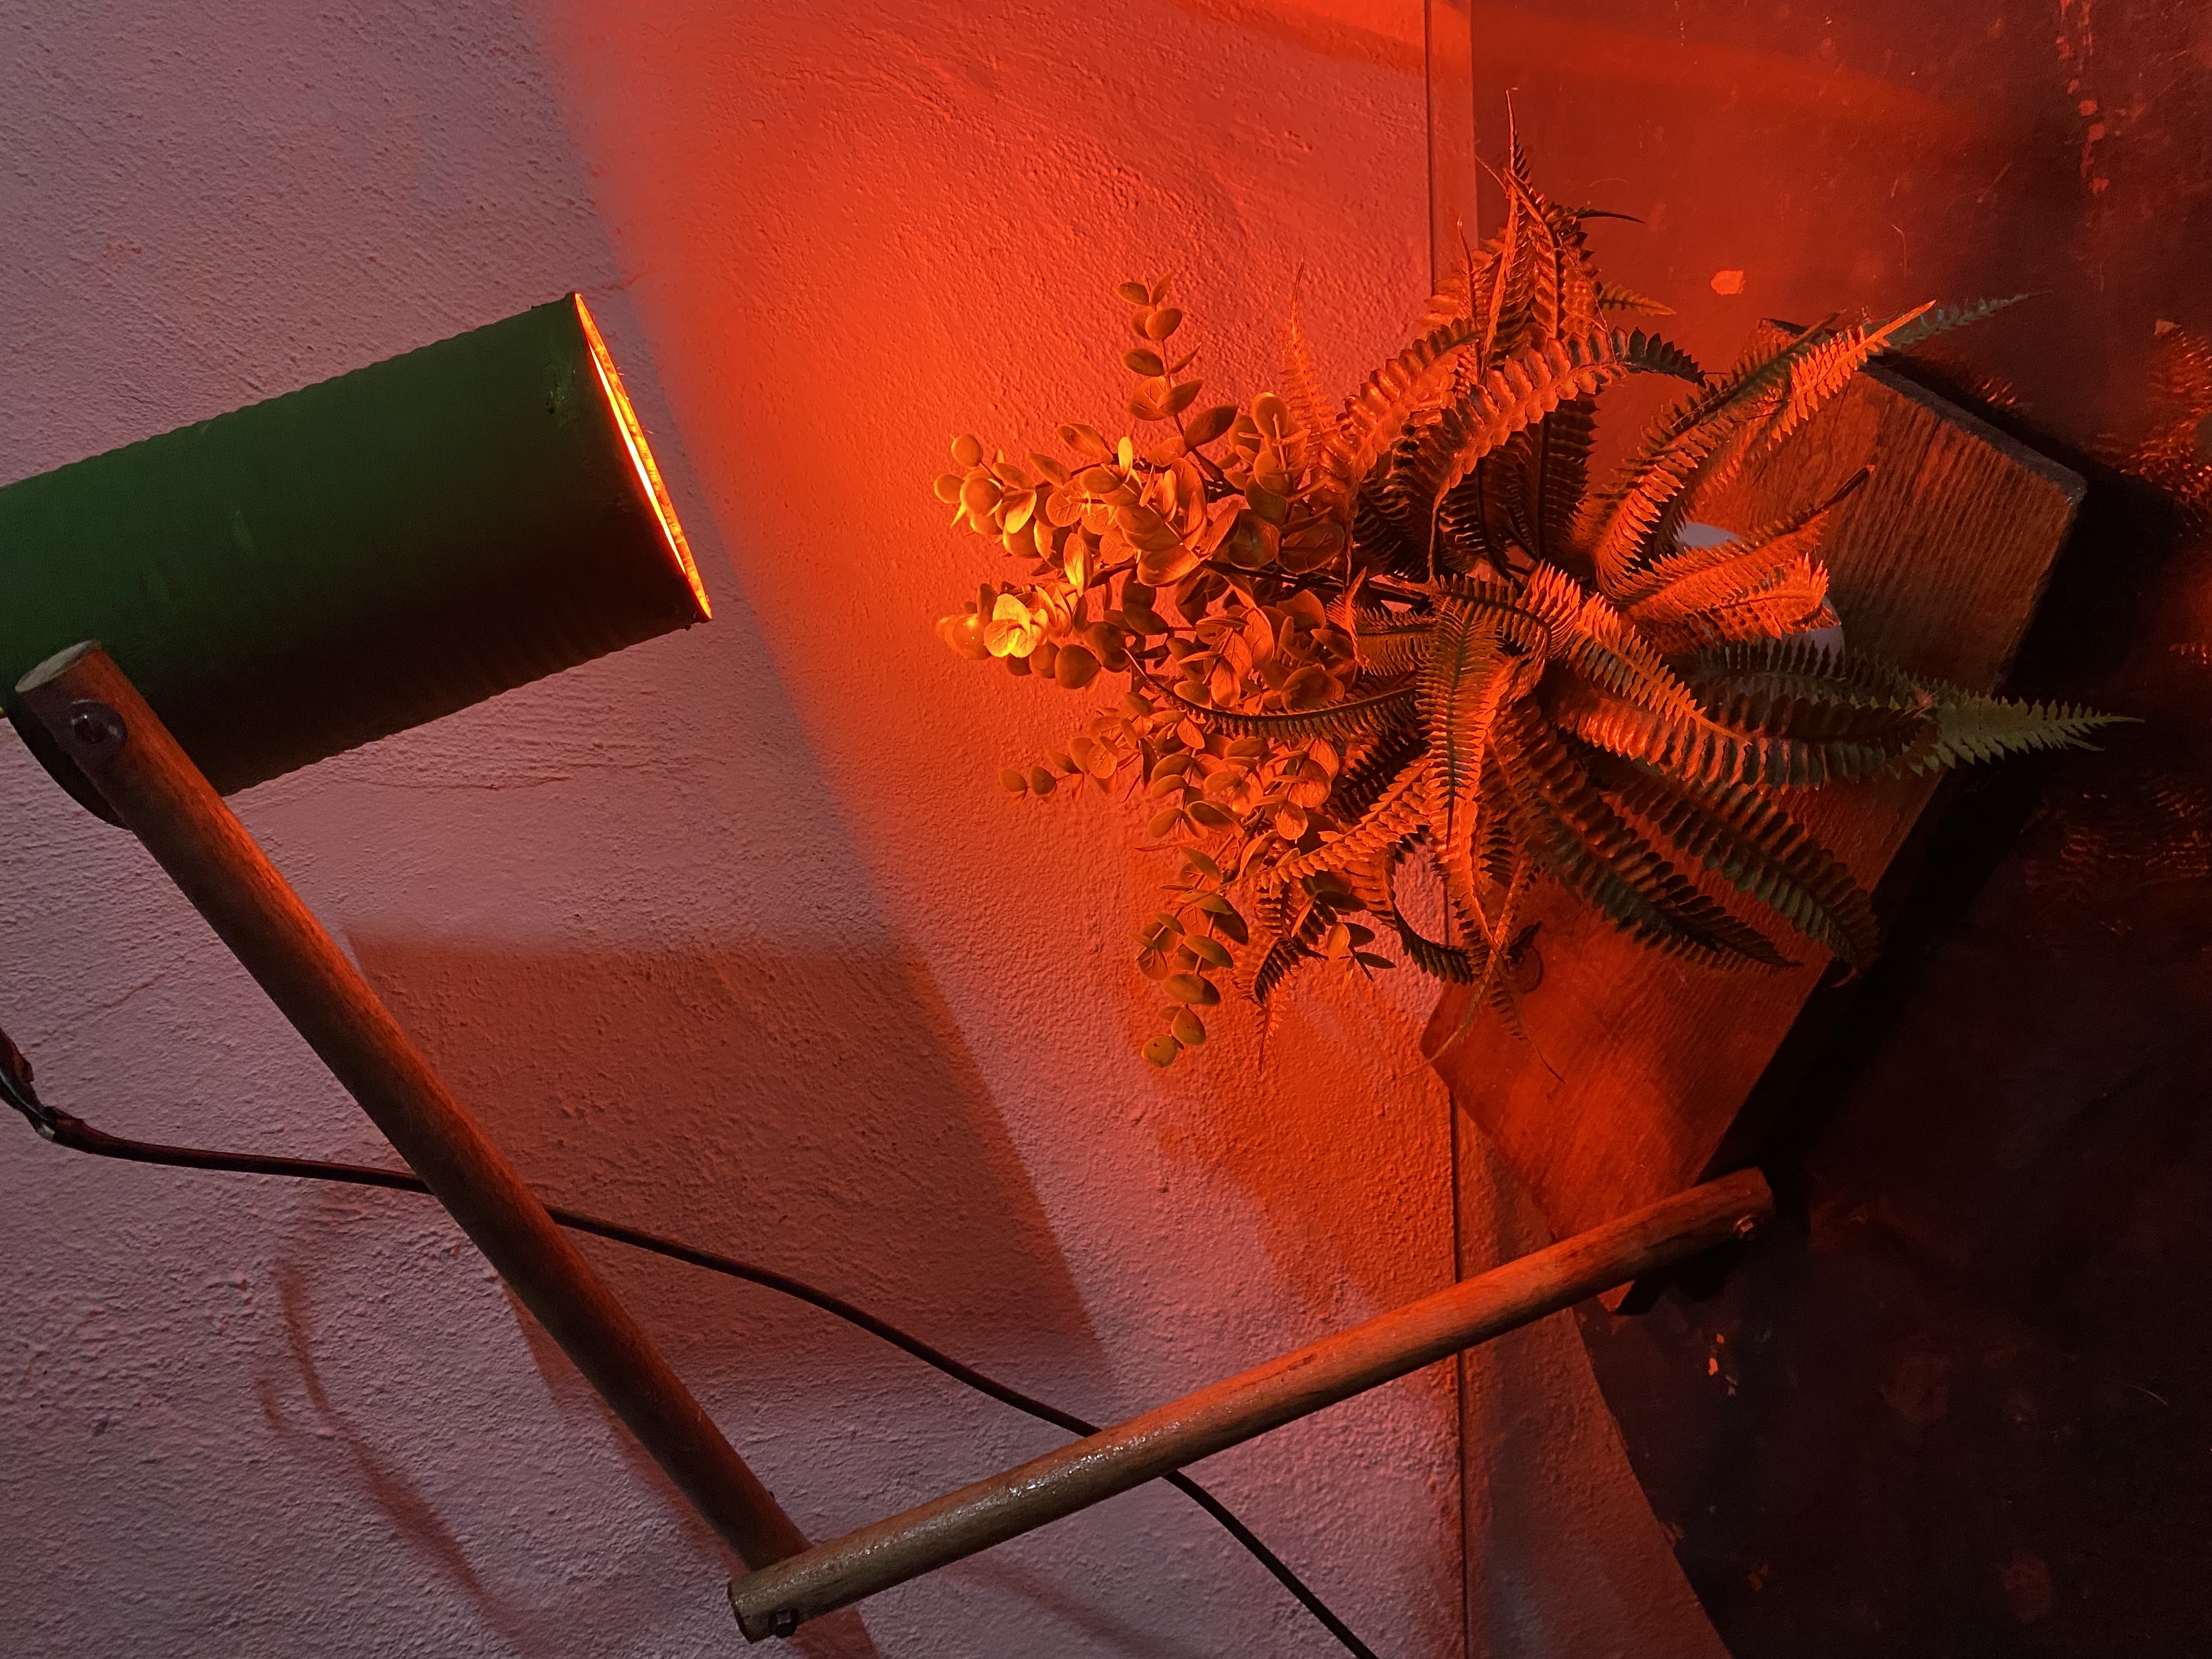
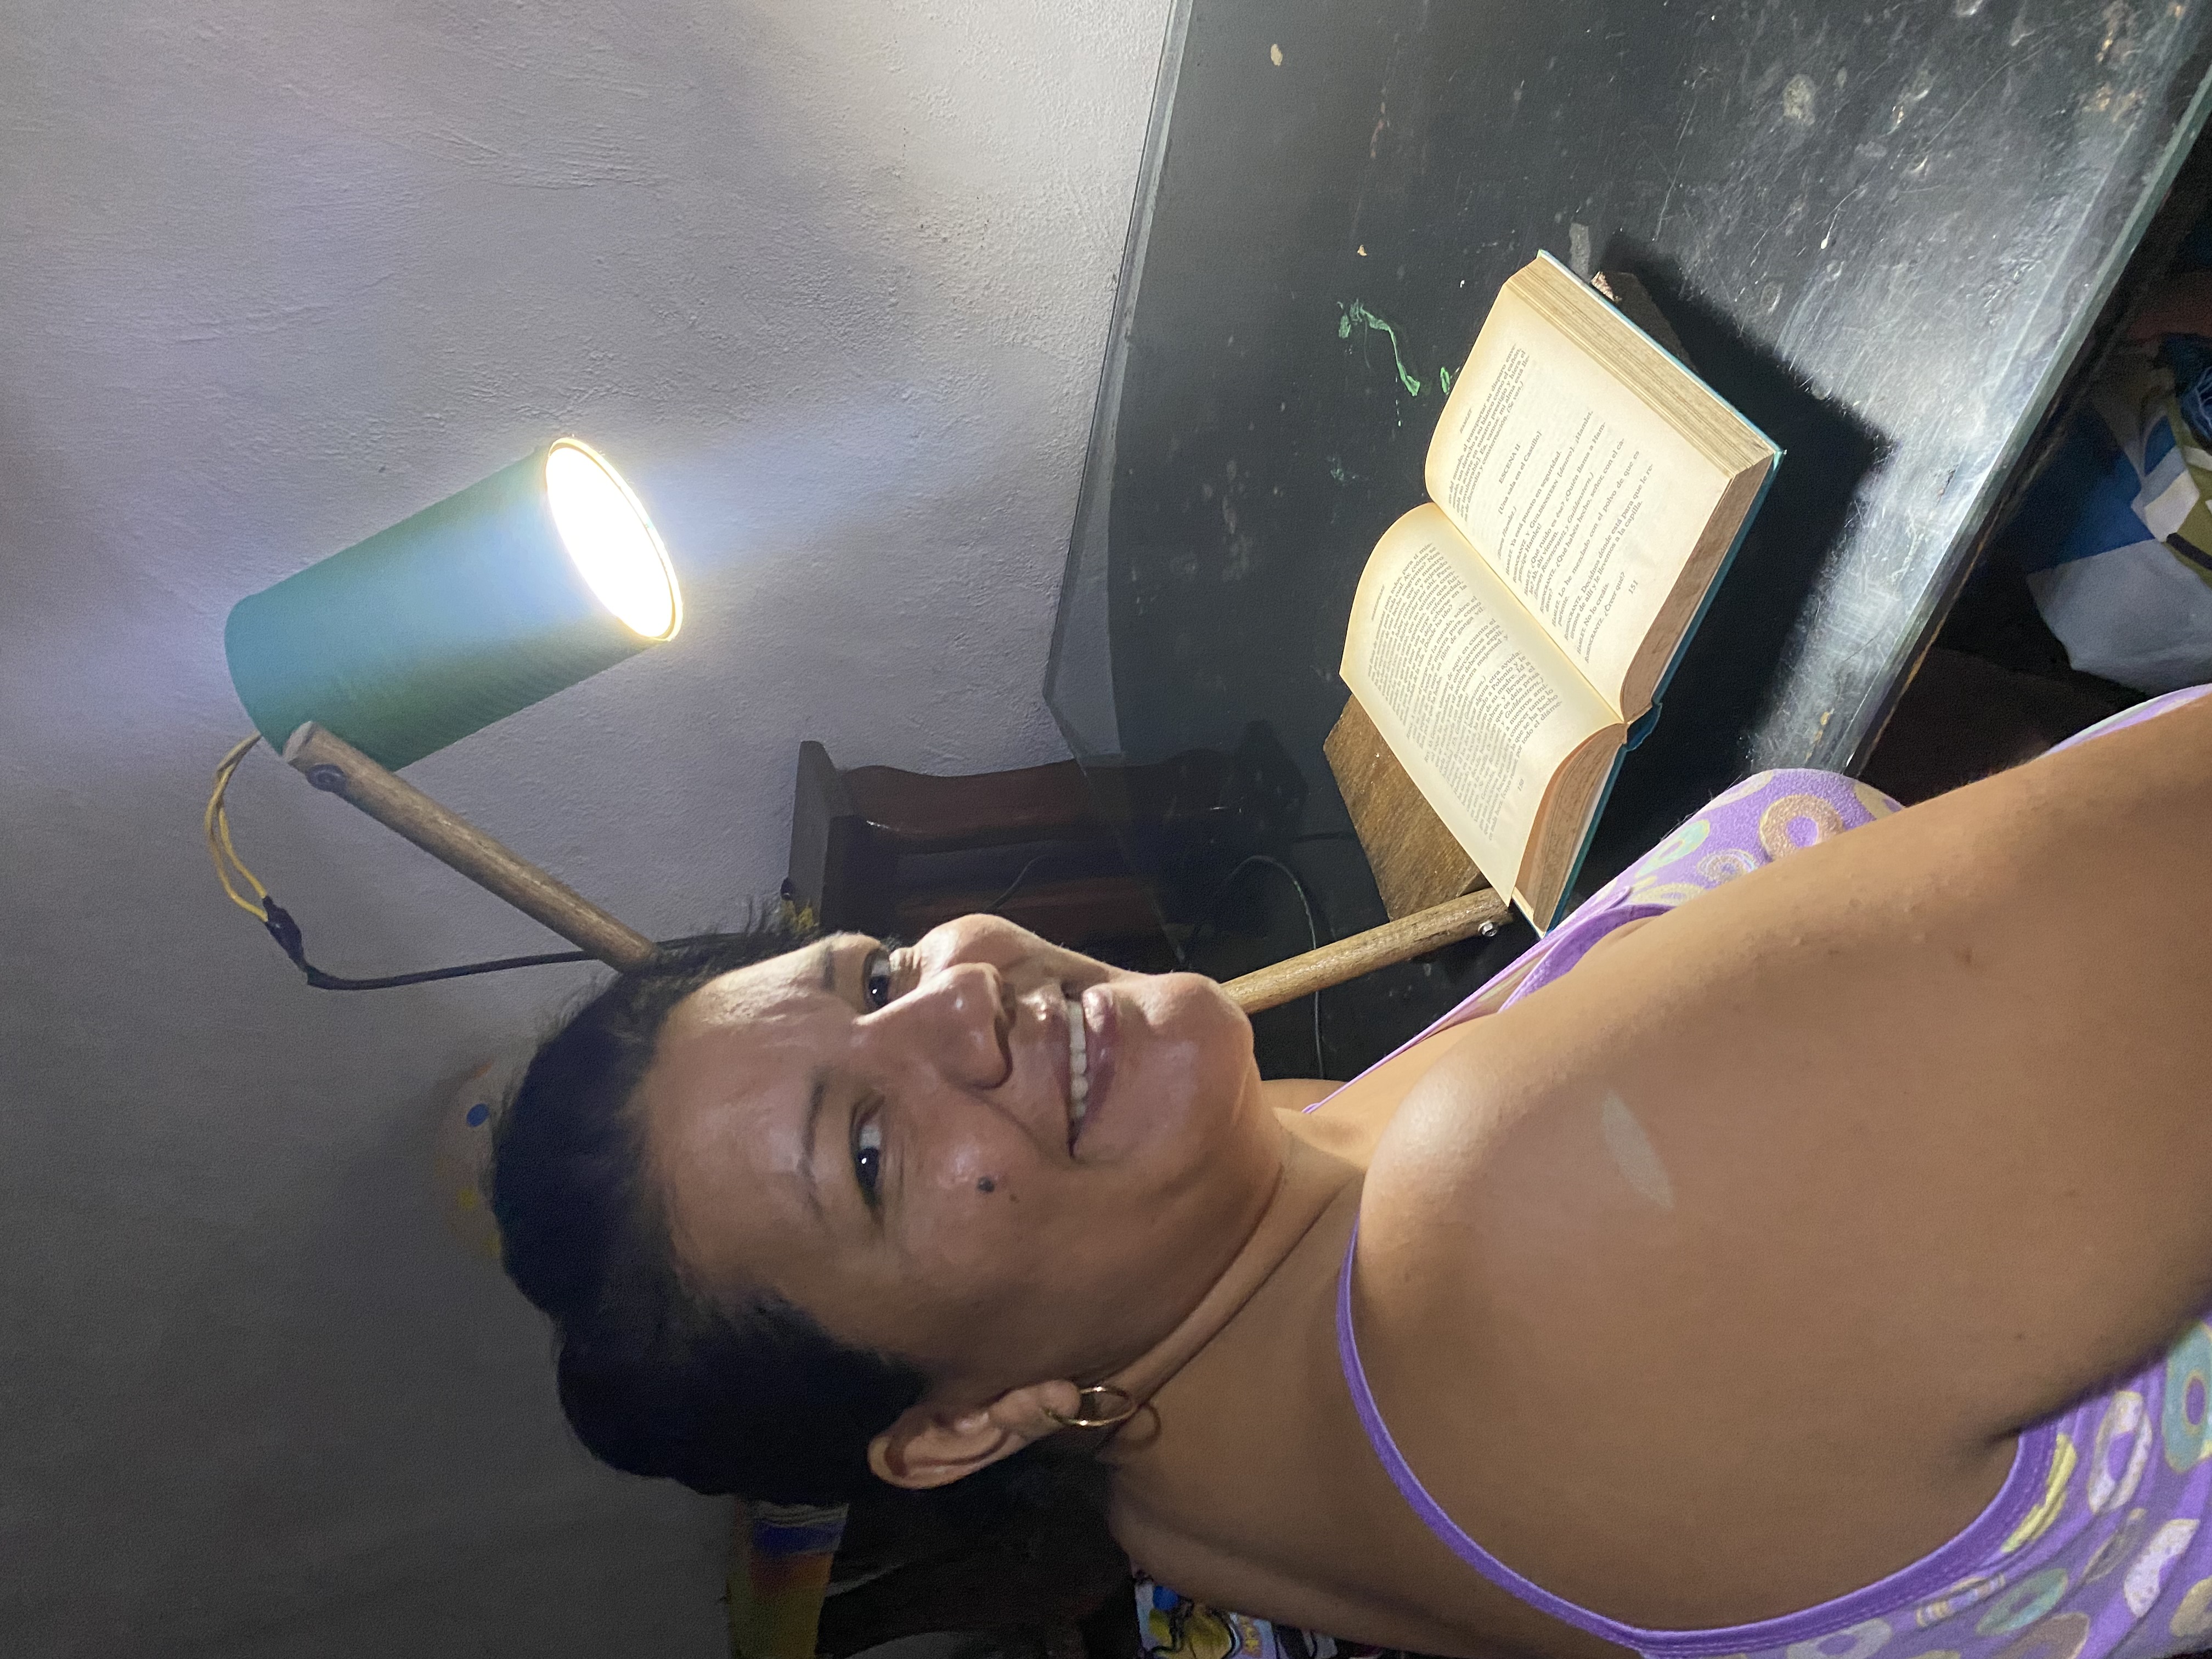
For the fifth and final step we are going to paint the can, in my case what I did was touch up the green color since I liked that color, I had already used this can before for another craft and I had saved it and I really liked it for this project since the light bulb was completely inside and it is not noticeable and it does the perfect job of lighting up the space I want, I adjusted all the screws well, turned on my lamp and Here I show you the result:
Para el quinto y último paso vamos a pintar la lata, en mi caso lo que hice fue retocar el color verde ya que me gustó ese color, esta lata ya la había utilizado antes para otra manualidad y la había guardado y me gustó mucho para este proyecto ya que el bombillo quedó completamente adentro y no se nota y hace la función perfecta para alumbrar en el espacio que deseo , ajuste bien todos los tornillos encendí mi lámpara y aqui les muestro el resultado :
 |  |
|---|---|
 |  |
One of the best pieces of advice I can give you is to do whatever you can to buy tools when you can get some money. At home, I love making repairs, creating things, and of course, doing a lot of crafts, and for this, it's necessary to have a lot of tools that make things easier.
To complete this project, I used my drill, grinder, screwdrivers, and a bunch of other tools I managed to get my hands on, and with this, I've put together this beautiful project. I loved the result. I was fascinated with the functionality of my new lamp. I hope you liked it, and I'm very grateful in advance that you've visited my post. I say goodbye, wishing you much success and blessings. ⚒️🪛⚙️🪚✏️❤️
Uno de los mejores consejos que puedo darles es que hagan lo posible cuando logren obtener algún dinero en comprar herramientas, en casa me gusta mucho hacer reparaciones, crear cosas y por supuesto hacer muchas manualidades, y para esto es necesario tener muchos implementos que nos hagan las cosas más fáciles.
Para lograr este proyecto utilice mi taladro, el Esmeril, destornilladores y otra cantidad de utensilios que he logrado obtener y con esto he materializado este hermoso proyecto, el resultado me encantó, quedé fascinada con la funcionalidad de mi nueva lámpara, espero les haya gustado y de antemano estoy muy agradecida de que hayas visitado mi Publicación, me despido deseándoles muchos éxitos y bendiciones ⚒️🪛⚙️🪚✏️❤️


las fotos aquí compartidas son de mi propiedad tomadas con mi teléfono iPhone 11, la edición fue hecha en Canva, para la traducción del inglés utilice el traductor de Google
Has sido votado por
PROYECTO ENLACE
'Conectando Ideas y Comunidades'
PROYECTO ENLACE es un proyecto de curación de habla hispana enfocado en recompensar contenido de calidad y apoyar autores en su proceso de crecimiento en HIVE.
Creemos y apostamos por el futuro de esta gran plataforma, y estamos muy emocionados de poder hacerla crecer junto a esta comunidad. Así que te invitamos a publicar en nuestra COMUNIDAD y estar atento a todas las actividades que tenemos preparadas y que estaremos publicando en breve.
¿QUIERES AUTOMATIZAR TUS GANANCIAS DE CURACIÓN? SE PARTE DEL PROYECTO ENLACE APOYANDO A NUESTRO TRAIL EN HIVE.VOTE INGRESA AQUÍ PARA CONOCER LOS DETALLES.
¿QUIERES INVERTIR ENLACE? DESCUBRE COMO HACERLO Y GENERAR INGRESOS DE FORMA SEMANAL MEDIANTE TU DELEGACIÓN DE HP AQUÍ TE EXPLICAMOS COMO.
Te invitamos a participar en nuestro servidor de Discord: https://discord.gg/3S9y7BbWfS
Atentamente
EQUIPO ENLACE 2025
Muy buena idea de reciclaje amiga una grandiosa participación en el concurso. Un trabajo muy útil 🙂
Muchas gracias amiga 🥰
A brilliant and very useful idea that many people could put into practice to make a beautiful lamp to place anywhere in their home. Excellent participation in the contest. Éxitos .
Una genial le muy útil idea que muchísimas personas podrían poner en práctica para realizar una bonita lámpara para colocarla en cualquier lugar del hogar. Excelente participación en el concurso. Exitos.
selected by @dayadam
Muchas gracias 😊
que ingenioso y con materiales prácticos, buen trabajo!
how ingenious and with practical materials, good job!
Gracias 😊
Guao quedó bien bonita y toda de reciclaje mira mami @rlathulerie está bien fina
Eso es lo mejor Amiga que podemos hacerla con materiales que quizás todos tenemos en Casa, gracias por comentar, saludos 🥰
Te doy toda la razón cuando dices que hay que tener herramientas en casa, la verdad es que son bastante útiles. Te quedo genial! Me encanto esto. :)
Así es Amiga las herramientas nos facilitan todo en el hogar, gracias por comentar, saludos 😊
Muy creativa y original tu lámpara amigos gracias por compartir tus trabajos..
Gracias 😊
I've always wanted to make my own lamp. I remember making one once for my kids' homework. It's great to have one made by our own hands. It turned out great, and congratulations!
Siempre he querido realizar mi propia lámpara, recuerdo haberla hecho en alguna oportunidad para una tarea de mis hijos, es genial tener una hecha por nuestras propias manos. Te quedó genial y te felicito
Son muy útiles Amiga espero pronto puedas hacer la tuya, muchas gracias por visitar mi publicación, saludos 🥰