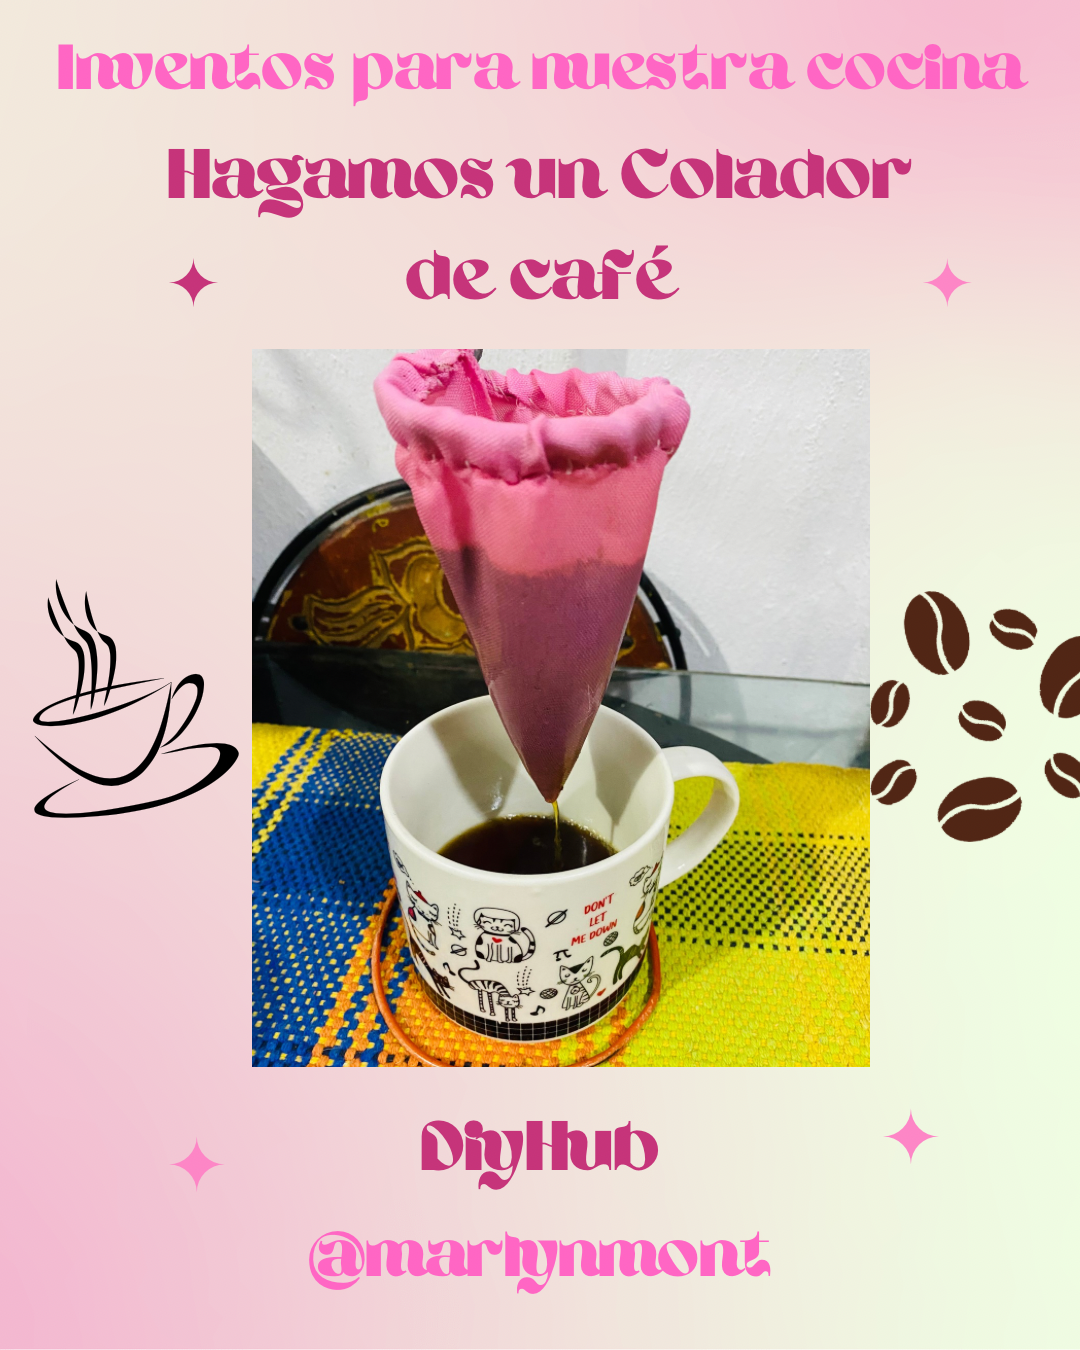
Inventos para nuestra cocina: hagamos un colador de café ☕️❤️ [esp/eng]
Saludos amigos de DIYHUB, por acá estoy nuevamente para participar en el concurso del mes de mayo: 𝓣𝓻𝓾𝓬𝓸𝓼 𝔂 𝓶𝓪𝓷𝓾𝓪𝓵𝓲𝓭𝓪𝓭𝓮𝓼 𝓹𝓪𝓻𝓪 𝓵𝓪 𝓬𝓸𝓬𝓲𝓷𝓪 ☕️🍽️❤️
En la cocina nos pueden surgir grandes ideas, ideas que nos hacen la vida más fácil, recordando momentos vividos no tan agradables, se me vino a la mente un refrán muy popular que dice: “ no hay mal que por bien no venga” , luego de vivir una crisis extrema en mi país, pudimos aprender muchas cosas, entre ellas hacer muchas creaciones con pocos materiales y hoy recordé esta gran idea de hacer un colador de café de manera artesanal, con materiales de reciclaje y que te aseguro será muy útil, aquí les dejo el paso a paso:
Greetings DIYHUB friends, here I am again to participate in the May contest: 𝓚𝓲𝓽𝓬𝓱𝓮𝓷 𝓗𝓪𝓬𝓴𝓼 𝓪𝓷𝓭 𝓓𝓘𝓨𝓼 ☕️🍽️❤️
Great ideas can come to us in the kitchen, ideas that make our lives easier, remembering not so pleasant moments, a very popular saying came to mind that says: "every cloud has a silver lining". After living through an extreme crisis in my country, we were able to learn many things, including making many creations with few materials, and today I remembered this great idea of making a colander. of coffee in an artisanal way, with recycled materials and that I assure you will be very useful, here I leave you the step by step:
MATERIALES
MATERIALS
En aquella época hice este tipo de Coladores, pero recuerdo que el modelo era el típico sólo colador, esta vez se me ocurrió la idea de hacerlo con su base para más facilidad al usarlo, este tipo de Coladores de café en tela los podemos conseguir en abastos o supermercados, pero lo mejor de todo es hacerlo nosotros mismos, con nuestro toque personal, los materiales a utilizar son sencillos de conseguir sólo les aconsejo que sus Mamis no vean de dónde van a sacar estos materiales, ja ja, porque se llevarán un regaño , en mi caso yo soy la mamá, puedo disponer de estos materiales sin llevar regaños 😊, aquí te dejo la lista de materiales a utilizar:
- un gancho de ropa de alambre grueso, de esos que vienen ya forrados en plástico.
- Un retazo de tela que sirva como colador, debe tener la capacidad de traspasar líquidos fácilmente.
- tenaza
- aguja e hilo
At that time, I made this type of colander, but I remember the model was the typical colander only. This time, I came up with the idea of making it with its base for easier use. We can get this type of cloth coffee strainer in general stores or supermarkets, but the best part is making it ourselves, with our personal touch. The materials used are easy to obtain. I just advise you to make sure your moms don't look for information about where you're going to get these materials, ha ha, because you'll get scolded. In my case, I'm the mom, so I can use these materials without getting scolded 😊. Here's the list of materials to use:
- A thick wire clothes hanger, one of those already covered in plastic.
- A piece of fabric that can be used as a colander; it must be able to easily transfer liquids.
- Pliers
- Needle and thread

PASO A PASO
STEP BY STEP
𝓟𝓪𝓼𝓸 1
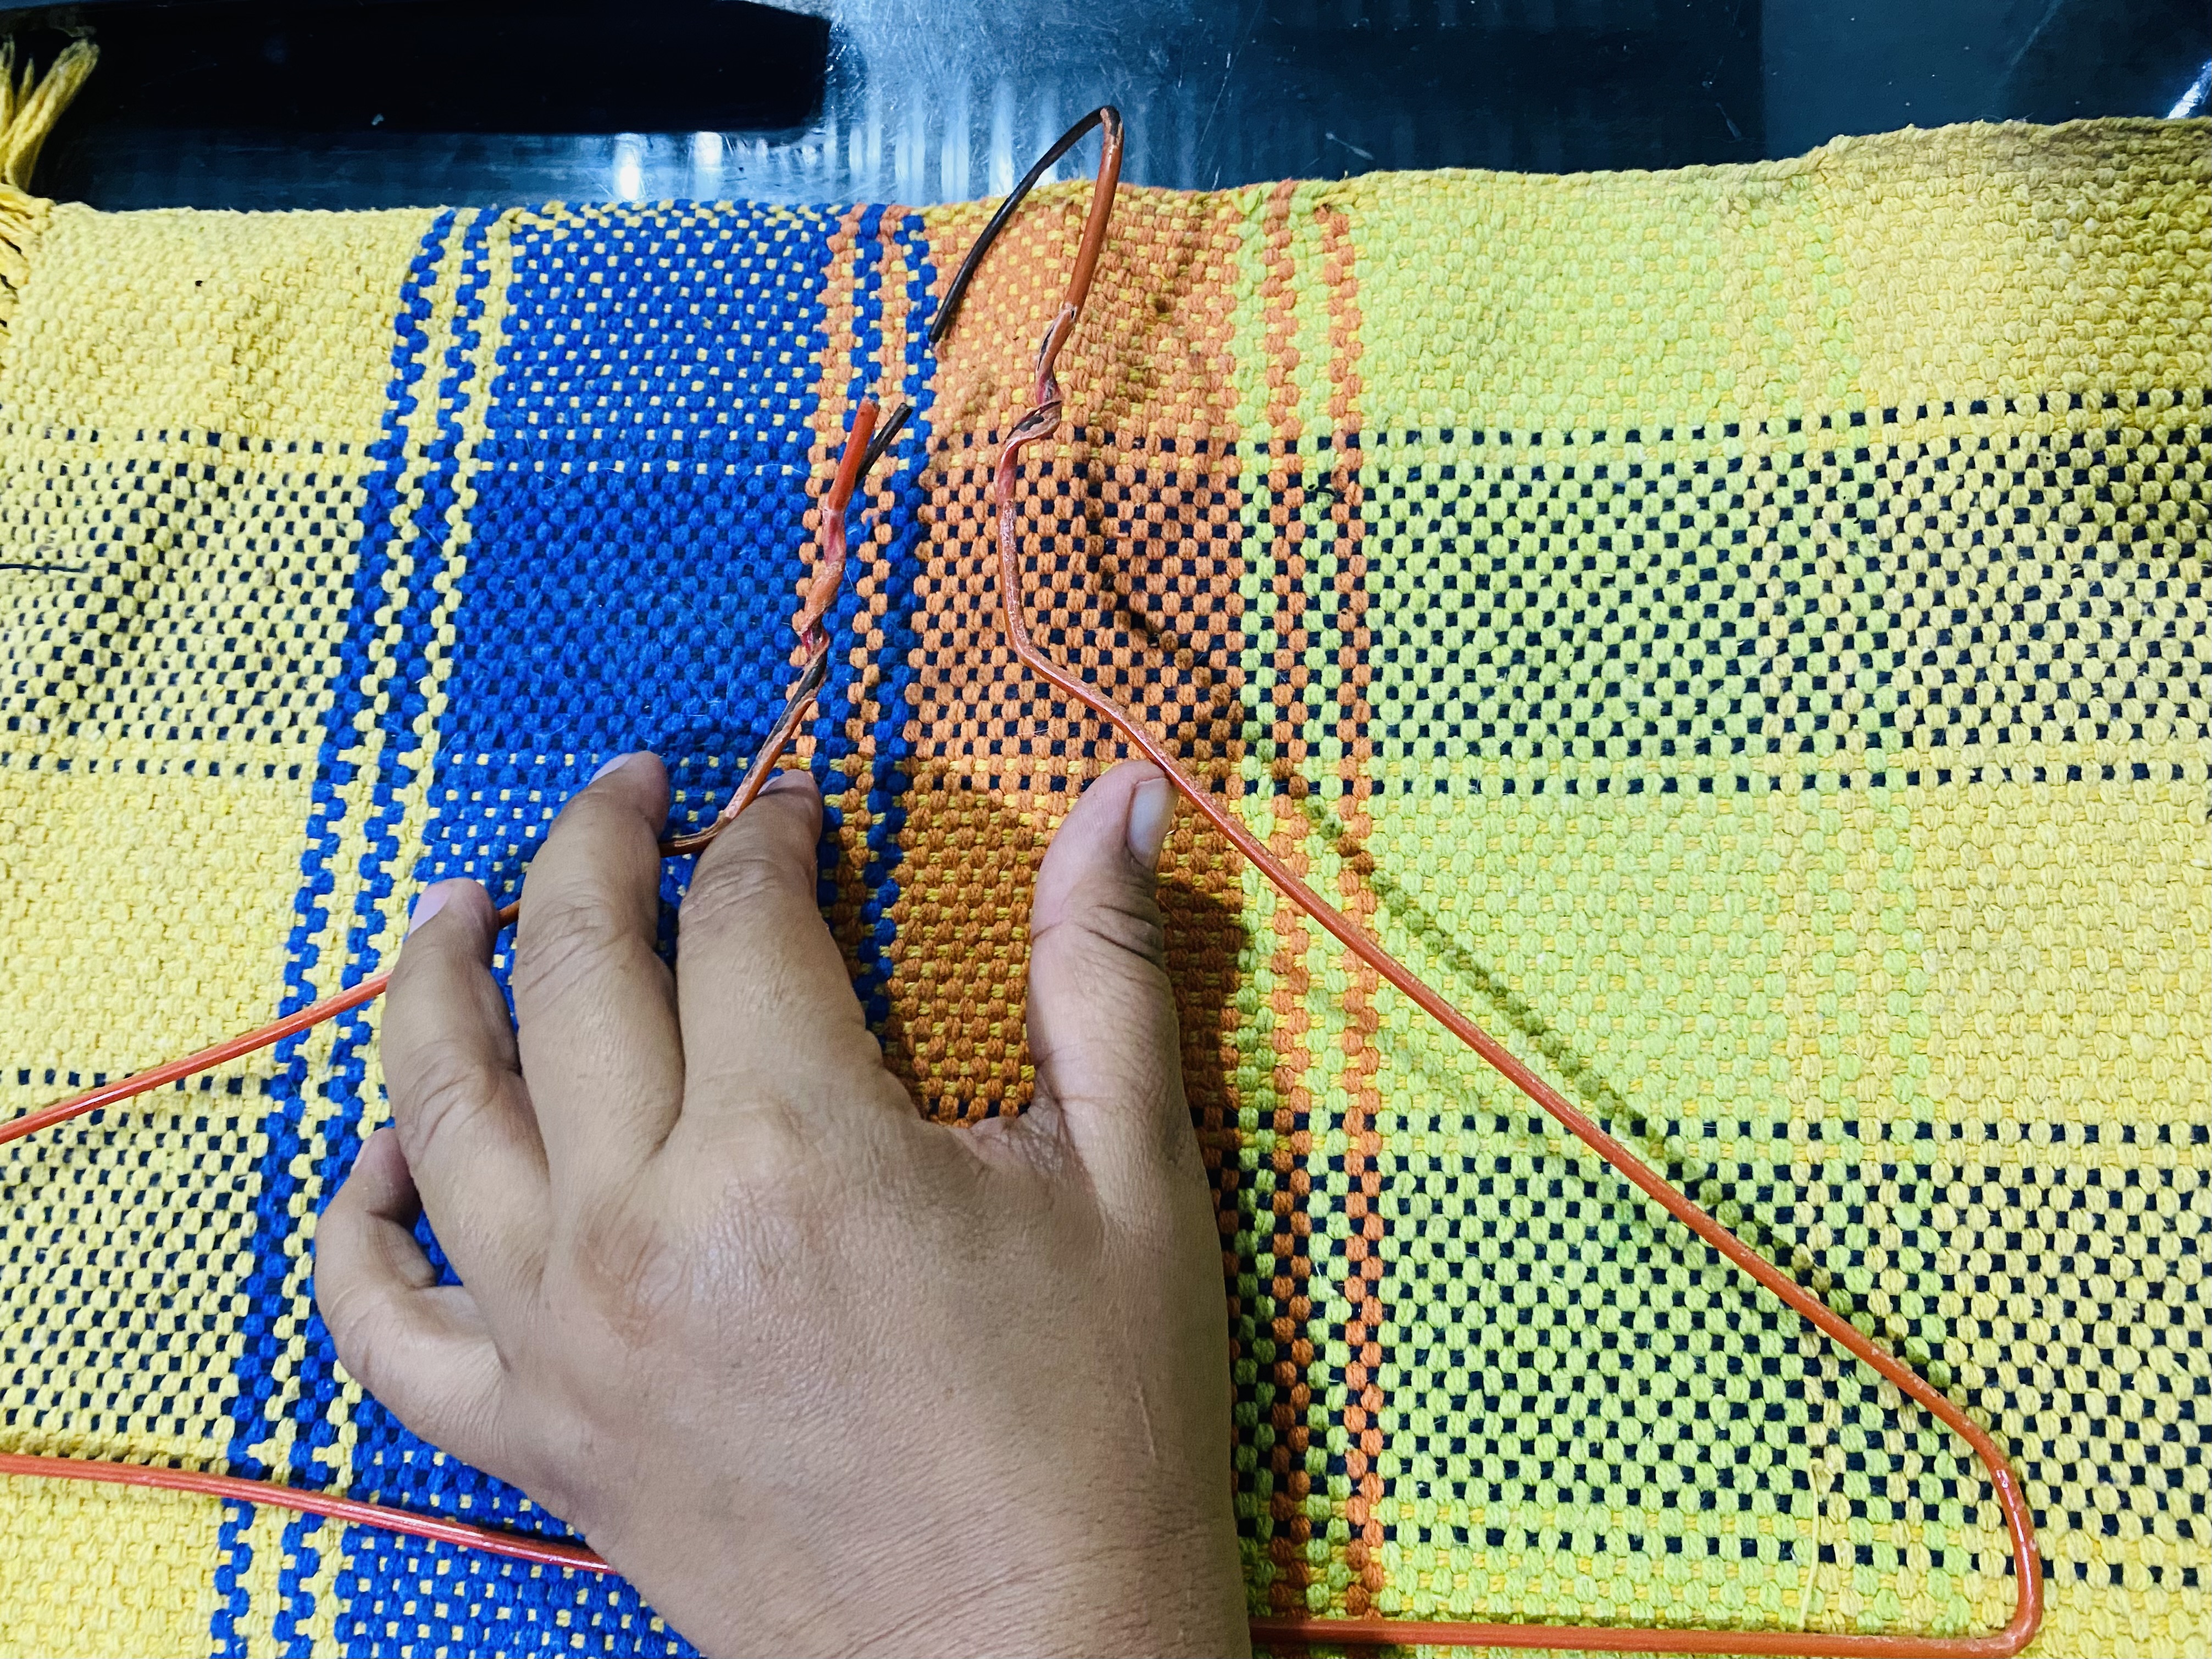
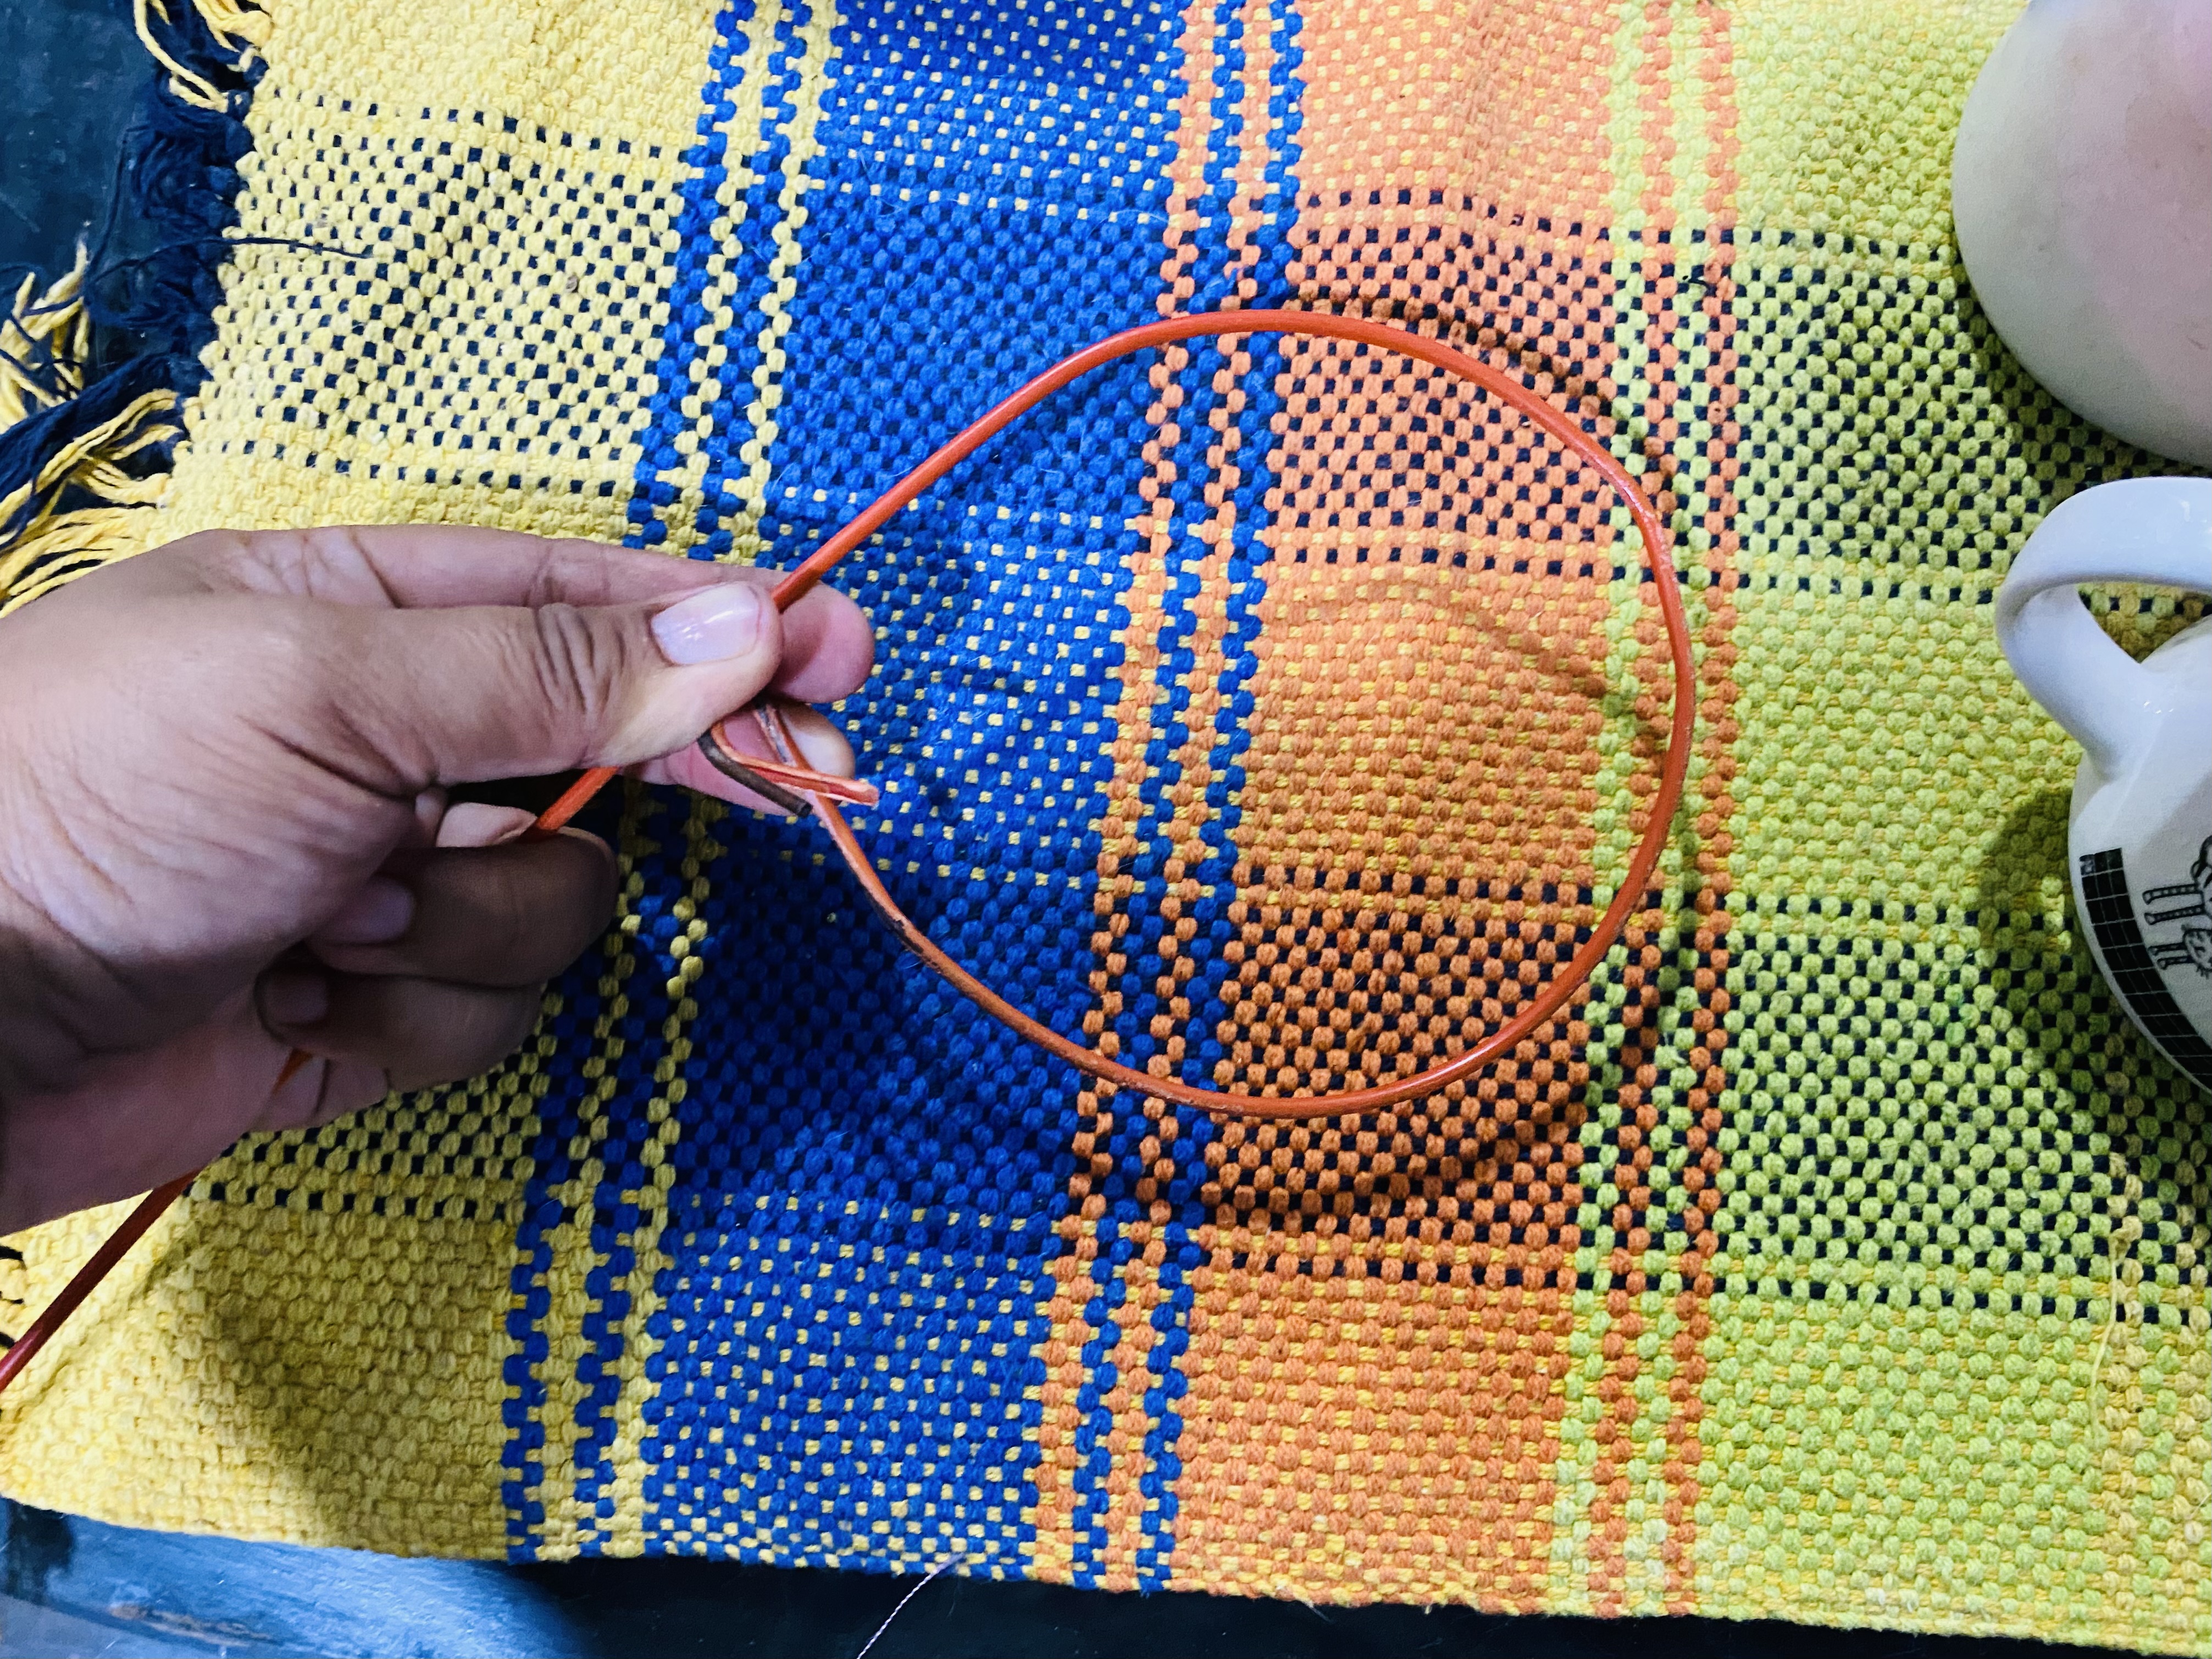
Esta idea es bastante sencilla de realizar y muy práctica, Como primer paso vamos a comenzar desarmando el gancho, este es un alambre bastante grueso, así que es apropiado que usemos alguna herramienta que sirva para cortarlo, doblarlo y así trabajarlo con más facilidad, luego de abrirlo en la parte superior lo vamos a estirar completamente, mi gancho tiene un aproximado de 1,10 m.
Comenzaremos a darle forma haciendo una circunferencia de aproximadamente 35 cm, podemos ayudarnos con algún envase que sea redondo, no es necesario que nos quede Perfecta incluso podemos hacerlo cuadrada todo va a depender de la forma que tú quieras darle, esta figura que haremos será para la base, luego unimos con una de las puntas y doblamos para fijar.
Luego doblaremos el resto de la alambre hacia arriba dejando un tramo largo de aproximadamente 20 cm, luego le damos otro dobles y hacemos otra circunferencia más pequeña para la parte superior, esta debe ser medir aproximadamente 23 cm, la idea de qué la circunferencia en la base sea más ancha es para que pueda sostenerse de pie, allí doblamos la otra punta para fijar y cortamos el excedente de alambre, así ya tendremos lista la base para nuestro colador de café.
This idea is quite simple to make and very practical. As a first step, we'll begin by disassembling the hook. This is a fairly thick wire, so it's a good idea to use a tool that can be used to cut and bend it, making it easier to work with. After opening it at the top, we'll stretch it completely. My hook is approximately 1.10 m long.
We'll begin shaping it by making a circumference of approximately 35 cm. We can use a round container to help us; it doesn't need to be perfect. We can even make it square. It all depends on the shape you want. This shape we'll make will be for the base. Then, we'll join one of the tips and bend it to secure it.
Then we will bend the rest of the wire upwards leaving a long section of approximately 20 cm, then we give it another fold and make another smaller circumference for the upper part, this should measure approximately 23 cm, the idea of making the circumference at the base wider is so that it can stand upright, there we bend the other end to fix it and cut the excess wire, so we will have the base for our coffee strainer ready.
 |  |
|---|---|
 |  |
| --- | --- |
 |  |
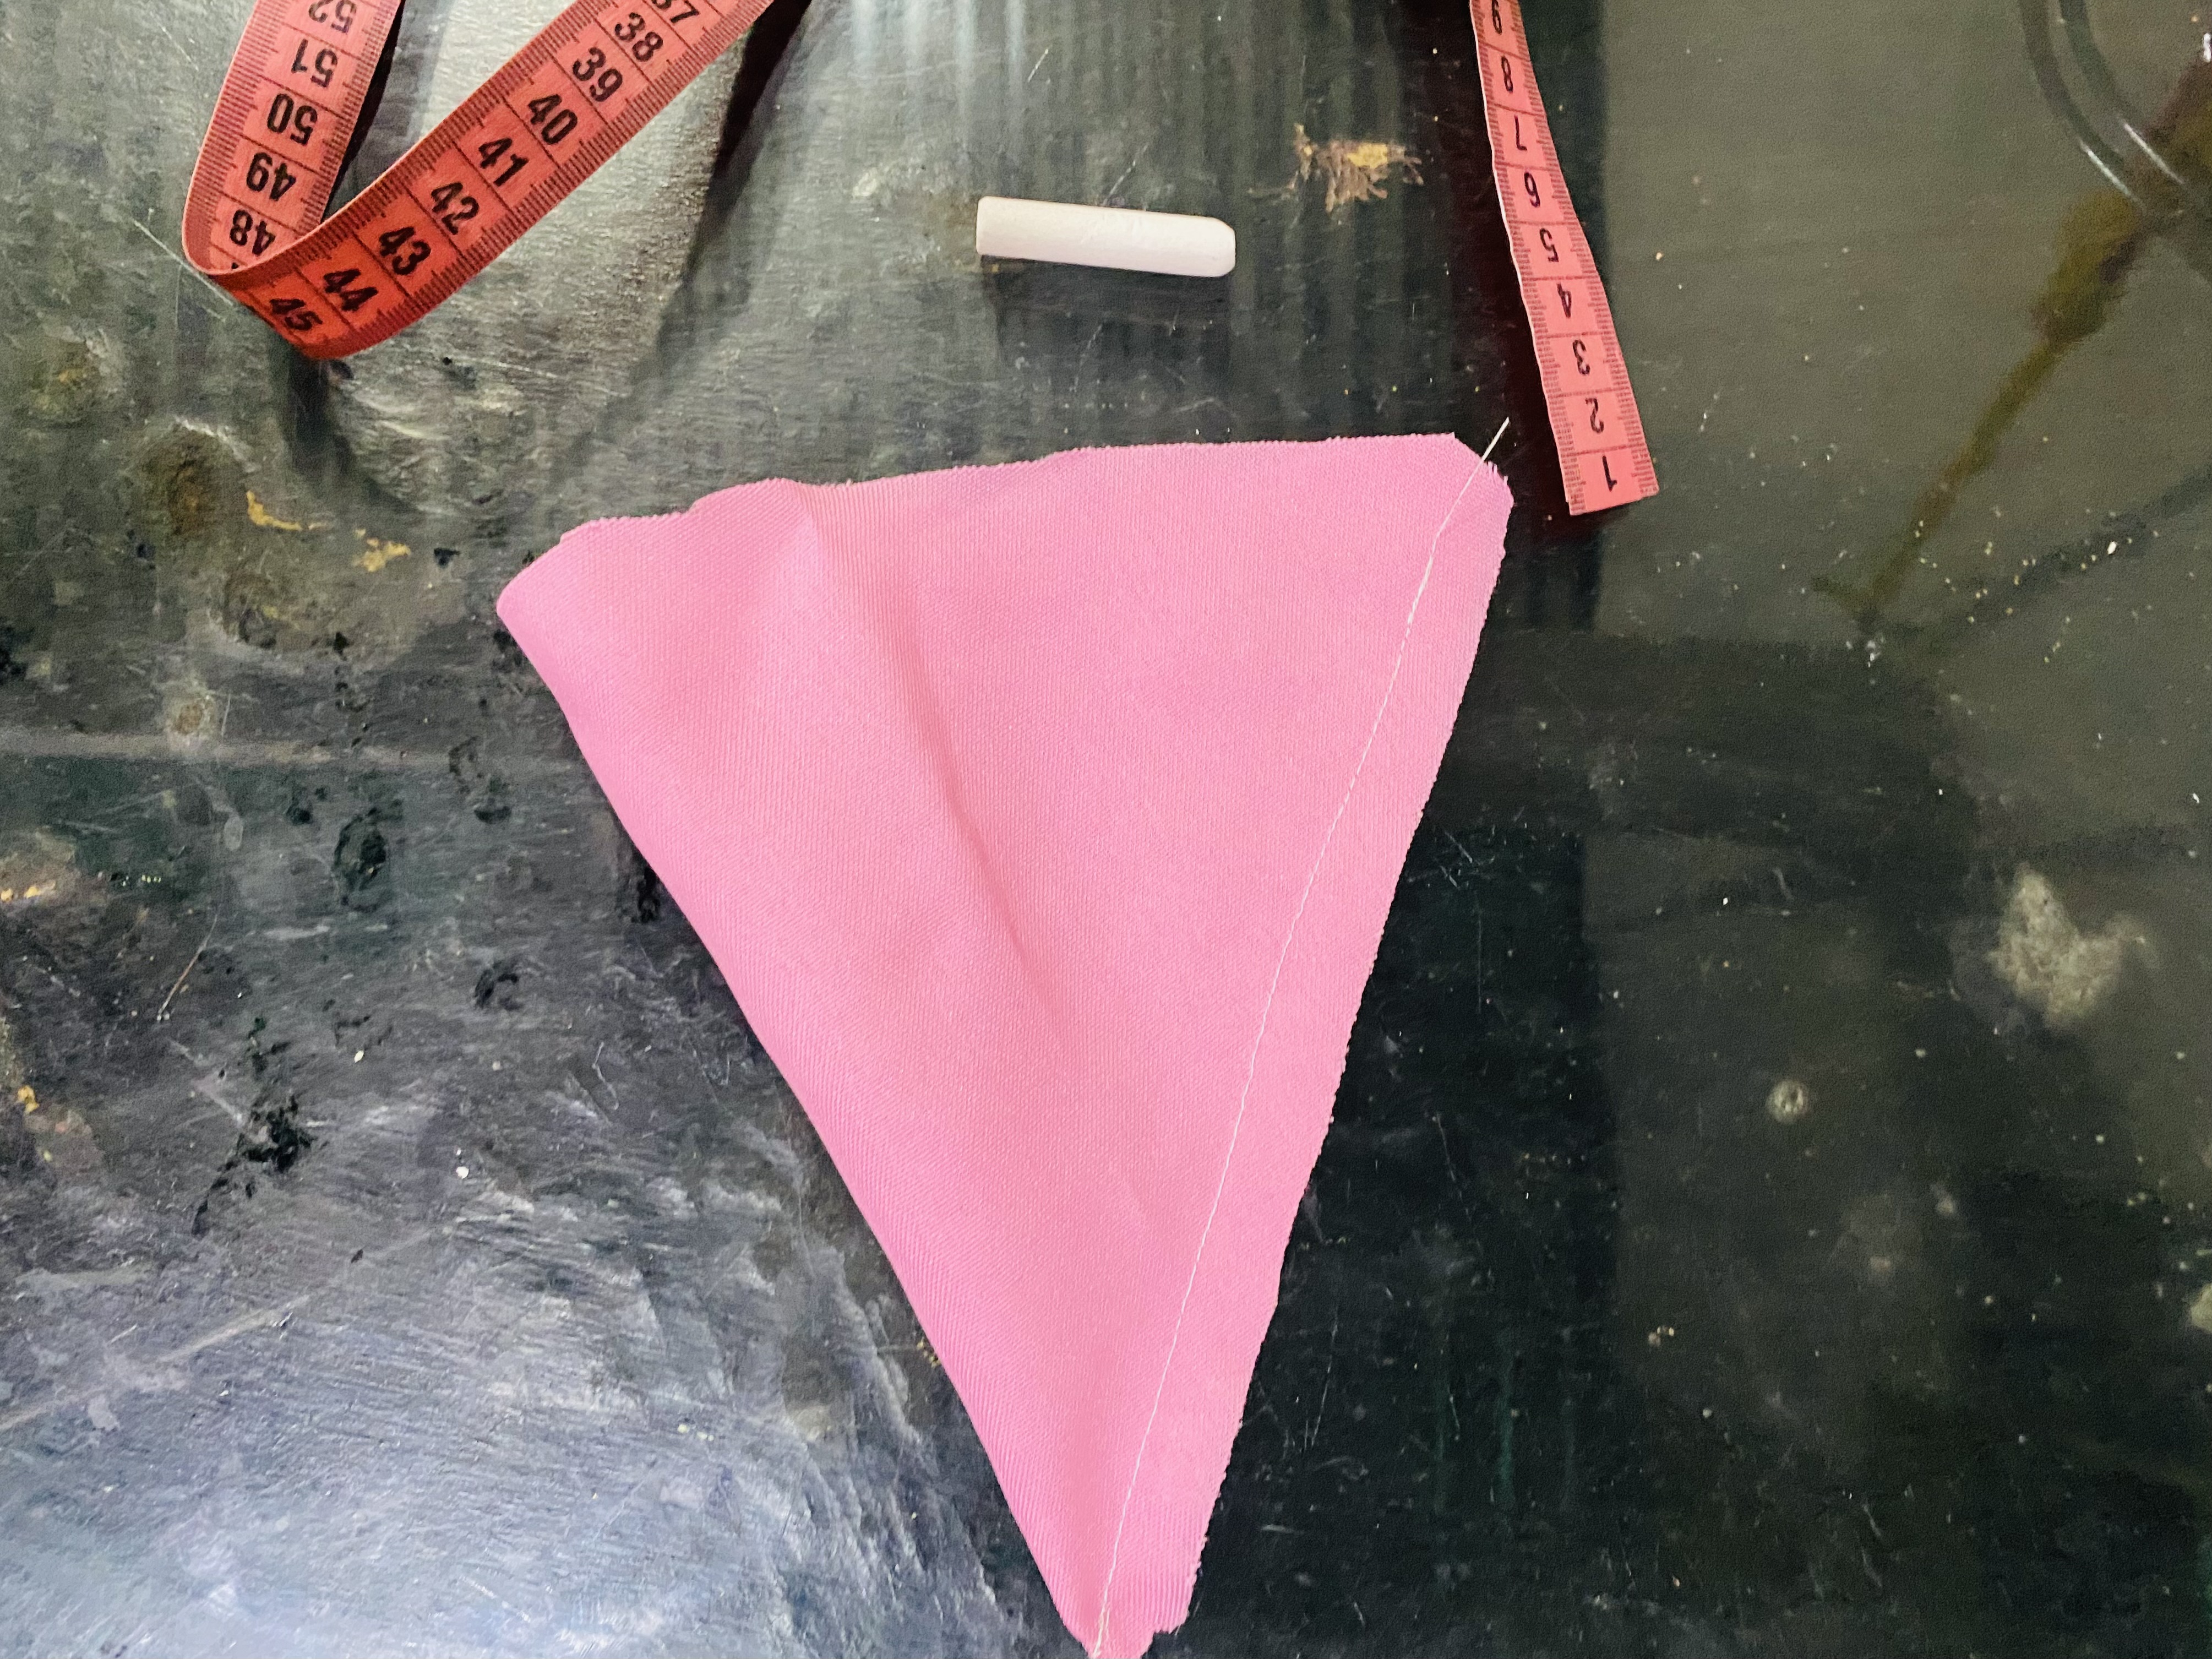
𝓟𝓪𝓼𝓸 2
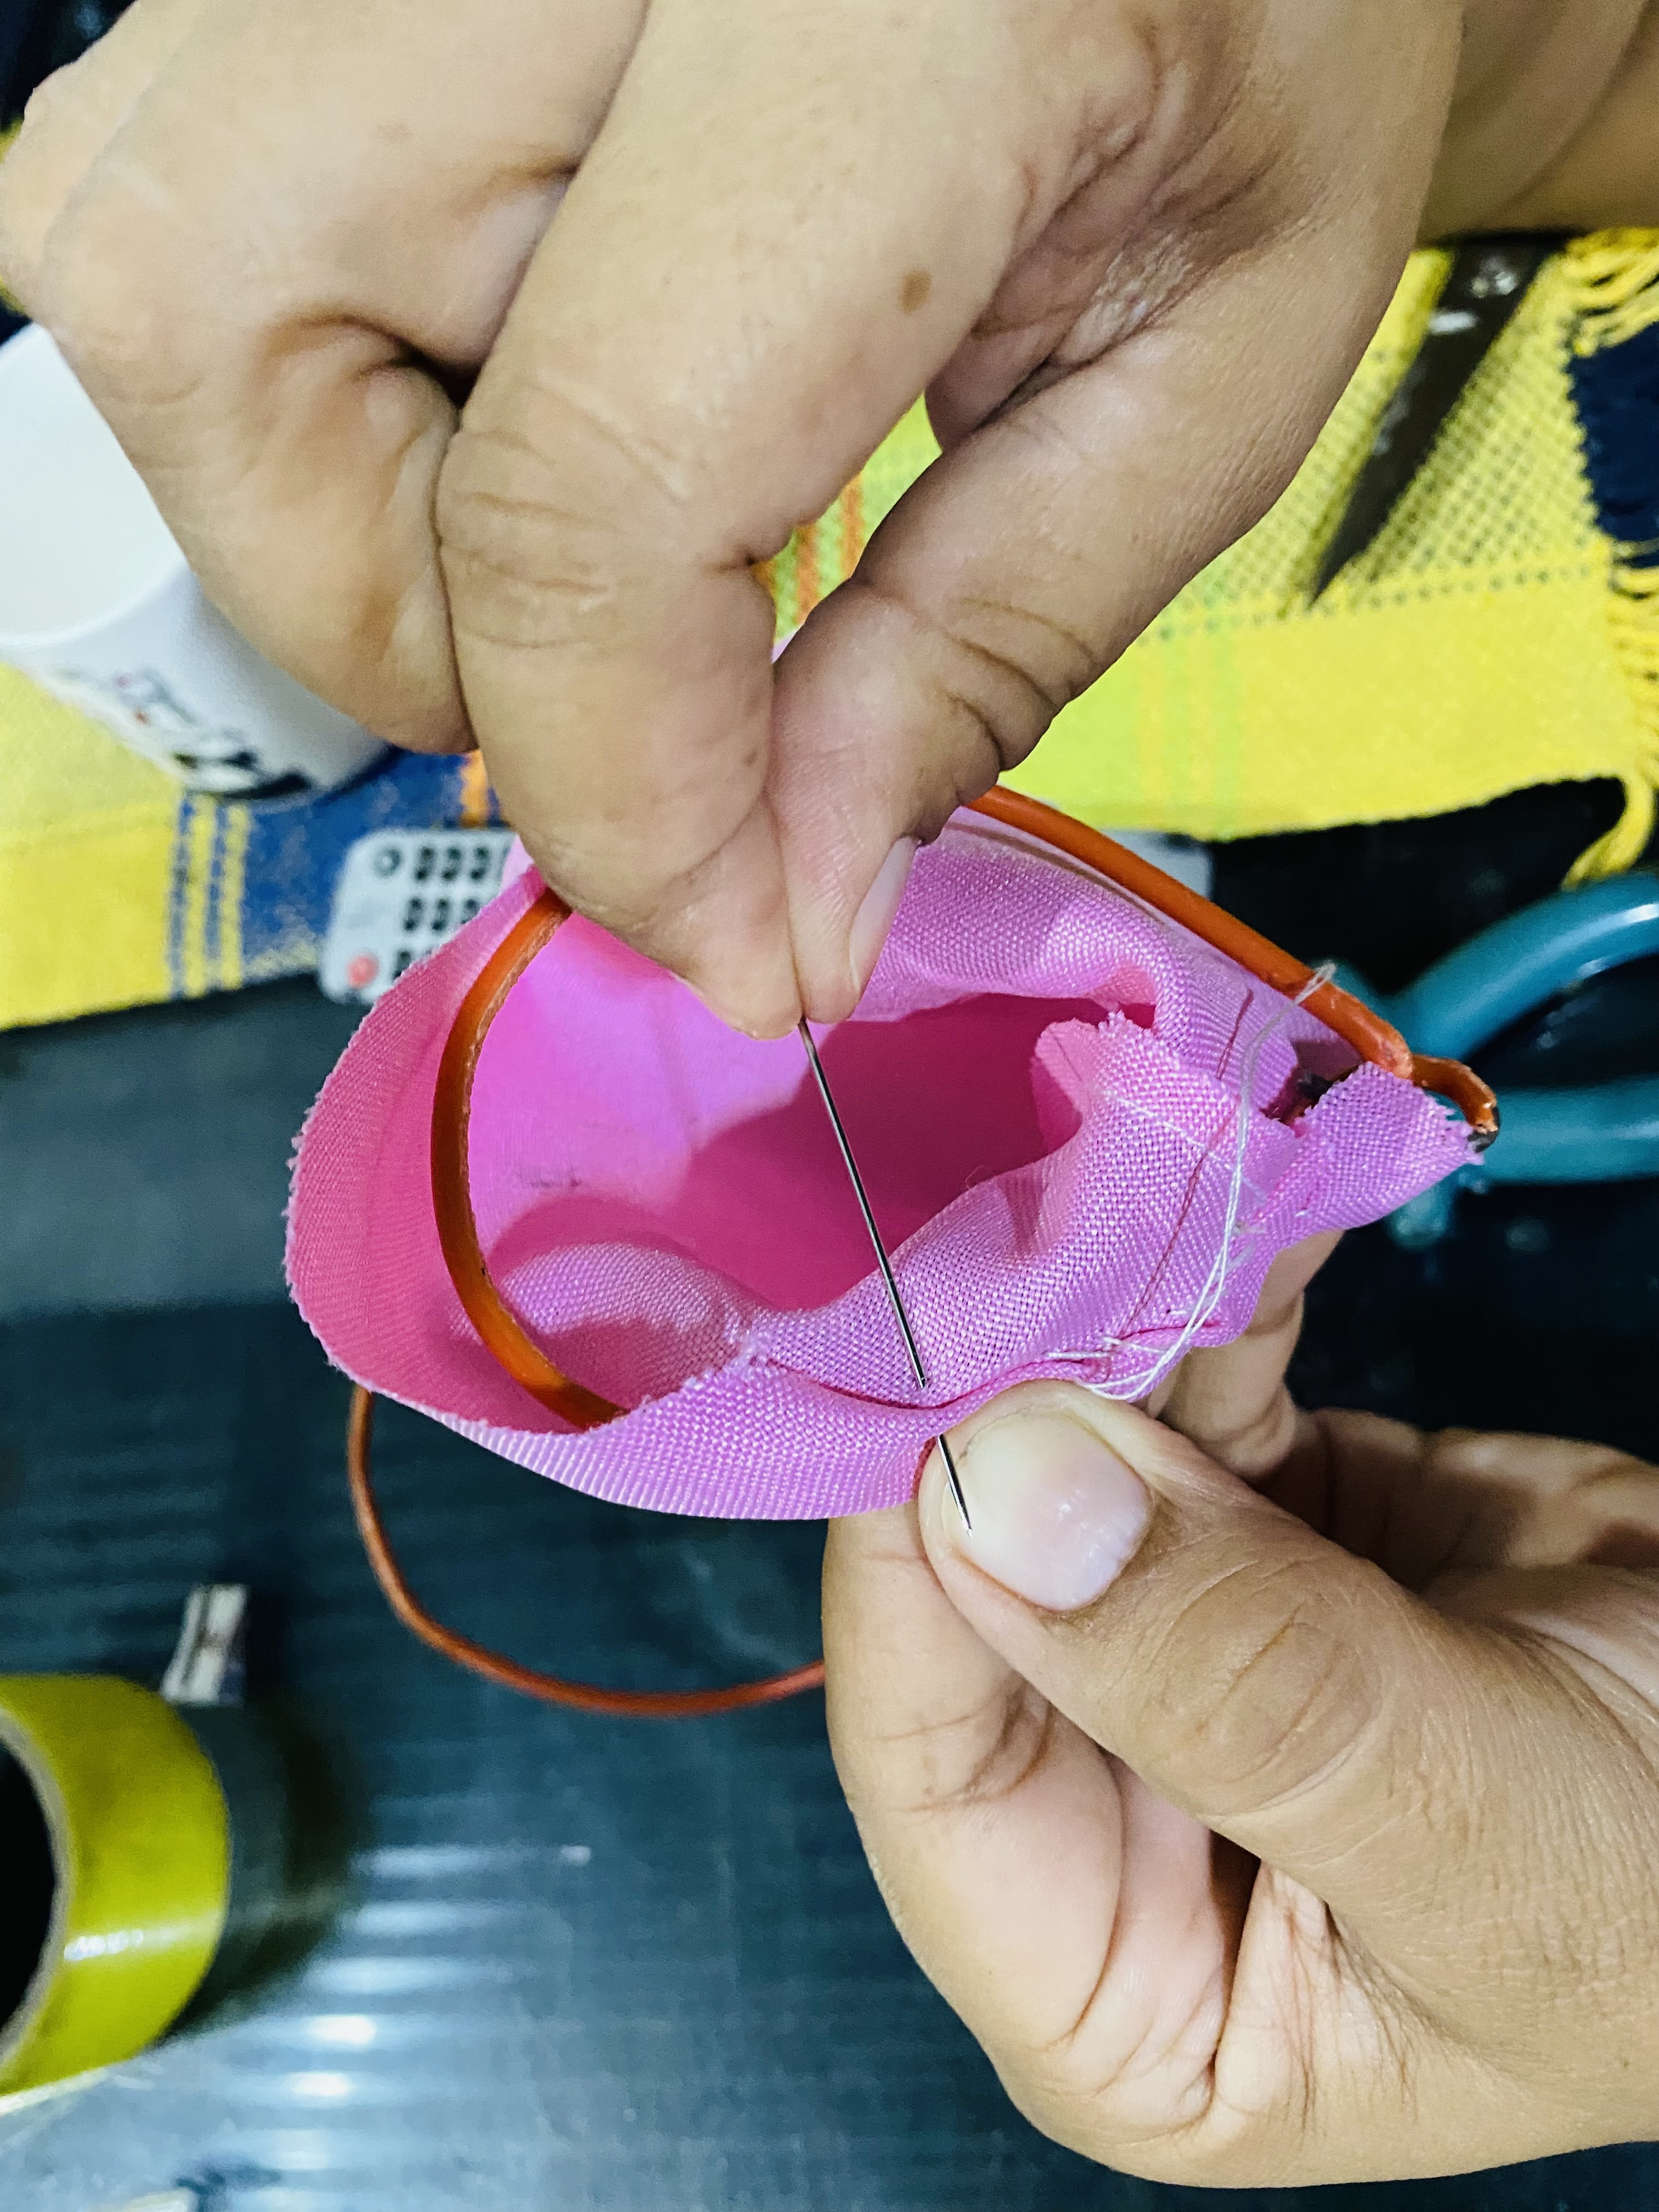
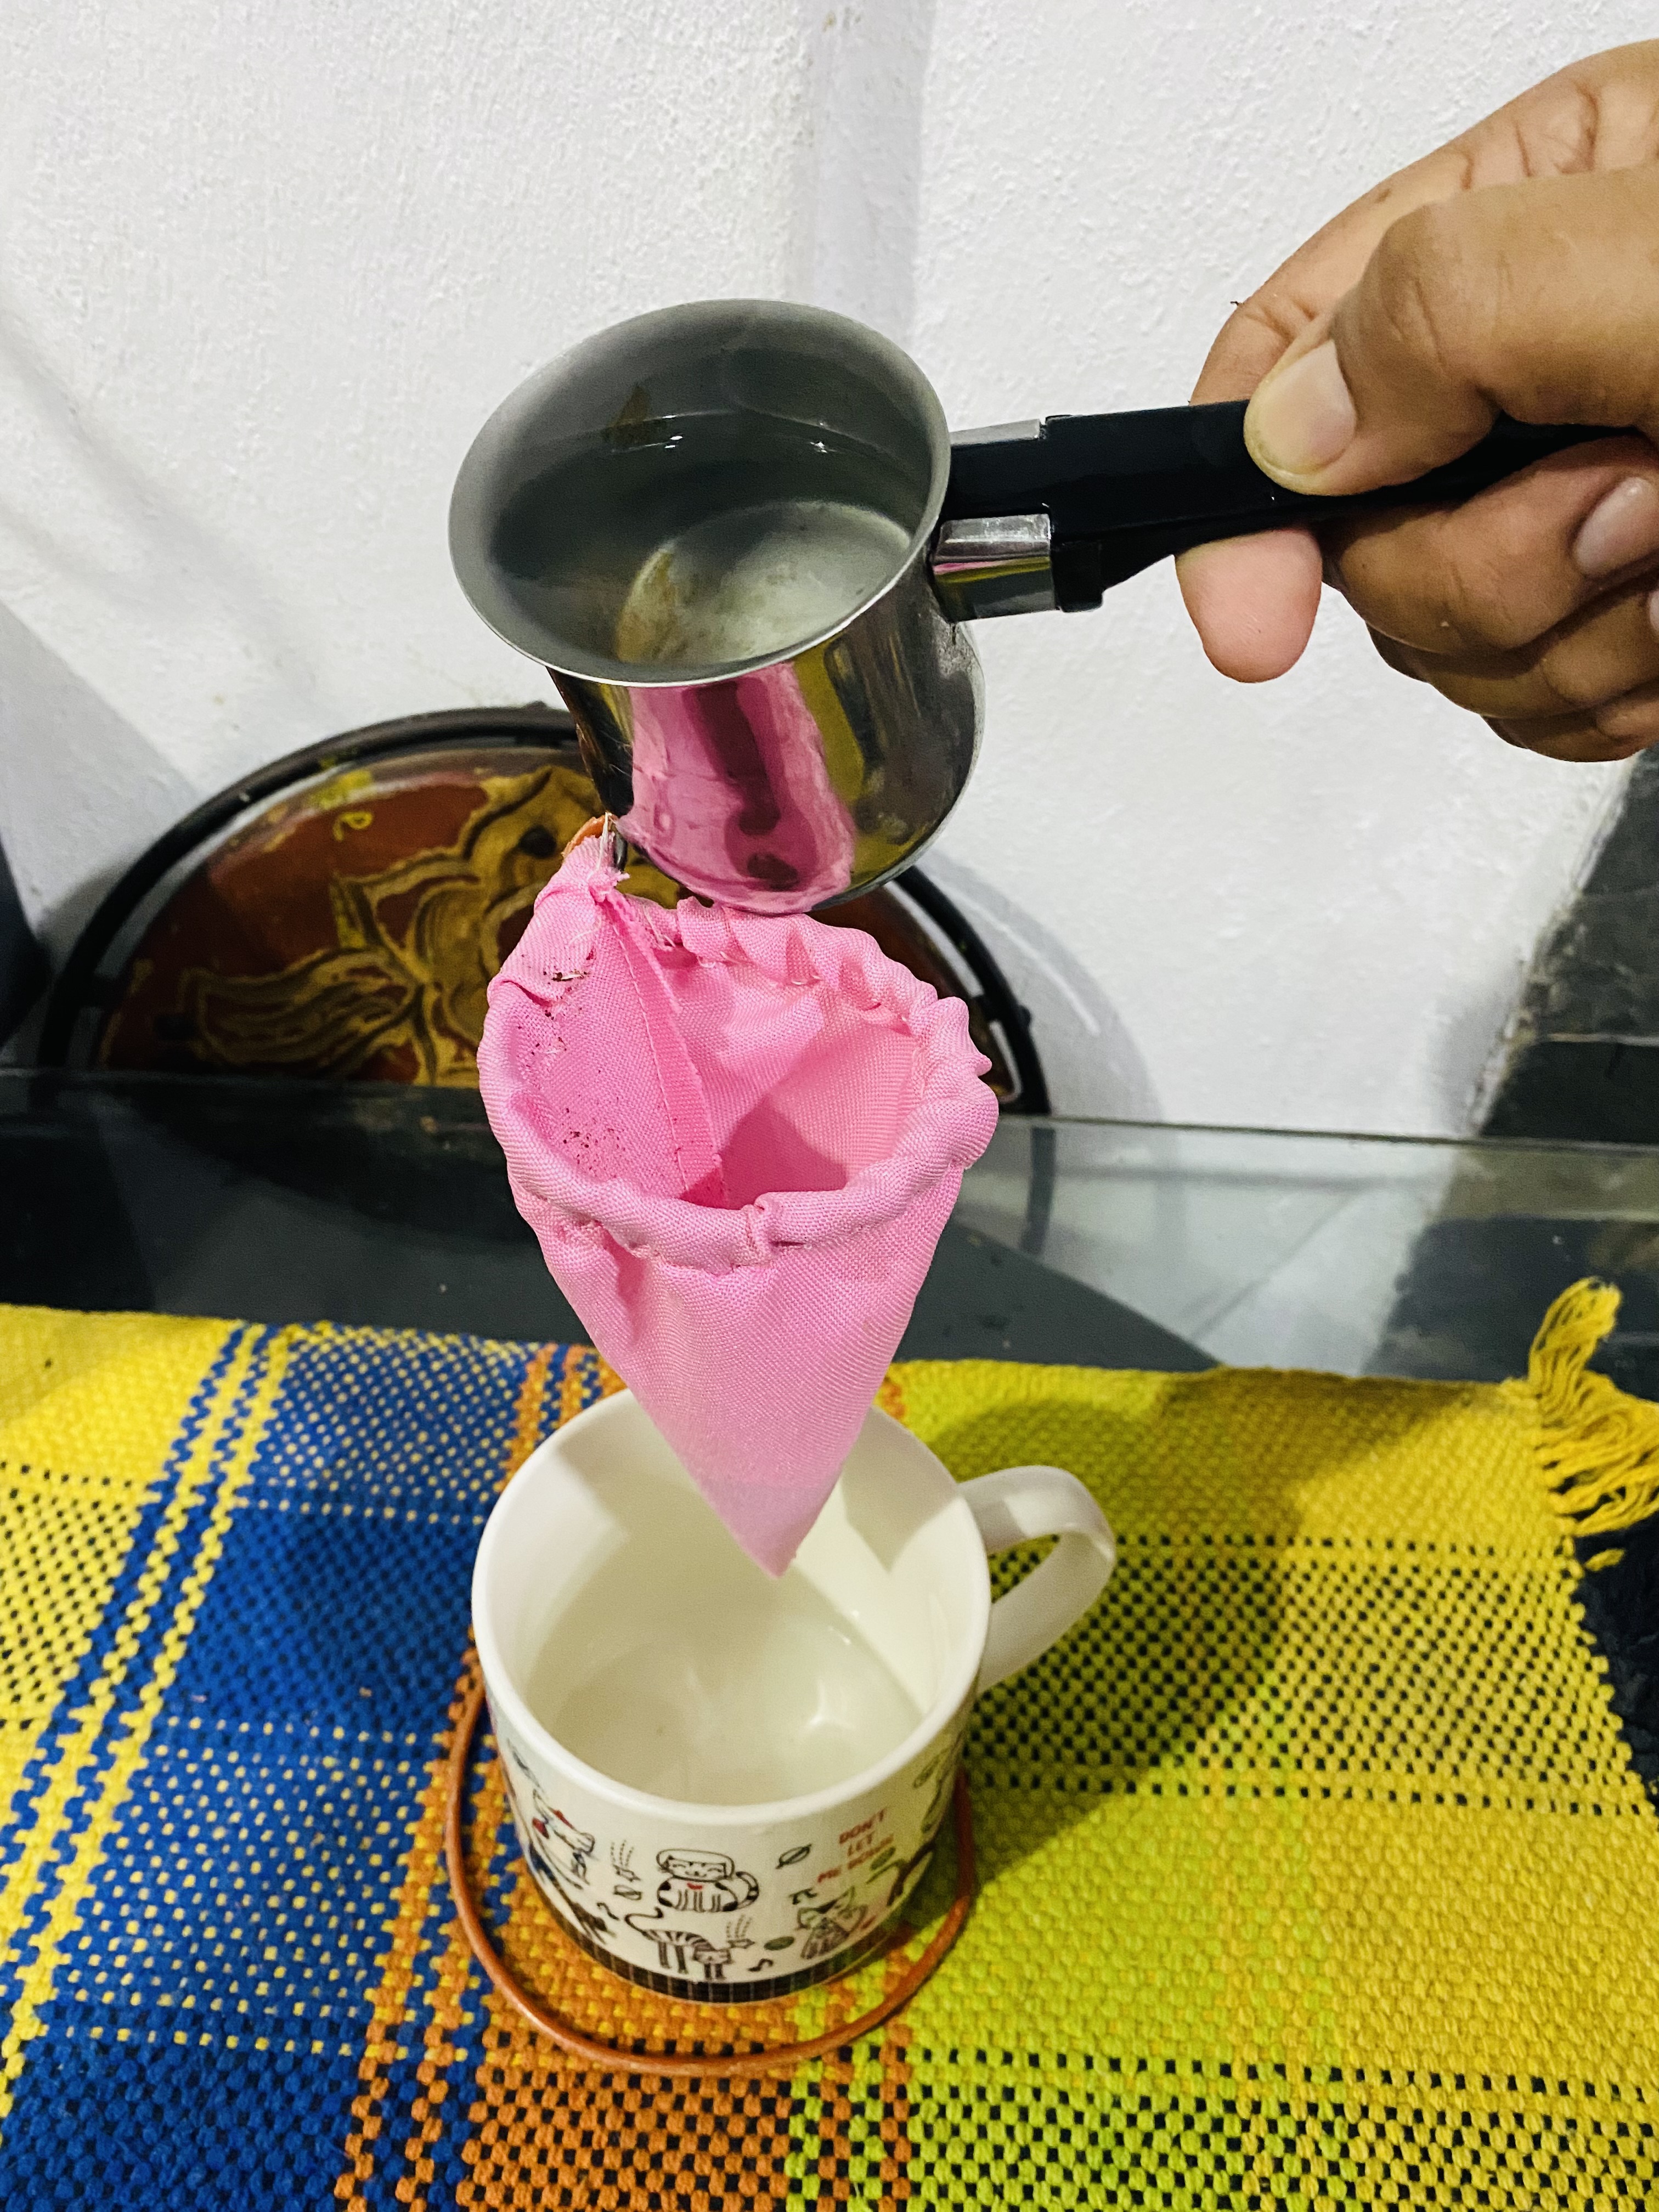
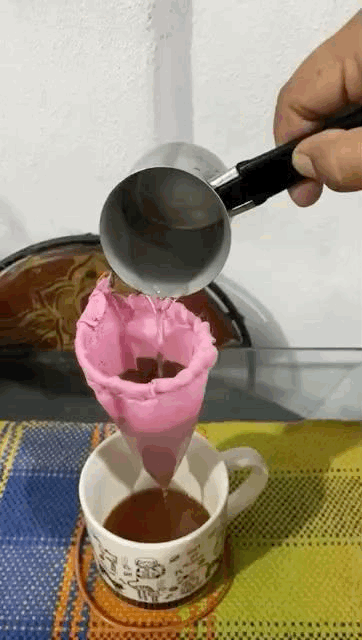
Para este segundo paso vamos a hacer la tela que funcionará como colador, doblaremos a la mitad el retazo de tela y le vamos a hacer la figura de triángulo el cual será de 18 cm por dos de sus lados y en la parte superior será de 16 cm, nos debe quedar como un cono, luego le hacemos un pequeño doblez en la orilla superior y le vamos pasando costura a mano uniéndola al aro superior de nuestra base de alambre , así ya tendremos listo nuestro colador de café, por supuesto no me iba a quedar con las ganas de usarlo y puse a hervir mi agua para hacer mi respectiva taza de café, espero les haya gustado esta idea.
For this second step we are going to make the fabric that will work as a strainer, we will fold the scrap of fabric in half and we are going to make the shape of a triangle which will be 18 cm on two of its sides and at the top it will be 16 cm, it should look like a cone, then we make a small fold on the top edge and we will sew it by hand joining it to the upper ring of our wire base, thus we will have our coffee strainer ready, of course I was not going to stay with the desire to use it and I put my water to boil to make my respective cup of coffee, I hope you liked this idea.
 |  |
|---|---|
 |  |
Lo mejor de esta idea es que puedes hacerlo personalizado, puedes hacer tu colador de café del tamaño que gustes, también puedes hacerlo separado haces la base y aparte haces tu colador de café, me gustaría conocer sus opiniones para esos amantes del café, de antemano estoy muy agradecida de qué hayas visitado mi Publicación, hasta otra oportunidad
The best thing about this idea is that you can make it personalized, you can make your coffee strainer the size you like, you can also make it separately, make the base and separately make your coffee strainer, I would like to know your opinions for those coffee lovers, in advance I am very grateful that you have visited my Publication, until another opportunity
 |  |
|---|---|
 |  |

las fotos aquí compartidas son de mi propiedad tomadas con mi teléfono iPhone 11, la edición fue hecha en Canva, para la traducción del inglés utilice el traductor de Google
The kitchen tools are creative and clearly done. A great improvisation from you to make your coffee. Buen trabajo.
selected by @stevenson7
Thank you 😊